Tiramisu

Share Button

image (14)

image (15)


image

Preparation Time : 35 minutes

Cooking Time : nil but 8 hours or over night refrigeration to set the tiramisu

Serving : 10 members

Description

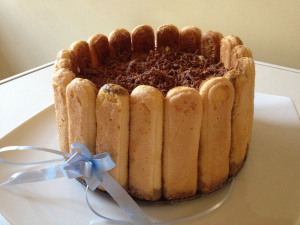
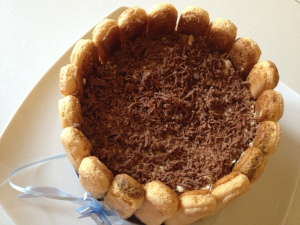
Tiramisu to me always relates to romance … The reason being the English movie ” NO RESERVATIONS ” . Where actor Aaron eckhart who’s nick in the movie brings actor Catherine zeta jones who’s Kate in the movie a tiramisu for a date to her apartment . Obviously , He being an Italian chef does so but Kate says she’s not a dessert person and nick makes a pizza instead but the tiramisu sure does change Kate’s mind and romance follows . From the very day I heard the word tiramisu in the movie and the way they both ate  it . I became desperate to taste this mighty delicacy from across the country dessert but the problem of days of no google where it was plain classic days of trial and error . No recipe in hand , had to just assume , ponder and fantasise upon it’s taste , texture , aroma and look . Finally one day did take note of a easy version of tiramisu in the telly through food safari . Now the next problem being not having marscopone cheese or savoiardi sponge fingers in hand . I was not ready to give up so substituted marscopone cheese with cream cheese and savoiardi sponge fingers with bourbon chocolate biscuits . Went ahead following the recipe . As making it was so confused that I am using raw eggs .. How will it taste ??? If it’s eggy that’s it the entire tiramisu will have to go to the bin . With a million doubts in mind went ahead and placed it in the refrigerator over night and the next day for lunch ,did start serving to all at home . For all the rave and enthusiasm I had over tiramisu , my heart was pounding with fear now about the taste . My fussy girl Anisha was the first to taste and she was like what is this , it tastes so yum . Relived me tasted my share and not a sign of raw egg smell in the tiramisu . What ever but still I haven’t got to taste the authentic tiramisu with marscopone cheese and savoiardi sponge fingers .well that quest was done slowly one by one as I got access to marscopone cheese first so the cream cheese was substituted and then once on a trip to Bangalore went head over heels seeing savoiardi sponge fingers in a department store . Grabbed a few packets and tried it out when at home the authentic way and my taste buds were never pampered so generously ever . Nothing can come close to an authentic tiramisu for sure and finally , now I know why Kate fell over the tiramisu and nick :-)) .

Ingredients

Ingredients
Quantity
Eggs6 separated
Sugar 3/4 cup
Marscopone cheese500 grams
Vanilla essence1 teaspoon
Italian sponge fingers (savoiardi) 1 large packet ( can replace with sponge cake fingers or Bourbon biscuits ( my version )
Instant Coffee powder1 1/2 tablespoon mixed in 1 cup water and sugar to taste . ( original recipe demands for coffee liqueur or coffee powder mixed with rum )
Chocolate grated to taste ( original recipe demands for cocoa powder )

Method

  1. Beat egg yolks , sugar , marscopone cheese and vanilla essence together to a smooth gooey mixture and set aside .
  2. Beat egg whites to stiff peaks . Fold in the egg white mix into the yolk mixture . ( fold and lift ) In a pudding tray or dish .
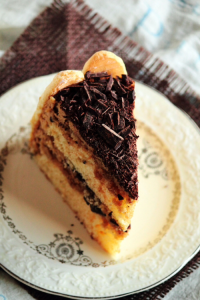
  3. Lay a layer of sponge biscuit finger dipped in coffee mixture on the bottom , then top with grated chocolate , cover with egg + cheese mix .
  4. Repeat the layers to the top of the pudding dish , finishing with a final layer of grated chocolate . Place in the refrigerator over night or for 8 hours and serve cold .

Guava and mango layered pudding

Share Button

image (11)

Preparation Time : 30 minutes

Cooking Time : 10 minutes or if in microwave 30 – 40 seconds +
20- 30 minutes to set the layers in the freezer .

Serving : 5-6 members

Description

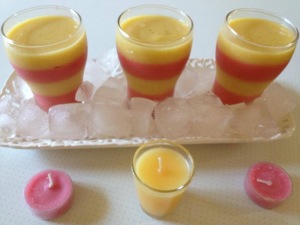
Guava and mango layered pudding . A pudding that I made inspired by a set of pink and yellow candles that I had at home . I just fell in love with the colour combination and decided to make a pudding with the same colours .  Having loads of mangos and guavas from our farm that made it easy for me to experiment these colourful adventure  as well . Started of by pureeing the fruits with sugar , strained and tasted . It was just like fruit juice . So to add more smoothness and texture I added cream . The guava mixture looked plain and me wanting a pink colour added a few drops of pink food colour and it was perfect .mixed the purées with gelatine to set and started of layering the seasonal freshness , watching it transform into something beautiful .  In between I was stuck with power shut down . Not knowing what to do .. as once the gelatine is Mixed with fruit purée , it tends to set . Immediately filled a bowl full of ice cubes with rock salt and placed the pudding glasses in between them and layered these puddings and set them . It’s a blessing to be born as an Indian as you get to master yourself to adapt and survive in what ever the situation demands and still manage to  execute well . Served it to my maternal  uncle Shanu mama , who really enjoyed saying this is a class apart dessert . To me , it was a lesson learnt that channelling creativity is an endless opportunity to reinvent .

Ingredients

Ingredients
Quantity
Guava purée 3 cups
Mango pulp 3 cups
Gelatine6 tablespoons
Sugarto taste
Cream1 cup
Pink or red food colour few drops ( optional )

Method

Soak gelatine in 1/2 cup water to bloom

  1. Grind 2 chopped ripe guavas with little water and sugar to taste to a smooth paste . Strain . Mix 1/2 cup cream to the strained guava puree and blend again .
  2. Taste and adjust the sweetness . Add a few drops of pink food colour or red food colour just a drop to get a pink colour . Mix well and set aside .
  3. Grind 2 chopped ripe mangos along with sugar to taste and little water to a smooth paste . Add remaining 1/2 cup cream and mix well . Taste and adjust sweetness and set aside .
  4. Double boil by heating a large vessel with water over flame . Place the bloomed gelatine containing smaller bowl over the large bowl of hot water and dissolve the gelatine to a liquid form or just microwave for 30 -40 seconds until the gelatine has dissolved well .
  5. Cool to room temperature making sure the gelatine does not set again . Divide the gelatine mixture equally into two portions . Add one half of the gelatine mix to the guava purée and the other half to the mango purée .
  6. Take a tall glass and pour 5 tablespoons of guava purée into each glass and place in the freezer to set . Takes about 5 minutes . Remove pour 5 tablespoons of mango purée over the set guava layer and place in the freezer for 5 minutes to set .
  7. Repeat the same by layering alternatively with both the fruit purées and set until the top of the glass . Make sure the remaining fruit purée does not set by the time you finish layering the tall glass alternatively .
  8. Place all the set glasses in the freezer for 1/2 an hour . Remove and place in the refrigerator and serve chill .

Nots

You can use any fruit of the season and do the same


Baked Oreo cheese cake

Share Button

image (10)

Preparation Time : 20 minutes

Cooking time : 40 -50 minutes

Serving : 10 members

Description

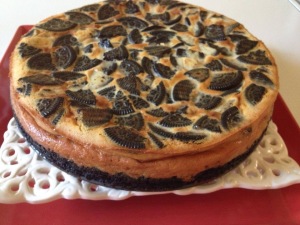
Baked Oreo cheese cake . All the cheese cakes that I have made till date were no bake cheese cakes . In one of the foodie guilds ,   I came across a blueberry cheese cake that was baked and every one had commented saying nothing can come close to a baked cheese cake and can be devoured as a cold dessert or eaten just as they are warm and fresh out of the oven . Immediately a backed cheese cake was added to my must try lists .  To be on the safer side gave my first baked cheese cake try with Oreo biscuits when my daughter ANISHA had come over to my place on a holiday . The cheese cake was kept in the refrigerator with the spring form unreleased . We were invited for dinner to my friend bindus place and it was an Italian feast with pizzas , lasagna , potato wedges , grilled chicken and ice cream with fruit salad .  I took this baked Oreo cheese cake over to her place . Removed it from the spring form mould and the golden colour on the crust and sides were perfect . With crossed fingers cut into wedges and served it to every one . Pin drop silence with every one just eating the cheese cake . I took my first spoon full and as I was thinking wow .. Feels like a bit of heaven on the tongue , better than its no bake counterpart . Bindu started of with its so creamy and yum and her daughter darshini came for her second helping . Relieved me , made up my mind … If its a cheese cake , its always going to be a baked one from now on for its composite of sophisticated flavours and textures.

Ingredients

Ingredients
quantity
Oreo biscuits20 +10 crushed in a blender to a smooth powder seperately ( 20 for base and 10 for the top )
melted butter 1/4 cup
cream cheese(8 ounce )3 packets softened
condensed milk1 tin
eggs 3
lime juice1 tablespoon
vanilla essence 2 tablespoon
Oreo biscuits8 broken to small bits

Method

  1. preheat oven to 300 degree Fahrenheit ( 180 degree Celsius ) . Mix powdered 20 Oreo biscuits with the melted butter to get a crumbly coarse powder . Press it down firmly on a spring foam pan or a baking pan .
  2. Beat cream cheese , condensed milk , lime juice , vanilla essence , eggs dropped one at a time to get a smooth batter with the help of an electric egg beater .
  3. Fold in the broken Oreo biscuit bits . Pour the batter over the pressed Oreo biscuit base . Level the top . Bake for 40 to 50 minutes till done . Make sure the top does not crake .
  4. Cool to room temperature and chill in the refrigerator over night . Top the cheese cake with 10 powdered Oreo biscuits . Remove from spring foam . Cut into wedges and serve .

Buttermilk fruit pennacotta

Share Button

image (9)

Preparation Time : 25 minutes

Cooking Time : 10-12 minutes

Serving : 6-8 members

Description

Butter milk fruit panna   cotta  . The word  Panna cotta was like Greek or Spanish to me when I first heard about it . I had no clue as to , if it was a geography term , mechanical term or an edible term . Well I got to know about it finally because its an edible term :-)) ( sure if it was related to the other two I mentioned , it would have remained as Greek or Spanish till date ) . As usual was glued to the telly watching Rachel allens home cooking show where she made this simple dessert in seconds , me in front hastily transcribing from the show on the telly to my cook book . Finally got a chance to make this dessert when my parents were here to visit me last summer ( its always summer at my place :-))  ) mom being very fussy about desserts as she hates eggy things , (dad compensates with gobbling anything named desserts ) had to force her to give a try  , She loved it and asked for another serving Letting herself be seduced by pure captivation . The first ever this has happened with her and I didn’t expect this simple dessert would delight her palette. To me it was a soul – satisfying moment  that would be cherished for ages and ages to come .

Ingredients

Ingredients
Quantity
Cold water2 tablespoons
Gelatine 1 teaspoon

Ingredients Soak for five minutes

Ingredients
Quantity
Cream 1 cup
Sugar 1/2 cup
Butter milk 2 cup
Vanilla essence1/4 teaspoon

Method

  1. Boil cream and sugar together in medium heat until sugar dissolves . Add gelatine and boil till the mix gets to a creamy silky texture . Remove from heat . Cool a little .
  2. Then add 2 cups of butter milk to the cooled cream mix . Add vanilla essence and mix well . Pour into desired glasses or pudding bowls and place in the freezer to set for 3 to 4 hours and replace in the fridge .
  3. Garnish with passion fruit juice or any pulp of fruit of your choice or in season . Serve chill .

Notes

  1. I wanted a mosaic pattern with mango pieces . So placed greased cling film over the pudding bowl and spread the mango bits all around evenly leaving a well in between .
  2. Poured the panna cotta mixture carefully making sure the mango pieces did not fall apart .And proceed to freeze and refrigerate as recipe demanded .
  3. Inverted the pudding bowl on to a plate and removed the bowl , peeled the cling film carefully making sure the mango pieces did not fall apart and served it .

Coconutty lychee pudding

Share Button

image

Preparation Time : 15 minutes

Cooking Time : 10 minutes + 3 hours or more to set the pudding in the freezer .

Serving : 10 members

Description

Coconutty lychee pudding . A pudding that I came up with by combining and demystifying two puddings together  . I combined  the ingredients of tender coconut pudding and added coconut milk and lychees to it and got a wonder full  mix of tropical flavoured Asian pudding . The marriage of our keralas very own tender coconut pudding with asian lychees is sure addictive and leaves you weak  kneed . My daughter didn’t fancy it much but I was blown away as it was light ,  high in taste  And full of life . The coconut milk flavour with the lychees and rose water melded into one another that lead to a homey charm pudding . A complete seduction to all your Senses that spell instant wow …..


Ingredients

Ingredients
Quantity
whole tinned lychees10 + few more to garnish
Thick coconut milk2 cups
sugar1/4 cup or to taste
reserved lychee juice1/2 cup
Tender coconut water1 cup
Tender coconut flesh of one tender coconut
rosewater ( paneer )1/4 teaspoon
gelatine 2 1/4 tablespoon

Method

  1. In a blender, combine the lychees , tender coconut flesh and coconut milk blend until smooth.
  2. Pour the coconut-lychee mixture into a big bowl and stir in the sugar, reserved lychee juice, and rose water . Mix well until sugar dissolves and set aside . Soak gelatine in tender coconut water for 5 minutes in a small bowl .
  3. Bring 3 cups of water to boil in a sauce pan . Place the soaked gelatine tender coconut mix inside the boiling water and keep stirring until the gelatine dissolves and gets to a runny syrupy consistency mixture . ( This is called double boiling ) Cool down to room temperature .
  4. Pour into the coconut lychee mixture and whisk well to combine. Pour into a large container and place in the freezer for 3 hours . once set remove and place in the refrigerator over night .it won’t set completely like a moulded gelatine dessert, but it will be a soft pudding. Serve chill garnished with lychees .

Pressure cooked rasagullas

Share Button

image (6)

Preparation Time : 20 minutes

Cooking Time : 5 minutes

Serving : 5-6 members

Description

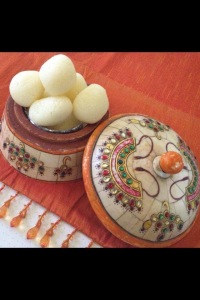
Rasgullas or rasagullas . I am still not sure about how to spell or pronounce the word right but have been eating it from my childhood days . Those days dad used to go to Bombay , Surath  and Calcutta very often related to his business . On his return , he always used to get us things and sweets from those places and if it was Calcutta we always got tins of rasgullas . Not having tin openers at home then . A big struggle would go on to break the tin . Myself and my brother would wait impatiently gazing on when we would get our share of this divine white ball . Once the tin is open each one is served with one ball each and the rest is stored in the refrigerator . Only after this tin is over the next is opened . ( dad used get 3 tins always and that was standard ) through out the day and night what ever I do  let it be playing , watching the telly to studying or anything my mind would always spark every now and then with this mighty sugar syrup drunk white wonder ball . The second spark hits my mind , I am there in front of the open refrigerator with a rasgulla in my mouth . Not wanting to finish of eating  it soon . I used to suck the sugar syrup first and then keep chewing the rest for quite some time . I was a very wired little crazy creature . Never did I think I will end up making this at home but a recipe shared by aara sheik in home chefs guild ( a foodie group I am a member of in Facebook ) was so easy to follow and I wanted to try it out then and there . Last night when I got a call from Asiya Omer ( a food blogger , a liker of sauté , fry n bake and the second prize winner of the completion that was held in our page ) that she might come over to my place to catch up . I wanted to make some home made goodies for her and the only ingredient at home was milk ( no eggs , so could not bake a cake ) and immediately the first thing that came to my mind was aara sheiks easy fluffy rasgullas . Made them and did serve it to Asiya Omer . Well I am back to square one with the spark in mind and moments of nigella lawsons way of sneaking towards the refrigerator and adding more calories into me .

Ingredients

Ingredients


Quantity

Full cream milk1 litter
Lime juice 3 tablespoons
Sugar 2 cups
Water4 cups

Ice cubes

Method

  1. Boil milk and when it just reaches boiling point add lime juice . When the milk curdles add in ice cubes . This will help the paneer to stay soft . Wash the paneer in water and strain in a muslin cloth .
  2. Wrap it loosely , press and knead for 7 minutes with the cloth on . Remove from cloth . Roll into small balls and set aside . Make sure there are no cracks it’s very important .
  3. Add water and sugar in a pressure cooker and bring to boil . Once it’s boiling add rasagulla balls into it . Close the pressure cooker lid , place the weight and pressure cook for one whistle and 5 minutes more on medium flame .
  4. Take away from flame and let the pressure release on its own . Open lid to find puffed up rasagullas . Cool to room temperature and enjoy .

Notes

  1. No need to make sugar syrup just dissolve the sugar before pressure cooking the rasagullas .
  2. Make sure there are no cracks when you roll the rasagullas .

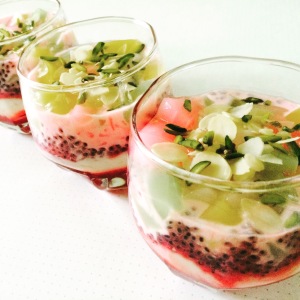
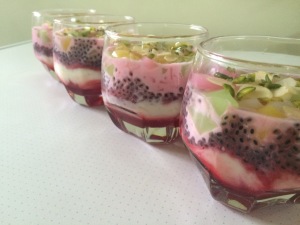
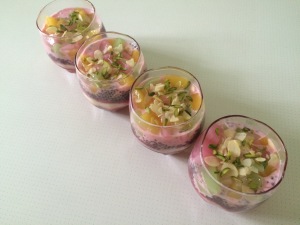
Falooda

Share Button

2015-09-04 12.15.31-1

2015-09-04 12.14.13

2015-09-04 12.14.06

Preparation Time : one hour

Cooking Time : 15-20 minutes

Serving : 2 members

Description

Falooda is an authentic Indian dessert drink that flourished during the Mughal rule . A drool worthy dessert with very little effort . I first got to know about falooda through my friend sulu . She mentioned about an incident during her holidays in Calicut about how a gang of cousins went out to eat ice- cream and they saw the next table seated girls having a tall glass of colour full ice cream . They ordered for the same and its name was falooda and tasted horrible . From then on I never ever attempted to order or have falooda . My other buddy sindhu had gone on an excursion to kanyakumari from school . After her trip she did mention and rave about having ice cream at a place called tirunelveli and it was so yum . That was the first time in my life I got to hear about such a place existed in this world not knowing my entire life had to be spent there :-)) when my marriage was fixed , I did enquire Sindhu first about this place .  After I was married  , every one used to rave about the cherry shake and falooda served at ARASAN BAKERY  ( the same place that sindhu had her ice cream ) here in tirunelveli . To be on the safer side even then I used to have the cherry shake and omit ordering the falooda . Then finally on my trip to Bombay( it was addressed so then )  once my uncle ordered for falooda in SUK SAGAR  and forced me to try it .  Being very hesitant did taste a spoon full and to my surprise it was divine . I ended up devouring it no time . Now falooda is on my must have list on every trip to Mumbai and I ended up making this magical and exotic treat at home with the name falooda always lending a whiff of nostalgia to me .

Ingredients

Ingredients
Quantity
Chilled Milk2 cups
Sugar to taste
Vermicellione hand full boiled
Rose Syrup or rooh afzah2to 3 tablespoons
Basil seeds ( sabza vethai in Tamil )1 tablespoons soaked in water
Vanilla icecream / kulfi 1 to 2 scoops for each glass
jellyany flavour , cut in to small cubes.( I usually use a combination of 3 colours and flavours )
Cashew nuts 3 tablespoons chopped
Pistachio 3 tablespoons chopped
Almonds blanched skin peeled and chopped - 3 tablespoons

Method

  1. Chill the cooked vermicelli by placing it in the refrigerator until needed .
  2. Soak the basil seeds in water for abt 45 min, they will puff up and double in size.then boil them for 5 minutes and drain.In a tall glass add cooked chilled vermicelli , basil seeds and rose syrup / rooh afzah .
  3. Mix sugar to taste with chilled milk and mix well until sugar has dissolved completely . Place an inverted tablespoon or dessert spoon at a 45º angle over the falooda glass and pour the milk over the spoon.
  4. The milk will slide gently to form a layer over the syrup and won’t get mixed with the bottom layer.garnish with jelly cubes and nuts. top it with a scoop of vanilla ice cream / kulfi and Serve chilled .

Notes

  1. make jelly as per packet instructions and use .
  2. I personally prefer kulfi to ice cream to be added to the falooda as it gives an authentic Indian touch to the dish .
  3. You could serve the falooda on a small plate by placing the kulfi first , topped with vermicelli , rose syrup , basil seeds and garnished with nuts and jelly . Omit the milk here .

Nutella sandwich curl buns

Share Button

image (40)

Preparation Time : 1 hour -30 minutes

Cooking Time : 20-30 minutes

Serving : 6-8 members

Description

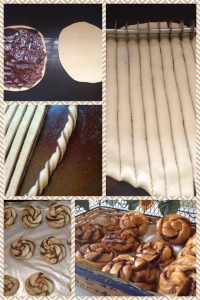
Nutella sandwich curl buns . My daughter ANISHA had e- mailed me an collage of step by step picture of this bun . Looked so appealing to the eyes with excellence oozing out from every glimpse .  then and there wanted to give a try but with no recipe in hand just had to save the  picture .last morning , my daughter ANISHA started of saying she wants to try her hands in making these Nutella buns .( I feel so good about getting to name dishes :-))  )  I told her , with no recipe in hand how can we go ahead . then i remembered , A few days back I had made cater   pillar chicken stuffed buns . The bun was really soft and moist . So decided to follow the bun recipe from the cater pillar buns . ANISHA started of by measuring the ingredients and sieving the flour . From there onwards she disappeared and I had to do the rest to finish the buns . But finally she went around saying I made these Nutella sandwich curl buns . The pleasure and liberty these kids have with us parents is so joyful  to the heart and soul , no matter how old they grow . Hot Nutella sandwich curl buns out of the oven . I was surprised with the unpredictable , artistic out come of using a new simple technique by twisting and curling the sandwich strips which created magic . Served the buns warm and they were devoured in no time . Quite an elaborate and  lengthy   Recipe apt for a relaxed weekend cooking .

Ingredients

Ingredients
Quantity
all-purpose flour2 cups
warm milk¾ cup
instant yeast1 teaspoon
baking powderpinch
sugar1/2 teaspoon
salt1 teaspoon
egg1 (lightly beaten and divided in half)
melted butter1 tablespoon
oil2 tablespoon
milk powder1 tablespoon

Method

  1. Sieve the flour, then add milk powder, baking powder, sugar, yeast and salt. Then add the oil, butter and half the egg (reserve the other half for brushing the bread later) and mix together.
  2. Now add the milk gradually whilst kneading. You might not need it all, so add it sparingly until your dough is nice and soft. If more milk is needed to get a soft dough consistency, warm a litte more and use.
  3. Knead for a good 8-10 minutes. The more you knead the softer the bread results will be.Touch a bit of oil with your fingertips and apply all over the ball of dough.
  4. Cover in a bowl and set aside for 40mins to an hour for it to double in size.Divide the dough into 2 equal sections. Start rolling each one into an oval/rectangular shape, about quarter inch or less thickness.
  5. apply Nutella all around one rectangle evenly . Cover with the other rectangle and sandwich them together .cut the sandwich into equal strips about 1/4 inch each .
  6. Twist each strip to get a curl and roll into a circle . Do the same with all the strips . keep covered with a wet damp cloth for 30 minutes . Brush with the remaining egg all around the surface of the buns .
  7. Preheat an oven to 180 degree Celsius and bake for 20 – 30 minutes until the buns are cooked through and has a golden colour . remove from oven and brush with melted butter .
  8. And keep covered in a damp wet cloth until needed to be served . Serve hot , warm or at room temperature .

Drinking chocolate pudding

Share Button

image (37)

Preparation Time : 10 minutes

Cooking Time : 15 -20 minutes + one hour or more to set in the freezer .

Serving : 8 members

Description

Drinking chocolate pudding . A recipe I learnt from my co – sister Farzana . This recipe is in the third page of my first hand written recipe note book  and the recipe was written by Farzana herself .i learnt the art    of using gelatine through her .   A very simple and easy pudding to rustle up at home and makes for a versatile addition to your dessert’s . Delicious yet fuss free , that is really apt for beginners to give a try . This no cook pudding is exactly the kind of dessert you want on your table on busy dog days . I love eating this 5 ingredient wonder pudding on a lazy weekend watching the telly . A lot of lickosis takes place with absolute pleasure :-) ( best time for the greedy like me ) sure to satisfy the cravings of the chocolate devil in all

Ingredients

Ingredients
Quantity
Milk 1/2 litter
Gelatine 4 tablespoons
Drinking chocolate powder2 tablespoons
Condensed milk1 tin
Dairy milk Chocolate1 bar grated to garnish
Chocolate chips white and browndecorate

Method

  1. Dissolve gelatine in 1/2 cup water and double boil till well dissolved until it gets to a watery solution . Mix milk , condensed milk and drinking chocolate together ,making sure no lumps are formed .
  2. Make sure the double boiled gelatine is cooled down and add to the drinking chocolate mixture . mix well . pour into desired pudding bowls or pudding tray . place in the freezer for one hour to set .
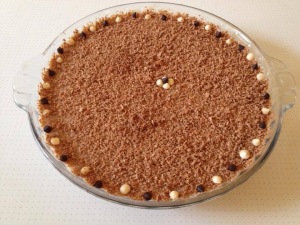
  3. Once set garnish with grated chocolate and decorate with chocolate chips . Replace into the refrigerator until needed to be served . serve chill .

Mango tart

Share Button

image (35)

image (36)

Preparation Time : 40 minutes

Cooking Time : 20-22 minutes

Serving : 5-6 members

Description

Mango tart . This is my first try with a mango tart . This tart is a perfect antidote for cheerless days to pump you up with energy . sure to indulge your cravings that your senses will swoon to freeze right there . Usually I make banana and apple tarts . As this year there is an over load of mangoes at home from our farm . Trying to make use of them to the maximum as they are at their sweetest best right now .  Got this recipe from the world wide net but swapped some ingredients to make it more mango dominated . I used to get so confused with tarts and pies ,  When i used to mournfully flip through pages of recipe books Wanting to make them . Go through the ingredients , you end up with not having half the ingredients available here . My first tart shell I made was for quiches de Lorraine . I could not believe that I made the tart shell as it was so perfect And looked festive enough to be served at any special occasions . I religiously follow and stuck to the same recipe for my tart shells from then on for sweet or savoury . Divine dessert creations are sure to please sweet lovers of all strips , isn’t it ????

Ingredients for pastry

Ingredients
Quantity
flour250 grams
salt a pinch
butter 90 grams
sugar 1/4 cup
Milka little

Ingredients for Filling

Ingredients
Quantity
condensed milk1 tin ,
Juice of lemon1 tablespoon full
egg yolks4
Vanilla essence1 teaspoon
ripe mangoesthinly sliced
Mango purée1 cup ( grind ripe mango pieces with sugar to taste to a smooth paste )

Sugar syrup made with 1 cup sugar and 1/2 cup water boiled together and cooled down completely .

Method for pastry

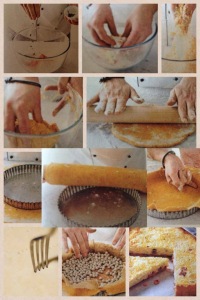
  1. Place flour in a bowl with the salt and sugar.
  2. Rub in the butter and enough milk to form a dry dough.refrigerate the dough covered with cling film for 30 minutes .
  3. Roll out to required size and line a tart plate with pastry.poke base and all around with a fork .
  4. Bake in a pre heated oven at 180°C for approximately 10 minutes or until golden brown.

Method for Filling

  1. Place condensed milk, lemon juice , vanilla essence and egg yolks into a blender and blend.Fill tart case with condensed milk mixture.
  2. Place the tart with filling in the oven and bake for 10 -12 minutes or until just browned on top . Remove cool completely . Spread 1 1/2 tablespoon of mango purée all around the tart on the top .
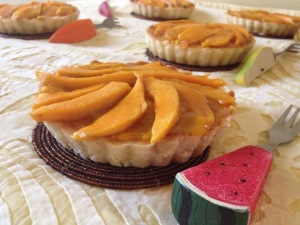
  3. Dip the sliced mango slices in sugar syrup ( to avoid de- colouring of mango slices ) and decorate as desired on top of the tart . Serve warm or chilled .