Daily Archives: October 27, 2014


Banana flower vada / vaala poo Vadai

Share Button

image (16)

image (17)

Preparation Time : 1 hour 35 minutes

Cooking Time : 10 minutes to cook the banana flower + 3-4 minutes to deep fry each batch of vadas .

Serving : 6 -8 members

Description

The banana plant is one thing that we in South India use from the leaf , stem , flower , ripe fruit, raw fruit to every bit of it in one way or the other . Like wise the banana flower is cleaned doing a pains taking job with every segment and used in many forms . One form is this recipe of Vadai that I learnt from my mother – in – law . At moms place we just make a thoran ( poriyal / sabji ) with it . I felt really wired to see vadais on the lunch table as a newly wedded bride as I am used to eating this deep fried snack for breakfast or on the go any time of the day . I was served two and tasted it and didn’t know there was banana flower used in it until my mother – in – law asked me to guess the ingredients in it . When she told me the banana flower is used in it too , I was dum struck as what a genius way to use a banana flower . The best part being this is an authentic Tamil vegetarian recipe that I didn’t know at all . I personally prefer these local produce to the sourced in produce and this helps to retain our traditional authentic house speciality recipes at home that are rarely featured in restaurant menus . The infinite range of flavours , aromas , textures and colours that’s the magic of Indian home cooking with varied state cuisines of our country is ultimate . The best way is to always remain faithful to our home style classics as it’s always made by our grand moms , moms , aunts or sisters with love in it and not to deny the quality of food that comes out of Indian home kitchens as it’s nothing short of astounding .

Ingredients

Ingredients
Quantity
peas dal ( Pattani paruppu or vadai paruppu as known in Tamil ) 2 cups
dry red chillies 4 to 5
small onions 1 hand chopped finely
green chillies 2 chopped
curry leavesfew chopped
snauf 1 teaspoon
salt to taste
ginger 1/4 inch pieces grated
Salt to taste
Turmeric powder1/4 teaspoon
Banana flower1 whole cleaned
oil to deep fry

Method

  1. Soak peas dal in water for one hour . Chop the cleaned banana flower to tiny bits . Cook with salt to taste , turmeric powder and little water until cooked . Make sure the cooked banana flower is dry with no moister left in it .
  2. Set aside and cool . Drain and reserve 2 tablespoons of whole soaked peas dal aside .Add red dry chillies and snauf to the remaining soaked peas dal and grind to a coarse paste adding very little water .
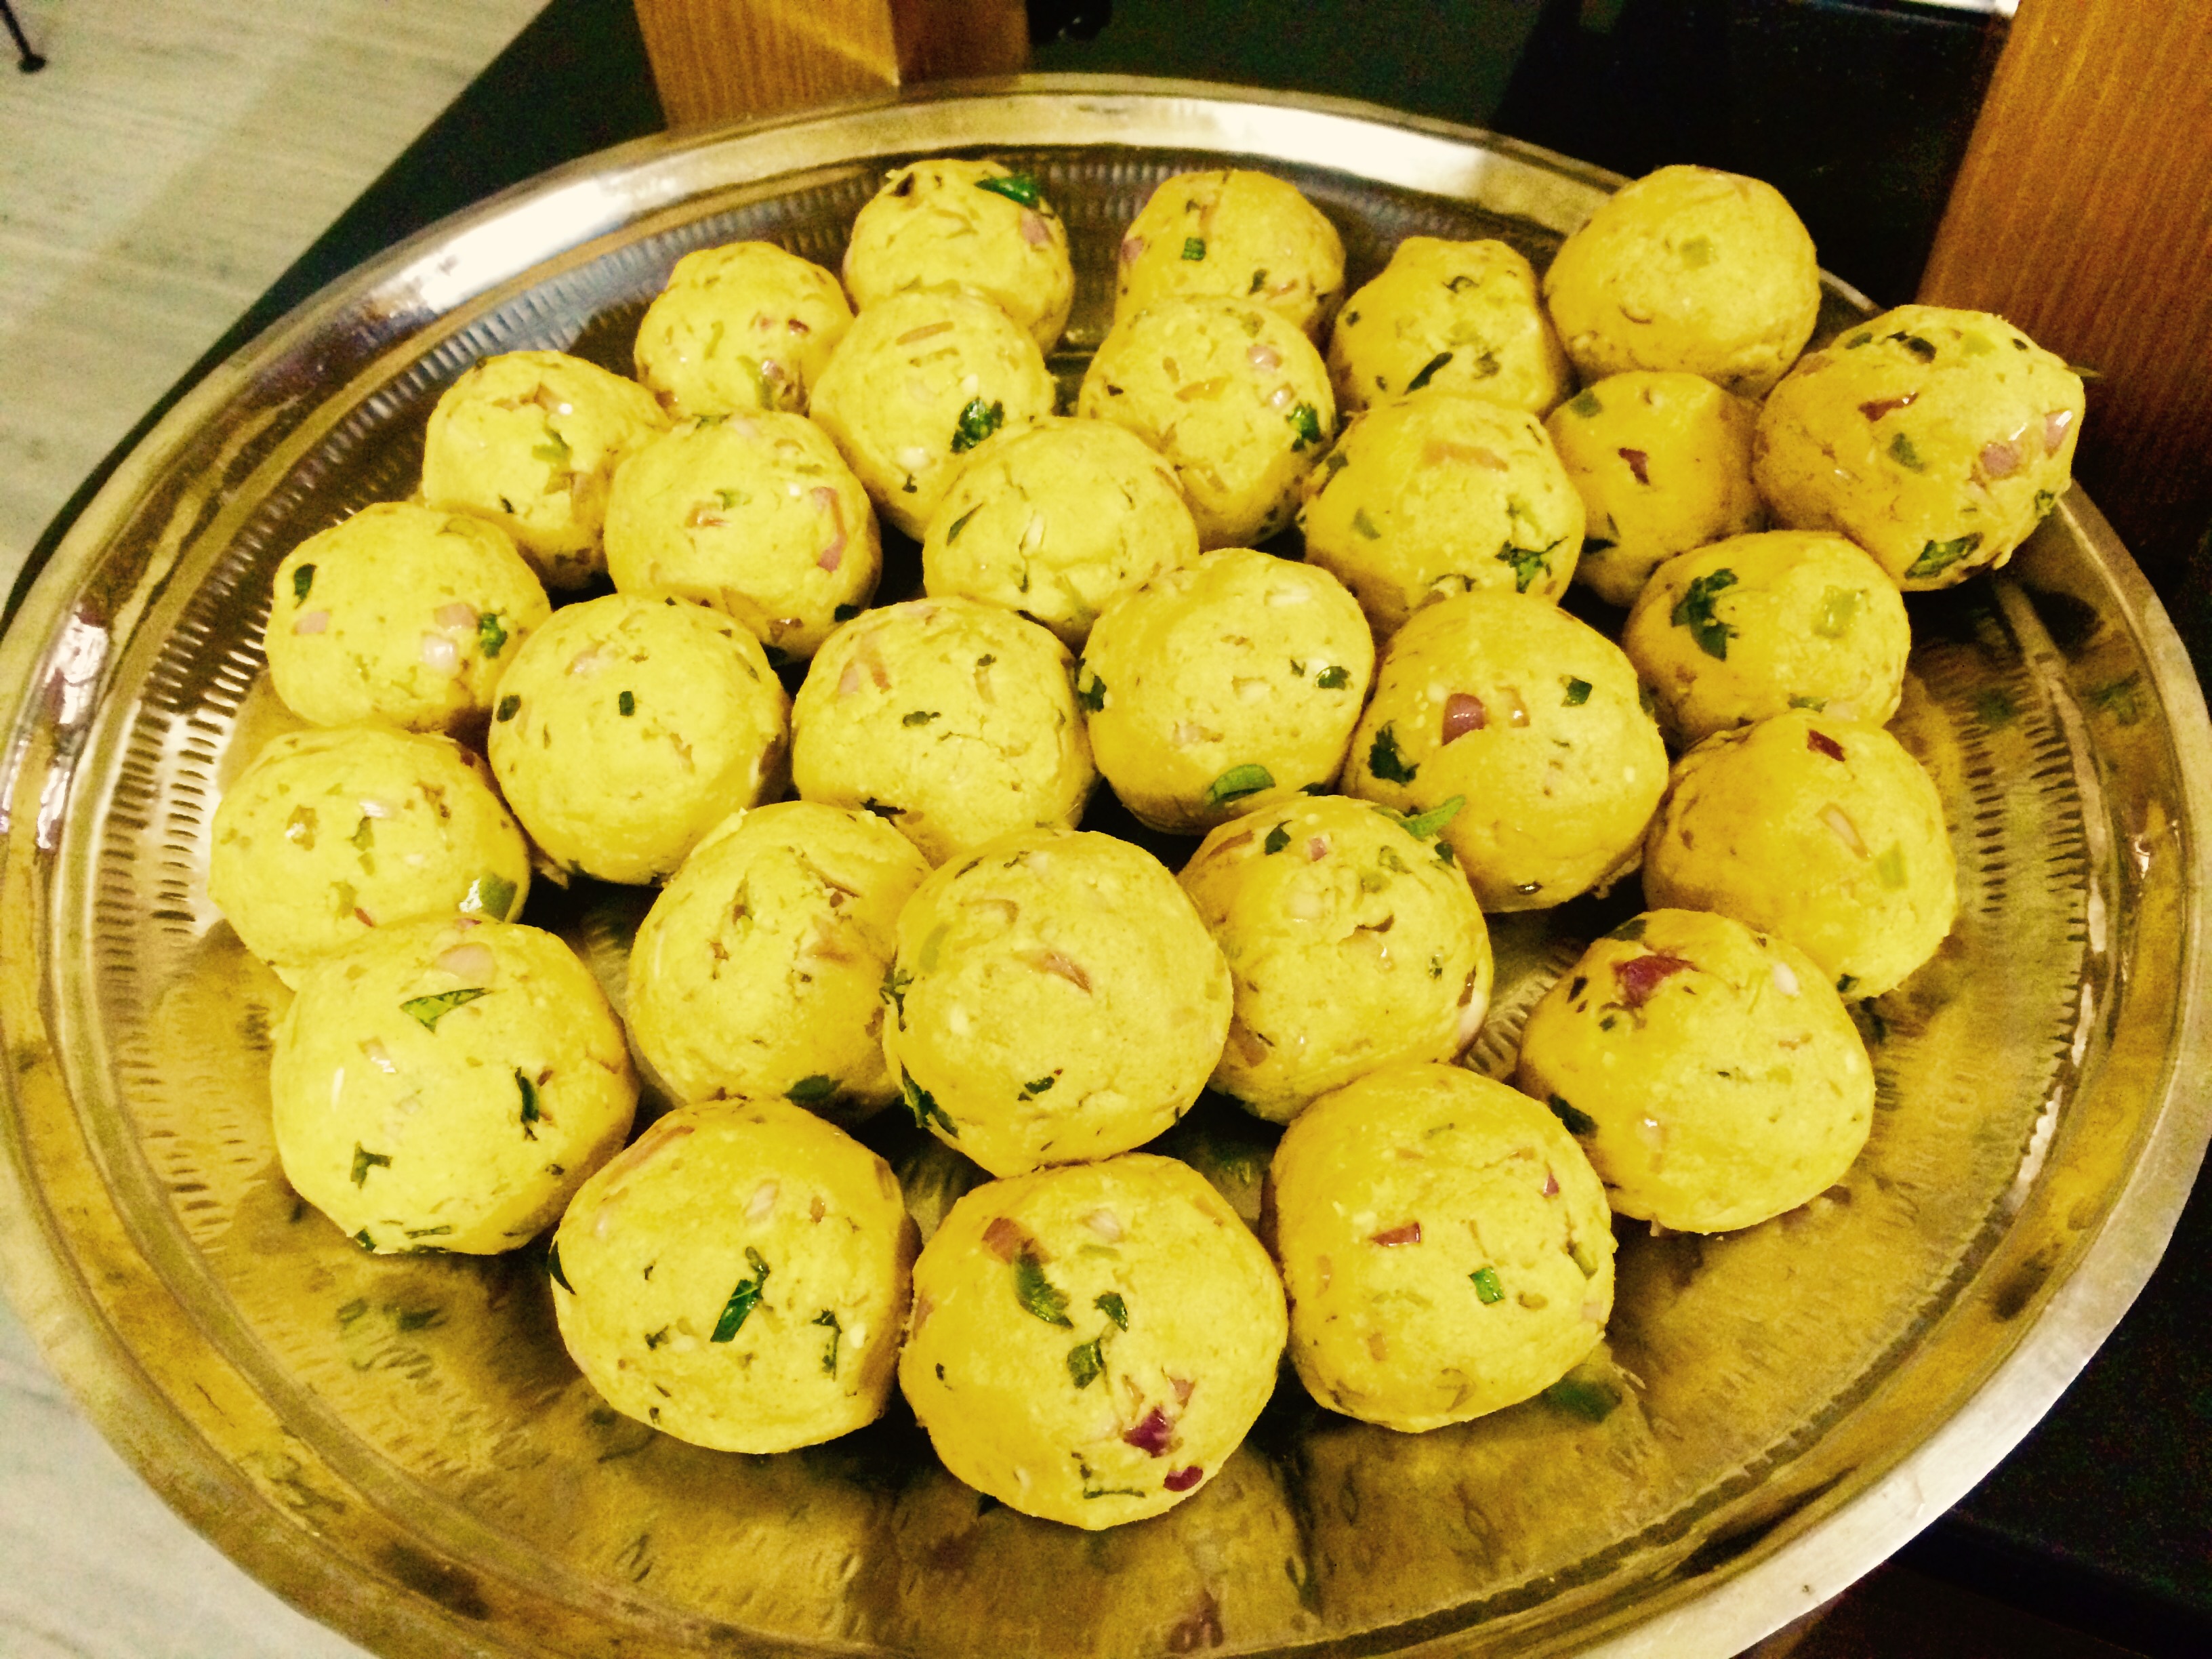
  3. Add all the other ingredients except for the oil to deep fry . Mix well . Heat oil to deep fry in a kadai .Make lime size balls with the peas dal and banana flower mixture . flatten them to get small round 1/4 inch thick Pattice .
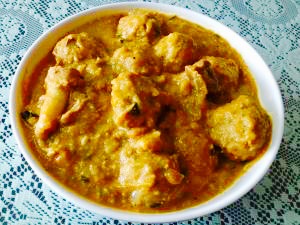
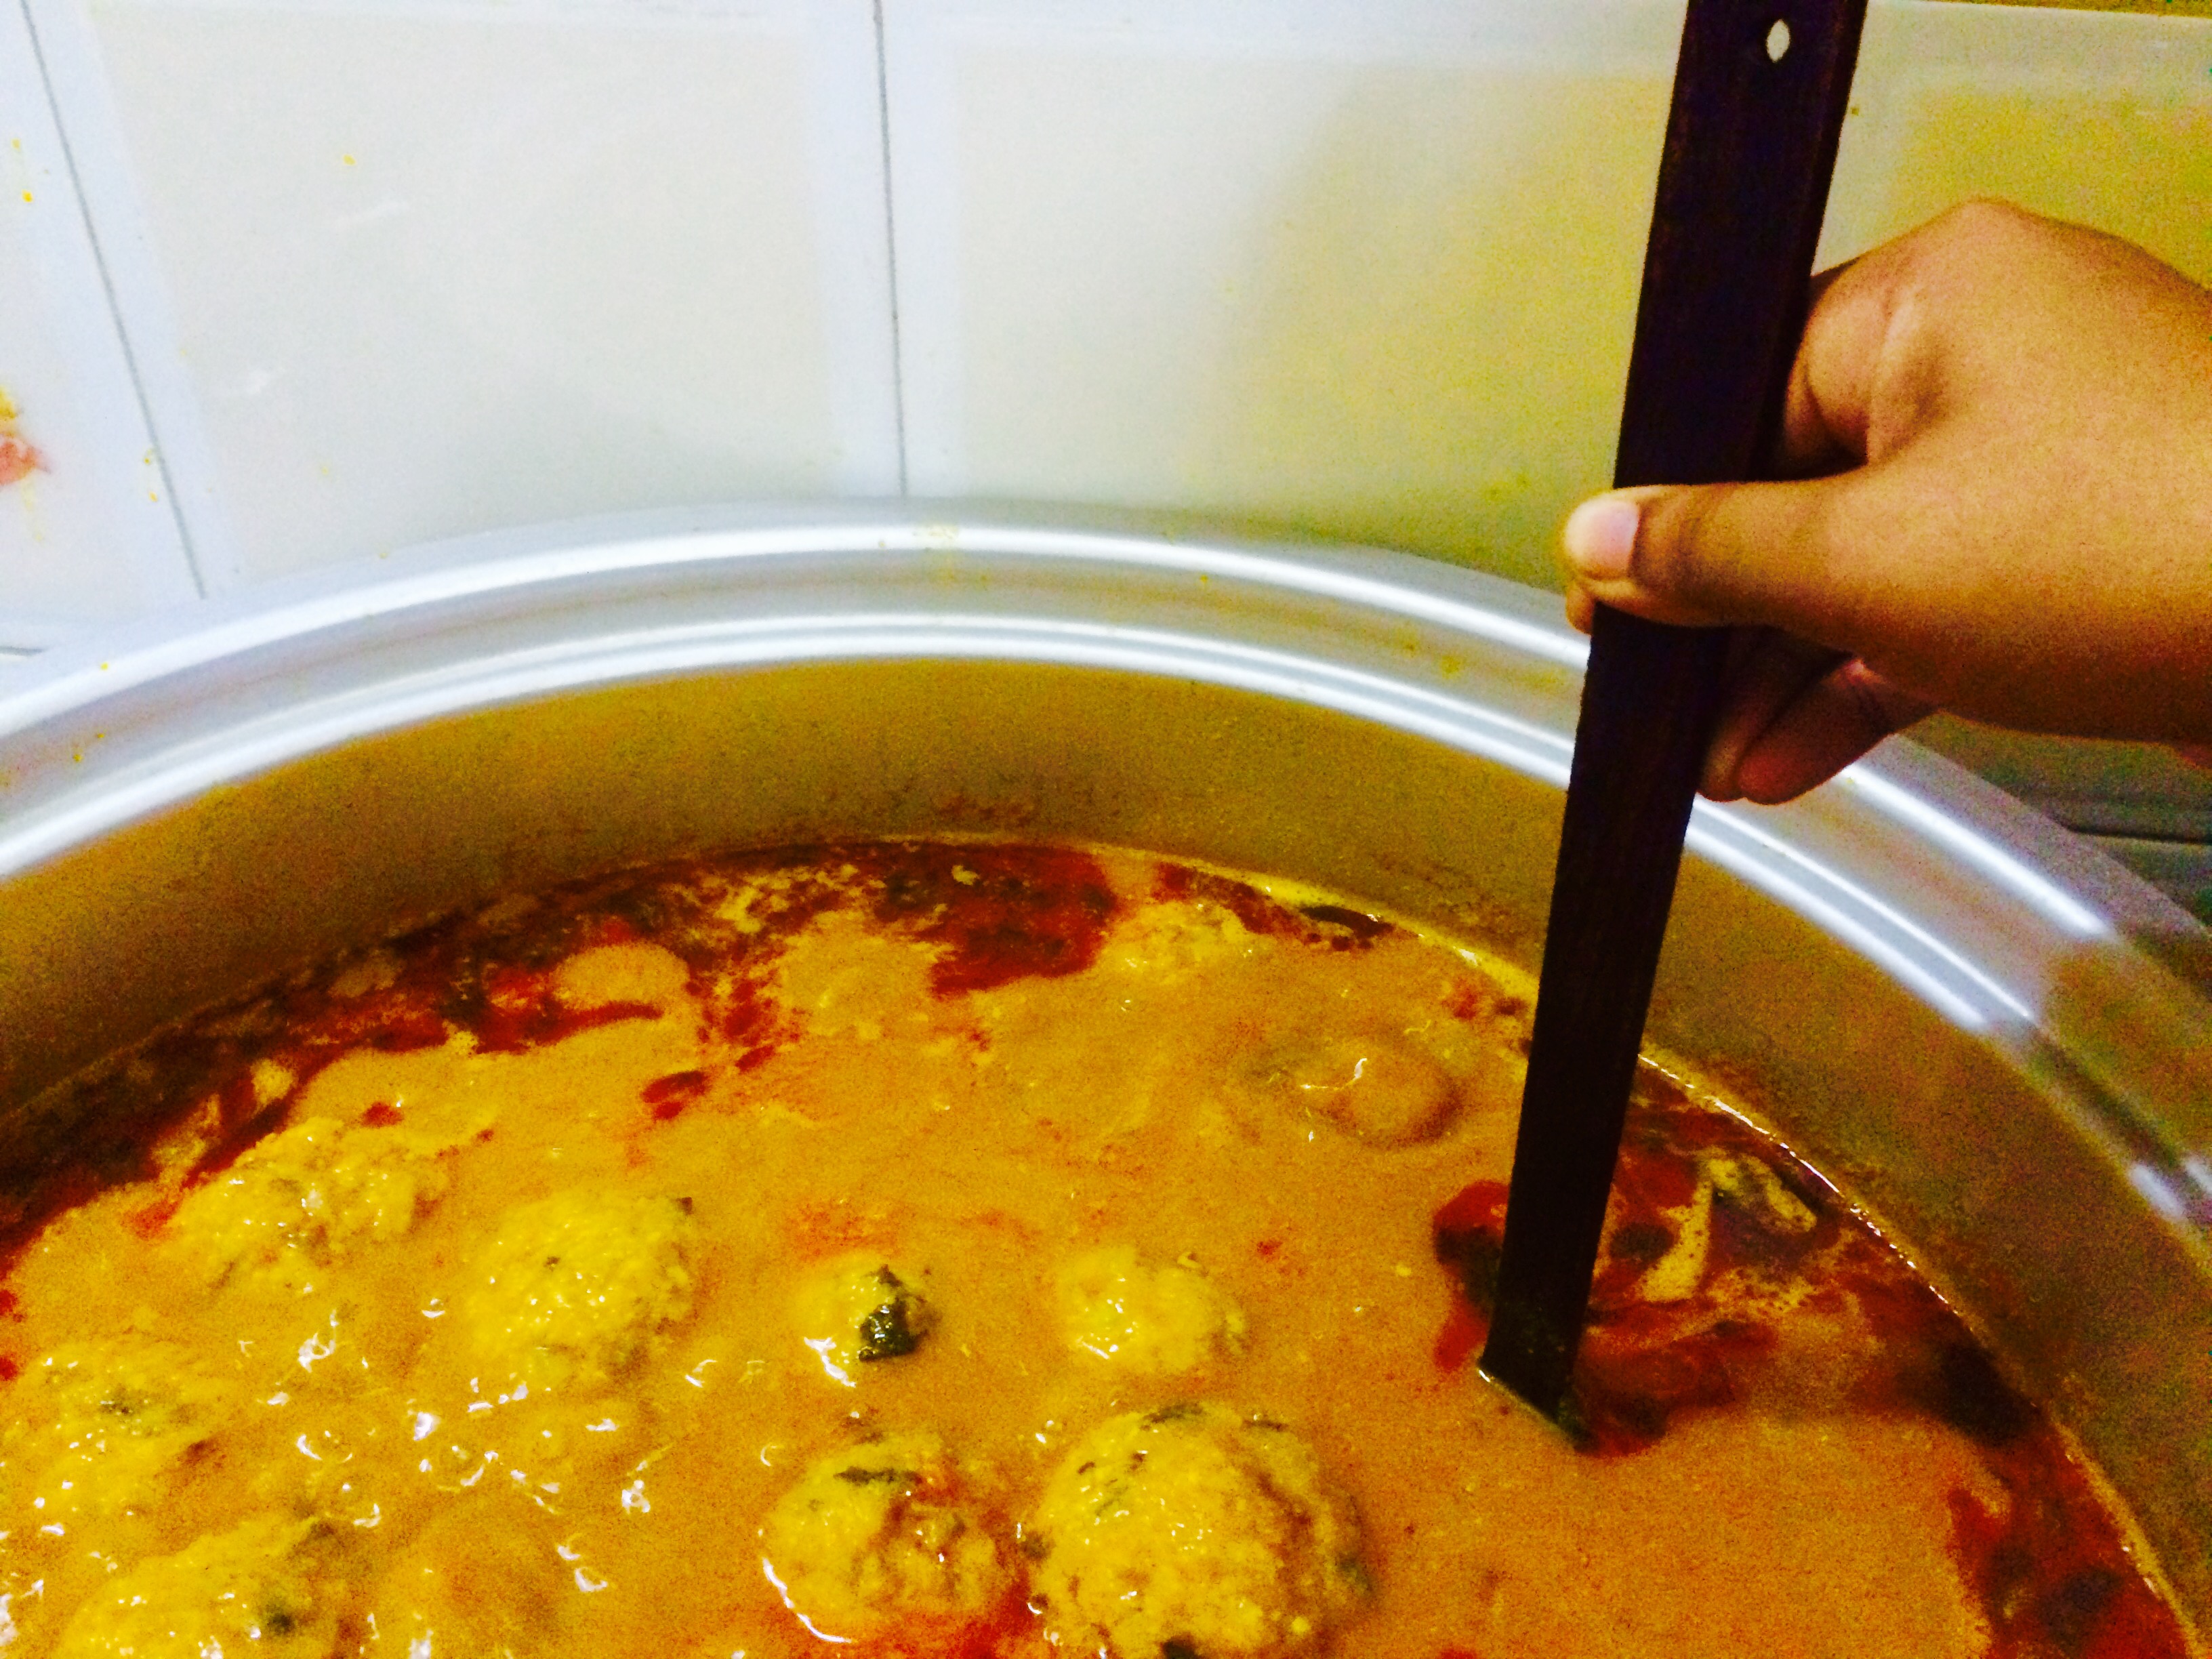
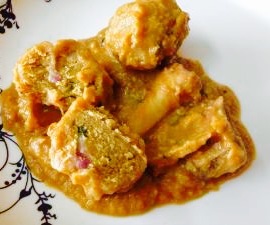
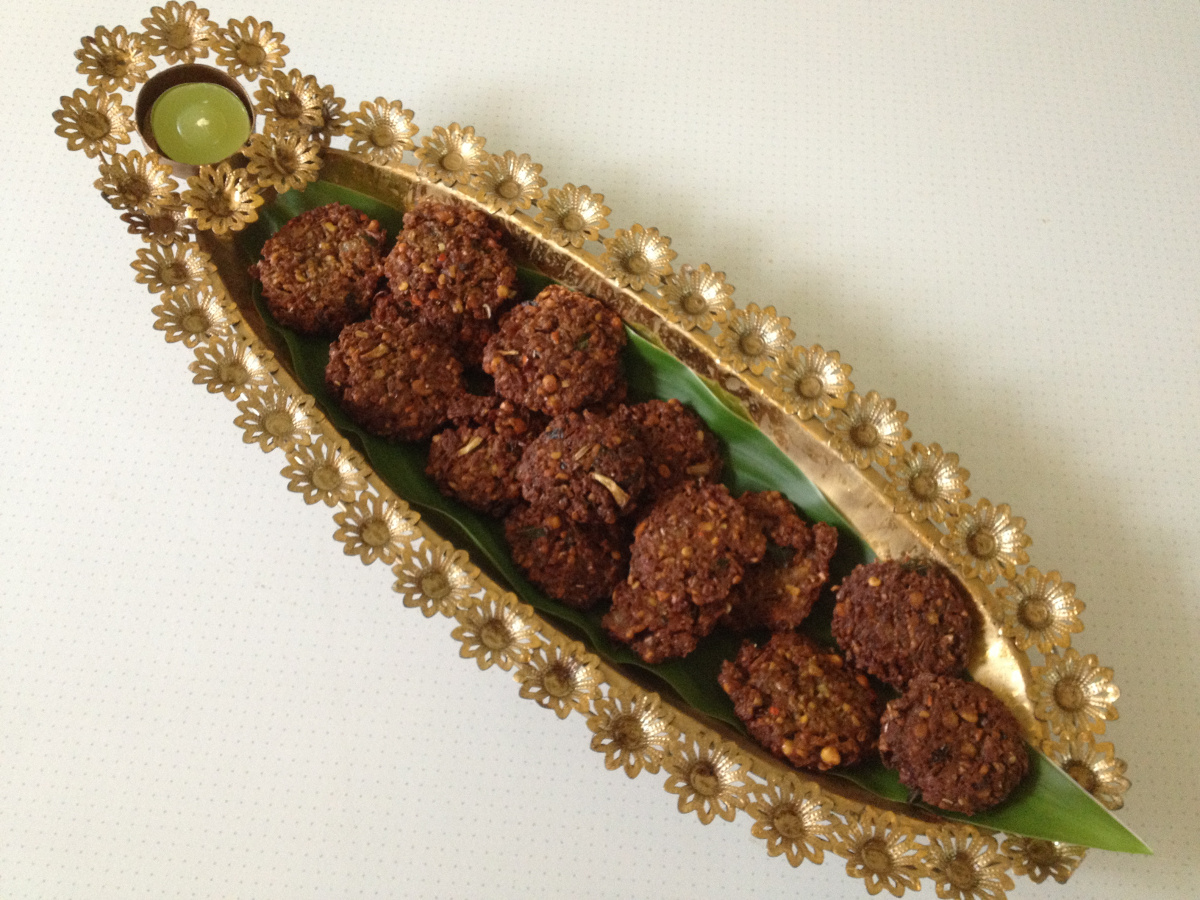
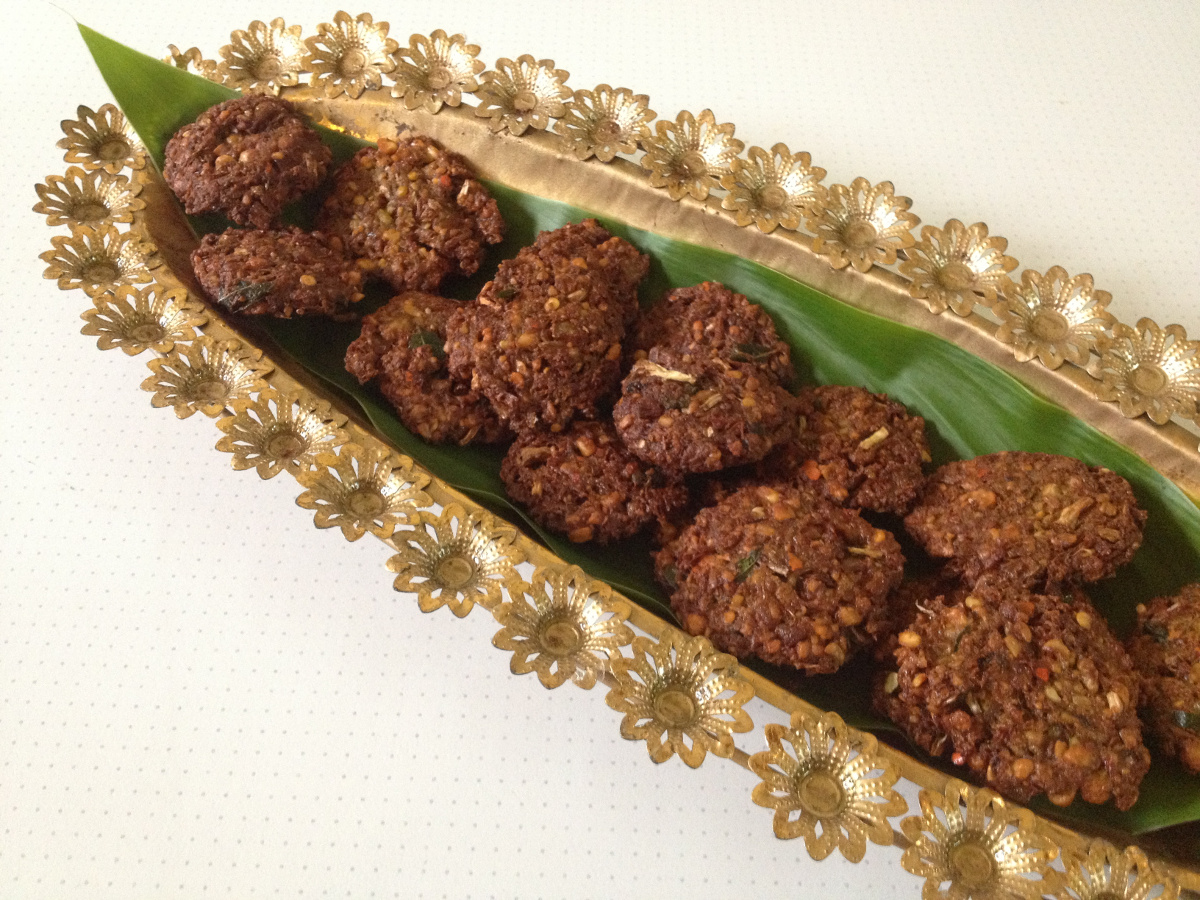
  4. Drop one by one , 4 to 5 in one batch into hot oil and fry for 2 minutes on each side to get a deep golden brown crisp vaala poo vadais .
    Drain and serve hot with your after noon meals as a side dish .
  5. There is no need of any chutney or dips to go along . It’s had as it is . At home ,Even before going to the dining table 3/4 of the vaala poo vadais are over in the kitchen , as every one has a taste before on the table .

Tiramisu

Share Button

image (14)

image (15)


image

Preparation Time : 35 minutes

Cooking Time : nil but 8 hours or over night refrigeration to set the tiramisu

Serving : 10 members

Description

Tiramisu to me always relates to romance … The reason being the English movie ” NO RESERVATIONS ” . Where actor Aaron eckhart who’s nick in the movie brings actor Catherine zeta jones who’s Kate in the movie a tiramisu for a date to her apartment . Obviously , He being an Italian chef does so but Kate says she’s not a dessert person and nick makes a pizza instead but the tiramisu sure does change Kate’s mind and romance follows . From the very day I heard the word tiramisu in the movie and the way they both ate  it . I became desperate to taste this mighty delicacy from across the country dessert but the problem of days of no google where it was plain classic days of trial and error . No recipe in hand , had to just assume , ponder and fantasise upon it’s taste , texture , aroma and look . Finally one day did take note of a easy version of tiramisu in the telly through food safari . Now the next problem being not having marscopone cheese or savoiardi sponge fingers in hand . I was not ready to give up so substituted marscopone cheese with cream cheese and savoiardi sponge fingers with bourbon chocolate biscuits . Went ahead following the recipe . As making it was so confused that I am using raw eggs .. How will it taste ??? If it’s eggy that’s it the entire tiramisu will have to go to the bin . With a million doubts in mind went ahead and placed it in the refrigerator over night and the next day for lunch ,did start serving to all at home . For all the rave and enthusiasm I had over tiramisu , my heart was pounding with fear now about the taste . My fussy girl Anisha was the first to taste and she was like what is this , it tastes so yum . Relived me tasted my share and not a sign of raw egg smell in the tiramisu . What ever but still I haven’t got to taste the authentic tiramisu with marscopone cheese and savoiardi sponge fingers .well that quest was done slowly one by one as I got access to marscopone cheese first so the cream cheese was substituted and then once on a trip to Bangalore went head over heels seeing savoiardi sponge fingers in a department store . Grabbed a few packets and tried it out when at home the authentic way and my taste buds were never pampered so generously ever . Nothing can come close to an authentic tiramisu for sure and finally , now I know why Kate fell over the tiramisu and nick :-)) .

Ingredients

Ingredients
Quantity
Eggs6 separated
Sugar 3/4 cup
Marscopone cheese500 grams
Vanilla essence1 teaspoon
Italian sponge fingers (savoiardi) 1 large packet ( can replace with sponge cake fingers or Bourbon biscuits ( my version )
Instant Coffee powder1 1/2 tablespoon mixed in 1 cup water and sugar to taste . ( original recipe demands for coffee liqueur or coffee powder mixed with rum )
Chocolate grated to taste ( original recipe demands for cocoa powder )

Method

  1. Beat egg yolks , sugar , marscopone cheese and vanilla essence together to a smooth gooey mixture and set aside .
  2. Beat egg whites to stiff peaks . Fold in the egg white mix into the yolk mixture . ( fold and lift ) In a pudding tray or dish .
  3. Lay a layer of sponge biscuit finger dipped in coffee mixture on the bottom , then top with grated chocolate , cover with egg + cheese mix .
  4. Repeat the layers to the top of the pudding dish , finishing with a final layer of grated chocolate . Place in the refrigerator over night or for 8 hours and serve cold .

Thakkadi

Share Button

image1

image2

image3

image4

image5

image6

image7

image8

image9

image10

Preparation Time : 50 minutes
Cooking Time      : 50 minutes
Serving                :  6-8 members

Description

Thakkadi is an authentic dish very own to the Tamil Muslims of southern districts of tamilnadu in and around tirunelveli district and Sri Lanka . I am not sure if this dish migrated from sir Lanka to India or vies –  ver – sa . I was introduced to this dish as a newly wedded bride and ever since loved this dish to the core . We do have a similar dish in the northern districts of tamilnadu called thikkadi that is an influence from the Kerala pedi and tastes similar to the pedi as well . The basic concept of both the dishes are the same that you basically are cooking rice flour dumplings in a mutton stew but with a slight difference of the texture of rice flour used and the size of the dumplings . Here we use coarse rice flour powder fried to a golden brown colour along with grated coconut , flavoured with the mutton curry and other few more ingredients leaving way to high lighten  the flavour of the rice dumplings even more . This rustic looking dish does take time to master the art of cooking and understanding like for a biriyani . I myself took a few years to get the exact loop of the authentic way to cook this dish that head towards to finding new cheats ways to replicate this dish . But what ever said and done the pains taking authentic way is the winner finally . This dish is mainly done to impress the newly wedded groom and sent over to married daughters homes as a gift and a mark of love . I was super excited about this dish and went raving about it when at mom’s place to all my cousins and aunts . When I mentioned the word ” THAKKADI ” my aunt , shaji Akka ( mom’s third sister ) just closed my mouth . I didn’t know what was happening around . Her two boys started laughing out loudly . My aunt then told me that this word is used to abuse people in her hubby’s ( Salem ) place . I felt so embarrassed and made sure never ever to utter this word any where in and around Salam there after . Wired that a dish which is addressed to be a sign of love here at my place is also addressed as an abusive word in another part of the world .

Ingredients for the mutton salna

Ingredients
Quantity
mutton 1 kg
onion2 sliced
small onion1 hand cut into 1/2
curry leaves 1 strand
cinnamon1 inch piece 2
cloves4
cardamom2
ginger garlic paste 1 tablespoon each
tomatoes 3 big chopped
green chillies6 slit
Turmeric powder 1/4 teaspoon
coriander leaves2 tablespoons chopped
saltto taste
poppy seeds1/4 cup ground to a paste adding 1 teaspoon of fennel seedsseeds
Coriander powder 5 tablespoons heaped
Red chilli powde3 1/2 tablespoons
Cumin seeds powder2 tablespoons
Fennel seeds powder2 tablespoons
curry masala powder 6 tablespoons heaped ground to a smooth paste ( can just add the powder as it is but my mother - in - law grinds it and adds more taste ) powder as it is but my mother - in - law grinds it and adds more taste )
coconut 1/2 grated and ground to a smooth paste
thick coconut milk1/2 cup

Method

  1. Grind turmeric powder , coriander powder , red chilli powder , cumin seed powder and fennel seed powder with little water to a smooth paste . The curry masala is ready .
  2. Heat 100 ml of oil ( gingely oil or vegetable oil . Gingely oil is used traditionally ) in a pressure cooker .
  3. Add cinnamon , cloves , cardamom , small onions and curry leaves . Once they splutter and onions are brown , top with ginger garlic paste and fry to crisp .
  4. Add meat , onions , tomatoes , green chillies , coriander leaves chopped and salt to taste . Sauté for 5 minutes till colour of the meat changes and lets out some juice .
  5. Add the poppy seed paste and sauté for another 5 minutes . Top with the masala  paste and sauté for 3 minutes .
  6. Pour water to cover the meat about 2 inch above in the pressure cooker . close with lid and pressure cook for 3 whistles or until meat is cooked  to 3/4 . Add coconut paste and coconut milk .
  7. Bring to boil and simmer for 5 minutes until oil floats on top .
  8. Top with chopped coriander leaves  and set aside .

Ingredients  For the rice dumplings

Ingredients
Quantity
Coarse Rice flour fried with coconut thangatta maavu as known authentically ( can use puttu flour instead )authentically ( can use puttu flour instead ) 3 cups heaped
Small onion 1 1/2 hand full chopped 
Green chillies3 chopped
Coriander leaves1 tablespoon chopped
Curry leaves1 tablespoon chopped
Grated coconut1/2 hand full
Salt to taste

Method for rice dumplings

  1.  Mix the coarse rice flour with all the other ingredients and mix well .  To this mixture add 2 cups of clear salna ( mutton curry –  as it adds more flavour to the rice dumplings ) and 1/2 cup of lukewarm water little by little and knead till you get a soft dough.
  2. Let it rest for 5 minutes. make balls out of the dough to a big lemon size .  Set aside one ball ( or a little crumbs from rolled balls would do ) . Check the Mutton salna if it has enough water to cook the rice dumplings .
  3. Add more luck warm water  if needed  and transfer to a large wide mouthed heavy vessel with lid . Check seasoning and adjust . Bring to boil and reduce the flame to medium but the salna must be boiling in medium flame .
  4. Now is the perfect time to add the rice flour dumplings into it. Add the dumplings in batches of 8 at a time . Do not stir for 3 minutes . Once the dumplings are cooked it starts to float on top .then stir very gently with the help of a wooden spoon.
  5. Follow with another batch of 8 dumplings and proceed as before . Be patient and cook the entire rice dumplings in batches of 8 . Make sure not to reduce or increase the flame at any time when cooking the rice balls .
  6. The temperature has to be same at all times . Takes about 20-25 minutes in total . Remove one rice dumpling , cut into half and check if it’s cooked . The rice dumpling stays intact as a ball and has a smooth even finish on the cut side of the dumpling .
  7. When tasted there is no raw flour taste . Now crumble one reserved raw rice ball all around to help thicken the runny loose mutton salna . Allow to simmer for about 5-8 minutes to thicken .
  8. The mutton also must be cooked as well by now . Finally turn off the heat and serve hot with a garnish of coriander leaves .

Notes

1. can steam the dumplings in the microwave for a minute and then drop into the mutton  salna and cook further . By this way being a beginner you feel more confident that the rice dumplings don’t break and dissolve at any cost . I used to do so in the initial tries of making takkadi  but these rice dumplings are not as soft as the directly boiled in the salna ones .
2. always cook the rice dumplings in a wide mouthed heavy bottom vessel with the temperature at the same level from start to finish before the last 5 minutes . I usually use my electric rice cooker to do this step as it helps to maintain the temperature in the same level but once cooked do not keep in ” keep warm ” as the rice dumplings tend to break . You have to remove the inside vessel of the electric rice cooker and set aside until needed to be served .
3. make the mutton salna a day ahead so that you just have to prepare the rice dumplings  , cook and serve . Which makes things much more easier .
4. best had for breakfast as it’s such a heavy dish and advisable to skip lunch there after :-)) .
5. The mutton salna should be a watery loose mass of gravy so that the rice flour dumplings can cook and float in the watery gravy .
6. while checking for seasoning before dropping the dumplings , feel free to add more masala powders to taste as well .
7. a very tricky dish to master but never ever loose hope . Keep trying to master the art and understand the dish .
8. An easy fool proof flour mix . Rice flour ( iddiappam flour ) – 1/2 cup : puttu flour – 1 cup mixed gives a hassle free rice dumplings for beginners but the texture does differ from the authentic coarse grainy thakkadi ( rice flour dumplings ) .


Strawberries blondies

Share Button

image (12)

image (13)

Preparation Time : 20 minutes

Cooking Time : 20 minutes + one hour in fridge to form up in the refrigerator .

Serving :  4 members

Description

The first time I got to know about blondies were on the telly watching chef Gordon Ramsay rustle up a blondies saying brownies are every where so let’s make blondies instead . I was awe stuck with his idea and loved the sneak peak of red coloured raspberries in between each blondie he baked , fair and square . The following week I came across a similar recipe in good food magazine . Usually I like to tweak recipes according to my comfort zone but when it comes to desserts and cakes , I make sure to follow the recipe religiously to the core as you need to be precise when baking .A slight change of measurements or ingredients will collapse the entire dish . Now the problem is I just can’t remember to whom this recipe belongs to . So it’s either Gordon Ramsay’s or good food magazines . I didn’t have raspberries in hand so used strawberry preserve  instead . These blondies were gooey in the middle , melt in the mouth with a cracked crust that gives way to a fudgy slab of indulgences . The strawberry marble effect hight lighting it as a few notches higher than the regular  that’s perfect for a high tea party . Trendy and  delicious too which packs in quite a few calories , but all of us can do with an occasional treat , can’t we ???

Ingredients

Ingredients
Quantity
strawberries60 grams
caster sugar1/2 cup
unsalted butter, chopped150 grams
white chocolate250 grams chopped ( I used morde brand )
eggs3
plain flour 1 2/3 cups ( 250 grams )
baking powder 1 teaspoon

Method

  1. Preheat the oven to 180 degree Celsius . Grease and line a 20cm x 30cm pan with baking paper.
  2. Combine strawberries , 2 teaspoons sugar and 1 tablespoon water in a saucepan over low heat, stirring to dissolve the sugar. Transfer to a mini food processor or blender and whiz until a puree. Set aside.
  3. Place butter and 200 grams white chocolate in a heatproof bowl set over a pan of simmering water (don’t let the bowl touch the water), stirring until smooth. Cool.
  4. Whisk eggs and remaining sugar until combined. Sift in flour and baking powder and stir to combine. Stir in the chocolate mixture and remaining 50 grams white chocolate until combined. Spoon into the pan.
  5. Drizzle over the strawberries puree, using a skewer to lightly swirl it into the surface. Bake for 20 minutes or until a skewer comes out with a few moist crumbs attached (not sticky batter). Cool completely in the pan.
  6. Cut into squares and refrigerate for 1 hour to firm up before serving.

Notes

  1. Can be stored in air tight containers in room temperature for 3-4 days .
  2. Feel free to use berries of the season .