Cheese fatayer

Share Button

image1

FullSizeRender (14)

FullSizeRender (13)

FullSizeRender (12)

FullSizeRender (11)

FullSizeRender (10)

FullSizeRender (9)

FullSizeRender (8)

Preparation time : 1 hour
Cooking time      : 15 minutes
Serves                : 4 members

Description

On a holiday in Dubai with the entire family. My NRI nephews, fed up eating Indian and continental food wanted to dine with some middle eastern food. We end up in a restaurant. I am left to place the order as every one else found the menu card to be typed in Greek. I took up the job and did the honours. We were served with a huge platter of raw fresh vegetables, herbs and olives with dips. We started and hubby dear was like no wasting food, as we kept eating and finishing them, they were replaced with more and more. Only after a few replacements we did get to know they were for free. We all laughed our gut’s out as the food ordered had to come there after. Hubby dear was like, no wasting the ordered food now. All of us with stomach full of raw vegetables, herbs and olive were like you eat, you eat, you eat. The bread platter was served and I was blown away with the various types of breads in the basket. But out of the lot, the eye shaped fatayer’s stole my heart. It was stuffed with cheese and herbs. Tasted yum and can be had as it is with no dips or sides. The table and our stomachs were lined with many other new dishes. Every time a dish is being served, hubby dear would give us glares warning us time and again about no left overs . Looking at the table, I was like ” I am going to get bombarded by hubby dear for all the left overs “. When with family on a holiday, I don’t know how on earth our appetites have this always hungry to eat, to hog, to gobble up mode. Believe me, with no left overs the table has clean empty bowls. Hubby dear was like .. gosh all I earned will go by feeding you people. … when I gave my first try at home serving these cheese fatayers.. hubby dear immediately recollected this incident and we had a good laugh .

Ingredients

Ingredients
Quantity
Flour / maida1 and 1/2 cup
Warm water1/4 cup + 2 tablespoons
Curd2 tablespoons
Instant yeast 1/4 teaspoon
Olive oil2 tablespoons
Coriander leavesfew chopped
Grated cheese1 and 1/2 cup
Sugar + salt1/2 teaspoon each
Oil1 teaspoon

Method

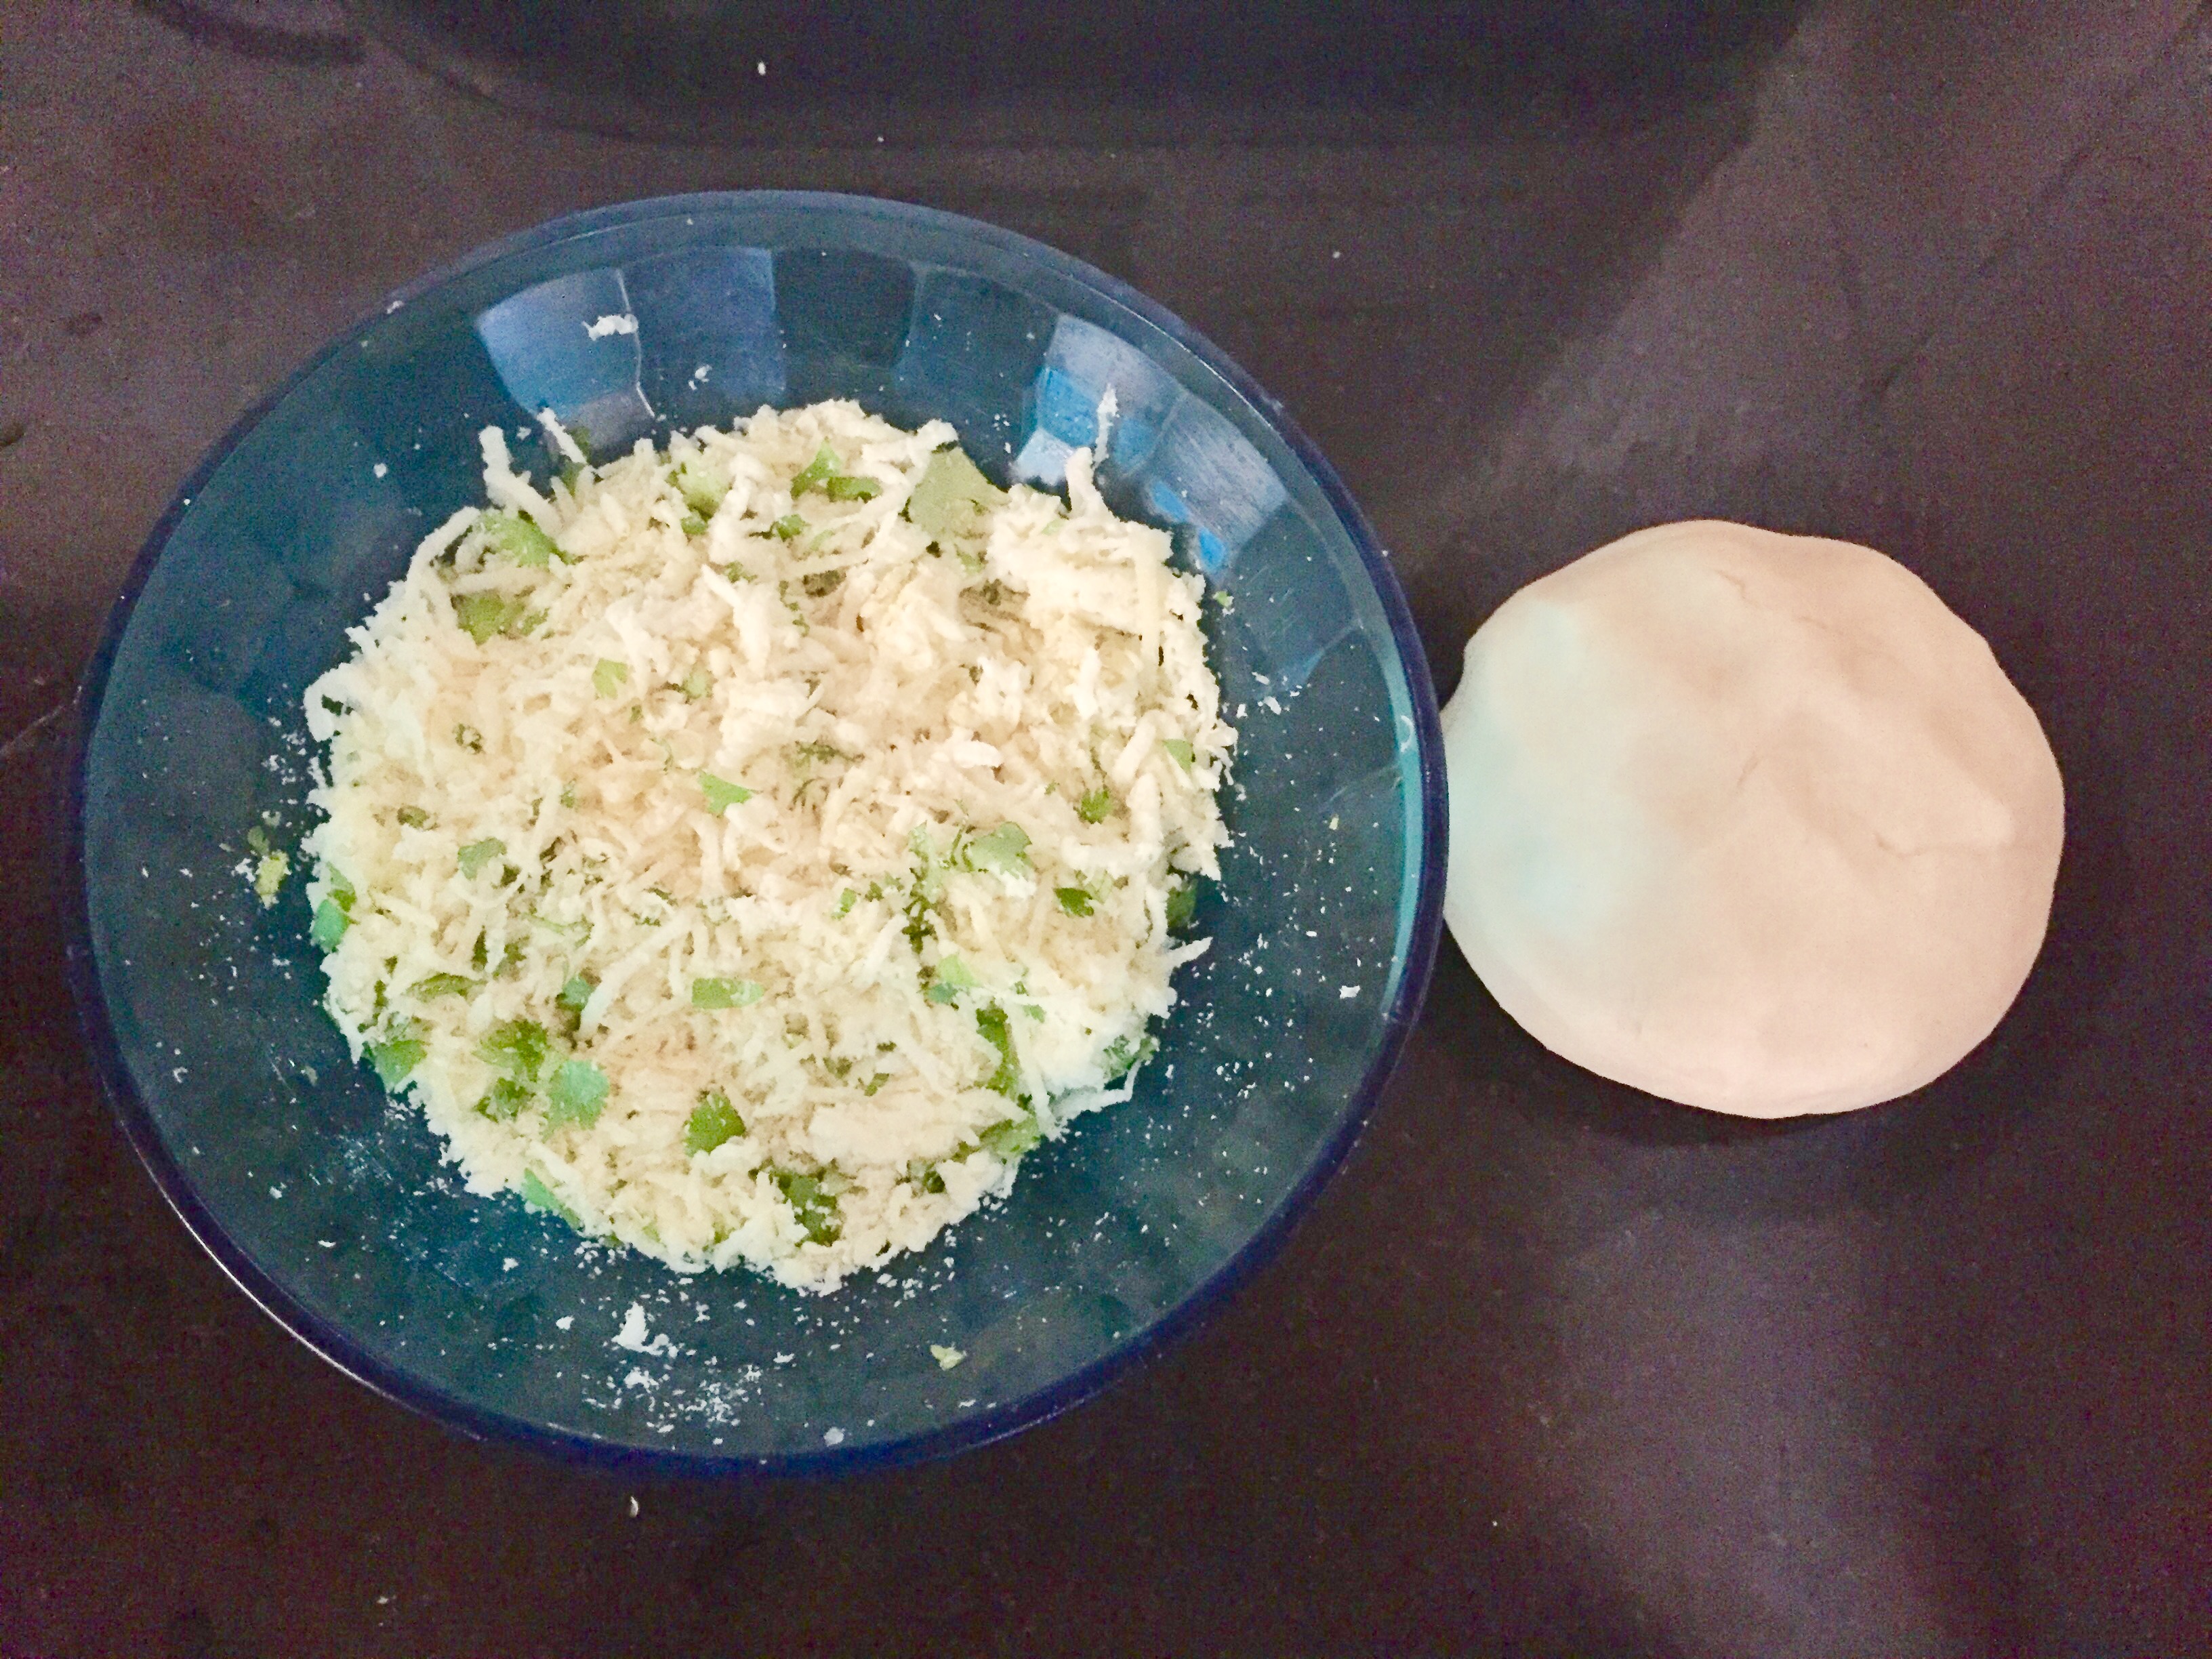
  • Mix grated cheese with chopped coriander leaves and keep aside. Mix flour, curd, warm water, olive oil, sugar, salt and yeast together. Knead well for five minutes.
  • Cover the dough and set aside to double for forty minutes. Grease a baking tray with oil. Preheat the oven to 200 degrees Celsius.
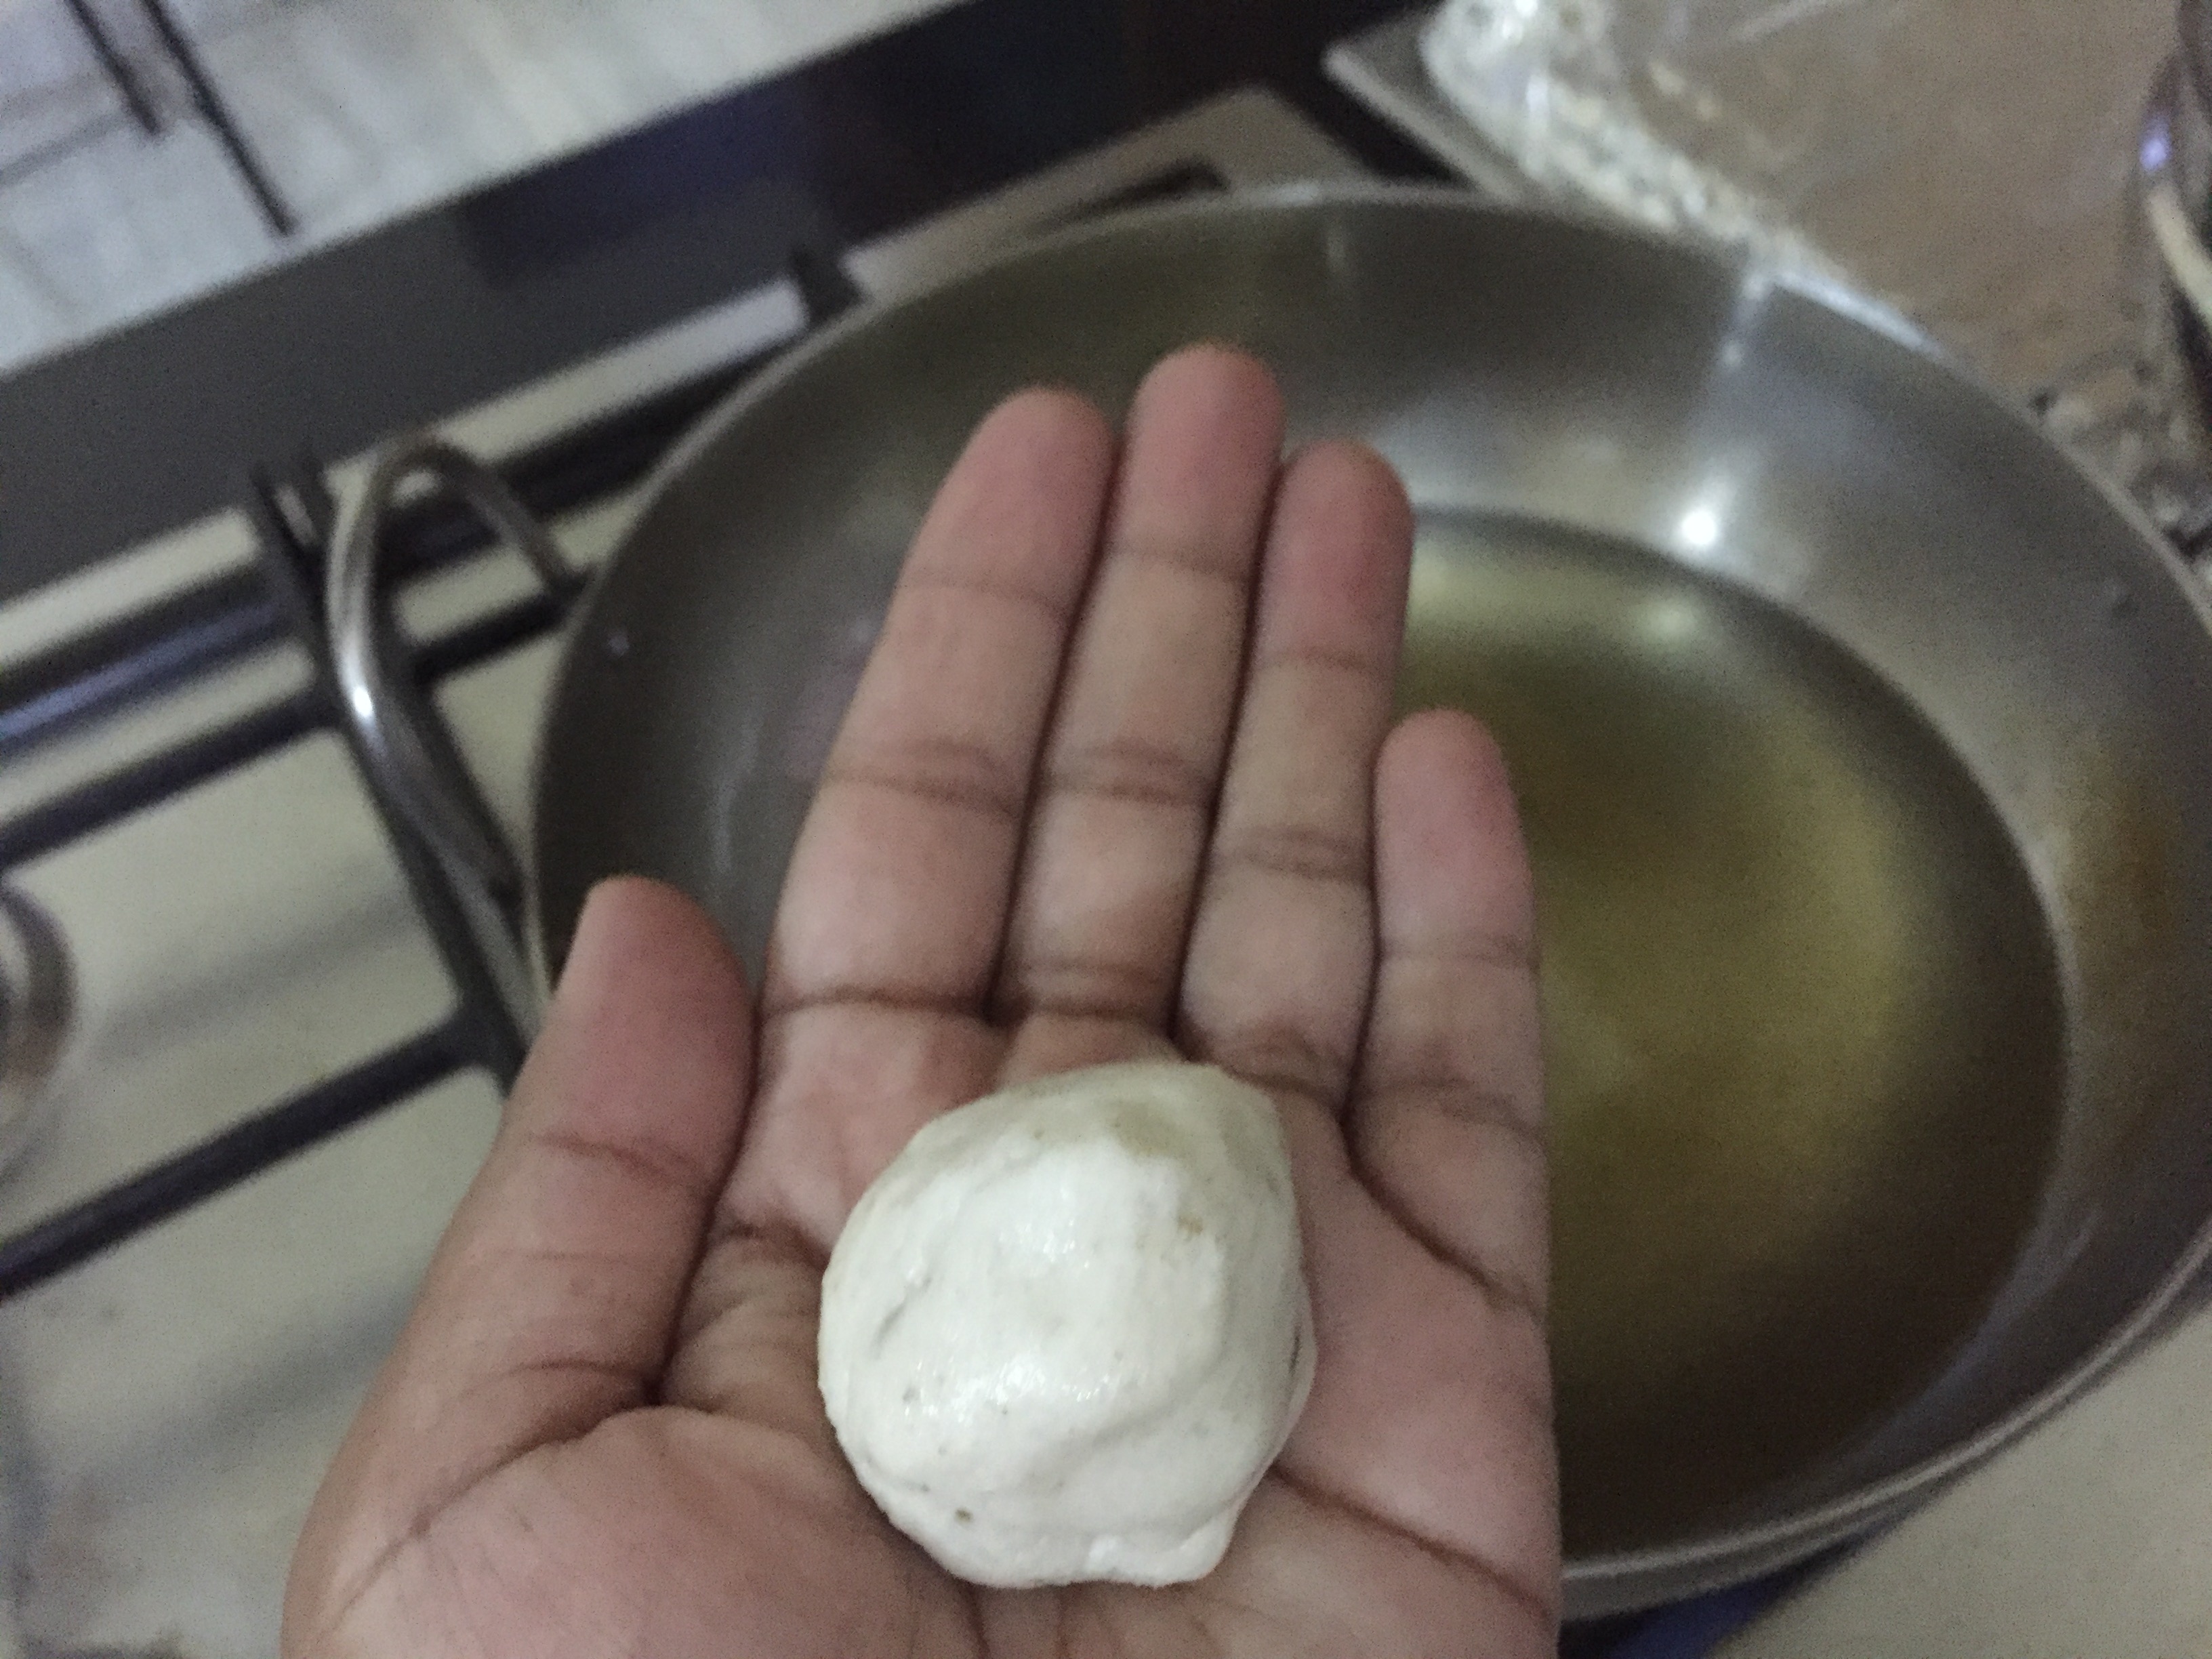
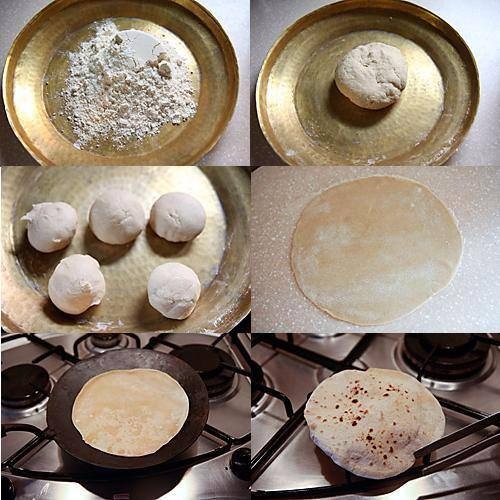
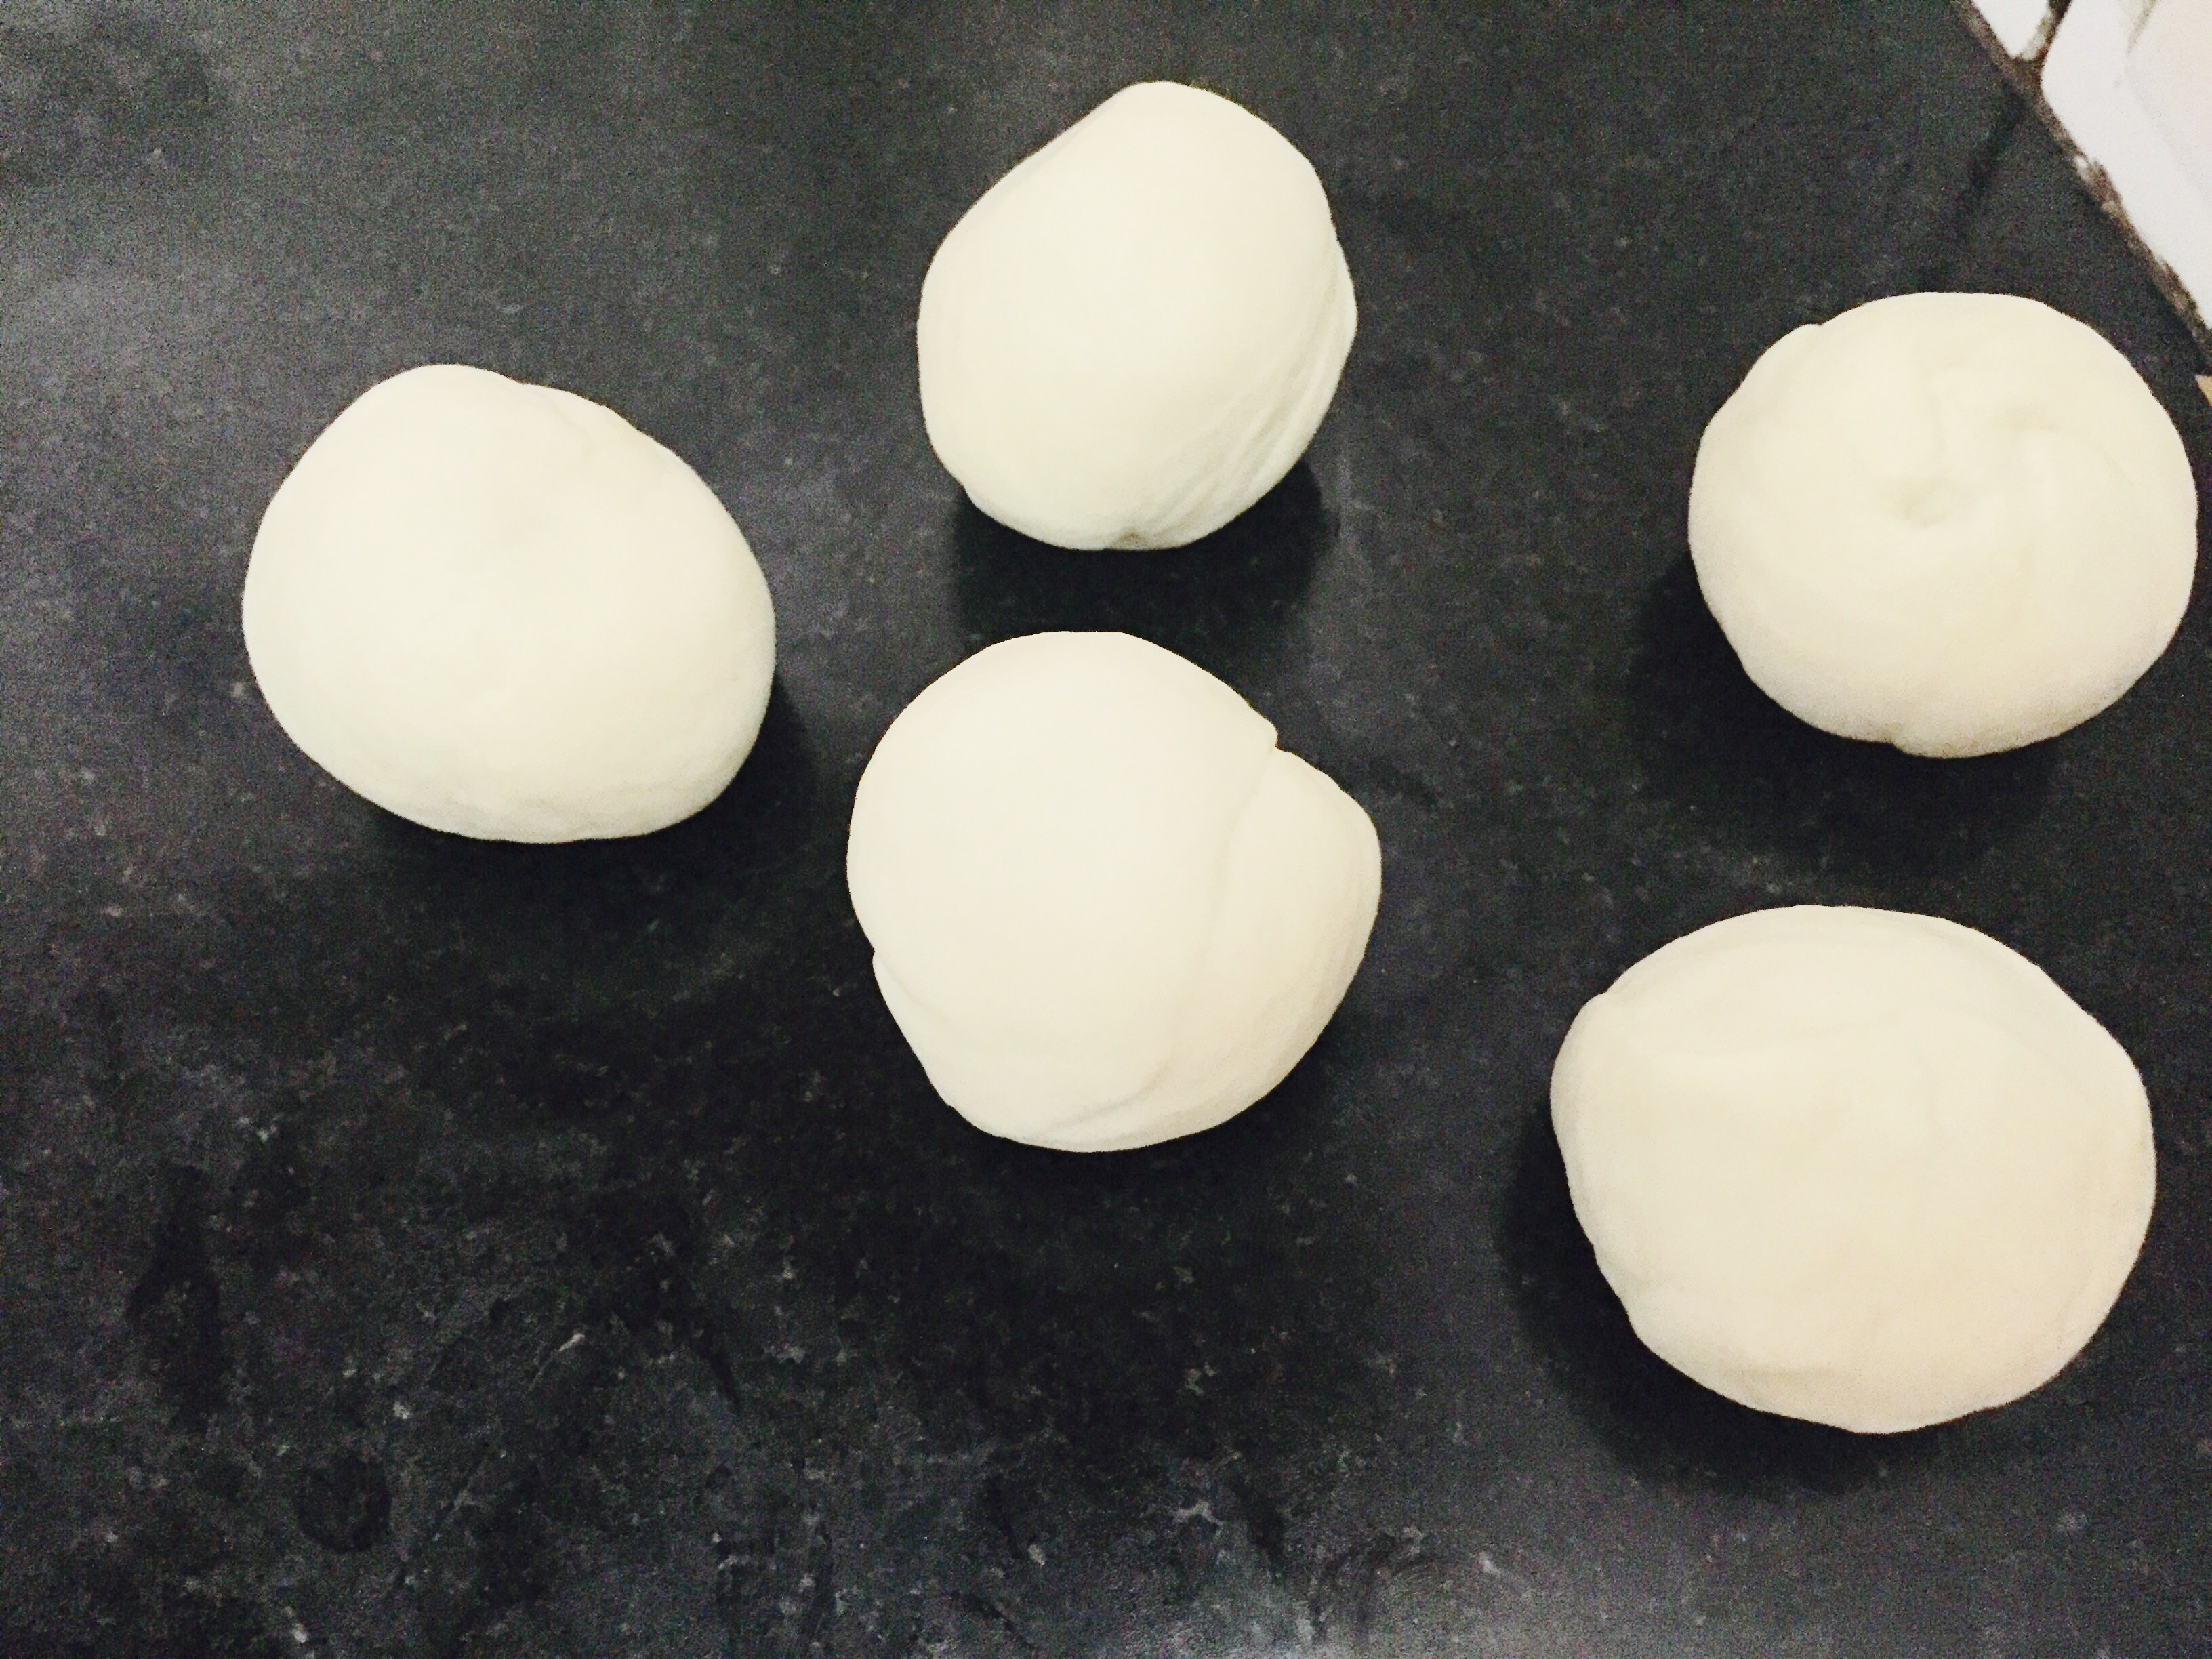
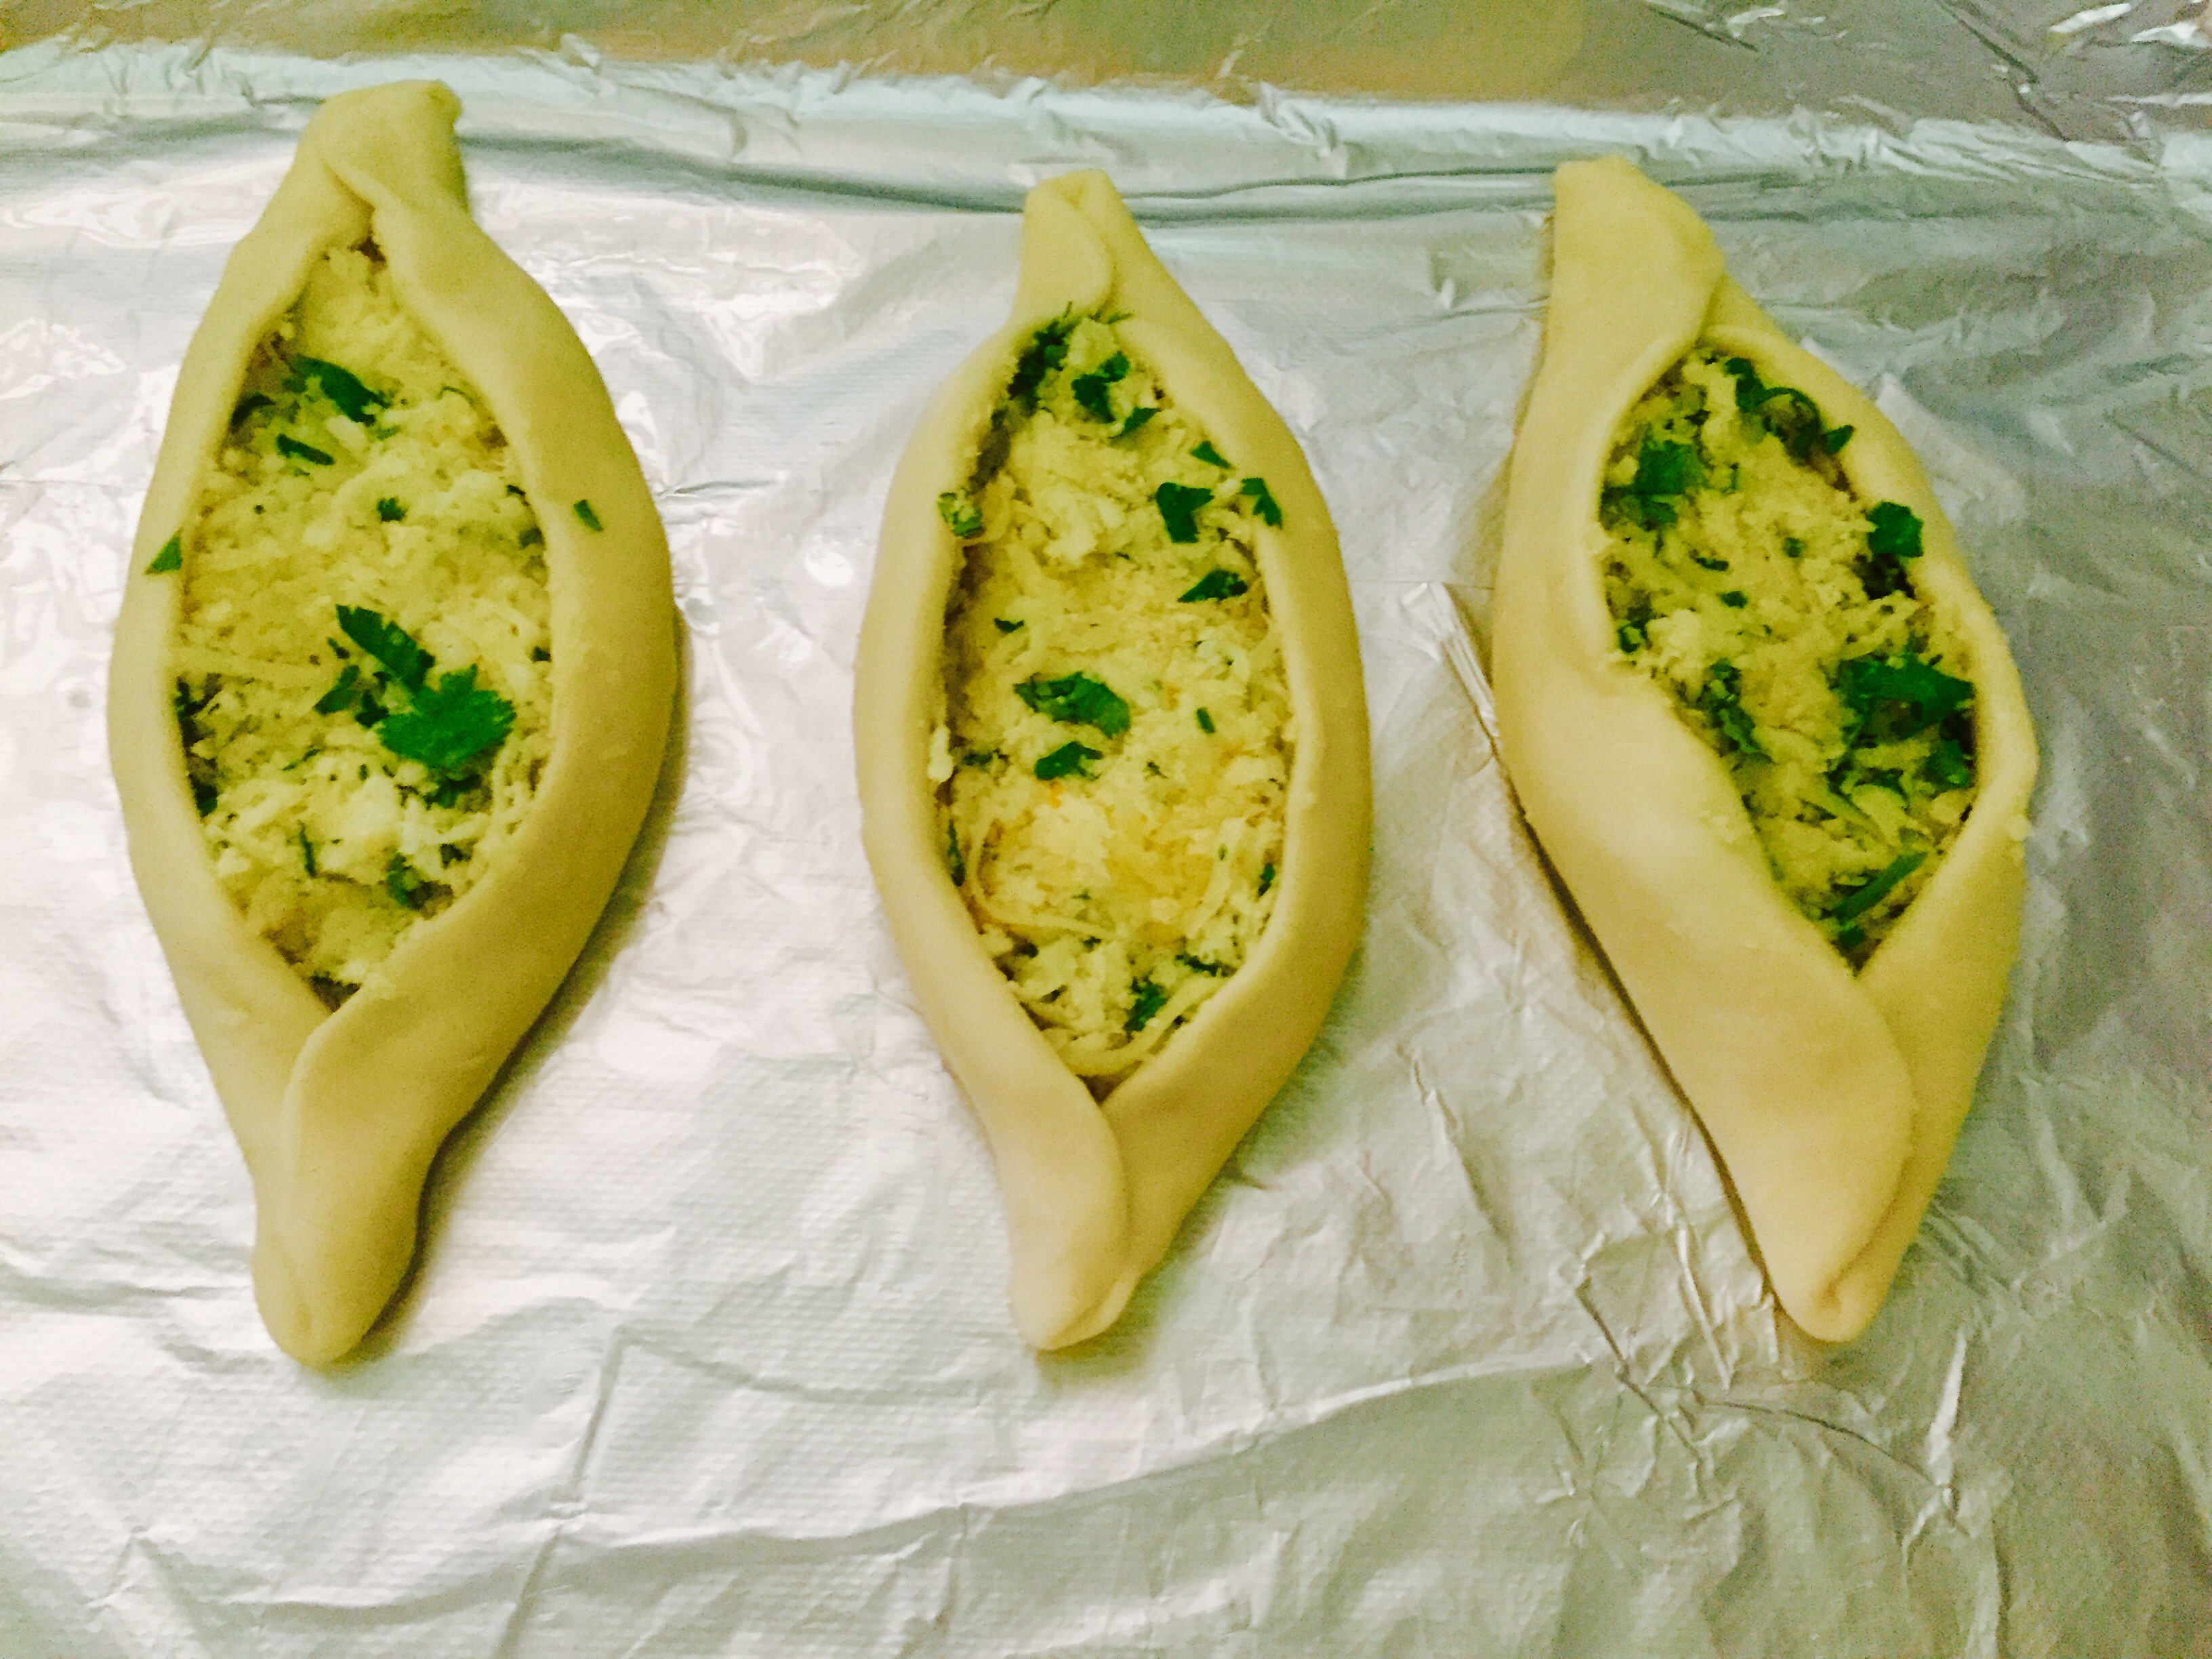
  • Punch down the doubled dough and knead well again for a minute. Make lemon size equal balls out of the dough. Roll each ball into a oval shape.
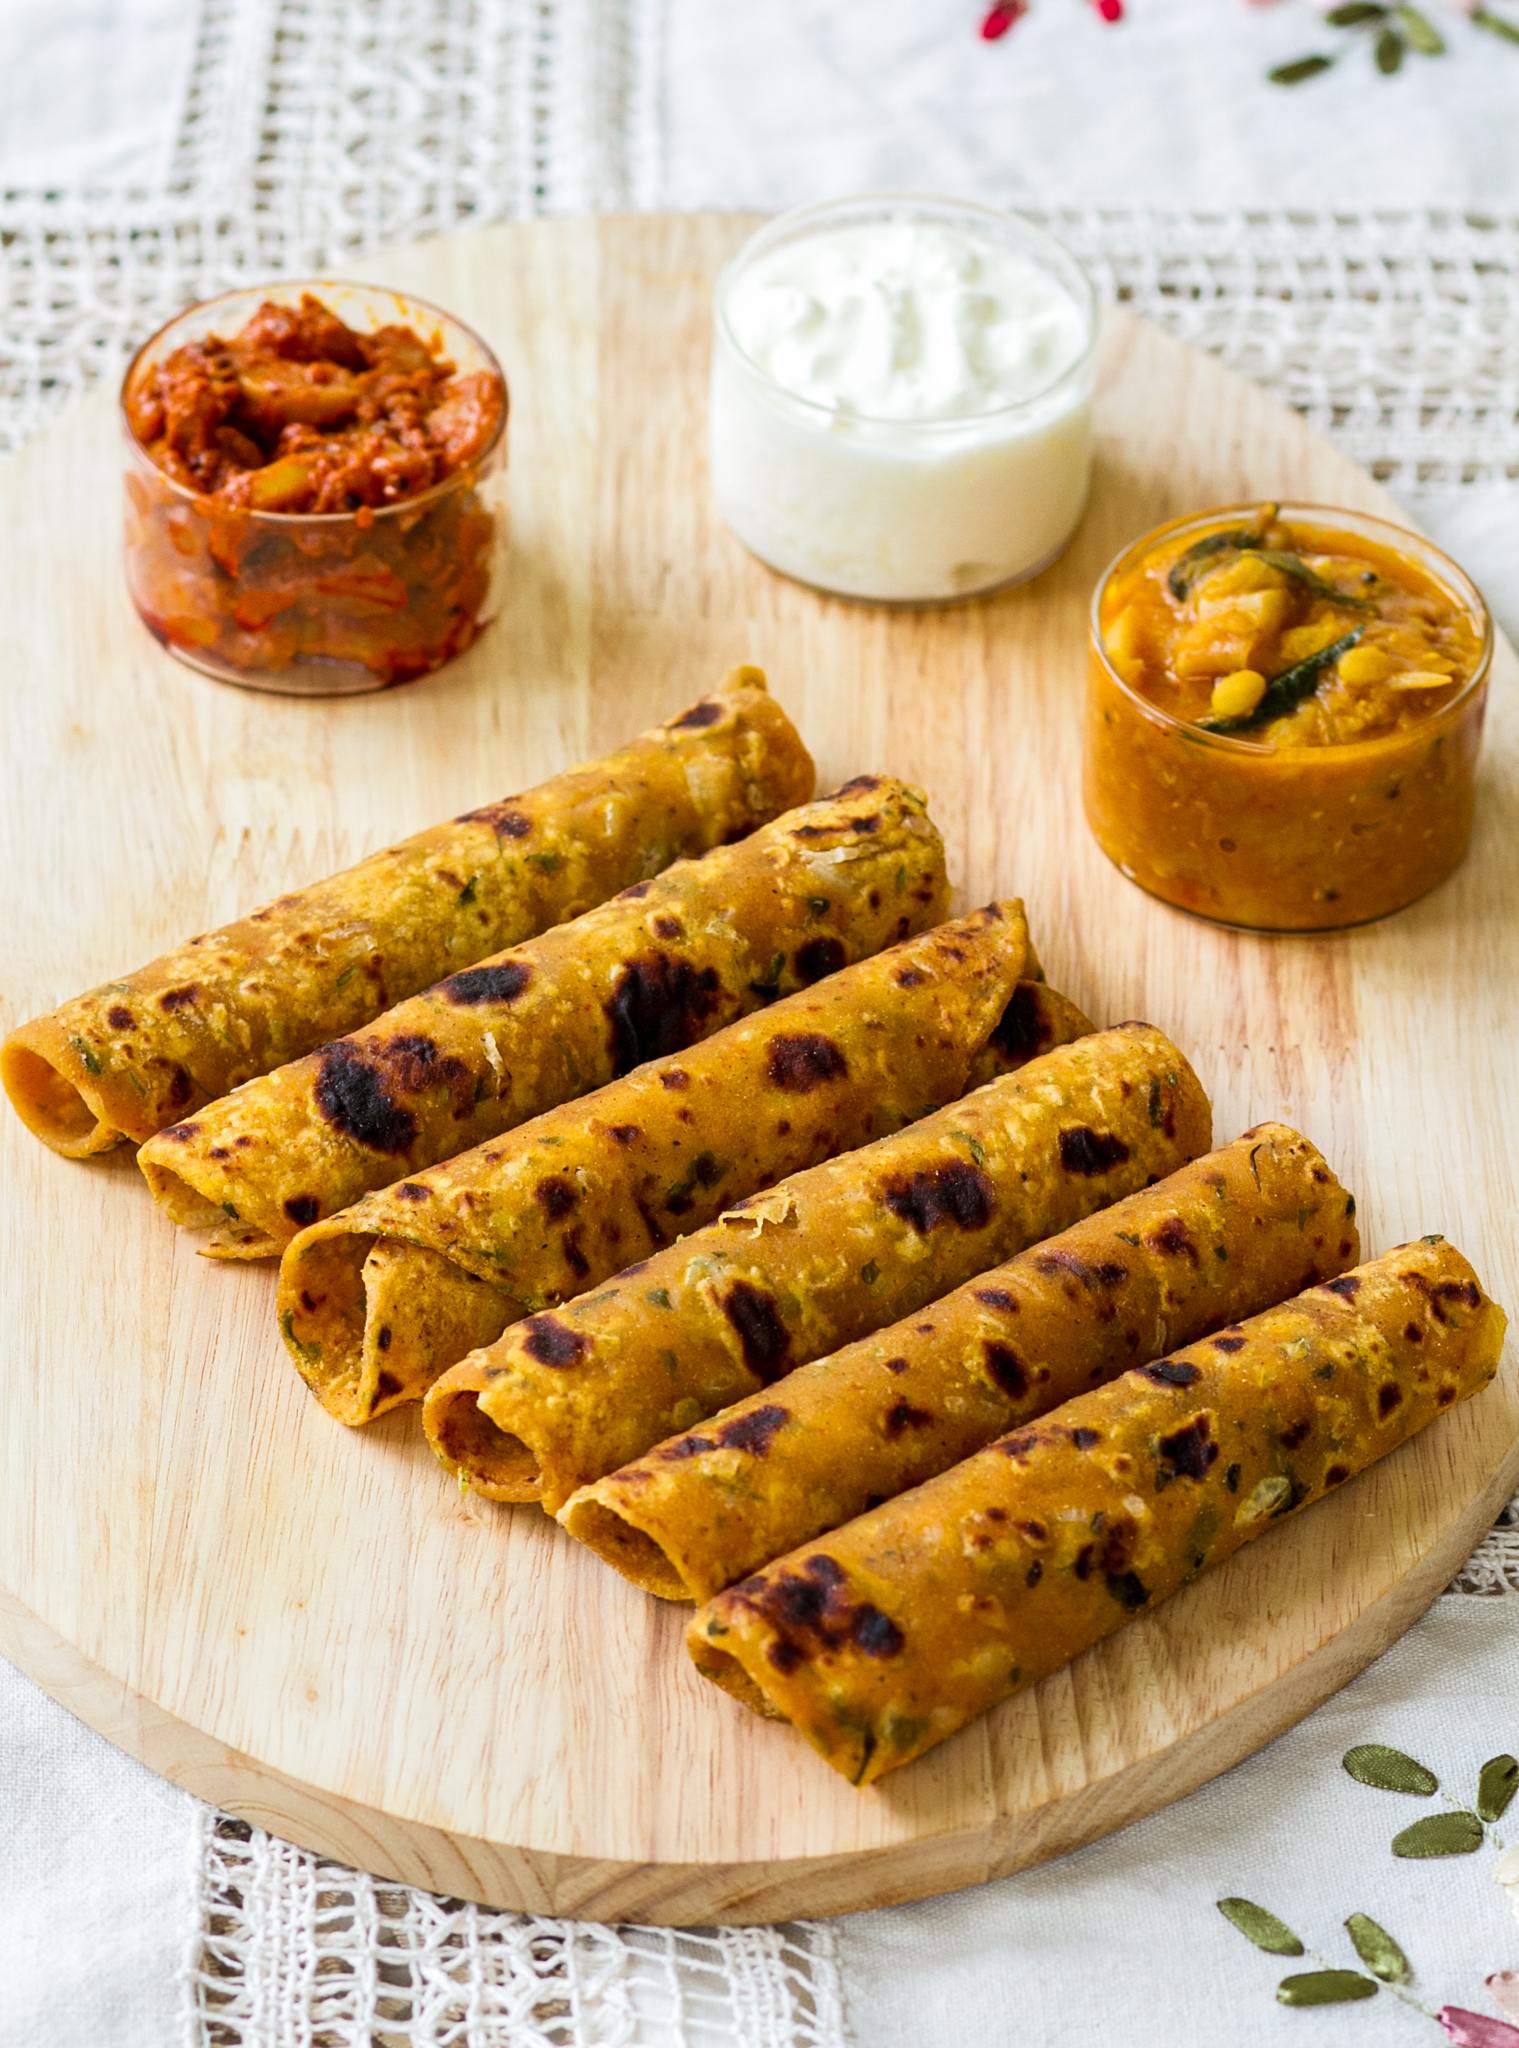
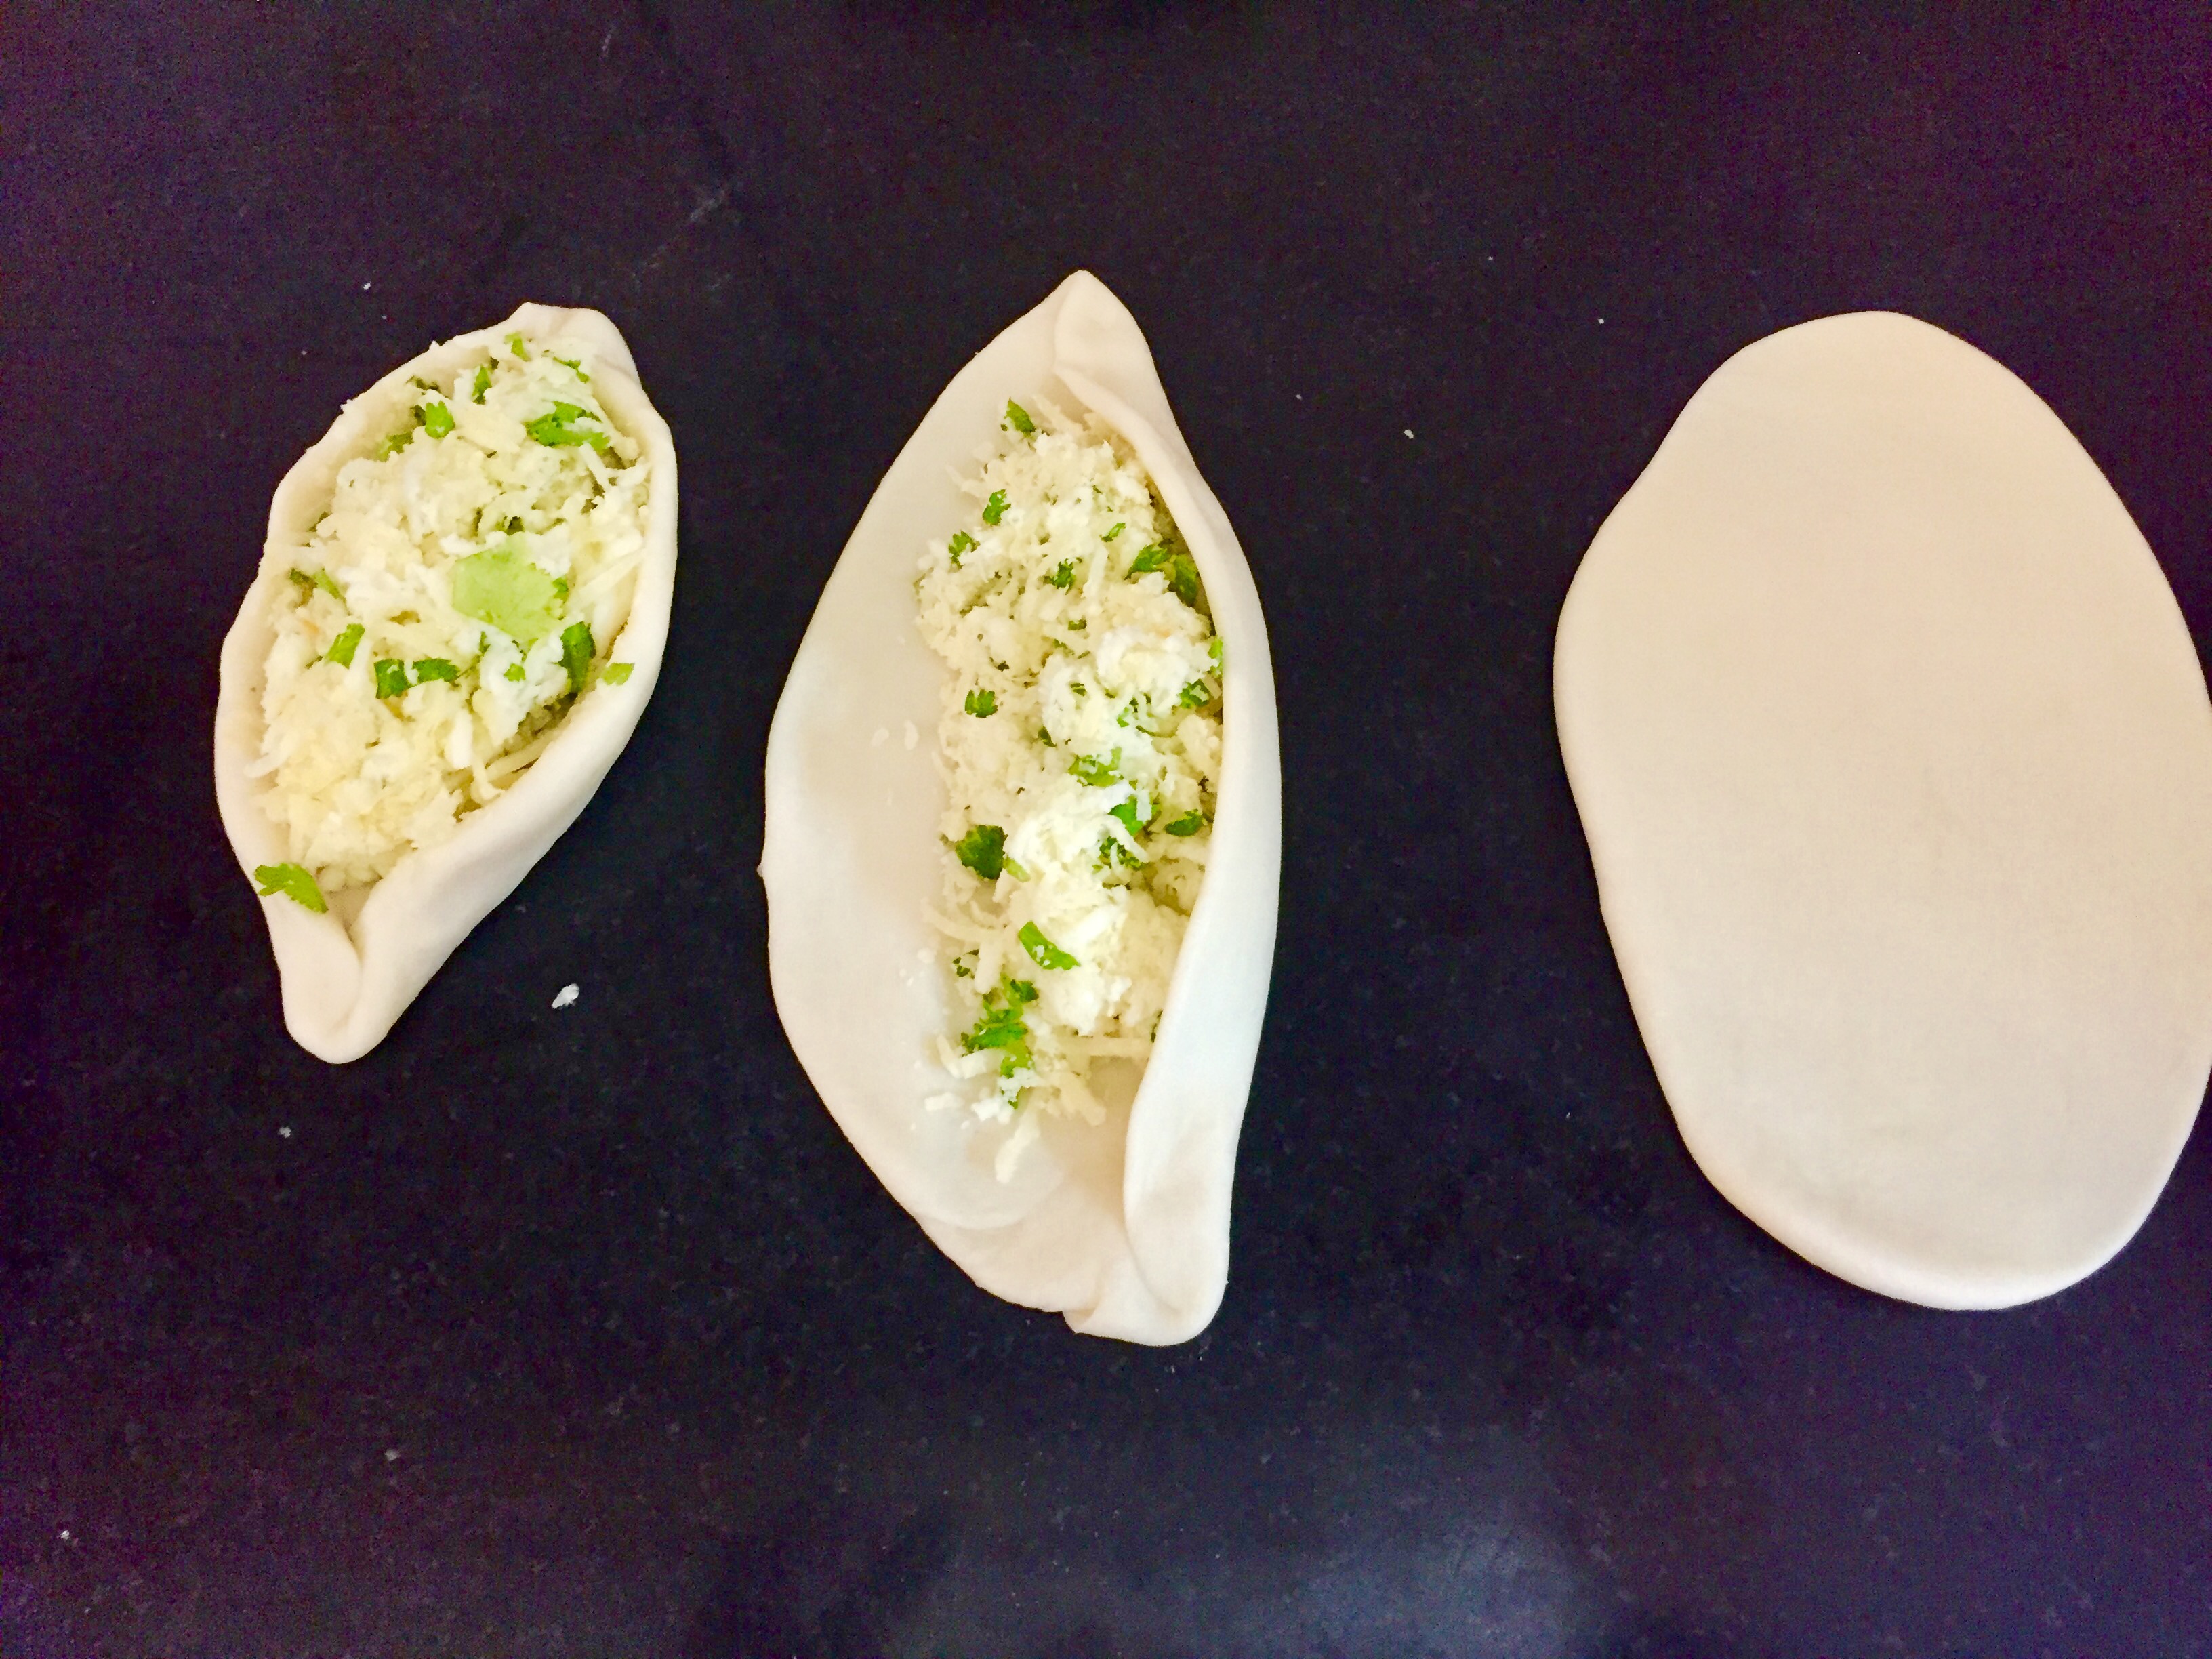
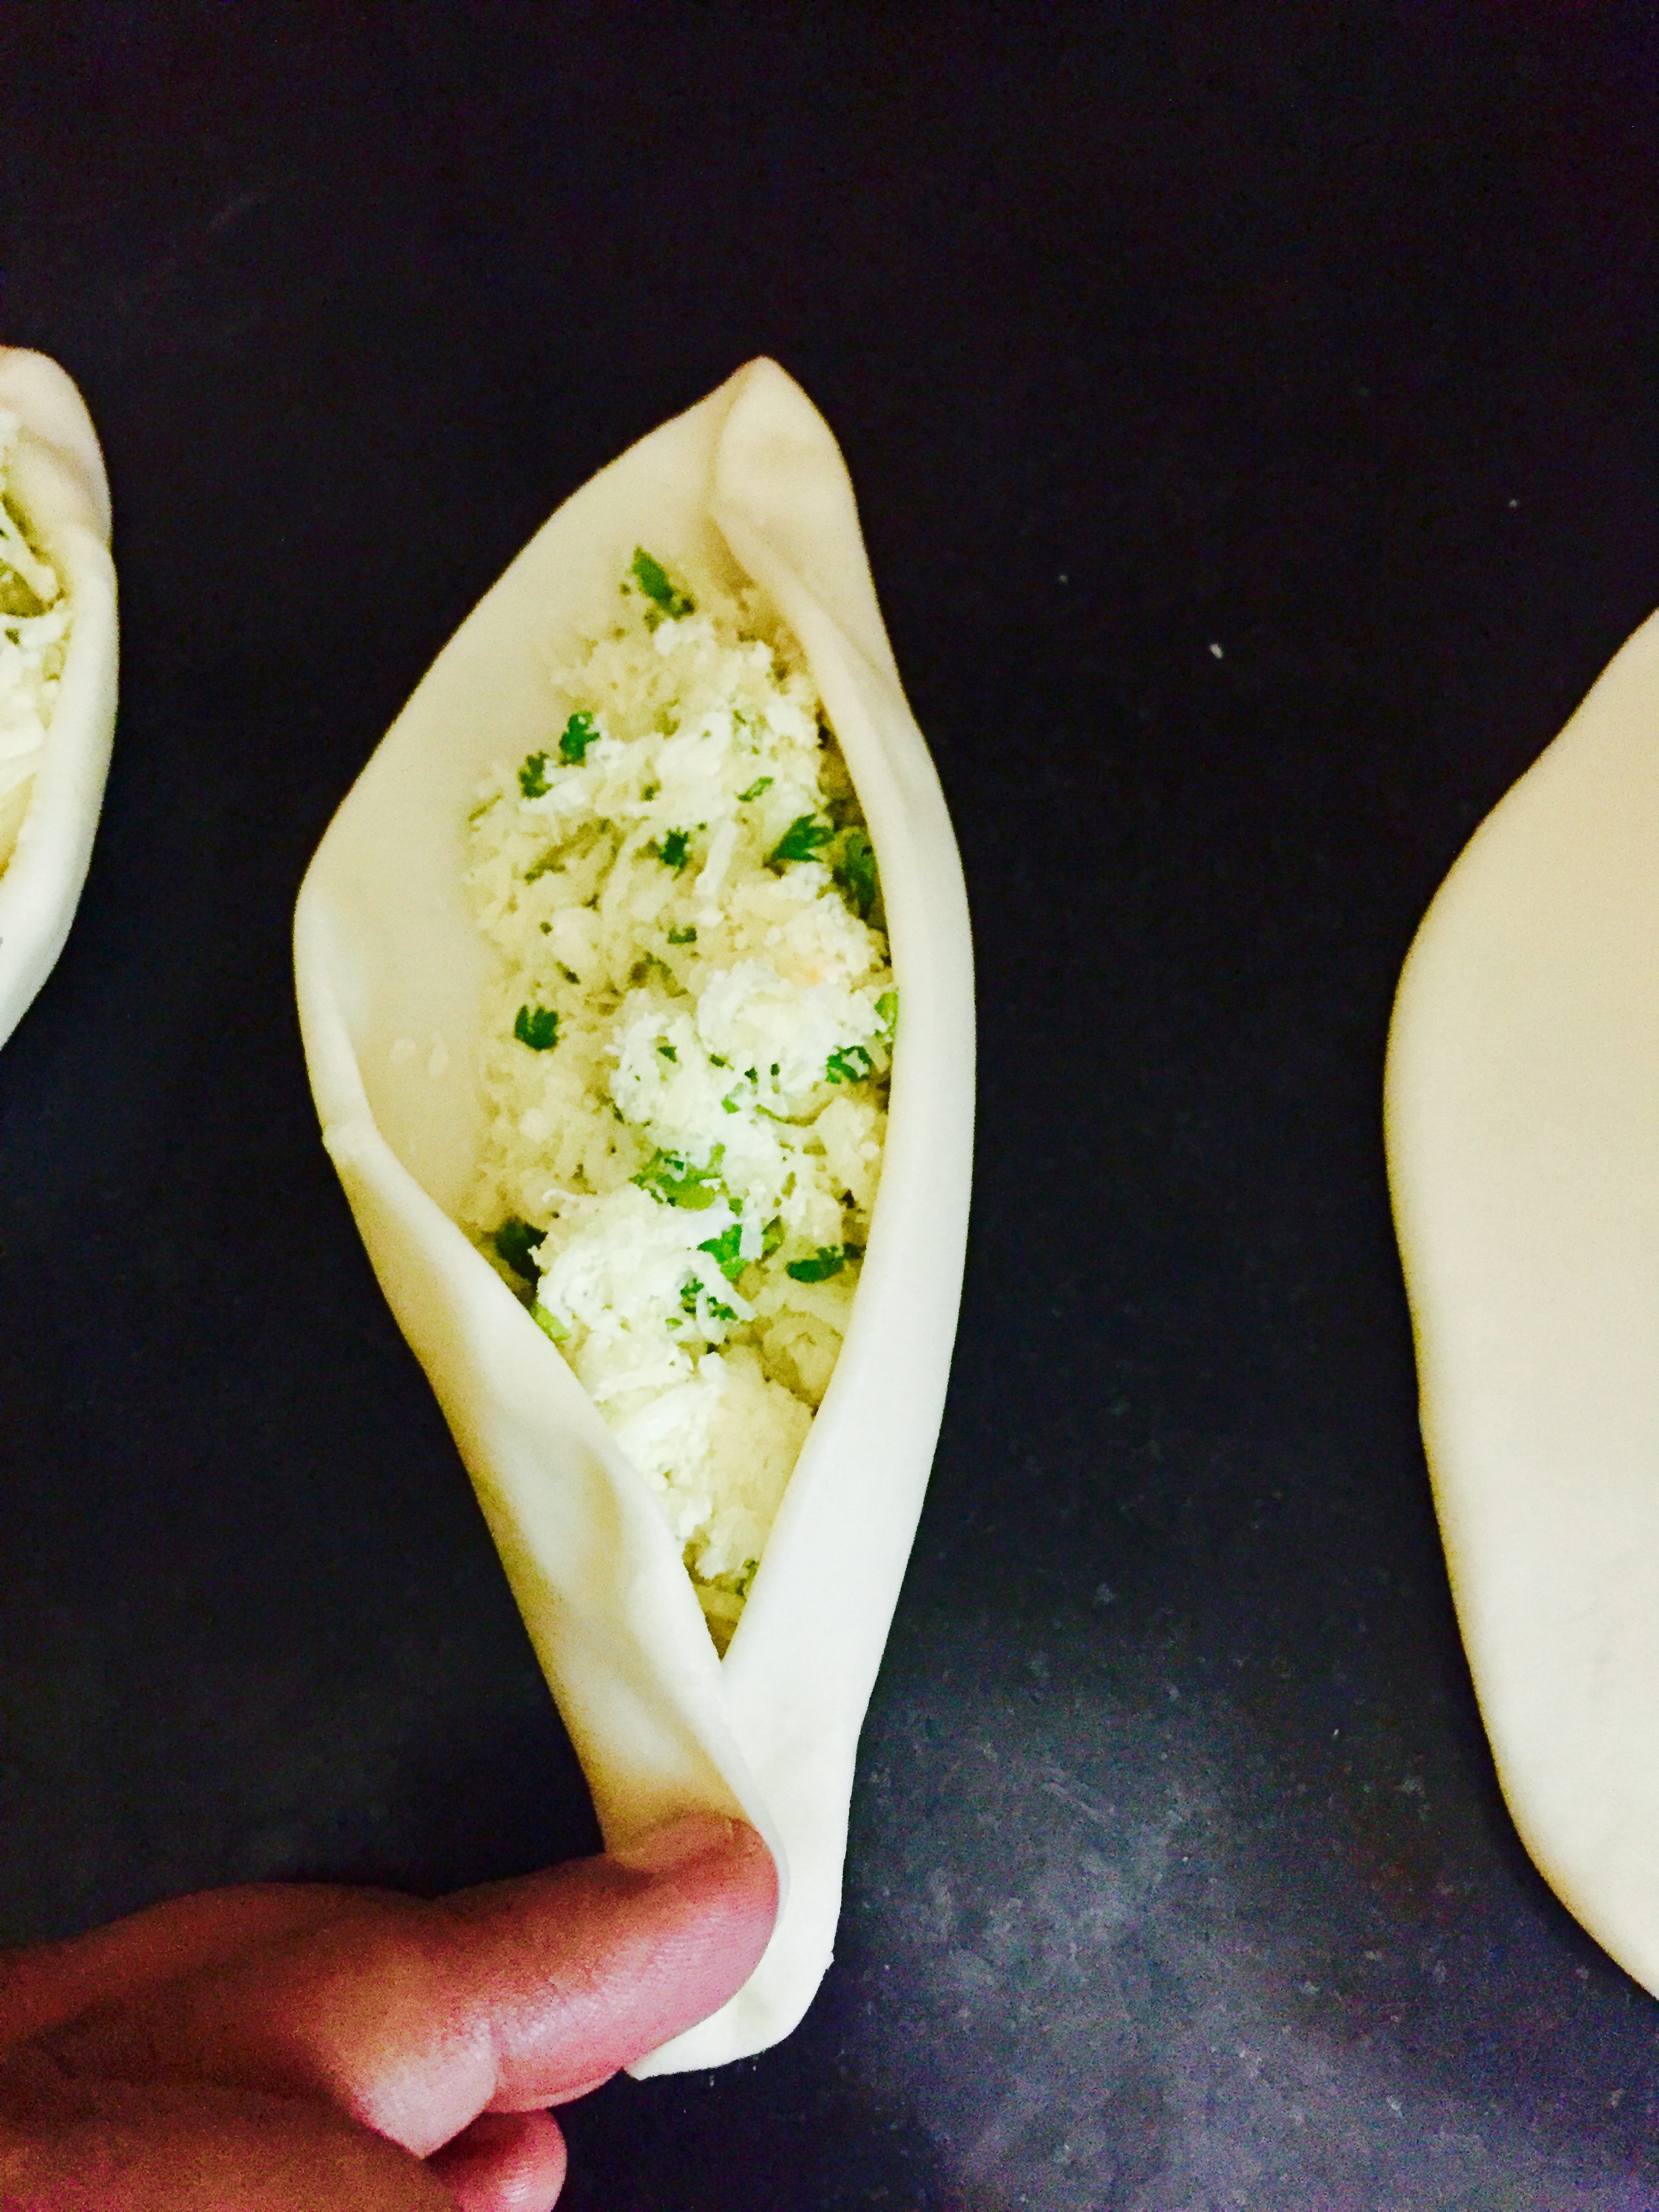
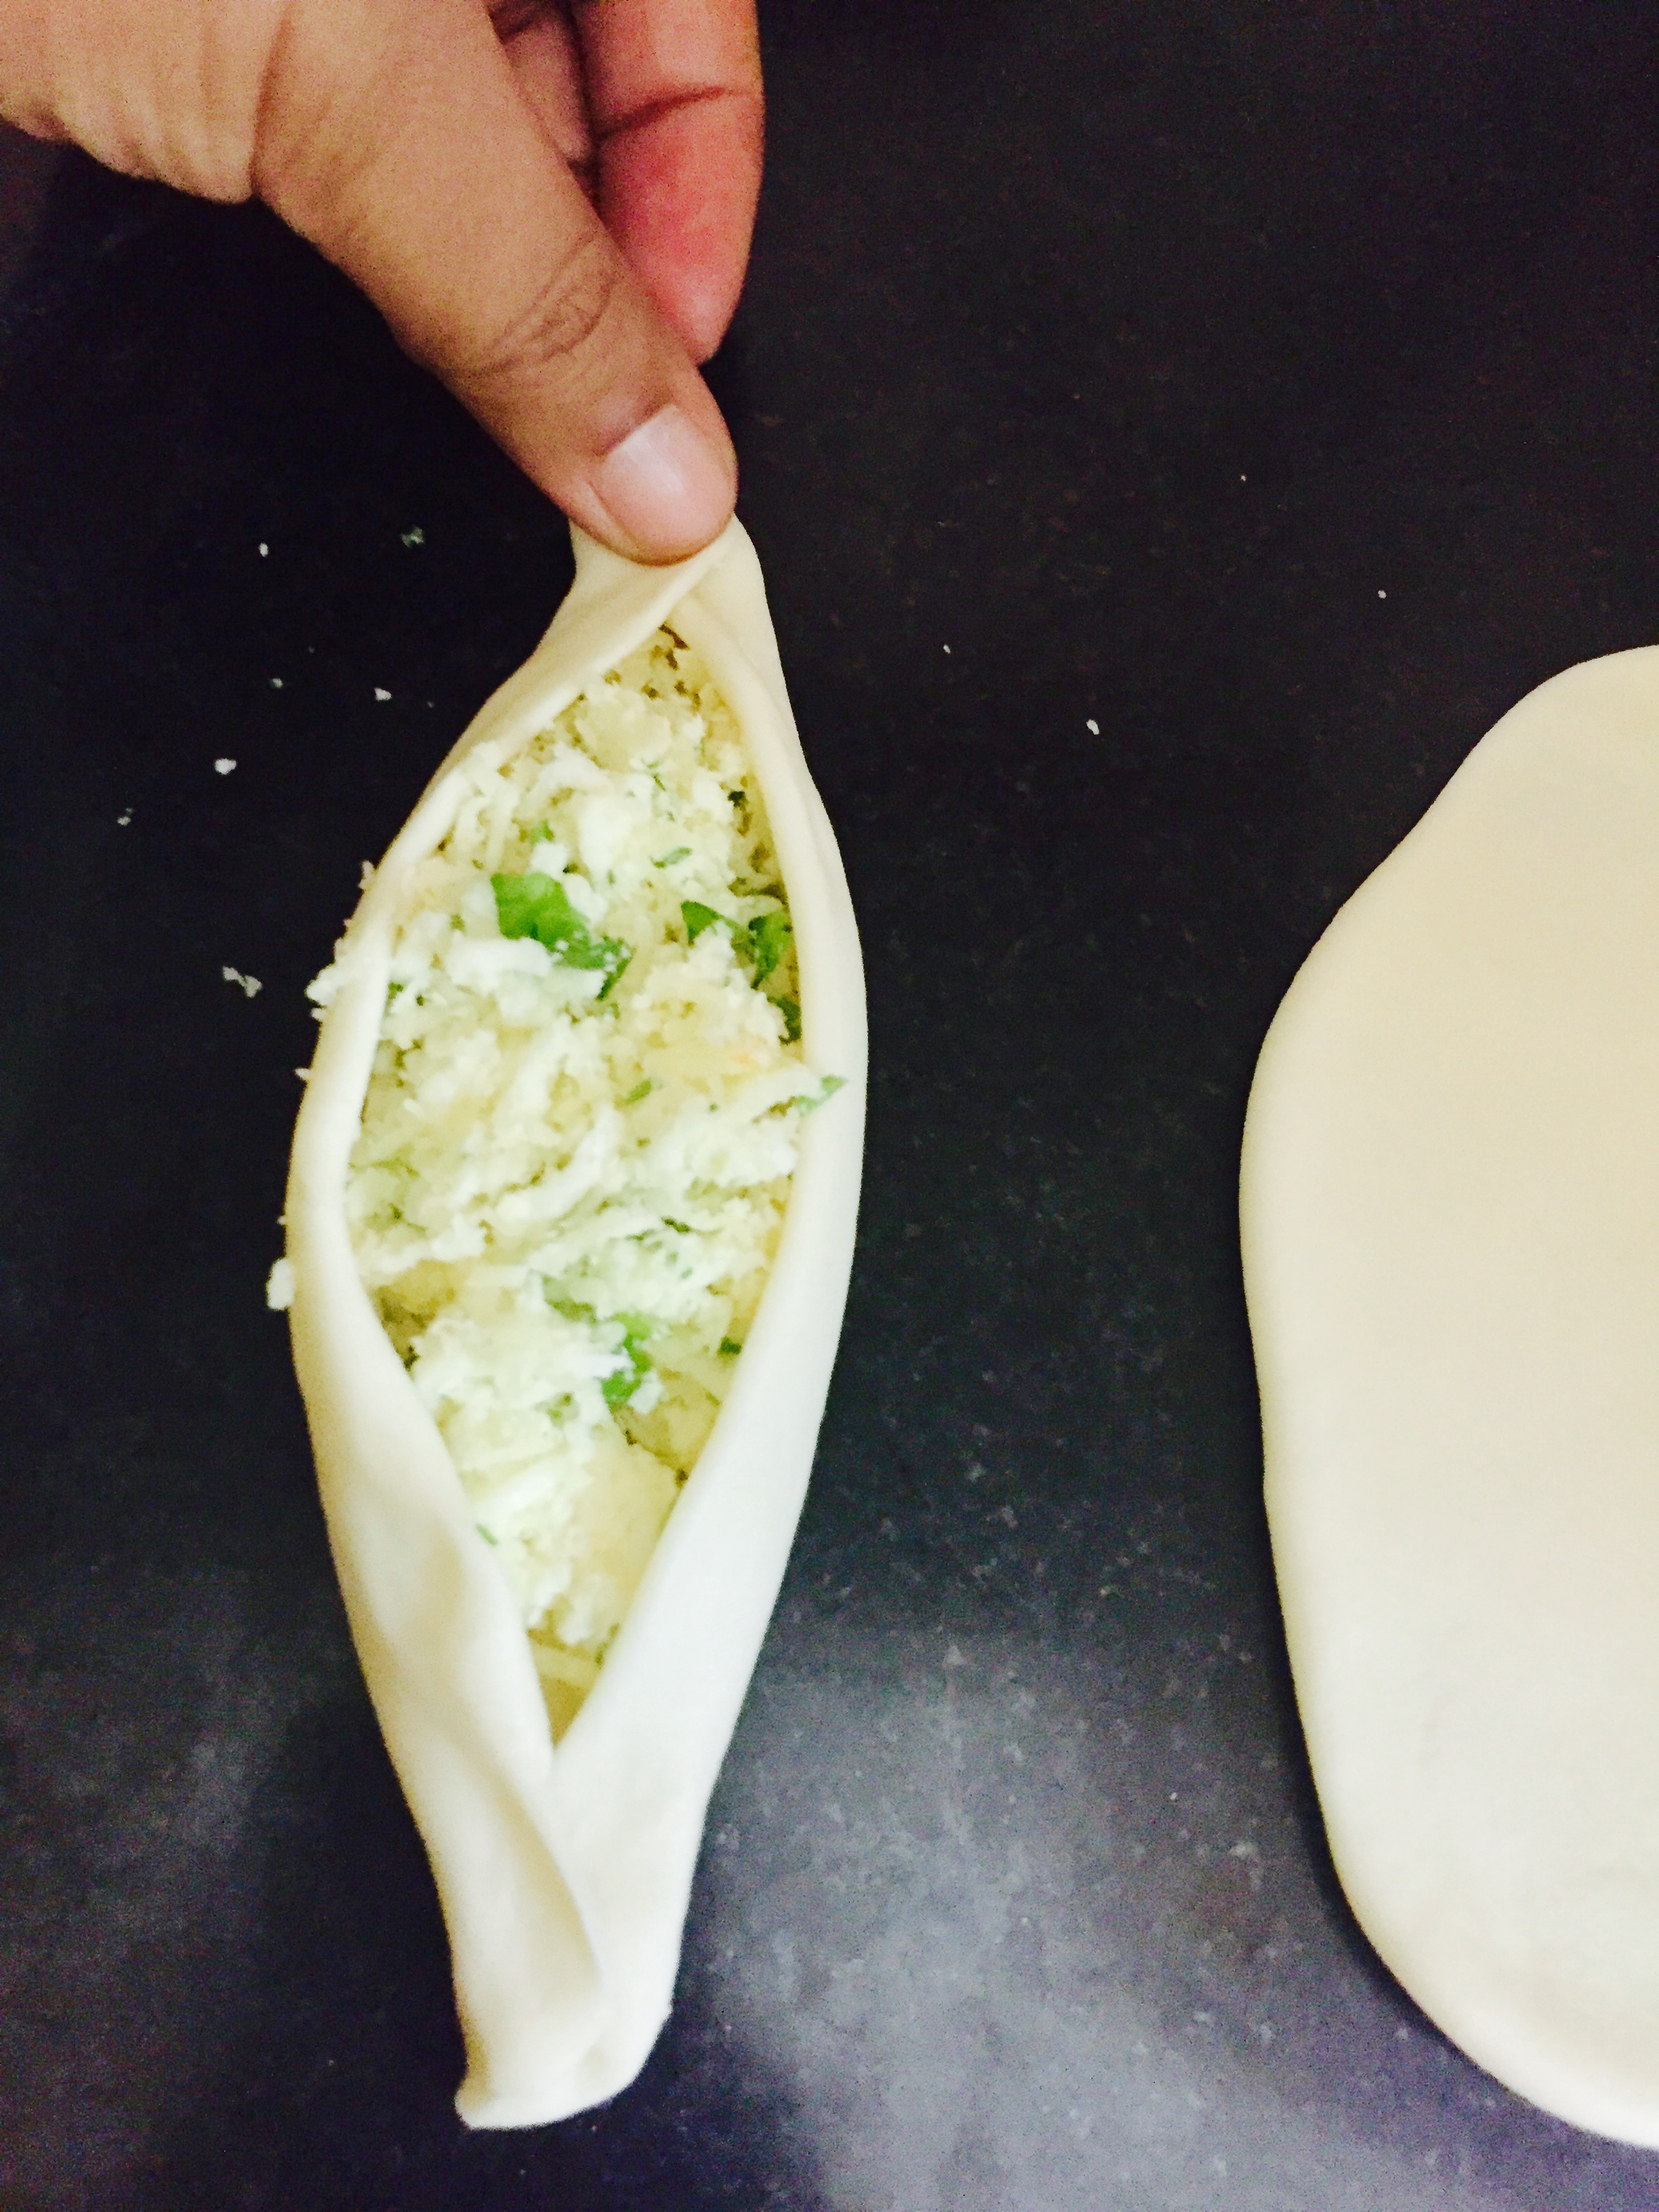
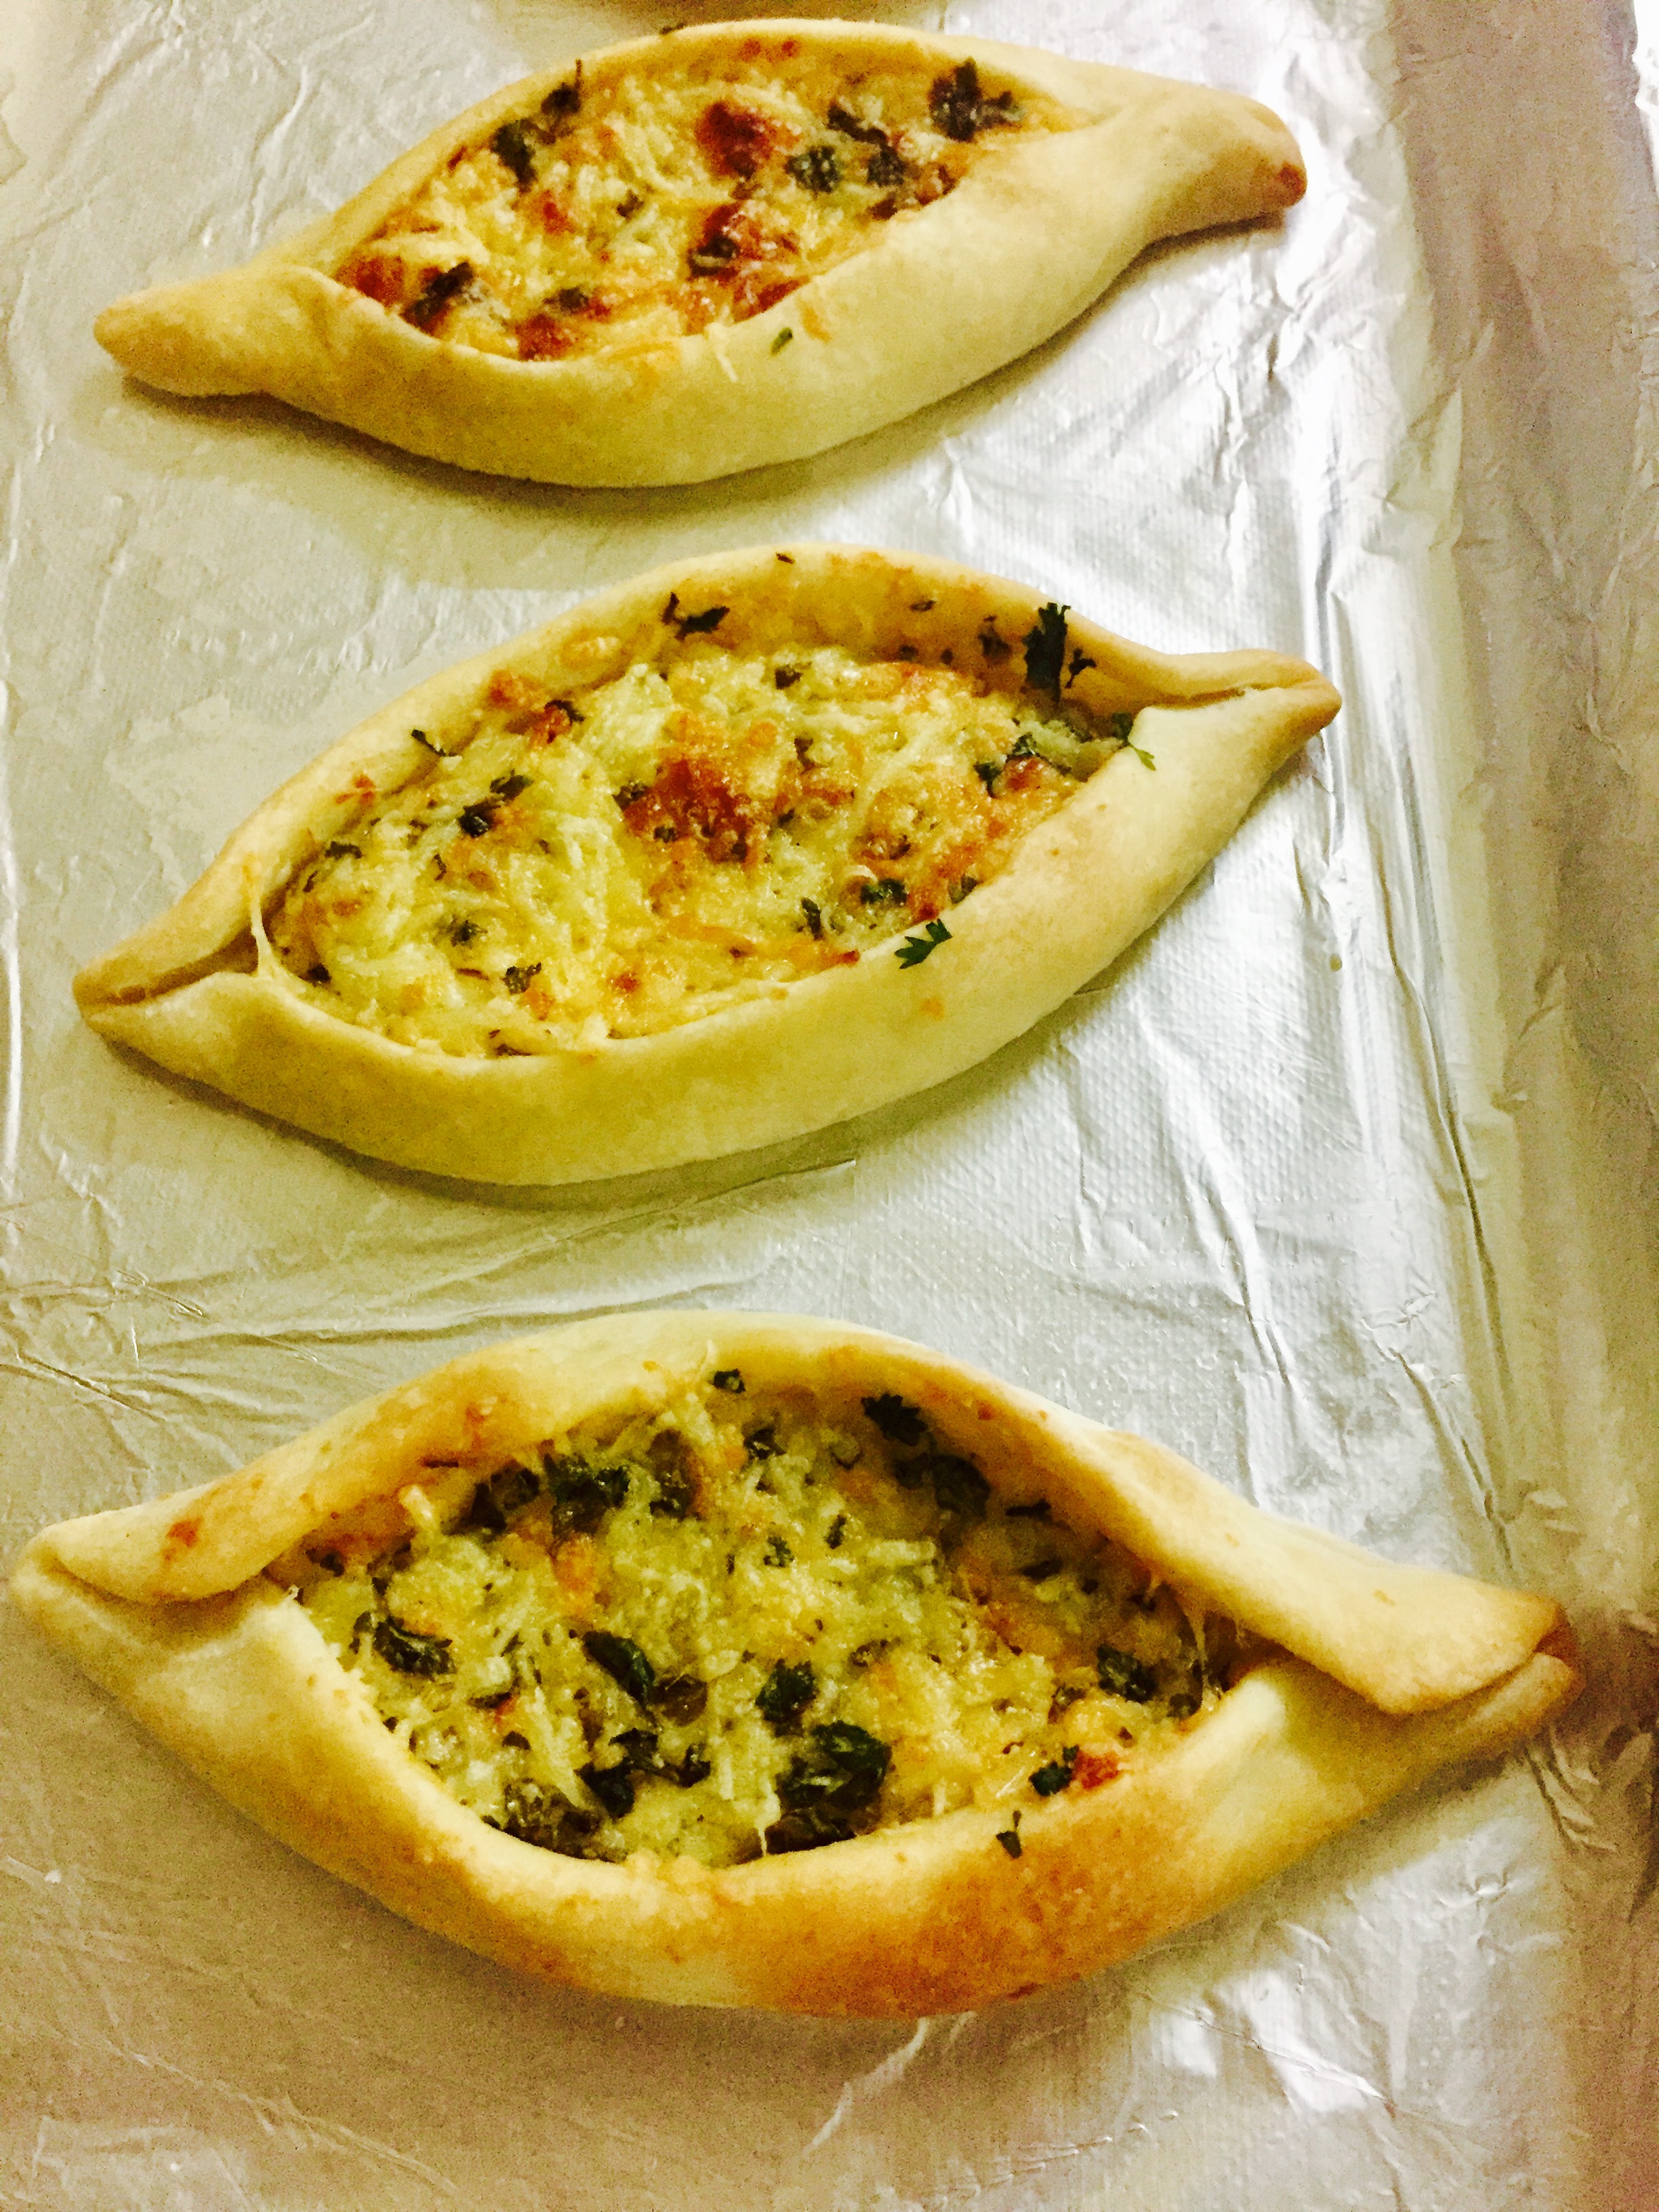
  • Place 2 tablespoons of the cheese filling in the centre of each oval shaped dough. Fold both the side’s and pinch together the edges of the opposite corners together to get an eye shaped bread with cheese filling inside.
  • Press the cheese filling in the centre to get a levelled surface. Place over greased baking tray.
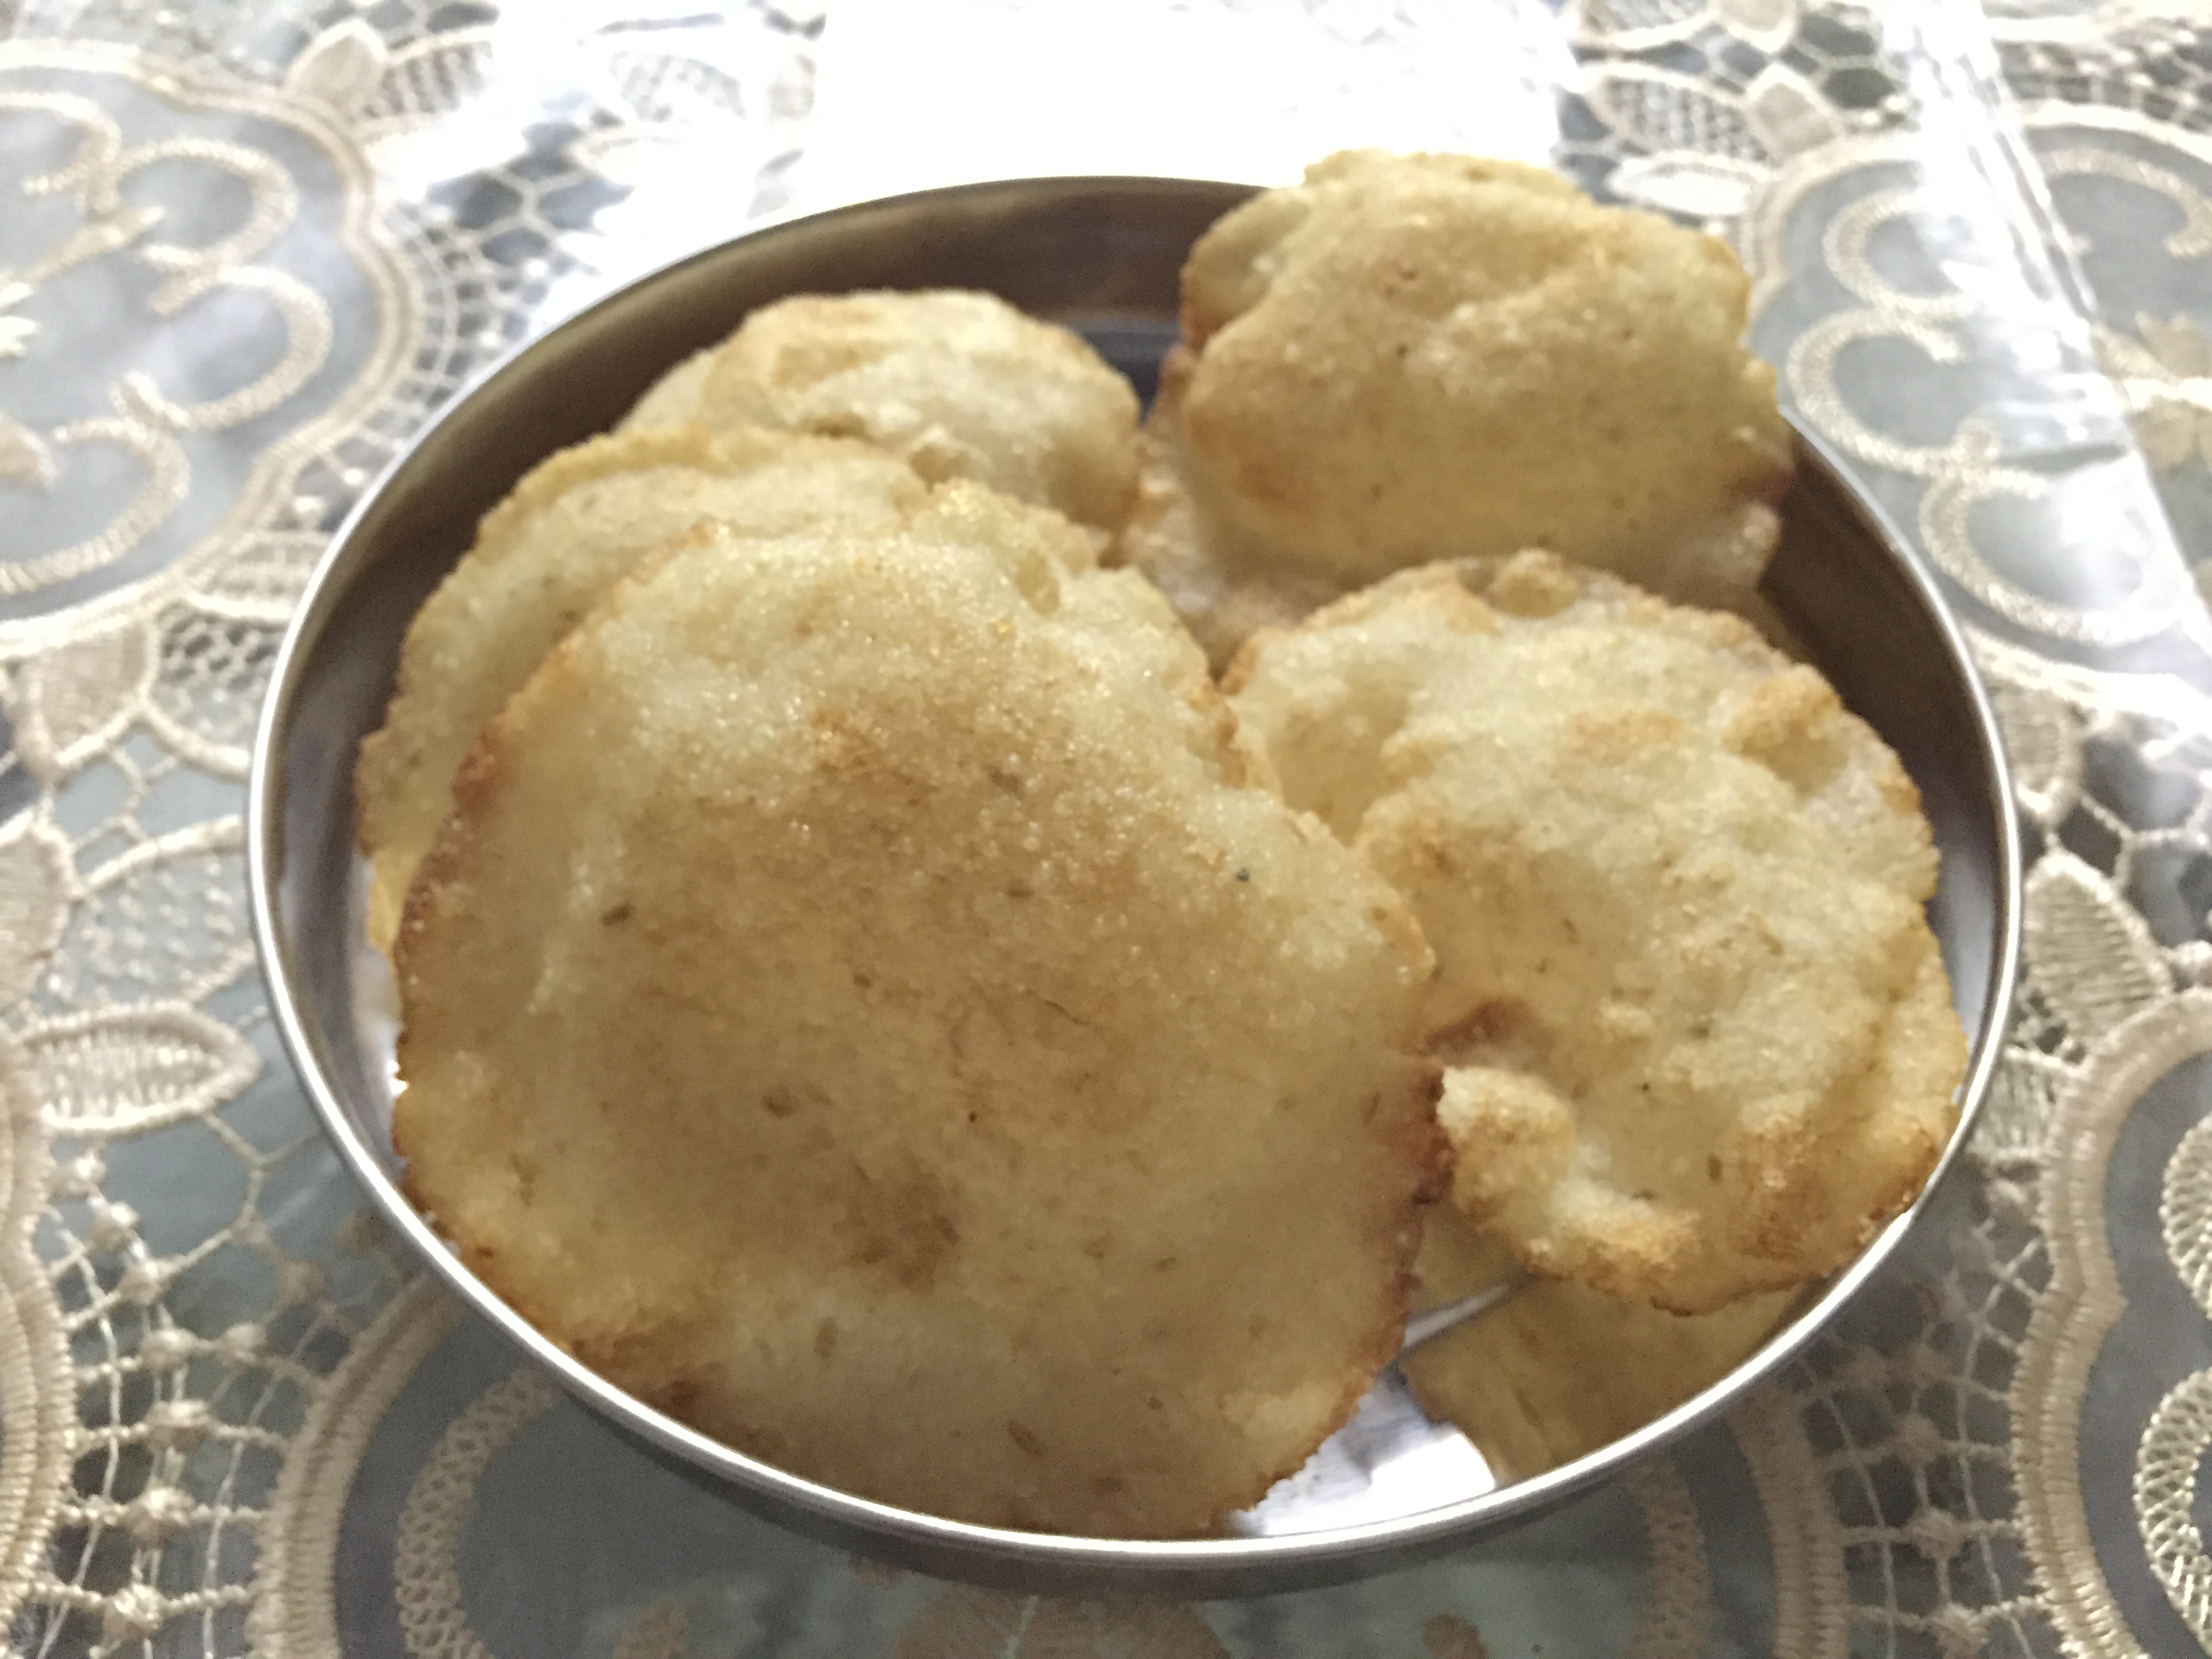
  • Bake for fifteen minutes until the edges start to brown. Remove and cool for five minutes and serve.

Notes

You can add spinach, mutton mince or chicken mince to the filling and do the same.


Ney pathiri

Share Button

IMG_9072

IMG_9075

IMG_9076

IMG_9078

IMG_9080


Preparation time : 4 hours soaking + 30 minutes
Cooking time      : 2-3 minutes
Serves                : 6 members

Description

My newly wedded daughter and son-in- law were busy attending parties at all our relatives homes. This is a custom that we follow to introduce the new bride or groom of our family to get to know our near and dear ones. We make sure that the entire family is there in all the parties hosted. It’s some thing like a give and take policy. Every home takes efforts to show case their table spread in style be it simple or grand to the newly wedded couple. Like wise we were invited to my cousin sister cithara’ home in Coimbatore. My aunt ( dad’s eldest sister who is my cousin’s mother in law too ) had a grand Malabar spread. Curious me landed in the kitchen and saw two of my aunts making this ney pathiri in greased banana leaves. It was just pure magic to see them do the entire lot. Since then, I have been wanting to give a try but it just did not happen. Finally I made sure to make these recently on my daughter’s visit home. As always, authentic dishes are tricky to master but this one I nailed it though being nervous. It tasted so similar to the maavu rotti we make at home but crisp and puff textured. Every one gave a green signal to the dish and I will be making them often for sure here after. Every custom our ancestors left us to follow sure does have a purpose.. Here the age old custom of feasting with the newly weds let me know about a new dish, learn it, give a try and share it with you all.

Ingredients 

Ingredients
Quantity
Raw rice / ( pacha arisi )2 cups
Rice flour / iddiappam flour1 1/2 cups
Saltto taste
Waterlittle
Grated coconut1 1/2 cups
Cumin seeds2 teaspoon
Small onion5
Oilto deep fry

Method 

  • Soak the rice in water for 3-4 hours. Drain and grind with little water until it becomes coarse and grainy mixture.Add rice flour and mix well to get a semi thick consistency dough.
  • Blitz the grated coconut, small onions and cumin seeds together in a food processor. Add salt and mix with the ground rice coarse mixture.
  • Heat oil in a deep pan. Take lime sized balls from the ground rice flour mixture. With greased hand’s flatten the lime size ball’s into a disc of 4-5 mm rounds over a greased plastic sheet. Remove the ney pathiri gently.
  • Drop the ney pathiri one by one into the medium hot oil. First you see bubbles and then it puff’s up. Deep fry to puffed and golden in colour.
  • Drain and serve hot with any curry of your choice.


Turnip Parata

Share Button

image1 (2)

image2 (2)

Preparation Time : one hour

Cooking Time : 20 minutes

Serving : 3-4 members

Description

Turnips are one vegetable that I hate in what ever form they are cooked in . I still remember piling up the entire mass of turnip from my plate to a spoon and gulping it down with a mouth full of water with out chewing or getting to taste it as a kid at my boarding school . As it was compulsory to finish of what ever was served in the plate . If not , we had a teacher minding us on each table and to add to this we did have a duty teacher who comes checking our plates after every meal . My aversion towards turnips got more worse as I started cooking them mainly due to the acquired smell it has . So no turnips at all what so ever at home . Once on a holiday to moms place , she served me a Parata with curd for lunch and it tasted yum . I was surprised to know it was a Parata   Stuffed using turnips . Though turnips to me is not considered a taste by itself , it still was one of the most intense sensations I experienced . The touch of thick curd magically added depth to the turnip paratas leaving way to  a satisfying meal  . Got the recipe from mom and then on it was added as a regular at home . This sure was a revitalising wake up call to me after decades of aversion towards turnips .

Ingredients for dough

[table “690” could not be loaded /]

Ingredients for turnip stuffing

[table “691” could not be loaded /]

Method for Parata Dough

Place wheat flour, salt, curd and oil in a mixing bowl.Knead to a soft dough adding water.Cover with a wet cloth and set aside for 30 minutes.

Method for Turnip Stuffing

  1. Heat 1 tablespoon oil in a pan. Add cumin seeds.Once it start’s to crackle, add grated turnips.Sauté until moisture is gone.
  2. Now add red chilli powder , ginger, garlic , green chillies, turmeric powder, garam masala powder , dry mango powder and salt.
  3. Cook and stir for 4 to 5 minutes or until all the ingredients are mixed well and stuffing turns dry . cool completely.

How to proceed

  1. Make 6 round balls from the dough.Roll each ball in the shape of a round roti (about 5-inch diameter) to hold the stuffing.
  2. Put 2-3 tablespoon stuffing in the centre of roti and gather the edges towards the middle and roll gently with in your palms to a round ball.
  3. Do the same with all the dough and turnip stuffing . Roll each stuffed ball gently dusting flour to one inch thick rotis . Heat a tawa / griddle over medium heat.
  4. Put the stuffed rolled paratha on the hot griddle / Tawa . Cook for 2 minutes then flip the paratha and apply ghee or oil on the paratha.Cook further for another 2 minutes longer or until the paratha colour changes to light golden brown.
  5. Remove and serve hot with thick curd or any vegetable curry of choice .


Kai pathiri

Share Button

image (38)

Preparation Time : 15-20 minutes

Cooking Time : 1 -1/2 minute for each Kai pathiri

Serving : 4-5 members

Description

Kai pathiri . An authentic malabar recipe that was introduced to our home by our then cook shakeela who had worked in Kerala before . On our every visit to my moms place after my marriage , a grand spread of food on the table was a must mainly to impress my hubby with warmth , a sense of well being and satisfying cravings .  this continuous till date . Shakeela would add her known new recipes to the menu and that is how we got to know about this dish and now its a regular at home . She paired it with a coconut chutney that is my grand mom ( dads mom ) balkees perimas recipe and the match felt like made in heaven .you will for sure get to taste the skill that goes into making a home style chutney .  My daughter ANISHA loves this Kai pathiri and chutney and who ever I have served it to there are no complains at all . My cousin sister Ashibha’s hubby hassan a very fussy eater who just sticks on to the authentic minimal dishes just loved it and out of all the dishes he had on his visit to my place , this one dish managed to tickle his taste buds that made me smile with utter pleasure …

Ingredients

Ingredients
Quantity
Rice Flour ( iddiappam flour ) 2 cups
Water2 cups
Coconut grated1 cup
Cumin Seeds1/2 teaspoon
Small onions1 hand coarsely chopped ( the traditional way is to just smash it over a ammi / sil patta coarsely )
Salt to taste
Coconut oil 1/4 cup

Method

  1. Boil water and salt in a board vessel.When boils, add the grated coconut,cumin seeds , coarse onions and rice powder .(At this stage the flame should be low)
  2. Stir well to combine all the ingredients together for 2-3 minutes to get a mass of dough together and switch off the flame.transfer the mix into another tray and start kneading by dipping your hands into a bowl of water , every now and then , so that you don’t feel the heat .
  3. Knead to make a soft dough.Make lemon size rolls from it.Take a banana leaf or foil and keep the roll in it.
  4. Flatten it using our palm.( I flatten in between greased plastic sheets using a rolling pin to 1/2 inch thickness and cut with a big size cookie cutter ( a round lid will do ) .
  5. Heat a iron griddle .place the kai pathiri and cook for a minute on medium heat on one side , turn oven and cook for another one minute .
  6. pour 1/4 teaspoon coconut oil all around and cook for 1/2 a minute on each side until the edges crisp and a good aroma arises .
  7. Remove and serve hot with coconut chutney ,beef ularthiyathu , chicken / mutton roast or gravy .

Ingredients Red coconut chutney

Ingredients
Quantity
Coconut1/2 grated
Dry red chillies6 to 8
Salt to taste
Small onions1/2 hand
Coconut oil 2 tablespoons

Method

  1. Grind coconut , red dry chillies and salt together to a coarse dry paste .
  2. Add very little water and grind further to a semi smooth paste .
  3. Top with small onions and blitz for 5 seconds just to crush the onions .
  4. Make sure not to grind the onions as the chutney gets onion dominating smell if gridded .
  5. Taste and adjust , remove to a serving bowl and add the coconut oil . Mix well and serve .

Parotta

Share Button

image (36)

Preparation Time : 30 minutes

Cooking Time : 1-1/2 minutes for each parotta

Serving : 3-4 members

Description

Parotta . An  authentic flakey  bread very own to Tamil Nadu and Kerala With a lot of emotion attached to it . Mostly found in the small eateries in all places .  At home it’s usually pronounced as barotta . Every alternative day barotta is made for dinner at moms place and is served with non – veg korma , white korma or a mutton chops curry . When in boarding school we were served parottas once in a week For dinner . three small ones on your plate , finish that and want more . You get piping hot white rice with rasam . The parota day in school is full of cribbing all around  …. i was like hey its barotta and why on earth are these people so annoyed about it . the first bite into my parota in school … the rubbery small circle which we had a never ending chewing experience made me realise the cribbing and annoying part around . I did join in with the rest but they stopped serving us parotas after a few months and we were saved finally . Married   of to Nellai , at hubby’s place the barotta is called rotti and served with non veg salna but very rarely made at home . ( once in two months or so ) one among the first dishes I learnt to do was barotta at home and I was surprised about this bread being made very rarely . My hubby has his share of stories about rotti salna . Here at Nellai its very famous to ask for the rotti to be shredded and mixed with the salna , then served . This is known as pichu potta rotti salna . There was a restaurant in the name of niyas hotel in Nellai where my father – in – law used to get rotti and salna for my hubby and sister – in – law when they were kids . The entire house used to be in an excited mood about having rotti salna for dinner . Hubby used to exchange mutton pieces with his sister for more rotti . Nostalgia …. Well how can I forget to mention about the famous vaira maligai rotti salna here in Nellai and the border kadai of shenkottai near coutralam  . In total this bread is a cheap and cheerful part and parcel of every house hold through out south India and at my home its always on the menu first when I have guests and on regular basis I substitute flour / maida with wheat flour and make gothumai rotti   to be on the safer side because of health benefits .

Ingredients

Ingredients
Quantity
Flour / maida 4 cups heaped
Sugar 1 /4 teaspoon
Egg1
Milk 1/4 cup
Water just enough to get a dough out of the flour mixture
Saltto taste
Oil1/2 cup (or 1/2 ghee + 1/2 coconut oil )

Method

  1. Mix salt , sugar and flour together . Make a well in between and add the egg and milk . Mix well and knead to a smooth elastic dough adding just enough water .
  2. Pat and knead well for 8- 10 minutes till the dough becomes pliable without breaking in the middle . Pour 2 teaspoons of oil on top of the dough , cover and keep aside for one to half an hour .
  3. Apply oil on the work surface . Divide the dough equally into small orange sized balls . Place a ball on oiled surface , flatten it with hands and stretch all around so that it forms a thin circular diaphragm .
  4. Apply little oil on top , fold like saree pleats by gathering the top on both sides and pleat them till the bottom.holding one end of the pleated dough, roll like a spiral and press the last edge on to the Center.
  5. Make all the balls in the same manner and apply little oil over the top ( just wipe it with the oil in your palms ) keep covered until needed to be served . Just as you want to serve , Heat a tawa .
  6. Pat each ball gently on top , flatten with hands like thick parathas or roll gently with a rolling pin . Fry on the hot tawa using little oil for both sides till golden brown in medium flame .
  7. After removing from fire , pat the sides with a help of a towel to loosen the layers . Serve hot with veg or non – veg curry of your choice .

Pulkas

Share Button

image (35)

Preparation Time : 15 minutes + 4-5 hours

Cooking Time : 1 minute for each pulka

Serving : 3-4 members

Description

Pulkas .As a kid I used to hate chappathi’s served at home . Mainly because of the South Indian food habits that makes us want more and more dishes made with rice . Secondly the chappathi’s are never up to the mark at home . I got a recipe book 100 TIFFIN VARIETIES ( vegetarian ) by mallika badrinath quite some time back . This book has nearly 40 different types of roti’s from basic to exotic . I did try all the basic roti’s and have adapted the tried roti’s as a staple at home . My previous post on soft chappathi’s is also from this recipe book . At home no one can differentiate chappathi’s from pulkas . Either of the two served are counted as chappathi’s at home :-)) these pulkas bring another memory leading a whiff  of nostalgia . At school ( good shepherd , ooty ) we had to eat our meals with spoon and fork . I had a hard time to learn the skill of handling the spoon and fork . Even after I mastered the art , I just could not accept the fact of eating chappathi’s with a spoon and fork ??? I always give extra points for eating chappathis  ( in fact every thing ) with  hands as it gives a soul full connection , touch  and feel of the food .

 Ingredients

Ingredients
Quantity
Wheat flour 2 cups heaped
Waterenough to mix the dough ( I usually use very thin butter milk strained or whey water ( the liquid which separates while making paneer from milk ) instead of water . Adds more taste and is nutritious .
Salt to taste
Oil or ghee2 teaspoons

Method

  1. Mix flour and salt together . Sprinkle water / buttermilk / whey water gradually and knead to a smooth paste .
  2. Pat and knead the dough several times at least for 10 to 15 minutes . ( a good way to burn some calories ) keep closed for 4 -5 hours .
  3. Make even sized balls . Flatten and roll out into medium sized chappathi’s . Heat a tawa and place the chappathi on top .
  4. When small bubbles appear on top , turn over immediately . Roast till light brown underneath .
  5. Turn over to direct flame or over a wire mesh on top of the stove . When it puffs up like puris , remove from fire .
  6. Crumble the chappathi with hands once .apply ghee or oil on one side of the chappathi ( optional ) .
  7. Fold like a triangle and keep in a chappathi box which is lined with a thin muslin cloth . Serve hot with any gravy of your choice .

Masala chappathi

Share Button

IMG_5848

image (34)

Preparation Time : 15 minutes  + 4-5 hours

Cooking Time : 1 minute for each chappathi

Serving : 3 members

Description

Masala chappathi . These chappathi’s are soft and moist with masala added to them . Can be had as it is without any accomplishment . Best served hot or at room temperature . Very handy to be taken along while travelling . My first masala chappathi I had was at a shop in Coimbatore called confectionary ( D.B road , R.S Puram ) . They have packets of these home made masala chappathi’s in the front counter of their shop . On my every visit to the shop , I never miss out to pick up masala chappathi’s . By the time I reach home the chappathi’s would have settled down in all our ( kids and myself ) tummy’s . My hubby’s new love towards chappathi’s has made me experiment to make more varieties . This recipe is just an assumption of the masala chappathi’s I had in confectionary . To my surprise it did work out well . I mean , I have come close to 80 % of confectionary masala chappathi’s .  Worth giving a try recipe which might add to your daily menu as a staple at home .

 Ingredients

Ingredients
Quantity
Wheat flour 2 cups
Curd 1/2 cup
Milk1/2 cup
Roasted cumin powder 3/4 teaspoon
Saltto taste
Red chilli powder1 teaspoon
Turmeric powder1/4 teaspoon
Dry mango powder(amchur powder )1/2 teaspoon
Garam masala powder1/4 teaspoon
Onion1chopped finely
Coriander leaveschopped finely few
Kasoori methi ( dried fenugreek leaves 1/4 teaspoon ( optional )
Oil5 teaspoons for the dough + more oil for frying

Method

  1. Mix all the dry ingredients together in a large mixing bowl . Add curd , oil and milk . Knead to a smooth dough .
  2. Keep aside closed with a wet moist cloth for 3- 4 hours . Make even sized balls .
  3. Roll out each ball into thin chappathi’s , using little wheat flour for dusting .
  4. Heat a chappathi tawa/iron griddle . Place one rolled chappathi on the hot tawa .
  5. Roast on one side for a minute . Turn over and apply oil . When it puffs up , turn over and roast till light brown on both sides .
  6. Do the same to all the remaining chappathi’s . Serve hot with Any Subji , raitha , pickle or curd .

Onion ragi roti

Share Button

IMG_5927

image (16)

Preparation Time : 15 minutes

Cooking Time : 3 minutes for each roti

Serving : 2 members

Description

Ragi in one ingredient that I thought was meant only for babies . As at home all babies are fed with a ragi porridge after 40 days in the evening by 6 , so their stomach is full and don’t disturb others around much in the nights . I did the same with my kids as well . So eating the left over porridge was the only thing that I did with ragi for decades ( as a kid to a grown up version of myself ) until one fine day tasted a ragi roti at moms place that was moist , soft , dark brown in colour and yum .   You could eat the roti on its own with out any sides . Found out the rotis were sent by karishma ( moms friend ) . Stored it in my mind and gave it a try at home for lunch . The rotis resulted perfect like what karishma had sent over . Happy me , as I found a new way experimenting using our local produce and added an unusual ingredient in my kitchen cupboard . I strongly feel it’s important to eat ethically , to consume food prepared using locally picked , high – quality organic produce

Ingredients

Ingredients
Quantity
Ragi flour 1 cup
Onion1 chopped
Green chillies3 chopped
Gingersmall piece grated
Saltto taste
Oil 2 teaspoons
Hot water for the dough

Method

1 . Add salt , oil , onion , green chillies and grated ginger to the ragi flour .
2 , Knead to a soft loose dough using enough hot water and use immediately .
3 , Roll the dough into equal 5 balls and spread each ball on a greased plantain leaf or wet cloth to 1/4 inch thick round discs .
4 , Place over a hot griddle / tawa and carefully remove the leaf or cloth
5 , Add oil around and cook well turning both sides .
6 , Serve with curd and onion chutney .


Methi roti

Share Button

methiroti

Preparation Time : 1 Hour 10 minutes

Cooking Time : 1 1/2 minutes for each roti

Serving : 4 members

Description

Methi chapathi . A vegetarian delight which is healthy and delicious . These green coloured chapathis are full of nutritional boost that will make them a staple at home . I did start making these chapathis at home very recently . As methi leaves were not available at my place all these years . I used to source them from my moms place most of the time before . when I was newly married and just started to cook along with my mother – in – law , I had got a bunch of methi leaves from home . all excited about cooking a new dish at in – laws place , I geared up to prepare methi chicken . Finished cooking and it tasted good .I was just so very curiously waiting for every ones verdict in the lunch table . Every one ate the chicken but the methi leaves were just put away into the waste plate . Was wondering what went wrong ??? When I ate , gosh the methi leaves were so rough and fibrous . Called mom to find out what went wrong , repeated the entire recipe as to how I prepared the dish . Every thing I did was right except for the cleaning the methi leaves which was done in a wrong way . We have to separate the leaves alone from the stem . I chopped the stem and leaves together as we do for other greens . What a fool , I was ……. Oops , even till date I do make such silly flaws in the kitchen :-)))) regardless of your devotion to food and experience in the kitchen , even the simplest thing might turn reverse at times .which helps you as a solution to sharpen your kitchen skills and fancy a challenge .

Ingredients

Ingredients
Quantity
Wheat flour2 cups
Fresh methi ( fenugreek ) leaves
1 bunch ( 1 cup )
Small onions5
Ginger1/4 inch piece
Garlic1 flake ,
Coriander leaves1 teaspoon
Turmeric powdera pinch
Cumin powder1/2 teaspoon
Green chilli1
Garam masalaa big pinch
Curd1 tablespoon
Oil1 tablespoon
Waterlittle if required
Saltto taste
Sugar1 teaspoon
Butter or ghee to garnish

Method

  1. Remove the fenugreek leaves alone . Wash and soak the fenugreek leaves in 1/4 teaspoon of salt and 1 teaspoon of sugar added to a big bowl of water . Set aside for 1/2 an hour .
  2. Blitz small onion , ginger , garlic , green chilli , coriander leaves and drained fenugreek leaves in a food processor just to crush them to a coarse mixture .
  3. Add all the ingredients to the crushed mixture . Mix well . Add water if needed to get a smooth dough . Set aside for 1/2 an hour .
  4. Roll into equal lemon size balls . Dust wheat flour and roll each ball to a round shaped chapathi .
  5. Heat a tawa . Place the rolled chapathi over and cook undisturbed for 30 seconds . Turn over and do the same .
  6. Turn over once more and cook until the chapathi is cooked through and you find small brown spots appear all around the chapathi .
  7. Top with a dot of butter or just spread with a spoon dipped into ghee all over the chapathi on one side .
  8. Serve hot with any gravy of your choice .

Rainbow parata

Share Button

rpa

Preparation Time : 1 hour 10 minutes

Cooking Time : 2 minutes for each parata

Serving : 5- 6 members

Description

“Rainbow parata’s ” that’s what I have named these nutritional power packed ,colourful parata’s that serve as an easy trick to make children to adults eat their veggies .A few notches higher than the regular does work pitch perfect always .Easy to make , can be packed for lunch or to be served at dinner parties that help you get your daily quota of nutrition with flavourful , colourful veggies . I came across a similar recipe in the net with bread and anything related to creating a visual treat with colours through food , I get week on my knees .I Immediately saved the recipe but now the problem is no one enjoys bread at home so had to keep the saved recipe untouched as it was . After a month or so came across a picture with a similar recipe in one of the foodie groups in Facebook but this time it was a parata that was trendy and sure delicious . Hurray , now I can try this and treat every one at home and to take the monotony out of the regular cooking with these impressive , vibrant , colourful parata’s . Dum me why didn’t my brain work to think of making a parata with this idea before . Any way’s it’s better late than never , isn’t it ?

Ingredients

Ingredients
Quantity
Maida3 1/2 cups
Saltto taste
Spinach2 cups ( boiled with water and pured to get 1 cup )
Beet root 2 ( boiled with water and pured to get 1 cup )
Carrot2 big ( boiled with water and pured to get 1 cup )
Oil / ghee 1/4 cup

Method

  1. Add salt to taste to the flour .Divide the flour into equal three portions . Knead a dough by adding little by little of the spinach purée to one portion of the maida to get a smooth dough .
  2. You might or might not need all the puréed spinach . Knead a dough by adding little by little of the beetroot purée to the second portion of the maida to get a smooth dough .
  3. You might or might not need all the puréed beetroot . Knead a dough by adding little by little of the carrot purée to the third portion of the maida to get a smooth dough . You might or might not need all the puréed carrot .
  4. Keep covered by applying a teaspoon of oil or ghee over the three coloured dough and set aside separately for half an hour . Roll each dough into small lemon sized balls and roll into thin long 1/4 inch logs .
  5. Take one rolled log of each colour . Place one above the other and coil it together in a circular manner to get single rolled colourful parata’s . Do the same to all the coloured rolled logs . Spread 1/4 teaspoon of oil on each coloured coiled paratha and set aside for 20 minutes or until ready to be cooked and served .
  6. Heat a heavy griddle . Roll the coiled colour full parata to palm size circle with the help of a rolling pin . Place over the hot griddle and cook for 30 seconds , turn over and cook for another 30 seconds .
  7. Turn over and pour a teaspoon of oil all around and cook for 30 seconds , turn over and cook further for another 30 seconds .
  8. Remove once the parata is cooked and has brown spots all over . Do the same to all the coiled parata’s and serve hot with any gravy of your choice along with a cooling yoghurt dip .