Daily Archives: October 25, 2014


Guava and mango layered pudding

Share Button

image (11)

Preparation Time : 30 minutes

Cooking Time : 10 minutes or if in microwave 30 – 40 seconds +
20- 30 minutes to set the layers in the freezer .

Serving : 5-6 members

Description

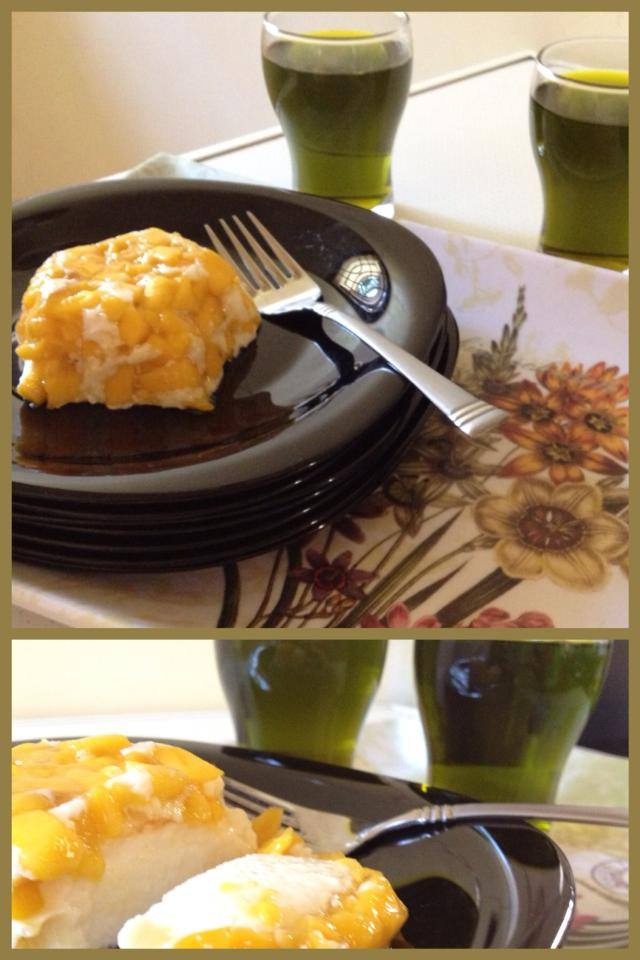
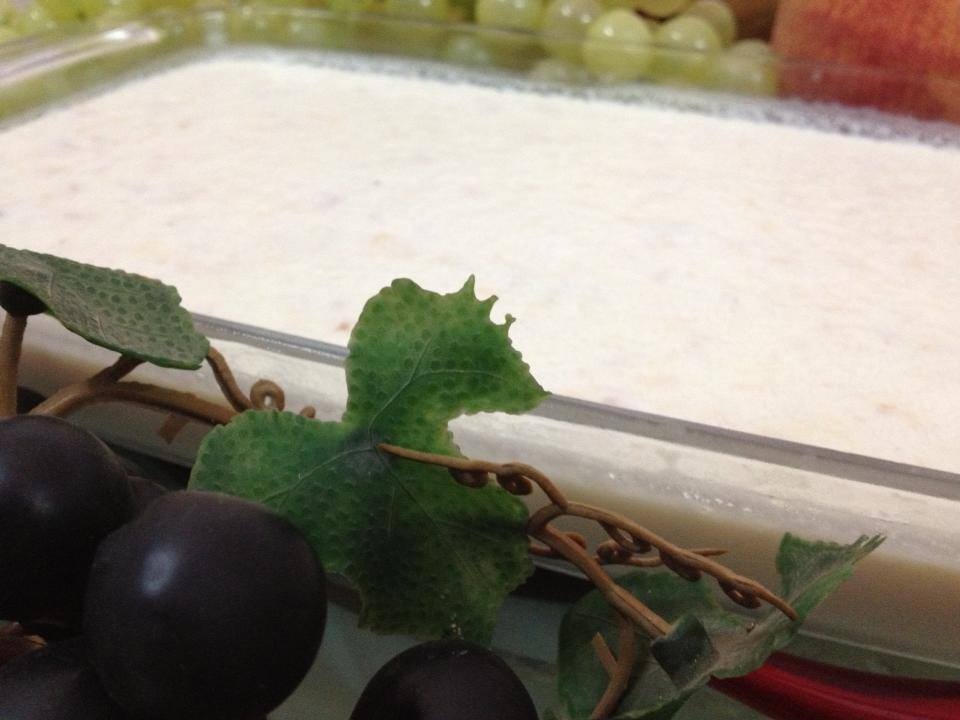
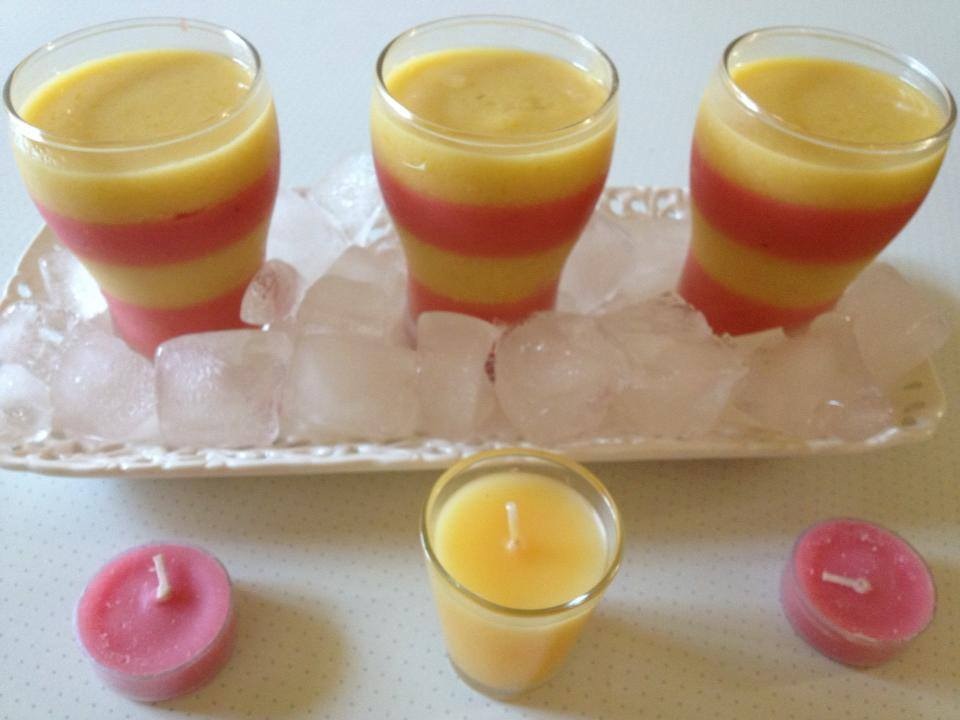
Guava and mango layered pudding . A pudding that I made inspired by a set of pink and yellow candles that I had at home . I just fell in love with the colour combination and decided to make a pudding with the same colours .  Having loads of mangos and guavas from our farm that made it easy for me to experiment these colourful adventure  as well . Started of by pureeing the fruits with sugar , strained and tasted . It was just like fruit juice . So to add more smoothness and texture I added cream . The guava mixture looked plain and me wanting a pink colour added a few drops of pink food colour and it was perfect .mixed the purées with gelatine to set and started of layering the seasonal freshness , watching it transform into something beautiful .  In between I was stuck with power shut down . Not knowing what to do .. as once the gelatine is Mixed with fruit purée , it tends to set . Immediately filled a bowl full of ice cubes with rock salt and placed the pudding glasses in between them and layered these puddings and set them . It’s a blessing to be born as an Indian as you get to master yourself to adapt and survive in what ever the situation demands and still manage to  execute well . Served it to my maternal  uncle Shanu mama , who really enjoyed saying this is a class apart dessert . To me , it was a lesson learnt that channelling creativity is an endless opportunity to reinvent .

Ingredients

Ingredients
Quantity
Guava purée 3 cups
Mango pulp 3 cups
Gelatine6 tablespoons
Sugarto taste
Cream1 cup
Pink or red food colour few drops ( optional )

Method

Soak gelatine in 1/2 cup water to bloom

  1. Grind 2 chopped ripe guavas with little water and sugar to taste to a smooth paste . Strain . Mix 1/2 cup cream to the strained guava puree and blend again .
  2. Taste and adjust the sweetness . Add a few drops of pink food colour or red food colour just a drop to get a pink colour . Mix well and set aside .
  3. Grind 2 chopped ripe mangos along with sugar to taste and little water to a smooth paste . Add remaining 1/2 cup cream and mix well . Taste and adjust sweetness and set aside .
  4. Double boil by heating a large vessel with water over flame . Place the bloomed gelatine containing smaller bowl over the large bowl of hot water and dissolve the gelatine to a liquid form or just microwave for 30 -40 seconds until the gelatine has dissolved well .
  5. Cool to room temperature making sure the gelatine does not set again . Divide the gelatine mixture equally into two portions . Add one half of the gelatine mix to the guava purée and the other half to the mango purée .
  6. Take a tall glass and pour 5 tablespoons of guava purée into each glass and place in the freezer to set . Takes about 5 minutes . Remove pour 5 tablespoons of mango purée over the set guava layer and place in the freezer for 5 minutes to set .
  7. Repeat the same by layering alternatively with both the fruit purées and set until the top of the glass . Make sure the remaining fruit purée does not set by the time you finish layering the tall glass alternatively .
  8. Place all the set glasses in the freezer for 1/2 an hour . Remove and place in the refrigerator and serve chill .

Nots

You can use any fruit of the season and do the same


Baked Oreo cheese cake

Share Button

image (10)

Preparation Time : 20 minutes

Cooking time : 40 -50 minutes

Serving : 10 members

Description

Baked Oreo cheese cake . All the cheese cakes that I have made till date were no bake cheese cakes . In one of the foodie guilds ,   I came across a blueberry cheese cake that was baked and every one had commented saying nothing can come close to a baked cheese cake and can be devoured as a cold dessert or eaten just as they are warm and fresh out of the oven . Immediately a backed cheese cake was added to my must try lists .  To be on the safer side gave my first baked cheese cake try with Oreo biscuits when my daughter ANISHA had come over to my place on a holiday . The cheese cake was kept in the refrigerator with the spring form unreleased . We were invited for dinner to my friend bindus place and it was an Italian feast with pizzas , lasagna , potato wedges , grilled chicken and ice cream with fruit salad .  I took this baked Oreo cheese cake over to her place . Removed it from the spring form mould and the golden colour on the crust and sides were perfect . With crossed fingers cut into wedges and served it to every one . Pin drop silence with every one just eating the cheese cake . I took my first spoon full and as I was thinking wow .. Feels like a bit of heaven on the tongue , better than its no bake counterpart . Bindu started of with its so creamy and yum and her daughter darshini came for her second helping . Relieved me , made up my mind … If its a cheese cake , its always going to be a baked one from now on for its composite of sophisticated flavours and textures.

Ingredients

Ingredients
quantity
Oreo biscuits20 +10 crushed in a blender to a smooth powder seperately ( 20 for base and 10 for the top )
melted butter 1/4 cup
cream cheese(8 ounce )3 packets softened
condensed milk1 tin
eggs 3
lime juice1 tablespoon
vanilla essence 2 tablespoon
Oreo biscuits8 broken to small bits

Method

  1. preheat oven to 300 degree Fahrenheit ( 180 degree Celsius ) . Mix powdered 20 Oreo biscuits with the melted butter to get a crumbly coarse powder . Press it down firmly on a spring foam pan or a baking pan .
  2. Beat cream cheese , condensed milk , lime juice , vanilla essence , eggs dropped one at a time to get a smooth batter with the help of an electric egg beater .
  3. Fold in the broken Oreo biscuit bits . Pour the batter over the pressed Oreo biscuit base . Level the top . Bake for 40 to 50 minutes till done . Make sure the top does not crake .
  4. Cool to room temperature and chill in the refrigerator over night . Top the cheese cake with 10 powdered Oreo biscuits . Remove from spring foam . Cut into wedges and serve .

Buttermilk fruit pennacotta

Share Button

image (9)

Preparation Time : 25 minutes

Cooking Time : 10-12 minutes

Serving : 6-8 members

Description

Butter milk fruit panna   cotta  . The word  Panna cotta was like Greek or Spanish to me when I first heard about it . I had no clue as to , if it was a geography term , mechanical term or an edible term . Well I got to know about it finally because its an edible term :-)) ( sure if it was related to the other two I mentioned , it would have remained as Greek or Spanish till date ) . As usual was glued to the telly watching Rachel allens home cooking show where she made this simple dessert in seconds , me in front hastily transcribing from the show on the telly to my cook book . Finally got a chance to make this dessert when my parents were here to visit me last summer ( its always summer at my place :-))  ) mom being very fussy about desserts as she hates eggy things , (dad compensates with gobbling anything named desserts ) had to force her to give a try  , She loved it and asked for another serving Letting herself be seduced by pure captivation . The first ever this has happened with her and I didn’t expect this simple dessert would delight her palette. To me it was a soul – satisfying moment  that would be cherished for ages and ages to come .

Ingredients

Ingredients
Quantity
Cold water2 tablespoons
Gelatine 1 teaspoon

Ingredients Soak for five minutes

Ingredients
Quantity
Cream 1 cup
Sugar 1/2 cup
Butter milk 2 cup
Vanilla essence1/4 teaspoon

Method

  1. Boil cream and sugar together in medium heat until sugar dissolves . Add gelatine and boil till the mix gets to a creamy silky texture . Remove from heat . Cool a little .
  2. Then add 2 cups of butter milk to the cooled cream mix . Add vanilla essence and mix well . Pour into desired glasses or pudding bowls and place in the freezer to set for 3 to 4 hours and replace in the fridge .
  3. Garnish with passion fruit juice or any pulp of fruit of your choice or in season . Serve chill .

Notes

  1. I wanted a mosaic pattern with mango pieces . So placed greased cling film over the pudding bowl and spread the mango bits all around evenly leaving a well in between .
  2. Poured the panna cotta mixture carefully making sure the mango pieces did not fall apart .And proceed to freeze and refrigerate as recipe demanded .
  3. Inverted the pudding bowl on to a plate and removed the bowl , peeled the cling film carefully making sure the mango pieces did not fall apart and served it .

Thulli

Share Button

image (8)

Preparation Time : 20 minutes

Cooking Time :20-  25 minutes

Serving : 10 -12 members

Description

Thulli . A simple dessert very own to the ravuthar ( tamil speaking muslim ) community of the Salem region in Tamil Nadu . A must on the break fast table for eid ul azha or bakrid usually made in large quantities mainly to be shared with near and dear ones with staples thats adapted to suit the brew available .( I guess thats why the measurements mentioned in this recipe is also of large quantity ) . This recipe is from my friend Fathimas mother – in – law Mehar ammas patiently preserved hand written smudged recipes from her cook book containing hundreds of our family recipes neatly written in her version of Tamil ( Mehar amma is a Malyali married to basha mama who is a tamilian )  . This cook book of her’s  is a precious treasured family hair-loom , more important to me than any silk Saree , diamond or gold that I may one day inherit .  This dessert is just another version of the kesari that is served through out India in various names . Here they have used wheat semolina instead of the white regular semolina and the jaggery syrup is added for sweetness instead of sugar . The dessert looks and sounds less felicitous but one spoon gulped in , I assure you peeps no way you can stop with one spoon full as they offer insights into the communities that devised them yielding secrets about people’s past .

Ingredients

Ingredients
Quantity
Wheat semolina1 litter
Ghee1 glass
Cashew nuts one hand
Raisinsone hand full
Water 1 1/2 litter
Jaggery1 kg ( heat with little water , dissolve and strain )
Cinnamon1 inch piece two
Salt a pinch
Cloves2

Method

  1. Heat ghee in a non – stick sauce pan . Add cloves , cinnamon , cashew nuts and raisins . When cashew nuts are light brown add water and a pinch of salt .
  2. Bring to boil . Add the wheat semolina and stir in little by little as we do for upma . Once all the semolina is mixed in and boiled nicely . ( Takes about 10 minutes ) Add the brown sugar .
  3. Mix well , keep stirring in low flame till it gets to a semi thick gooey paste consistency . ( like for kesari ) pour into desired bowl ,
  4. Set aside for 10 minutes , so that the thulli gets set and serve hot or at room temperature .

Malaysian apam balik

Share Button

image (7)

IMG_8512

IMG_8533

IMG_8534

IMG_8536

IMG_8537

IMG_8538

IMG_8541

IMG_8542

IMG_8544

IMG_8545

Preparation Time : 40 minutes

Cooking Time : 3-4 minutes for each pancake

Serving : 3-4 members

Description

Malaysian apam Balik . A street food wonder very own to Malaysia . I came across this deceptively simple recipe in the world wide net and just loved the combination of ingredients that are always available in my pantry but never ever thought about coming up with such a dish . These pancakes look plain on the outside but take a bite and the filling hits you on the right spot . these pancakes are made either thin and crisp or a bit thicker like pancakes . I tried both ways . My vote goes for the thicker version as the sugar melts and soaks up the pancake and when you bite in , its got that pillowy effect with the goodness of the filling oozing out with a delicious surprise .  I made this for break fast and it was slurped away in seconds and got every one sweet talking on the table :-)) .

Ingredients Malaysian peanut pancakes

Ingredients
Quantity
Flour / maida 1/2 cup
Baking powder 1 teaspoon
Rice flour1/2 cup
Egg1 beaten
Salt to taste
Coconut milk1/2 cup
Water 1/2 cup
Butter4 tablespoons

Ingredients Filling

Ingredients
Quantity
Roasted peanuts3/ 4 cup
Sugar 1/4 cup
Cream style corn3/4 cup
Grated coconut3/4 cup

Method

  1. Grind the roasted peanuts coarsely . Mix all the ingredients for the pancakes together to get a loose pouring consistency batter . Cover and set aside for 30 minutes . Heat a non – stick pan ( I used my appam kadai ) ,
  2. Pour 1/3 cup batter over and swirl pan to cover the base and sides of the pan . When bubbles start to appear , sprinkle sugar , followed by 2 tablespoons each of peanuts ,
  3. Cream corn and grated coconuts evenly onto the batter . Dot with a teaspoon of butter and allow pancakes to cook for 3 to 4 minutes until golden brown .
  4. Fold pancake into 1/2 using a spatula . Remove and serve hot . Repeat with remaining batter and filling . Serve hot immediately .

Coconutty lychee pudding

Share Button

image

Preparation Time : 15 minutes

Cooking Time : 10 minutes + 3 hours or more to set the pudding in the freezer .

Serving : 10 members

Description

Coconutty lychee pudding . A pudding that I came up with by combining and demystifying two puddings together  . I combined  the ingredients of tender coconut pudding and added coconut milk and lychees to it and got a wonder full  mix of tropical flavoured Asian pudding . The marriage of our keralas very own tender coconut pudding with asian lychees is sure addictive and leaves you weak  kneed . My daughter didn’t fancy it much but I was blown away as it was light ,  high in taste  And full of life . The coconut milk flavour with the lychees and rose water melded into one another that lead to a homey charm pudding . A complete seduction to all your Senses that spell instant wow …..


Ingredients

Ingredients
Quantity
whole tinned lychees10 + few more to garnish
Thick coconut milk2 cups
sugar1/4 cup or to taste
reserved lychee juice1/2 cup
Tender coconut water1 cup
Tender coconut flesh of one tender coconut
rosewater ( paneer )1/4 teaspoon
gelatine 2 1/4 tablespoon

Method

  1. In a blender, combine the lychees , tender coconut flesh and coconut milk blend until smooth.
  2. Pour the coconut-lychee mixture into a big bowl and stir in the sugar, reserved lychee juice, and rose water . Mix well until sugar dissolves and set aside . Soak gelatine in tender coconut water for 5 minutes in a small bowl .
  3. Bring 3 cups of water to boil in a sauce pan . Place the soaked gelatine tender coconut mix inside the boiling water and keep stirring until the gelatine dissolves and gets to a runny syrupy consistency mixture . ( This is called double boiling ) Cool down to room temperature .
  4. Pour into the coconut lychee mixture and whisk well to combine. Pour into a large container and place in the freezer for 3 hours . once set remove and place in the refrigerator over night .it won’t set completely like a moulded gelatine dessert, but it will be a soft pudding. Serve chill garnished with lychees .

Pressure cooked rasagullas

Share Button

image (6)

Preparation Time : 20 minutes

Cooking Time : 5 minutes

Serving : 5-6 members

Description

Rasgullas or rasagullas . I am still not sure about how to spell or pronounce the word right but have been eating it from my childhood days . Those days dad used to go to Bombay , Surath  and Calcutta very often related to his business . On his return , he always used to get us things and sweets from those places and if it was Calcutta we always got tins of rasgullas . Not having tin openers at home then . A big struggle would go on to break the tin . Myself and my brother would wait impatiently gazing on when we would get our share of this divine white ball . Once the tin is open each one is served with one ball each and the rest is stored in the refrigerator . Only after this tin is over the next is opened . ( dad used get 3 tins always and that was standard ) through out the day and night what ever I do  let it be playing , watching the telly to studying or anything my mind would always spark every now and then with this mighty sugar syrup drunk white wonder ball . The second spark hits my mind , I am there in front of the open refrigerator with a rasgulla in my mouth . Not wanting to finish of eating  it soon . I used to suck the sugar syrup first and then keep chewing the rest for quite some time . I was a very wired little crazy creature . Never did I think I will end up making this at home but a recipe shared by aara sheik in home chefs guild ( a foodie group I am a member of in Facebook ) was so easy to follow and I wanted to try it out then and there . Last night when I got a call from Asiya Omer ( a food blogger , a liker of sauté , fry n bake and the second prize winner of the completion that was held in our page ) that she might come over to my place to catch up . I wanted to make some home made goodies for her and the only ingredient at home was milk ( no eggs , so could not bake a cake ) and immediately the first thing that came to my mind was aara sheiks easy fluffy rasgullas . Made them and did serve it to Asiya Omer . Well I am back to square one with the spark in mind and moments of nigella lawsons way of sneaking towards the refrigerator and adding more calories into me .

Ingredients

Ingredients


Quantity

Full cream milk1 litter
Lime juice 3 tablespoons
Sugar 2 cups
Water4 cups

Ice cubes

Method

  1. Boil milk and when it just reaches boiling point add lime juice . When the milk curdles add in ice cubes . This will help the paneer to stay soft . Wash the paneer in water and strain in a muslin cloth .
  2. Wrap it loosely , press and knead for 7 minutes with the cloth on . Remove from cloth . Roll into small balls and set aside . Make sure there are no cracks it’s very important .
  3. Add water and sugar in a pressure cooker and bring to boil . Once it’s boiling add rasagulla balls into it . Close the pressure cooker lid , place the weight and pressure cook for one whistle and 5 minutes more on medium flame .
  4. Take away from flame and let the pressure release on its own . Open lid to find puffed up rasagullas . Cool to room temperature and enjoy .

Notes

  1. No need to make sugar syrup just dissolve the sugar before pressure cooking the rasagullas .
  2. Make sure there are no cracks when you roll the rasagullas .