Preparation Time : one hour
Cooking Time : 15-20 minutes
Serving : 2 members
Description
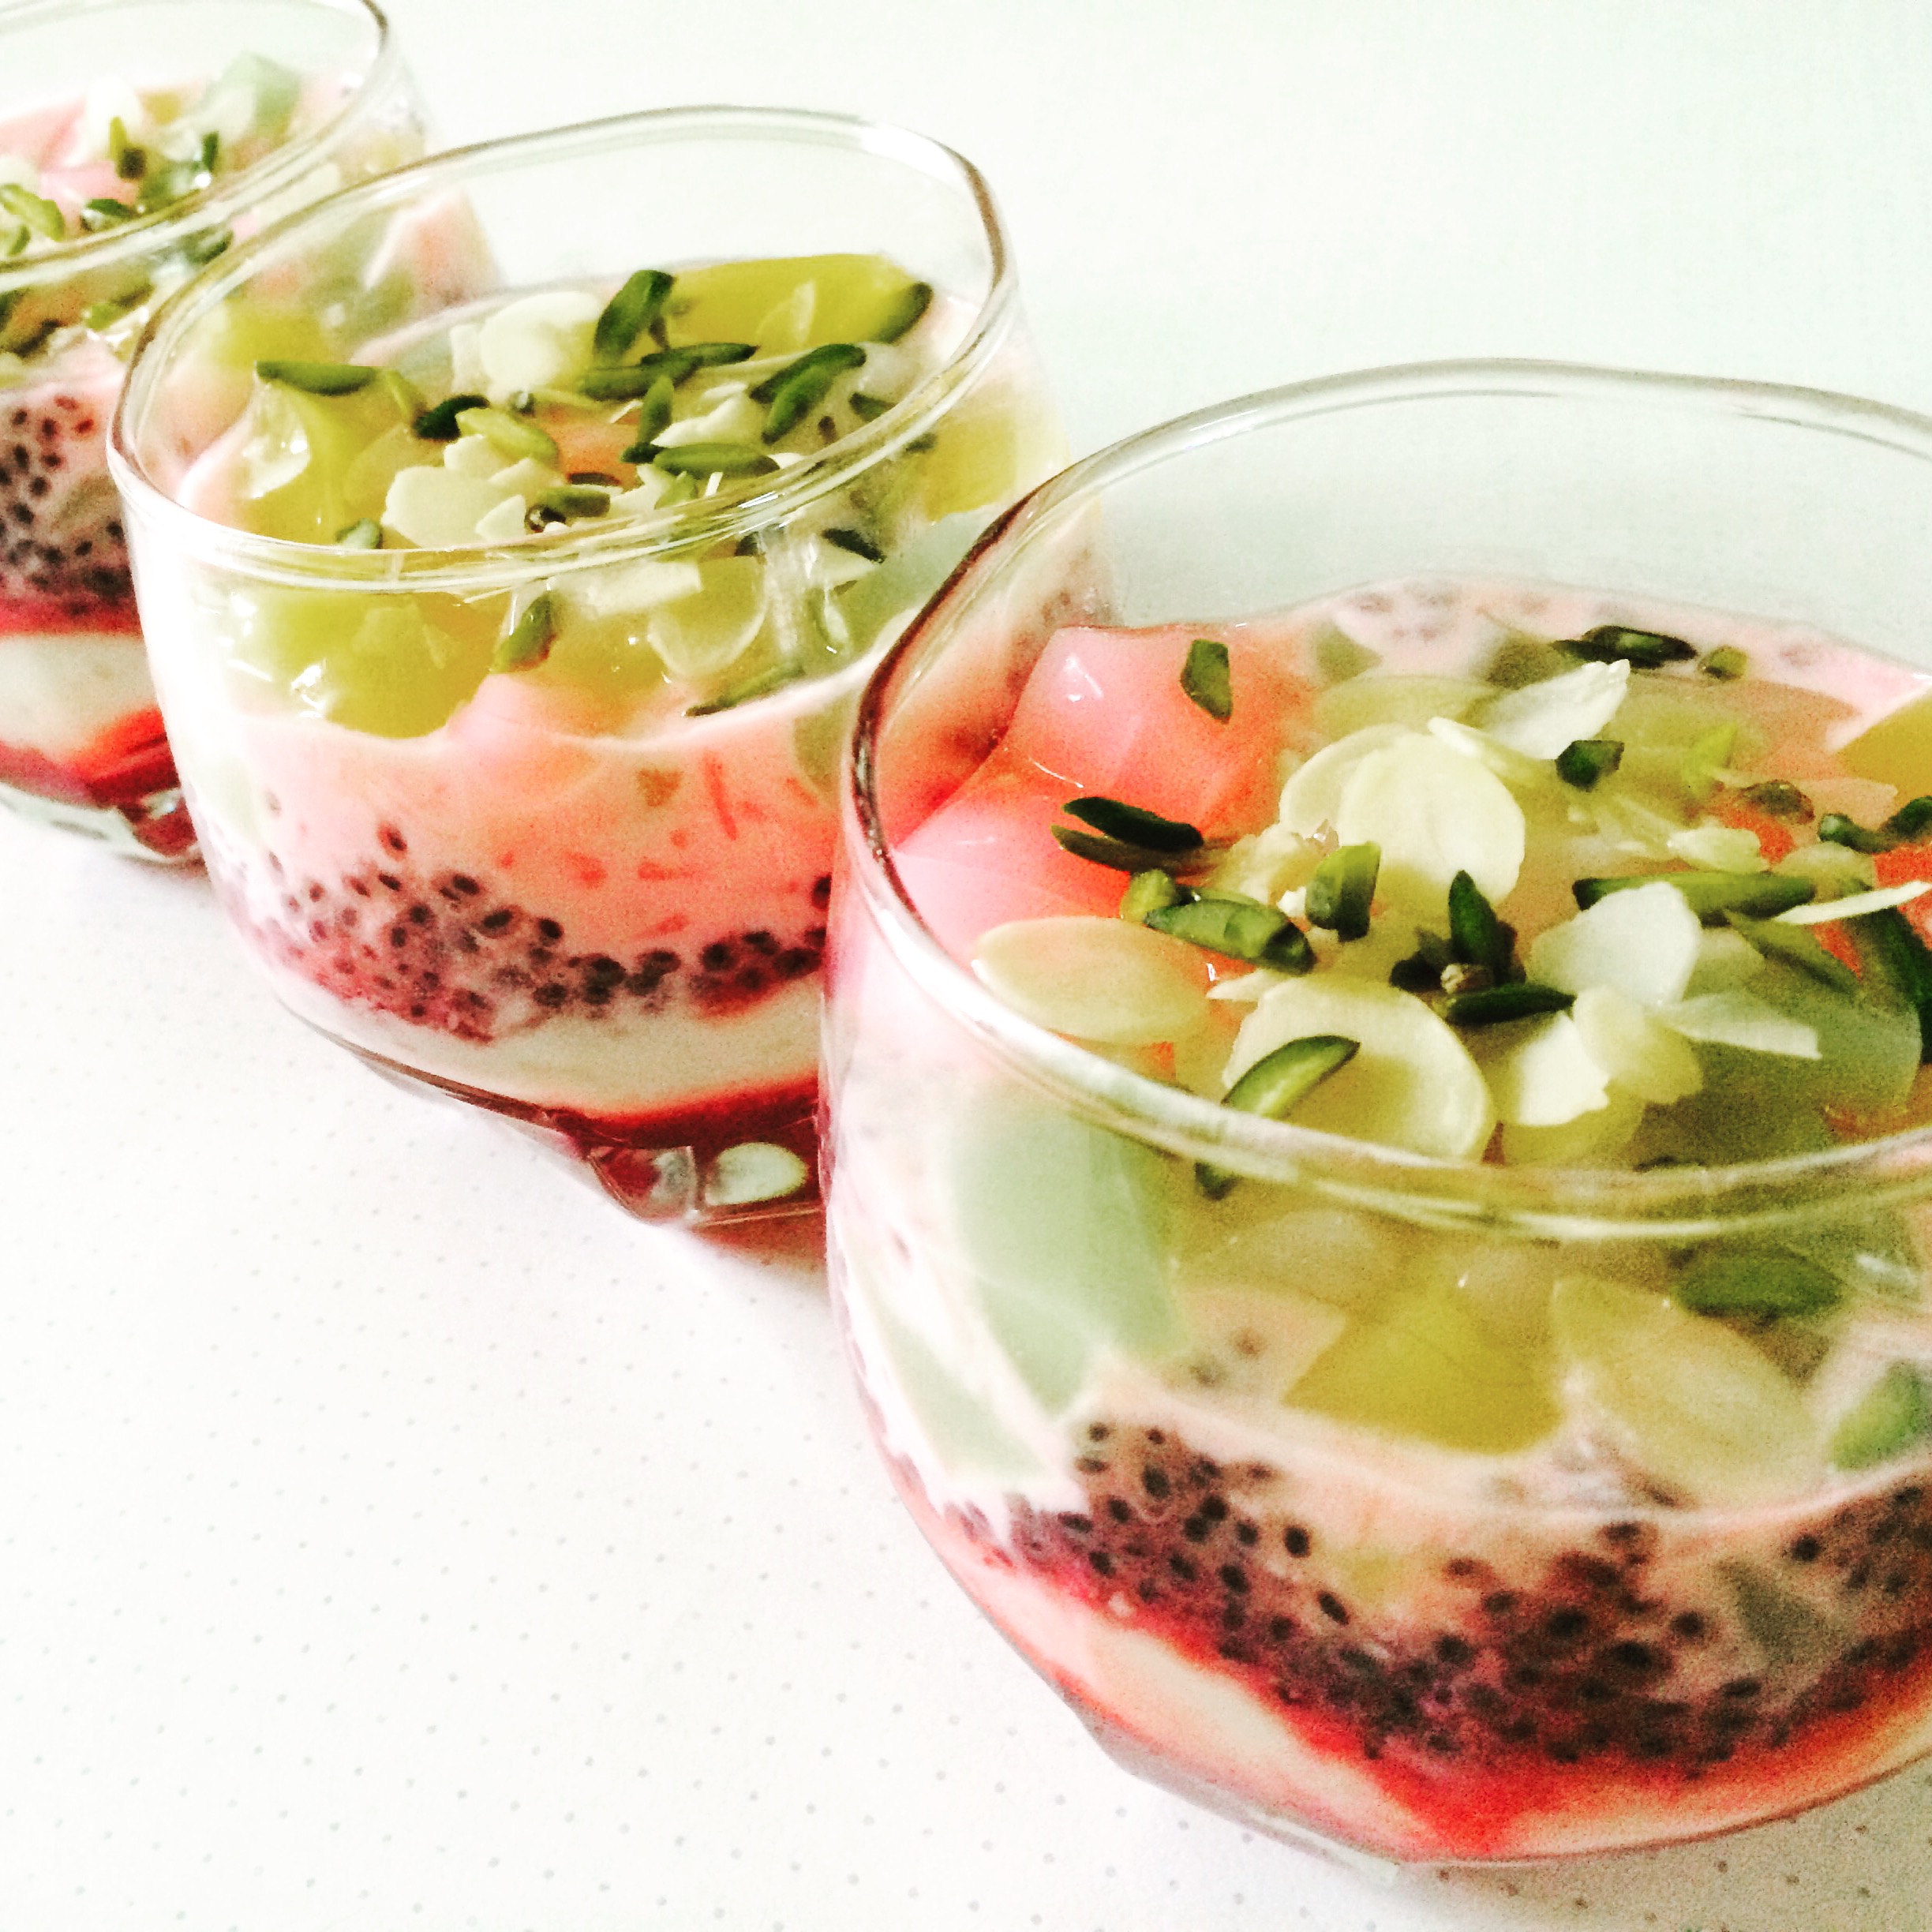
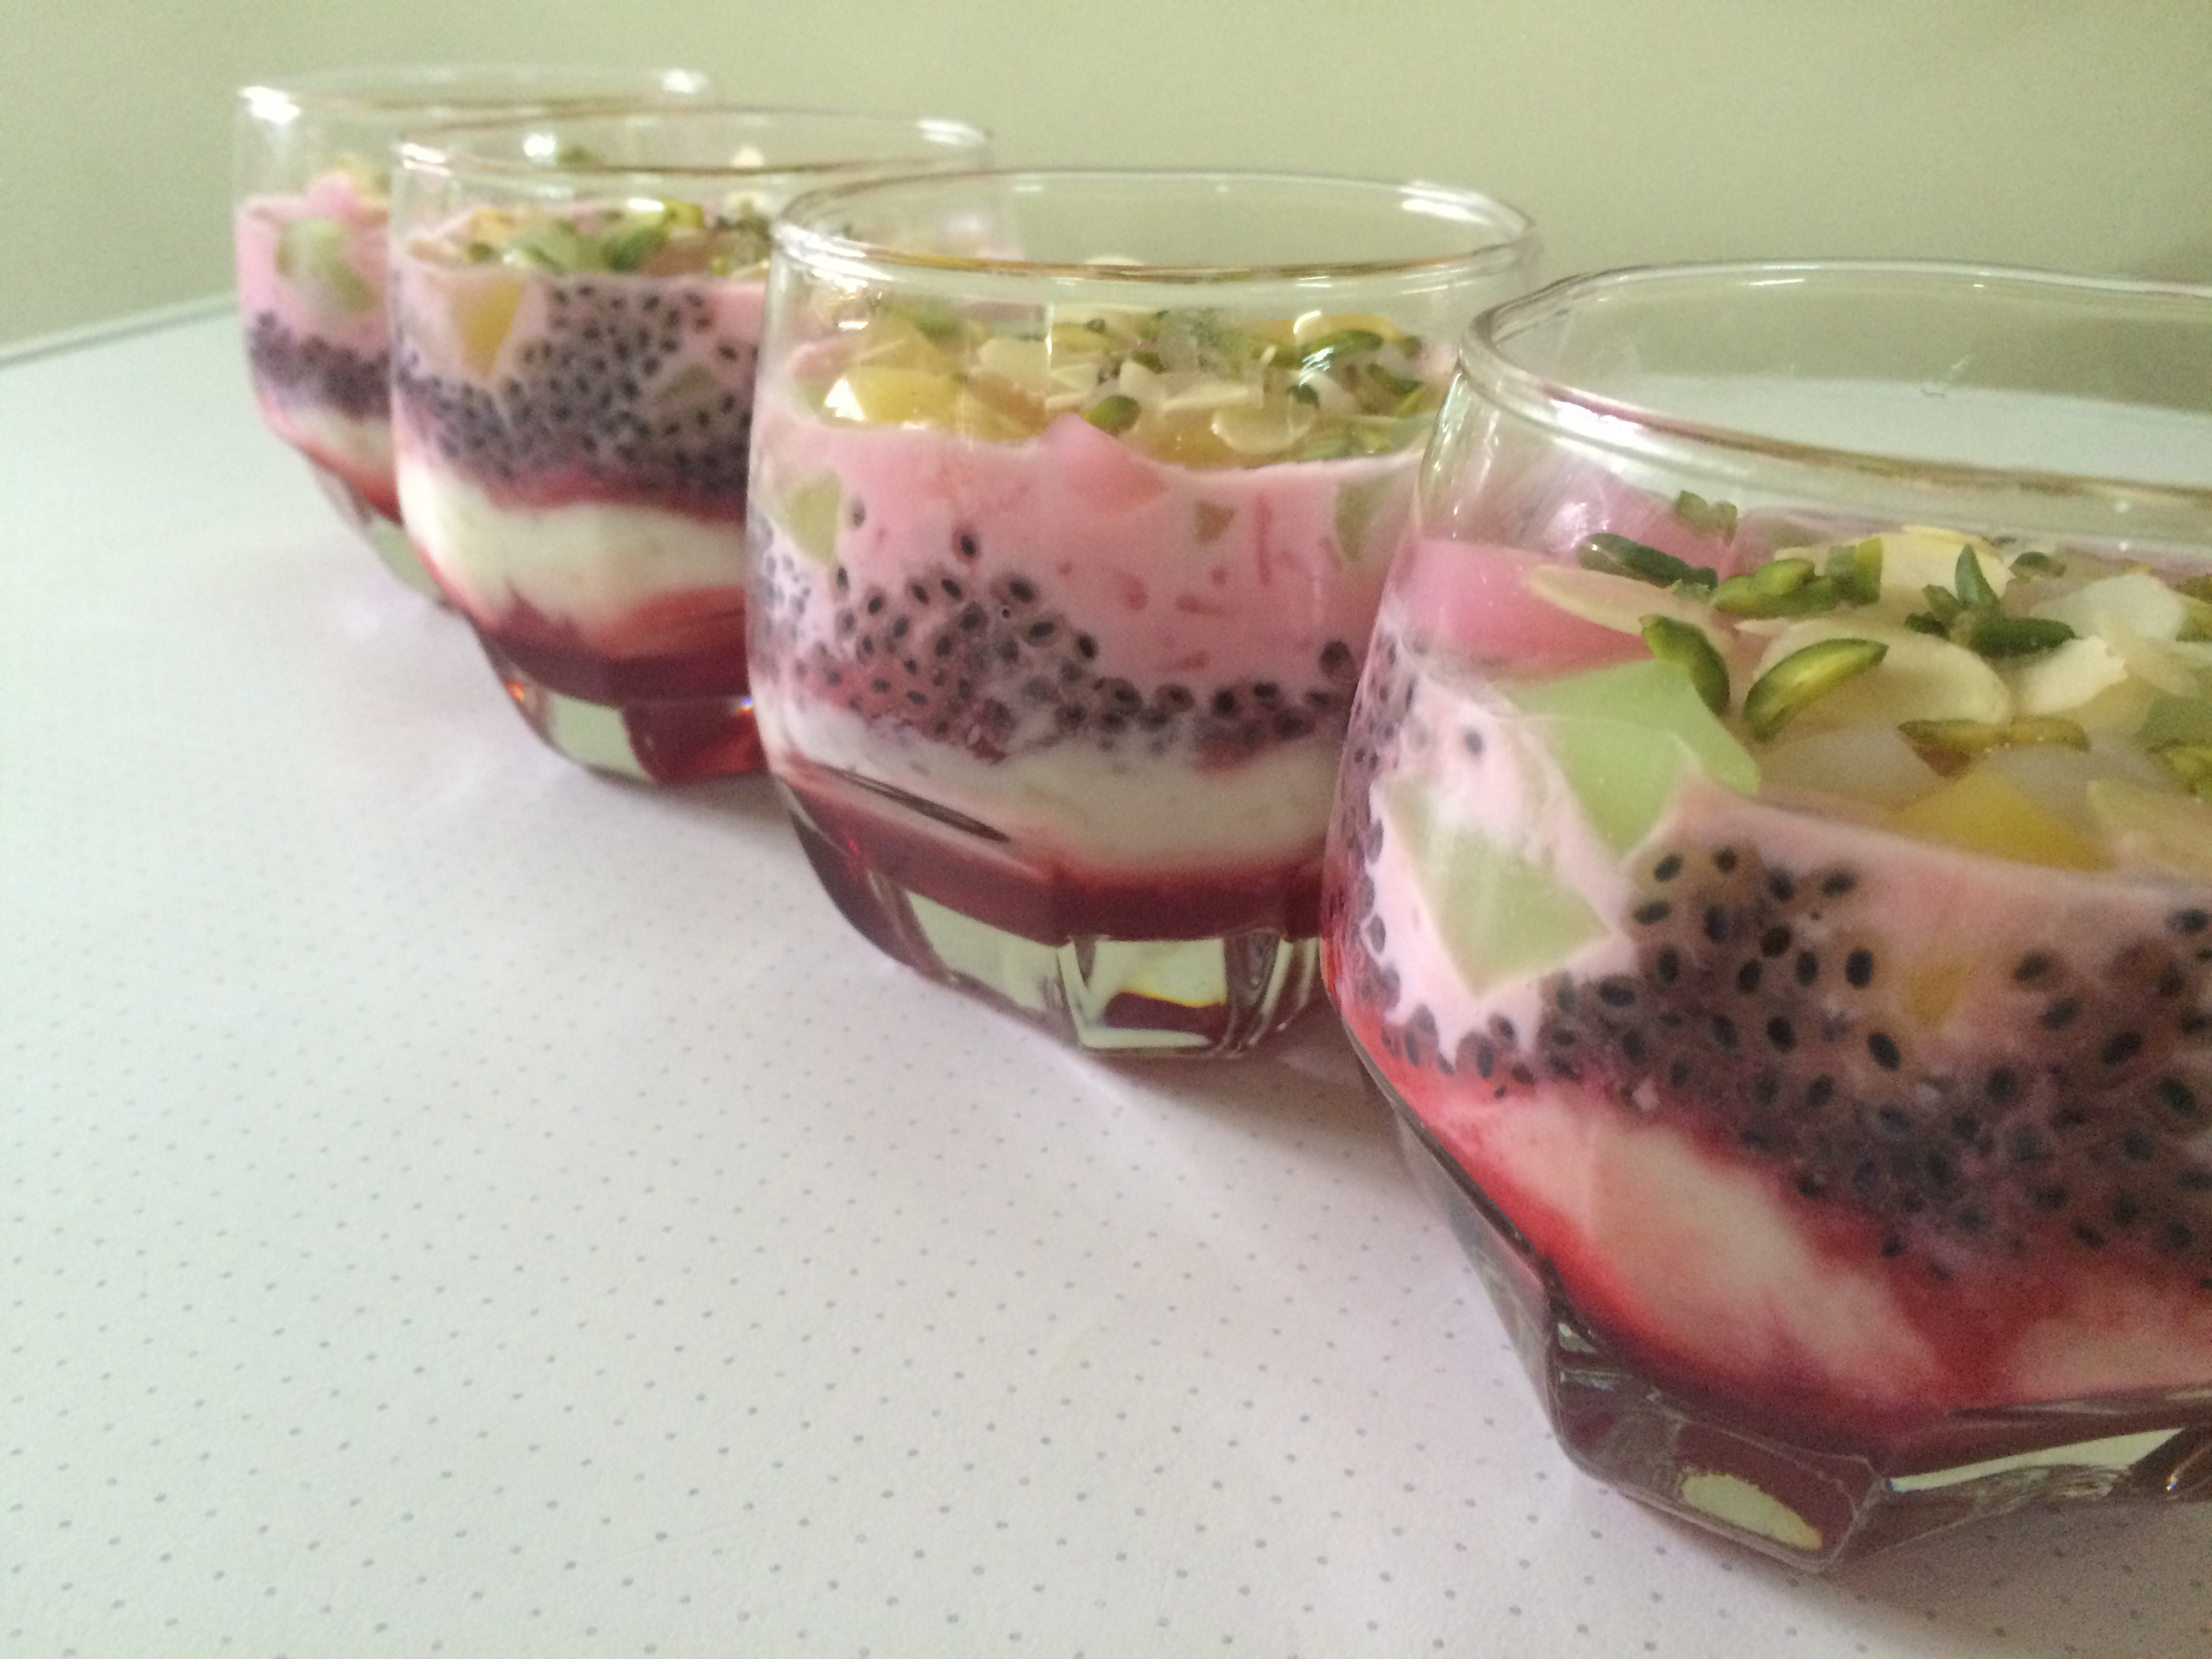
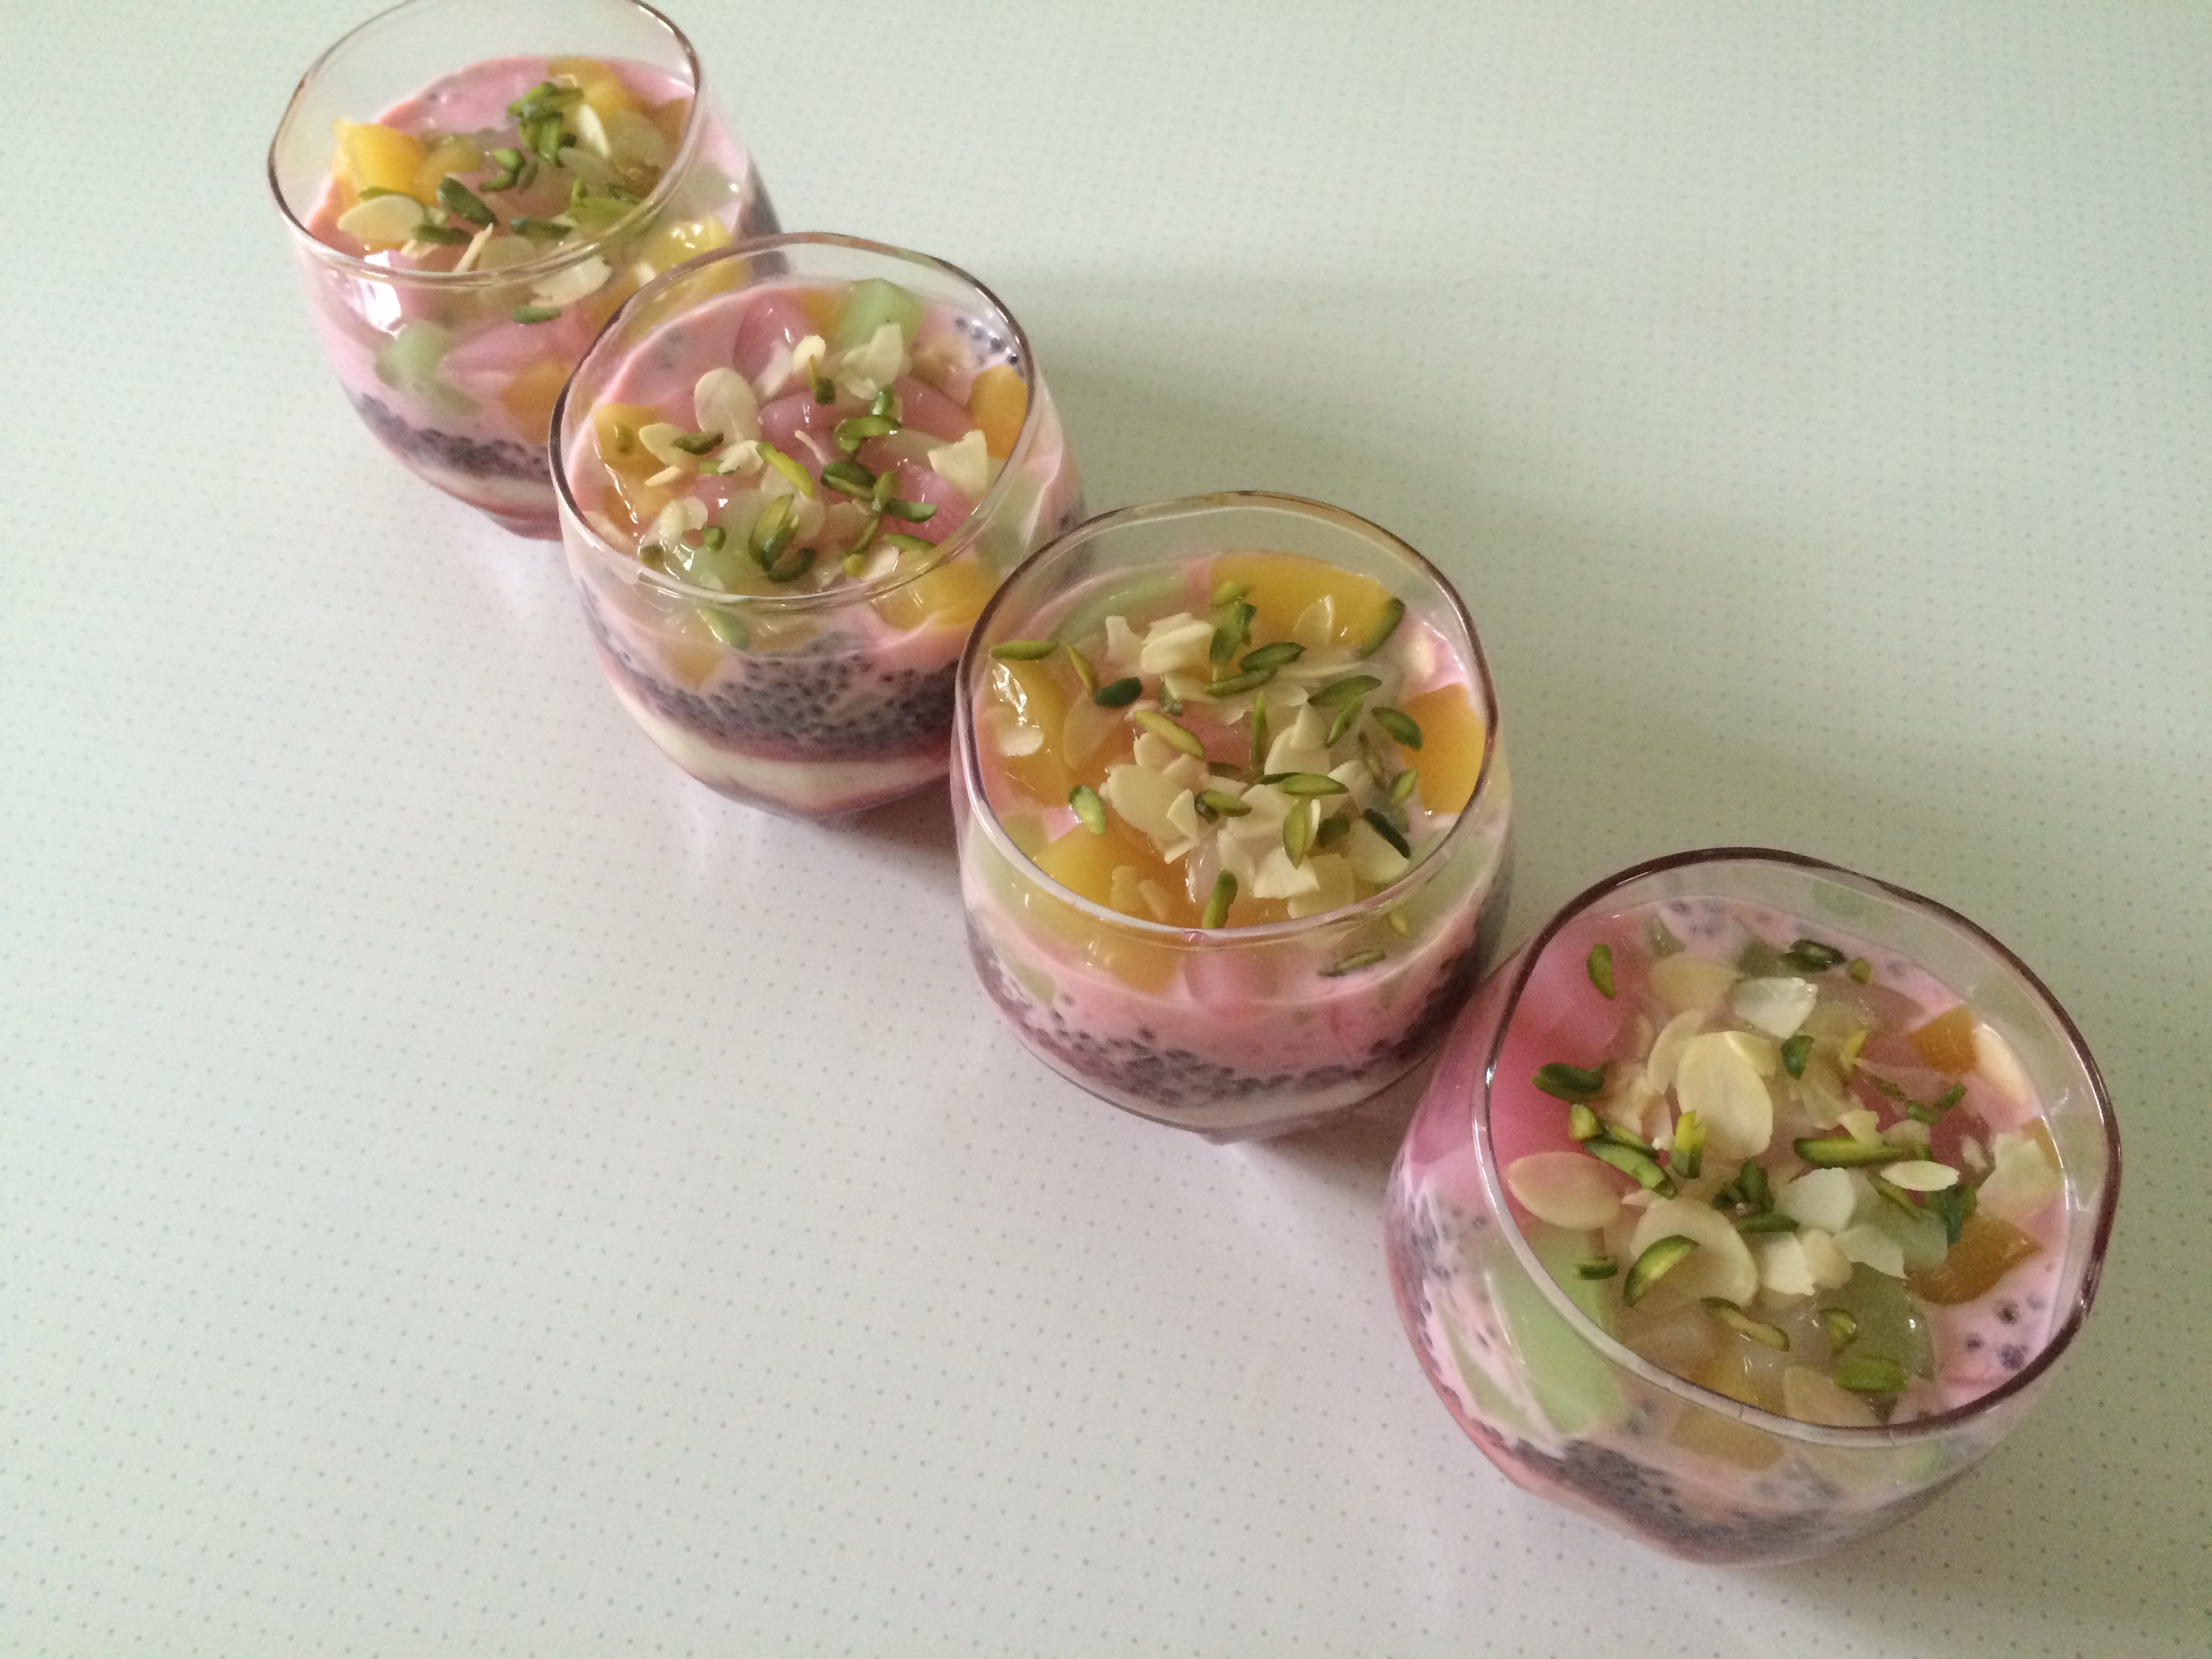
Falooda is an authentic Indian dessert drink that flourished during the Mughal rule . A drool worthy dessert with very little effort . I first got to know about falooda through my friend sulu . She mentioned about an incident during her holidays in Calicut about how a gang of cousins went out to eat ice- cream and they saw the next table seated girls having a tall glass of colour full ice cream . They ordered for the same and its name was falooda and tasted horrible . From then on I never ever attempted to order or have falooda . My other buddy sindhu had gone on an excursion to kanyakumari from school . After her trip she did mention and rave about having ice cream at a place called tirunelveli and it was so yum . That was the first time in my life I got to hear about such a place existed in this world not knowing my entire life had to be spent there :-)) when my marriage was fixed , I did enquire Sindhu first about this place . After I was married , every one used to rave about the cherry shake and falooda served at ARASAN BAKERY ( the same place that sindhu had her ice cream ) here in tirunelveli . To be on the safer side even then I used to have the cherry shake and omit ordering the falooda . Then finally on my trip to Bombay( it was addressed so then ) once my uncle ordered for falooda in SUK SAGAR and forced me to try it . Being very hesitant did taste a spoon full and to my surprise it was divine . I ended up devouring it no time . Now falooda is on my must have list on every trip to Mumbai and I ended up making this magical and exotic treat at home with the name falooda always lending a whiff of nostalgia to me .
Ingredients
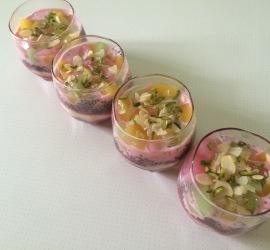
Ingredients | Quantity |
|---|---|
| Chilled Milk | 2 cups |
| Sugar | to taste |
| Vermicelli | one hand full boiled |
| Rose Syrup or rooh afzah | 2to 3 tablespoons |
| Basil seeds ( sabza vethai in Tamil ) | 1 tablespoons soaked in water |
| Vanilla icecream / kulfi | 1 to 2 scoops for each glass |
| jelly | any flavour , cut in to small cubes.( I usually use a combination of 3 colours and flavours ) |
| Cashew nuts | 3 tablespoons chopped |
| Pistachio | 3 tablespoons chopped |
| Almonds | blanched skin peeled and chopped - 3 tablespoons |
Method
- Chill the cooked vermicelli by placing it in the refrigerator until needed .
- Soak the basil seeds in water for abt 45 min, they will puff up and double in size.then boil them for 5 minutes and drain.In a tall glass add cooked chilled vermicelli , basil seeds and rose syrup / rooh afzah .
- Mix sugar to taste with chilled milk and mix well until sugar has dissolved completely . Place an inverted tablespoon or dessert spoon at a 45º angle over the falooda glass and pour the milk over the spoon.
- The milk will slide gently to form a layer over the syrup and won’t get mixed with the bottom layer.garnish with jelly cubes and nuts. top it with a scoop of vanilla ice cream / kulfi and Serve chilled .
Notes
- make jelly as per packet instructions and use .
- I personally prefer kulfi to ice cream to be added to the falooda as it gives an authentic Indian touch to the dish .
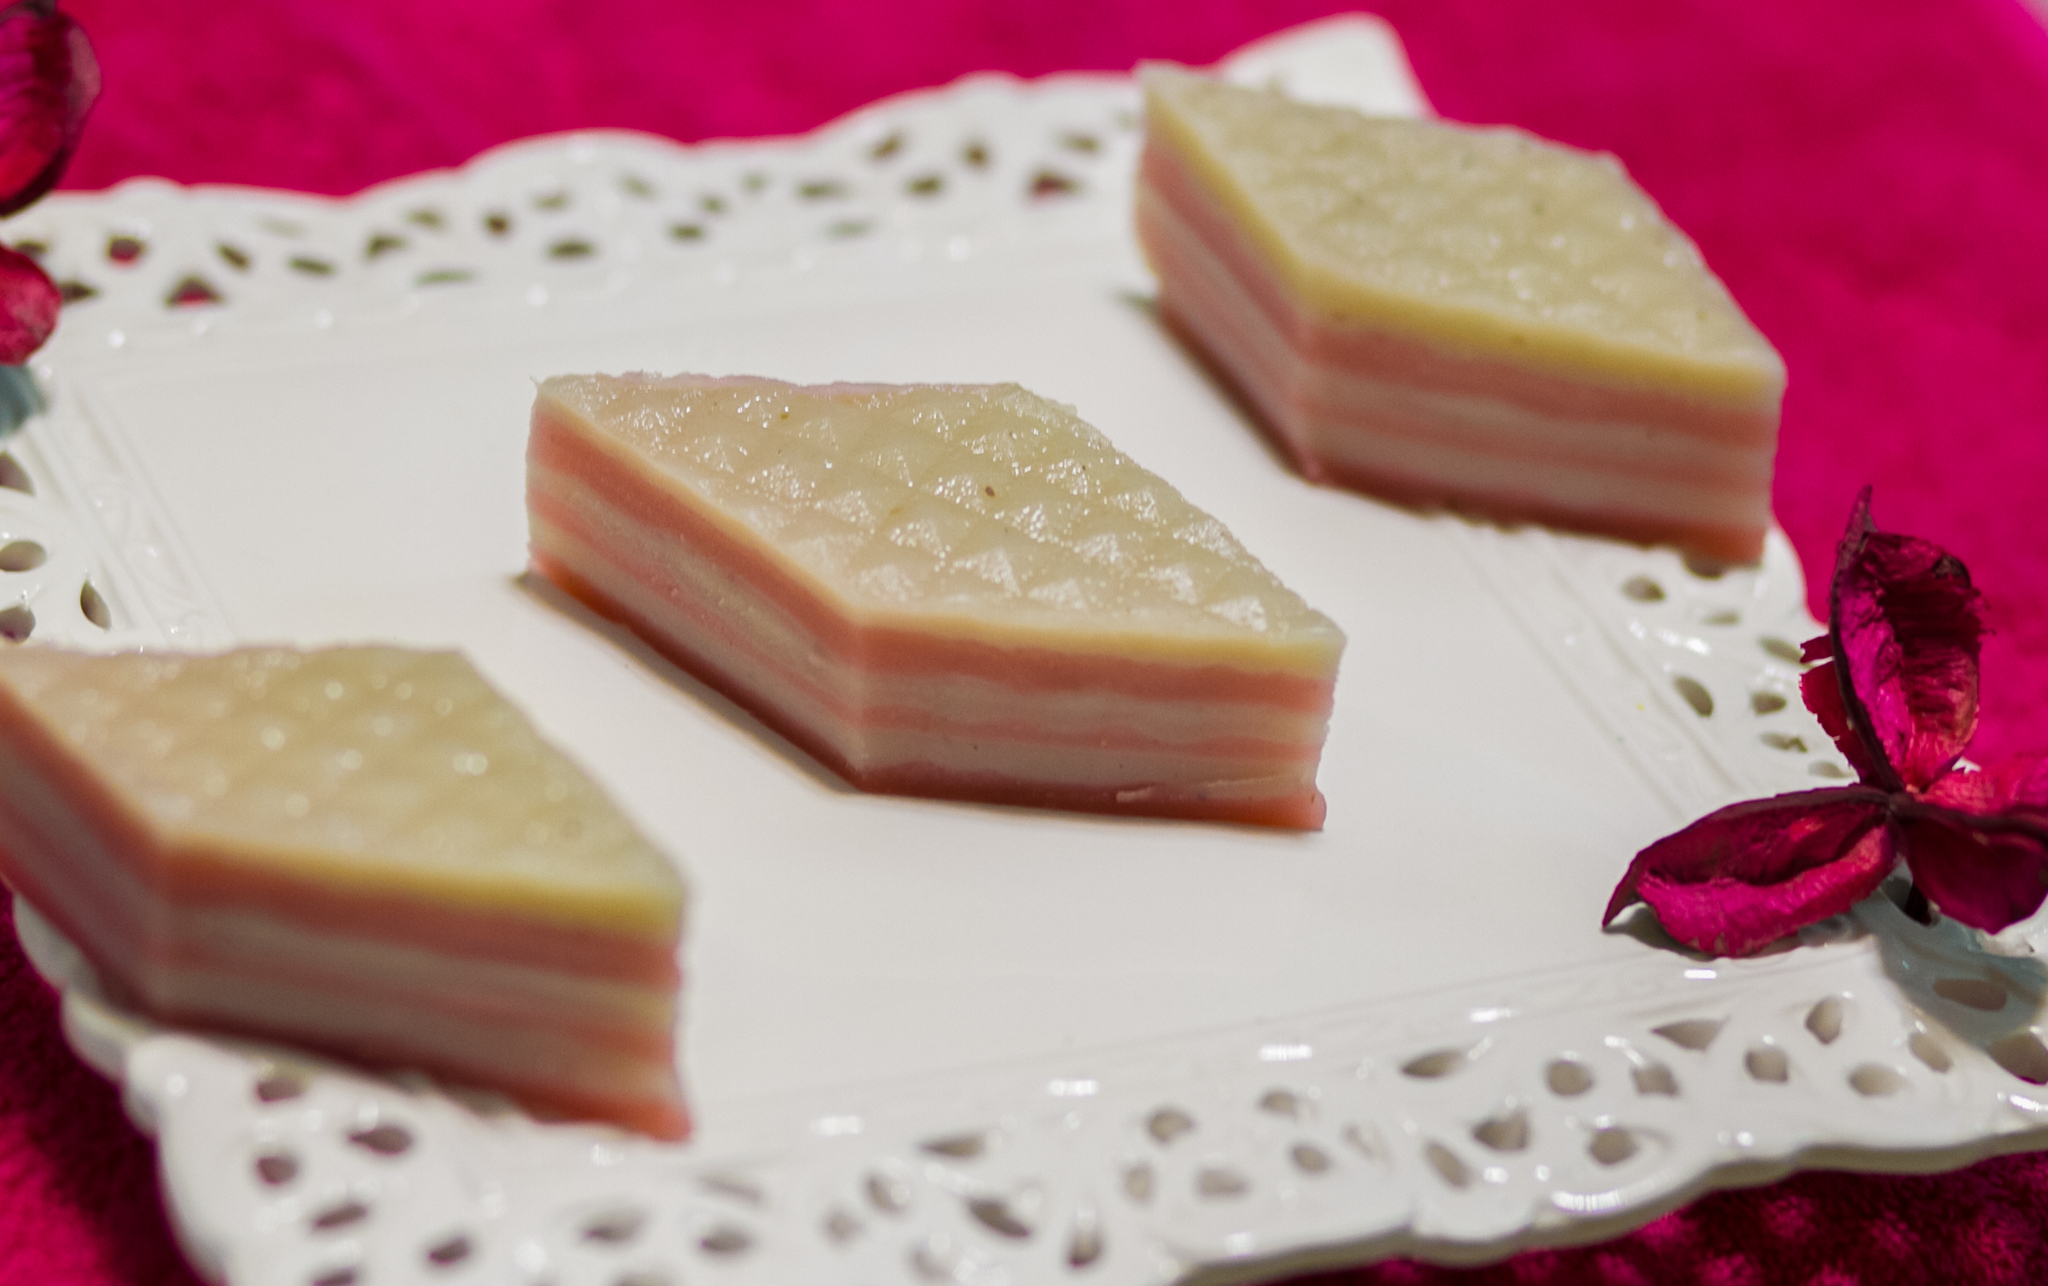
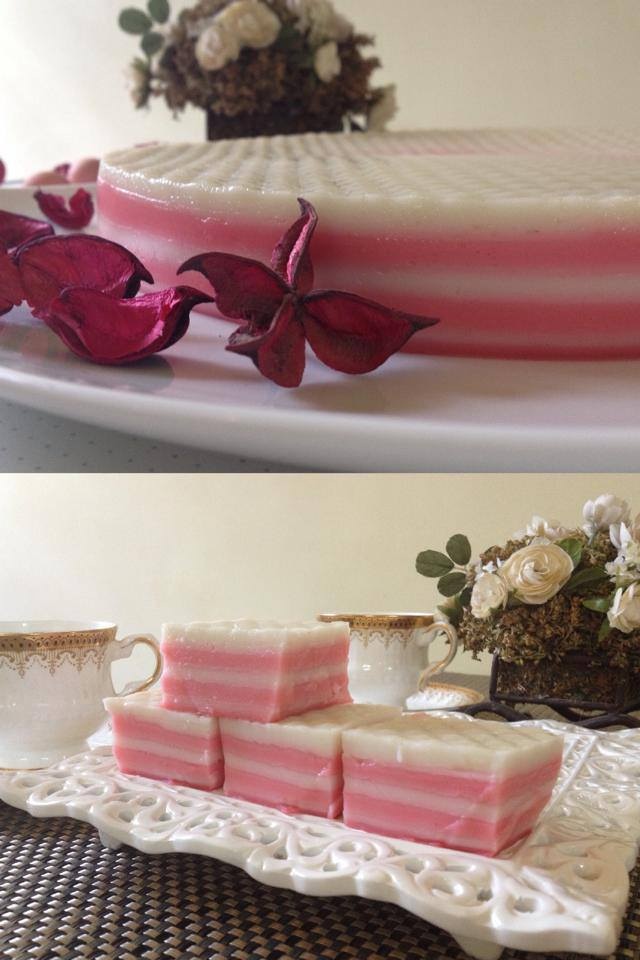
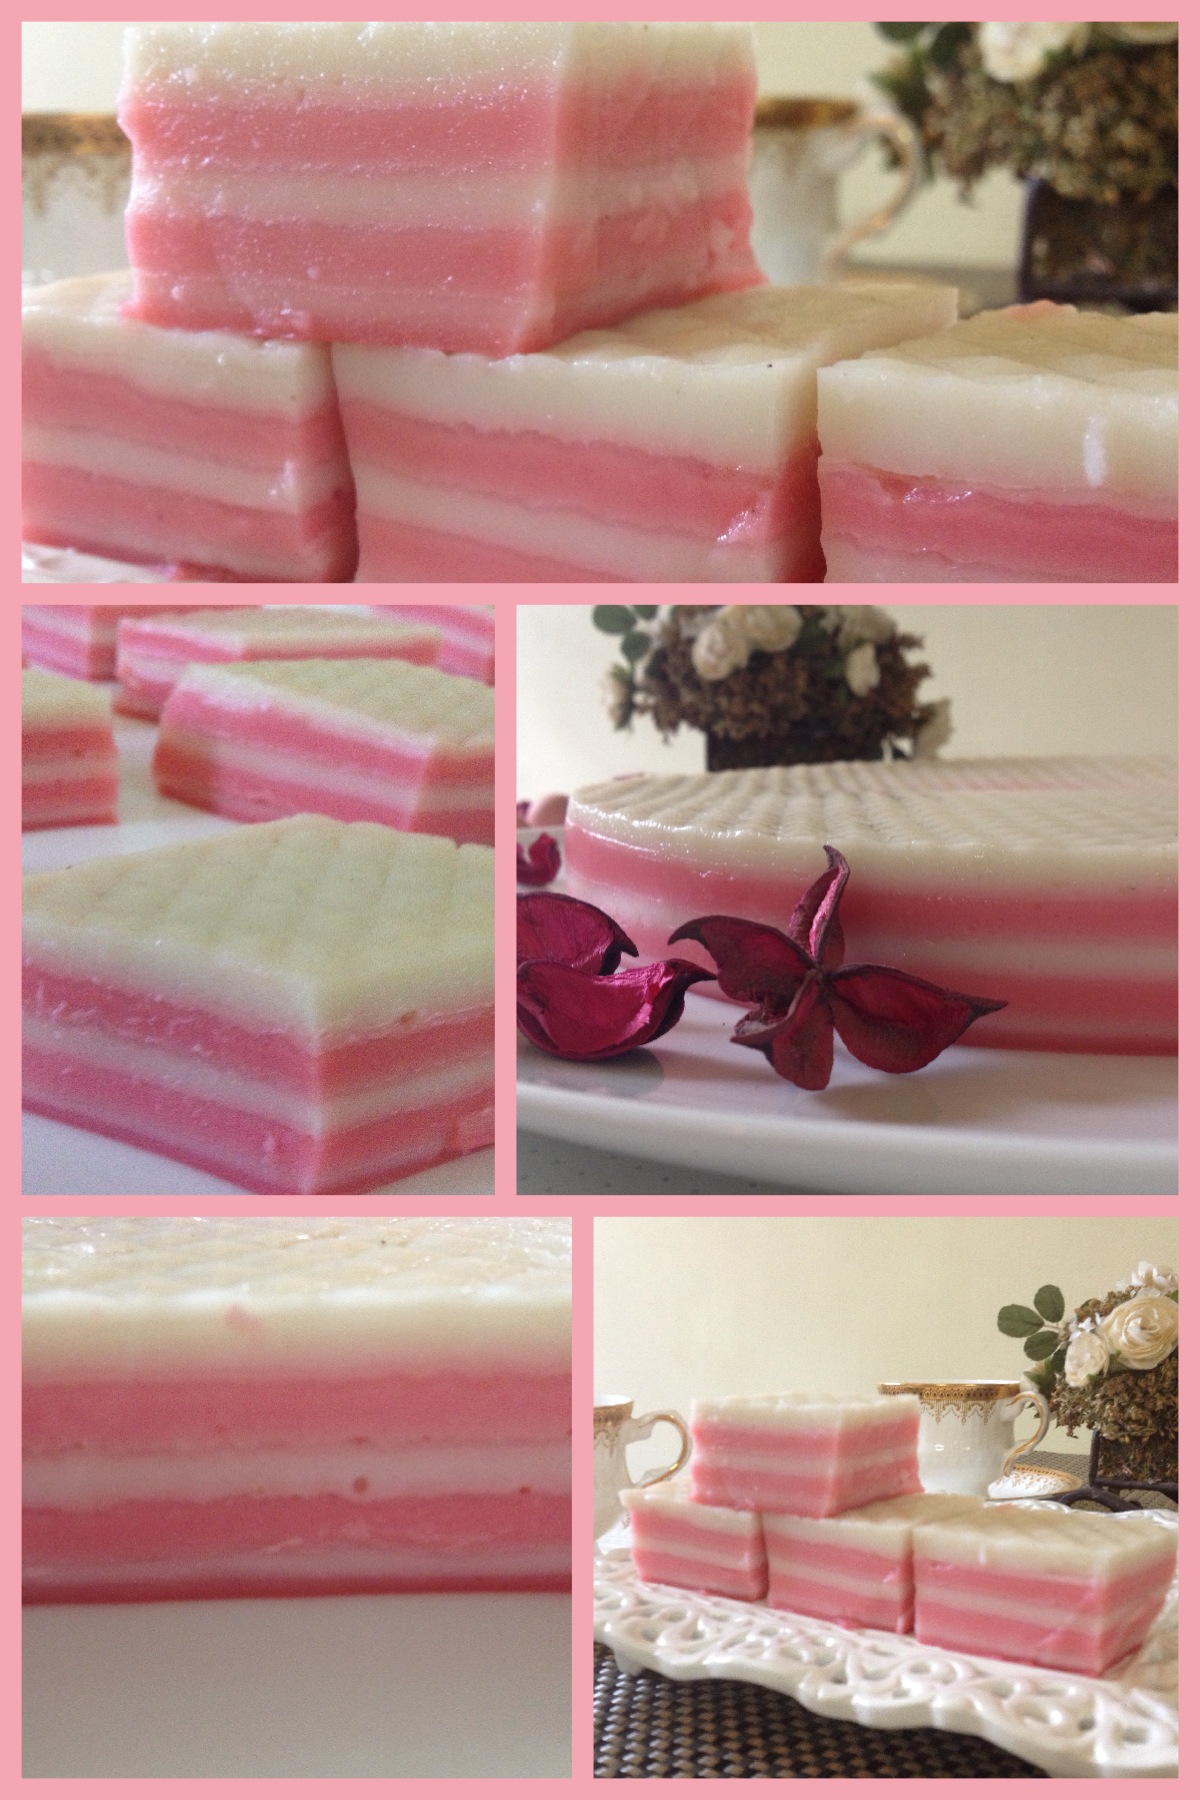
- You could serve the falooda on a small plate by placing the kulfi first , topped with vermicelli , rose syrup , basil seeds and garnished with nuts and jelly . Omit the milk here .