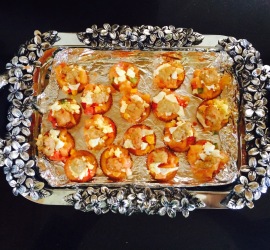
Salami Wraps

Share Button

IMG_0311

IMG_0303

IMG_0304

IMG_0305

IMG_0306

IMG_0307

IMG_0309

IMG_0310

IMG_0336

Preparation time : 10 minutes
Cooking time      :  6 minutes
Serves                :  4 – 6 members

Description

Appetizers or canapés always bring in a surprise element when served to Guests as its decorative food, eaten in one bite with hands. I always look out for ideas to impress loved ones through food and canapés are my favorite cheats way to win hearts. This idea, I did steal from the cover of the salami packet that I had in my freezer. ( shameless me ) Wanting to finish off the salami which I usually use for sandwiches, this idea seemed to be easy and impressive. Made good use of it when I had my friend drop in home for dinner. We had so much fun eating these making sure not to drop a bit of these and make a mess. The taste was sublime with simple ingredients put together to create a visual treat. This was the most impressive dish on the table which took me just a few minutes to assemble. Food has its own way to bring in a new twist each day. Which is why I am madly, deeply in love with it. So peeps fall in love over and over again as the entire world revolves around being loved the most.

Ingredients
Quantity
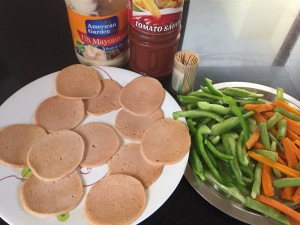
Frozen Salami1 packet
Vegetable strips2 cups ( carrots, beans , three colour capsicum's )
Mayonnaise3 tablespoons
Tomato ketchup3 tablespoons
Saltto taste
Pepperto taste
Tooth prickfew

Method

  • Boil carrot strips and beans with salt to taste and water to cook with a slight bite to it. Remove from heat and cool completely.
  • Thaw the salami that has been in the freezer. Microwave it for one minute. Remove and cool completely.
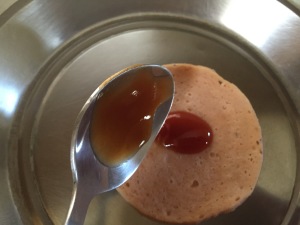
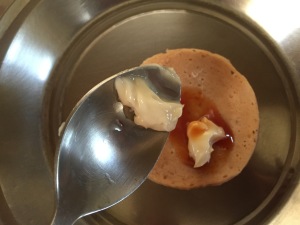
  • Place a dot of tomato ketchup in the center of the salami. Top it with a dot of mayonnaise. Sprinkle with salt and pepper to taste.
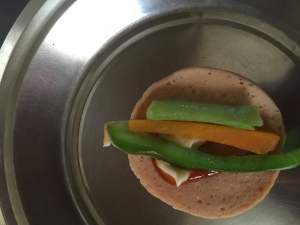
  • Place vegetable strips one each in the center ( I used green capsicum alone as only that was available in my pantry ).
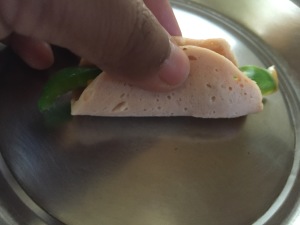
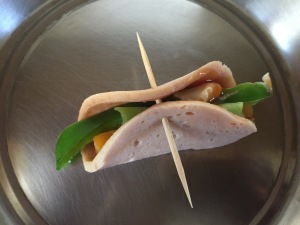
  • Bring the edges of the salami together towards the center making sure the vegetable strips are intact .
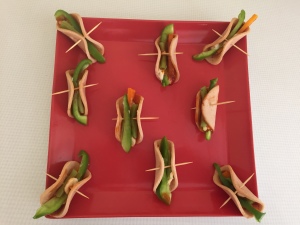
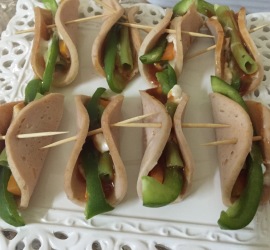
  • Prick with a tooth prick together and serve.


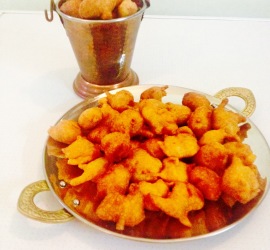
Deconstructed Samosa

Share Button

FullSizeRender (17)

FullSizeRender (16)

FullSizeRender (15)

FullSizeRender (14)

FullSizeRender (13)

FullSizeRender (12)

FullSizeRender (11)

FullSizeRender (10)

Preparation time  : 34-40 minutes
Cooking time       : 15 minutes for filling + 3-4 minutes for each batch deep fried
Serves                 :  6-8 members

Description

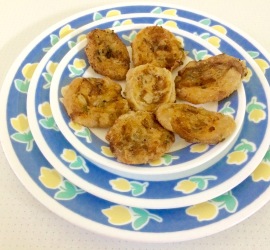
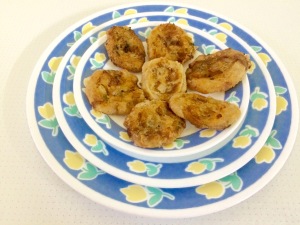
The deconstructed version of any dish sure does excite me a lot. This is a deconstructed version of our regular samosa ‘s. The huge one triangular calorie culprit is made into small bite size pinwheel’s here which is so easy to munch letting you feel the same soothing effect. These desi – inspired posh snack is guaranteed to chase away your blues. The clever new tweak to this classic is a tribute done to this soul Warmer that you will love. These deconstructed therapeutic comfort snack never fails to make you feel indulgent as these have comforted generations and truly endured the test of time. Try these lighter, brighter and much more modern treasure trove delicacy that will sure raise eye brow’s of your loved ones. What an amazing reinterpretation done to the Indian staple that’s turned humble to naughty. All the best peep’s for an exciting gamble to unshackle your regular palette where you need not burn a hole in your pocket’s by visiting restaurant’s , instead just add more verity to home cooking.

Ingredients for the dough

Ingredients
Quantity
Flour/maida1 cup
Semolina2 tablespoons
Saltto taste
Oil3 teaspoons
Cold water1/3 cup
Cumin seeds1/4 teaspoon

Method

  • Mix all the ingredients together to get a soft dough. Do not knead too much.
  • Cover with a damp clean cloth and rest for 15 minutes.

Ingredients for filling

Ingredients
Quantity
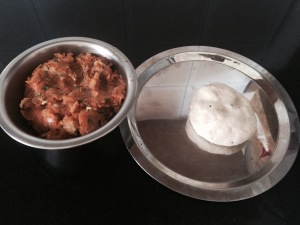
Boiled mashed potato2 cups
Cumin seeds1/4 teaspoon
Green chilly1 chopped
Mango powder1/4 teaspoon
Saltto taste
Coriander leavesfew chopped

Method

  • Mix all the ingredients together. Taste and adjust seasoning.
  • Divide the mix into two equal portions.

Other ingredients

Ingredients
Quantity
Flour / Maida3 tablespoons
Water1/2 cup
Oilto deep fry

How to proceed

  • Mix flour with 1/2 cup water and set aside.
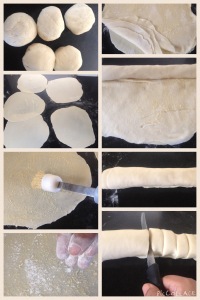
  • knead the dough for a minute. Divide dough into two equal parts.
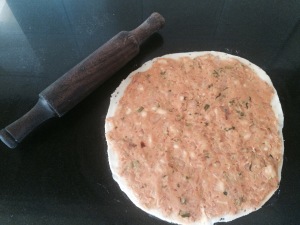
  • Roll each dough ball into eleven inch diameter. Spread one part of the potato filling evenly over rolled dough. Press slightly.
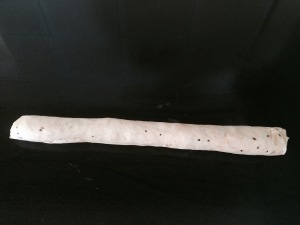
  • Roll the dough sheet gently but firmly to get a neat firm log. Seal the edges with water. Roll the log gently 6-7 times to keep it together.
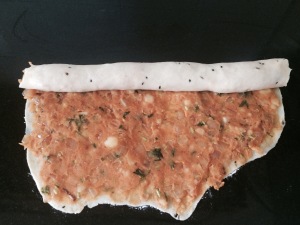
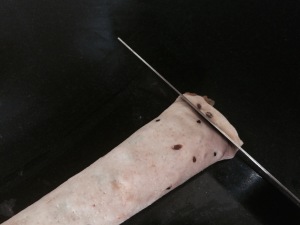
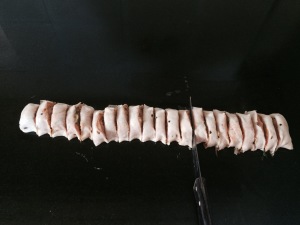
  • With the help of a sharp knife, slice both the ends about one inch long. Then slice the log to half inch thick pieces to get about 13-15 pieces.
  • Press pine wheels slightly to flatten a bit.
  • Repeat the same with the remaining dough and potato filling.
  • Heat oil to deep fry. Dip the deconstructed samosa pieces into thin batter and drop into medium hot oil in batches of six pieces at a time.
  • Deep fry to golden and crisp. Drain and serve hot with tamarind sweet chutney, mint chutney.

Paped Cups

Share Button

image1

image2

image3

image4

image5

image6

image7

image8

image9 (1)

image10

Preparation time : 10 -15 minutes
Cooking time      :  5-8 minutes
Serves                : 10 members

Description

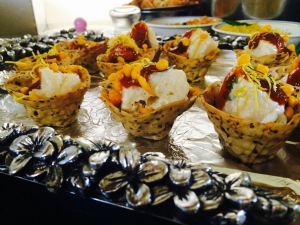
Pappadam, appalam, paped or with its any form.. I just love it. A meal had with a pappadam beside sure does help me gulp in a bit more. The pappadam was there on the table every lunch. Puffed up, crisp and light ( well it’s the Kerala pappadam’s ) as a kid. Me and my evoking foodie childhood memories. In fact, my dad was nick named pappadam samy. I really don’t know why? Must be because of the love he had towards it and I guess it was just passed down to me. I really get excited to know new recipes that are done with things I love and this one was sure for keeps. Who will not want to give a try to this fuss free, gratifying and popular with every one dish. As I started to make this dish, my cook keenly taking note of what I was up to, says ” amma, you turn into a child once you step into the kitchen and play around like a kid in the candy store with utter joy. Don’t you get tired “. I just smiled and the saying “A man who loves good food has a way of making it gravitate toward his kitchen.” Came into my mind. Coming to the dish,it is no more than an easy assembling job and is prepared in advance making it ideal for entertaining large groups when pressure is mounting and time and energy declining. These cups can be made 1- 2 days ahead and stored in air tight containers at room temperature. It’s best served as an appetiser or a snack at a party adding so much more glamour letting the guests oomph about us as self – taught culinary whizz’s.

Ingredients
Quantity
Masala pepper paped's10
Water2 Cups

Other things required

Small Muffin tray1
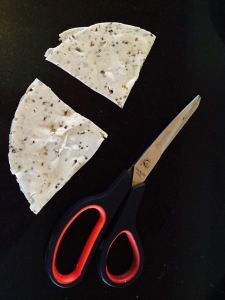
Sharp Kitchen scissor1

Method

  • Preheat oven to 180 degree Celsius for ten minutes.
  • Pour water into a wide vessel with high sides. Grease the mini muffin tray with oil in to each dent generously.
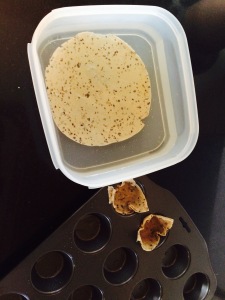
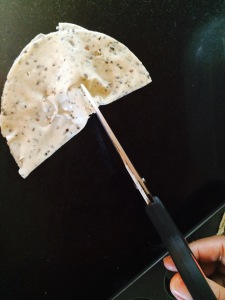
  • Pour water into a wide, flat mouthed vessel with high sides. Place one masala pepper paped into the water for 30 -50 seconds to soften and get pile able.
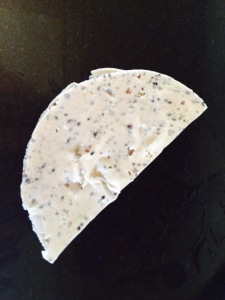
  • Remove the paped carefully and fold into a semi circle. Cut into equal triangles with the help of a sharp kitchen knife.
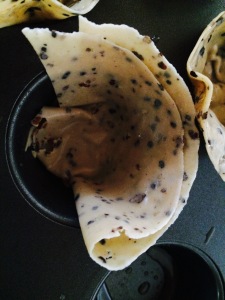
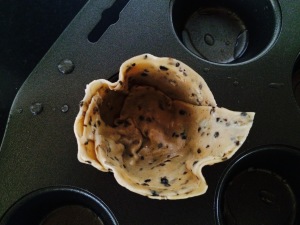
  • Place one paped triangle with the “V” shape placed into the bottom greased muffin tray dent half way and the rest coming up to the sides of the dent.
  • Take the other cut paped triangle and do the same as above over lapping the previously placed paped triangle to get a cup shape.
  • Press well making sure both the triangles stick together and has no gap to get a cup once baked.
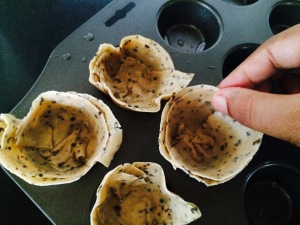
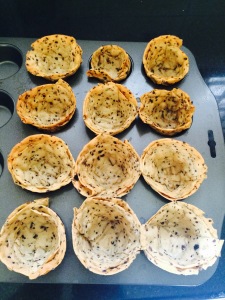
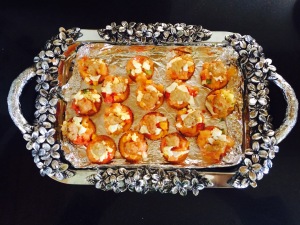
  • Do the same to all the remaining papeds as above. Bake in the preheated oven for 5 to 8 minutes or until cooked and gets crisp with out getting burnt.
  • Remove the muffin tray from the oven. Cool a little so the paped cups get crisp ( if left for too long they tend to get soggy ).
  • Remove the cups and store in dry air tight containers until needed to be used.
  • Just before serving, fill with filling of choice and serve immediately in style.

Birds Nest

Share Button

image1

image2

image3

image4

image5

image6 (1)

image7

image8

image9

Preparation time :  20 minutes
Cooking time      :  35 minutes
Serves                :  5-6 members

Description

Deconstructing a dish…. I did get to hear this for the first time watching master chef Australia. Took me time to know what it means and how. Well it’s no high end mathematics but the regular cheats way we home chefs do to represent our regular dishes in a new avatar. This birds nest as well is just a deconstruction done to my regular cutlets when I had to host a special feast for guests at home. It’s always a joy to do dishes that are with in your comfort zone when pressed for time to entertain. Your entire system just works fine like a computer knowing what to do exactly even when blind folded. So this was the best option I had in mind to cheat the guests and all at home with this new thrillingly innovative reconstructed dish. I was blown away to watch it transform into some thing beautiful. Tasted it and was a pleasing mix of textures, Devine with the crispy vermicelli and a bite of the green peas. This dish sure has taught me that taste does matter but the visual look and presentation of any dish matters equally. As , if I had made these into cutlets I should have sure had left overs but with its new deconstructed look it was all let to graze, vanishing in seconds which made me smile with this sure fire crowd pleasure.

Ingredients
Quantity
Potato1/2 kg ( boiled , peeled and mashed )
Boneless chicken200 gm ( optional )
Turmeric powder1/4 tea spoon
Onion3 chopped
Garam masala powder 1/4 tea spoon
Green chillies4 crushed
Ginger garlic paste1/2 tea spoon
Red chilli flakes1 tea spoon
Coriander leaves2 table spoon chopped
Mint leaves 1 table spoon chopped
Pepper and saltto taste
Lime juice1/2 lime
Egg1 beaten with salt and pepper to taste
Fried vermicelli2 cups
Oil2 table spoons and to deep fry
Boiled green peas1 cup
Boiled sweet corn1/4 cup

Method

  • Boil chicken with turmeric powder, ginger garlic paste and salt to taste. Cook till dry n shred the chicken.
  • Heat 2 tablespoons of oil in a non stick kadai. Add onions and green chillies and fry to translucent. Add all the other ingredients one by one except for egg, vermicelli, lime and oil to shallow fry.
  • Sauté till all the flavours infuse together. Remove from flame add lime juice. Mix well taste and adjust seasoning and cool.
  • Make equal goose berry sized round balls of the potato – chicken mixture.
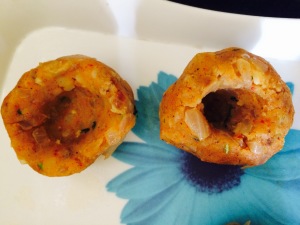
  • Insert your thumb into the center and just widen the sides to get a shallow dent like a nest .
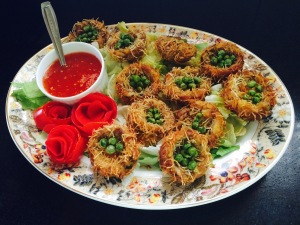
  • Dil the nests into beaten egg. Then place over the vermicelli and make sure it sticks all around with out the nest shape being spoiled. Do the same to all the nests .
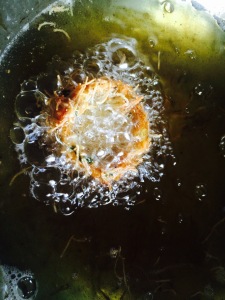
  • Heat oil to medium high and deep fry the birds nests in batches of 3-4 on both sides for 2 minutes on each side to a golden brown in colour gently.
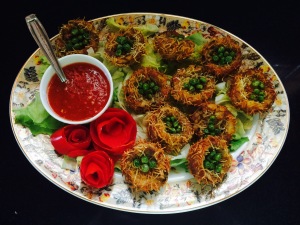
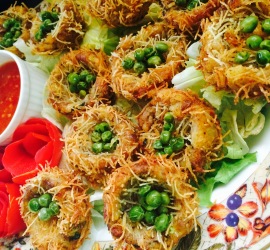
  • Drain over absorbent paper. Fill the crisp nests with boiled green peas and sweet corn ( I was out of stock in my pantry and just had to go ahead with green peas alone ).
  • Serve hot with tomato ketchup .

Monaco biscuit canopies

Share Button


image2(1)

image1(1)

Preparation time : 15 minutes
Cooking time      : 10 minutes
Serves                : 6-8 people


Description

By gone days of utter innocence of flipping magazine pages as a kid just gazing at all the colour full pages of attractive advertisements and movies stars. The image of Monaco biscuits stacked up with edible goodies over it always made me drool with the scheduled time table of food served at boarding school. I always wondered how it would taste and who serves such stylish visually attractive food at homes ?? Even then not realising that my passion was food and cooking. The Monaco image just vanished away from my mind as days, months and years passed by. Having to entertain some guests at home, I was fed up with the regular starters I always serve. Pondering around in my mind for an easy but impressive starter…. The image of my by gone days of the Monaco biscuits that haunted me just popped up in my mind. Well now was the time to execute the image to reality. I remember seeing cheese cubes, olive slices, tomato bits on top the biscuits. I had none of the above in my pantry. I just assembled the biscuits with ingredients That I thought might taste good. Had a fast taste before serving to guests. My fantasy of tasting the canopy in style was thrown in to the bin with reality taking over but the taste was sure worth the wait after all the by gone years.
 

Ingredients
Quantity
Monacco salted biscuits1 packet
Red , yellow and green capsicumchopped each colour 1/8 cup
Sweet corn3 tablespoons
Carrot1 small grated
Boiled eggs2 chopped ( optional)
Boiled Chicken bits1/2 cup ( optional)
Mayonnaise1/2 cup
Tomato sauce4 tablespoons
Sugar1 tablespoon
Saltto taste
Red chilli powder1/4 teaspoon


Method

  • Mix mayonnaise, sugar, salt, tomato sauce and red chilli powder together until the sugar dissolves. Taste and adjust seasoning. Keep aside.
  • Mix the chopped red, yellow and green capsicum with sweet corn and carrot. Add the mayonnaise mix to the mixed veggies and mix well.
  • Just before serving. Assemble the canopy with topping each biscuit first with the veggie mayonnaise mix, sprinkle with chopped boiled eggs and top with a chicken piece.
  • Serve immediately or else the canopies tend to get soggy.

Notes

  • Vegetarians can avoid the egg and chicken used. Instead can opt for boiled potatoes, paneer, broccoli flower lets etc..
  • Let your imagination rule and create your favourite taste canopy.

Chicken -65 bajji

Share Button

 
image2
 
image1
 
Preparation time : 20 minutes + one hour marination time
Cooking time      : 3-4 minutes for each batch deep fried
Serves                : 6 members
 
Description
My first cousin brother’s Newly wedded wife brought a big casserole on her first visit to mom’s place. She opened the casserole in the tea table. The smell from the casserole just travelled out into each one of us on the table.. Eagerly peeped into the casserole and saw the age old regular bajji bits. I was like “umm it’s just bajji..”. She served it to all of us and with my first bit was surprised as it was no way a normal bajji but a chicken bajji and that’s where the aroma just took all of us in table for a spin. I immediately got the recipe from her and got to know its not just a chicken bajji but a chicken – 65 bajji. The outer cover crisp with the chicken really soaked with spicy flavours, moist and succulent. I could not stop with a few and had to force fully ban myself from them to keep up to the standards of being a decent sister- in- law in front of the newly wedded bride. Once they were gone, ran to the table to taste a few again but it was sheer disappointment with the casserole being wiped out clean. My put up decency attitude punished me for sure. Back home and the first thing was to try the chicken-65 bajji. It was a big hit with being added to our regular menu and is a must on the ifthar table every alternative day while breaking our fast.


Ingredients for the chicken

Ingredients
Quantity
Bone less chicken 1/4 kg cut into very tiny bits
Ginger garlic paste1/4 teaspoon each
Chilli powder 1 teaspoon
Turmeric powder1/8 teaspoon
Curd1/4 cup
Cinnamon1 inch piece
Cloves2
Cardamom1
Pepper powder1/4 teaspoon
Cumin powder1/4 teaspoon
Fennel seed powder1/4 teaspoon
Garam masala powder1/4 teaspoon
Lime juice1/2 lime
Vinegar1/4 teaspoon
Saltto taste


Ingredients for the bajji batter

Ingredients
Quantity
Gram flour1 cup
Rice flour1/4 cup
Red chilli powder1/2 teaspoon
Asafoetidaa pinch
Saltto taste
Soda salt1/4 teaspoon
Orange red food coloura pinch (optiona)
Water1/2 cup or more
Oilto deep fry


Method

  • Grind all the ingredients together except for chicken mentioned under the chicken ingredients to a smooth paste.
  • Marinate the cleaned chicken in the ground masala for one hour or more.
  • Cook the chicken bits with the marinated masala to done and dry with out adding water . Remove from heat and cool completely. (I follow up to this step in advance and store the chicken bits in the refrigerator for easy access later when pressed for time)
  • Mix all gram flour, rice flour, red chilli powder, soda salt, asafoetida and food colour together.
  • Add water gradually and mix well to get a semi thick batter that’s lump free.
  • Heat oil to deep fry. Dip each chicken piece into the batter making sure the batter is coated well all around. Drop into hot oil and deep fry to crisp and golden. They will pop up once cooked. Drain and serve hot as it is. No dips needed as it tastes Devine by itself.

Chicken pakoda

Share Button

image1(1)

image2(1)

image3

image4

image5

Preparation Time   : 25 minutes

Cooking Time        : 15 minutes

Serving                  : 6 members

Description

As a new bride, very rarely did I get an opportunity to dine out. Mainly because of the few good restaurants we had at hubby dear’s place (oops my place too). I remember a new restaurant named neelambari was open and out of the blue we ended up there for dinner. I ordered chicken pakoda for starters and it was yummy yum. There after on our every visit to the hotel the chicken pakoda was a must. A few years later, the restaurant was shut down and back to square one with no going out to dine. The chicken pakoda did haunt me every now and then. Once I had gone to help hubby dear’s aunt- sara amma for a party arranged at her home. She was prepping for some thing and asked her what it was? She told chicken pakoda for starters . I could hear the bells ring in my heart but it paused immediately when the though came in… Will it taste like the one in neelambari restaurant?? If yes, hurray or else just keep craving. I made sure to take note about the ingredients to the procedure. Waited for the star moment to give it a try and it tasted perfect exactly like the neelambari hotel chicken pakoda. The trick was to add hot oil to the batter to get crisp pakoda’s creating a spark. I have been making this simple to make pakoda’s from then on but every time I re- check with Sara amma once again as it’s made only during the Iftar day’s taking our table by storm always.

Ingredients

Ingredients
Quantity
Bone less chicken 1/4 kg cut into chunks
Red chilli powder1 teaspoon
Turmeric powder1/4 teaspoon
Ginger garlic paste1 teaspoon
Salt to taste .

Method for chicken

  1. Marinate cleaned chicken with all the above ingredients for half an hour. Pressure cook for one whistle with out water.
  2. Once the whistle sound subsides. Open and boil until the the cooked chicken bits get dry. Cool and shred the chicken pieces.

Other ingredients

ingredients
Quantity
Big onions4 sliced
Curry leaves few chopped
Green chillies3 chopped
Red chilli powder1 teaspoon or to taste
Ginger1/4 inch piece grated
Chick pea flour / besan / kadala maavu1 cup
Rice flour100 grams
Hot oil 5 tablespoons
Salt to taste
Soda salt 1/4 teaspoon
Cashew nuts 2 tablespoons cut to bits
Oil to deep fry

Method for chicken pakoda

  1. Mix all the ingredients together mentioned above except for oil to deep fry along with the chicken shredded.
  2. Mix well with out adding water and set aside for ten minutes. The onions will let out enough moister to the batter to get a sticky thick mass and the hot oil added also helps to give a crisp pakora.
  3. Heat oil to deep fry. Drop one tablespoon of batter into to the hot oil in batches.
  4. Deep fry to crisp and golden in color.
  5. Drain and serve hot as it is with no dips.

Coconut milk semolina sweet balls

Share Button

image1(2)

image2

Preparation Time   : 10 minutes + 30 minutes to soak

Cooking Time        : 5 minutes for each batch deep fried

Serving                 : 6-8 members

Description

Very rarely did my mother-in-laws mother-nannima ( that’s how we called her ) visit us when we were in a joint family set up but the few times of her visit she would cook some family style meals or make appalam’s. Very simple, tasty and soul full food for sure. Towards her last few years, she did stay with all of us. Harm less soul in her own space but never wanted cold food or thin dosas. Other than these two demands… All she wanted was a lot of love . She would tell stories to the little ones ( my kids ) at home. I was called for only to cut her nails and check her meals before being served to her. She kept complaining ( this is when she lost her eye sight completely) about rats biting her toe thumb. We all were really worried and did the needful immediately. A week passed by and she kept complaining the same. One day, we were all chit chatting in the living room and suddenly heard nannima shout out rat, rat.. We ran in to see my nephew (brother-in-laws one year old son) biting her toes. We grabbed him and all of us laughed our guts out seeing the actual rat.. Stories and memories to be cherished of living in a joint family…. Coming to the dish… This was one snack that nannima would make for tea on her visits. The first time I had this full flavoured indulgence, I had to ban myself from eating it as it just went in non- stop. A few days back was craving for this home cooked comfort snack and felt lost as I didn’t know the recipe. With my fingers crossed asked my mother- in- law and luckily she did know. Made it but the authentic flavour of nannima’ hands  that offered warmth and a sense of well being and satisfying carvings were surely missing.  I curse myself for not taking note of the hearty recipes she used to cook for us… I can’t be blamed though as I was just in my teenage when all this happened ….

Ingredients

Ingredients
Quantity
All purpose flour / maida1 cup
Semolina / rawa1/2 cup
Sugar1 cup
Salta pinch
Cardamom powder2 teaspoons
Soda salt1/4 teaspoon
Coconut milk1 cup ( might require less or more depending on the quality of flour used )
Oilto deep fry

Method

  1. Mix all the ingredients together except for oil to deep fry. Add coconut milk little at a time to get a thick bajji batter consistency.
  2. Set aside for half an hour. The batter might get too thick as the semolina swells. Add little more coconut milk to get to the right bajji batter consistency. (at times this Taste and Check seasoning.
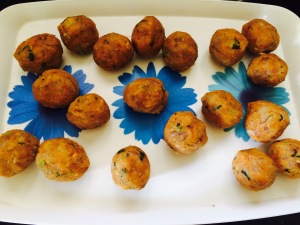
  3. Heat oil to deep fry. Drop balls out of the batter in batches and deep fry to crisp and golden in color. Drain and serve hot.

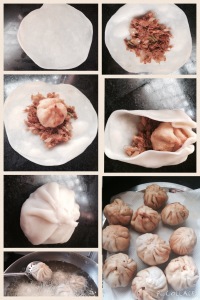
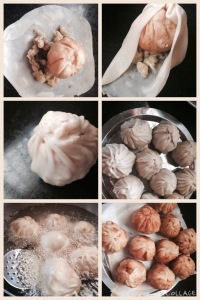
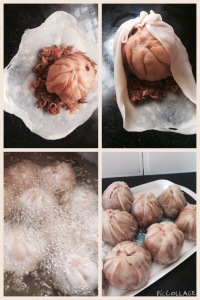
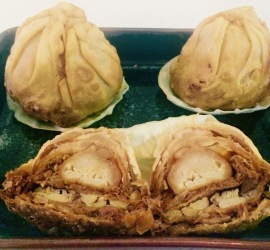
Sweet and savoury filled pumpkin’s /erachi nirachathu

Share Button

image2(1)

image3

image7

image8

image9

image10

image1

Preparation Time  : 50 minutes

Cooking Time       : one hour

Serving                 : 5 members

Description

I really am not sure from where my love for malabar food started as the only malabar connection I had was my best buddy sulu and a few home made treats she would bring to school after every holiday. The first time I really got to relish a typical malabar treat was when I was taken along with a heard of people ( around 30-40 of us… Gosh we were a crazy heard ) to see a bride  for my moms first cousin brother in Kerala. Cant remember the name of the place but the house was in between a rubber forest, lush green and silent. We were served a grand spread of snacks and tea . Every snack on the table was home made and all the snacks were so different and my first time for sure. The bride was equally good looking like the grand spread and we made sure to add her to our crazy heard. Even till date I keep telling my mom that afsina aarrs is the best looking daughter- in- law of our family. Later I got to know the pappla’s are known for their fondness for good food. Palagaram or savoury snacks are loved by the entire community and had between meals. This snack recipe was taken from my moms recipe book which was gifted to her by a pappla friend . Though the book has stained pages, she has never made this snack for us being her true lazy to cook self. I made it with two minds following the recipe as it had two fillings one sweet and the other savoury. Wanting to be loyal to the recipe went ahead with the method for filling but changed the dough ingredients a bit as I felt the given dough ingredients would give the dish a chewy cover. The multiple layers of cover and fillings add to its unique flavours. A very indulgent snack but worth every calorie and when eating a malabar fare you should forget about your waist line.

Ingredients for mince filling

Ingredients
Quantity
Minced meat200 grams
Turmeric powder1/4 teaspoon
Red chilly power1/4 teaspoon
Coriander powder1 teaspoon
Salt to taste
Big Onions2 chopped
Green chillies4 chopped
Ginger garlic paste1 teaspoon each
Garam masala powder1/2 teaspoon
Coriander leaves1/4 bunch chopped
Oil 2 tablespoons

Method for mince filling

1. Mix cleaned mince meat with turmeric powde, red chilly powde, coriander powder, salt to taste and little water together. Cook to done and dry consistency.
2. Heat oil in a kadai, add onions and green chillies. Fry to light brown in color. Top with ginger and garlic paste. Fry to crisp. Add boiled mince meat, garam masala powder and coriander leaves. Mix well and remove from heat. Cool completely and keep aside.

Ingredients for egg filling

Ingredients
Quantity
Eggs4
Sugar2 tablespoons
Ghee 2 tablespoons
Cashew nuts 2 tablespoons cut into bits
Raisins 2 tablespoons
Cardamom powder 4 pods powdered finely
Salt a pinch

Method for egg filling

1.Beat eggs with sugar and salt.
2.Heat ghee in a frying pan. Add cashew nuts and raisins. Fry to a golden brown color. Pour the beaten eggs and scramble adding cardamom powder. Remove and cool completely.

Ingredients for the cover

Ingredients
Quantity
Ingredients for the cover 250 grams
Saltto taste
Oil1/4 cup
Water enough to get a smooth dough

How to proceed

  1. Take a small ball of dough. Roll out to a 6 cm round. Place one teaspoon of egg filling in the middle. Get the edges of the circle together towards the center to get a pumpkin shape. Pinch off excess flour from the top. Heat oil to deep fry. Fry the filled pumpkin shaped pot to a golden color. Drain and set aside. ( I did ten pieces similarly at a time making it easier )
  2. Roll a bigger round out of the dough about 10-12 cm which is bigger than the first circle. Place two teaspoons of mince filling in the center. Top with the first egg  filled deep fried pumpkin. Bring the edges of the circle toward the center covering the first small pumpkin. Pinch of the excess dough. Deep fry in hot oil to a golden brown color. Drain and keep aside.
  3. Do the same repeatedly with bigger rolled dough rounds each time and filling alternatively with egg filling and mince filling. Deep fry each time you stuff a filling.
  4. Four layers is good enough but you want a smaller pumpkin’s you can stop with three layers. If using three layers make sure to use two layers of mince filling and one layer of egg filling.

Layered moon samosas

Share Button

image5

image2

image4

image6

Preparation Time   : 1 hour

Cooking Time        : 35 minutes

Serving                  : 8 members

Recipe source       : Pavithra elangovan

Description

There are a few dishes that I don’t cook but have particular individual’s cook it when ever they drop by to visit me . Like wise, my nanny cum cook from moms place fathima used to make  samsa’s ( that’s how she pronoun’s it- samosa ) that were rustic looking,Devine in taste and high in calorie’s and my comforting childhood favourite.This snack is usually made as an offering in huge amounts (500 -1000 pieces) during the holy month of Ramadan in mosques by people willing to distribute to those fasting.fathima makes this snack every year with her sister and mother and does so. This has actually made her an expert in this dish. When ever she makes this at home, I just keep taking note of the procedure but never attempted to give a try. I came across a similar recipe in a fellow foodie blogger pavitra elangovan’s blog with a more posh look but a sweet snack. I followed her recipe to the core with no changes but just opted for a savoury non vegetarian filling. Quite a pains taking job but worth the work when you have a bite into this indulgent snack. The layers of distinct crumbliness and the twisted pattern used to seal the edges together add so much glamour to the snack. It’s always a challenge with food to get both taste and texture right. For an extra touch of indulgence  gear up to spoil all your loved ones with these tempting treats. I assure you they will earn you loads of brownie points.

Ingredients for the Layered cover

Ingredients
Quantity
Flour1/2 cup
Rice flour 1 teaspoon
Salta pinch
Oil to deep fry

Method for the layered covering

Mix all the ingredients together mentioned above for the layered covering. Add little water and knead to a dough that is slightly stiffer than a chapathi dough. Keep aside covered for fifteen minutes.

Ingredients for Filling

Ingredients
Quantity
Boneless chicken1/4 kg
Ginger garlic paste 1/4 teaspoon each
Saltto taste
Turmeric powder1/4 teaspoon
Onions5 big chopped
Green chillies 4 chopped
Mixed vegetables - carrots , beans , cabbage , green peas chopped and boiled in water with salt 1 cup
Garam masala powder1/4 teaspoon
Mint leavesfew
Coriander leavesone hand chopped
Pepper powderto taste
Oil2 tablespoons

Method for chicken filling

  1. Pressure cook cleaned chicken , salt , turmeric powder, ginger garlic paste and little water for one whistle.
  2. Bring to boil and Reduce the water. Cool completely and shred the chicken to treads ( I run it in the food processor for a second ).
    Heat oil in a non stick board pan. Add onions and fry to translucent.
  3. Add green chilies, boiled chopped mixed vegetables, shredded chicken, mint leaves, coriander leaves, salt, garam masala powder and pepper to taste.
  4. Mix well and lower the flame and keep stirring for 3 minutes letting all the flavours infuse together. Remove from heat, cool and set aside.

Other ingredients to brush in between each layer of disc

ingredients
Quantity
Ghee / oil 1/2 teaspoon for each layer
Rice flour1 teaspoon for each layer

How to proceed

  1. Divide the dough into equal five lemon size balls. Roll each ball into 8 1/2  to 9 inch equal circles. Brush 1/2 teaspoon ghee on one side of the first rolled round disc.
  2. Sprinkle one teaspoon rice flour on top of the brushed ghee. Slightly rub it all over.Place another rolled disc on top and do the same with ghee and rice flour.
  3. Stack all the five rolled discs with applying ghee and sprinkling rice flour in between each disc. Once they are stacked up , using a rolling pin,slightly roll with little pressure to get even circles.
  4. Make sure not to give too much pressure. Starting from one end make a tight roll.Cut the tight roll into 10-11 equal one inch thick slices.Dust rice flour on one slice, with out using much pressure roll with a rolling pin to 3- 3 1/2 inch disc.
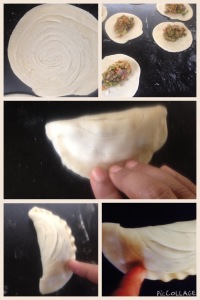
  5. Fill with 1 1/4 teaspoon of cooled filling in the centre. Apply water around the edges. Close to get a semi circle.starting from the left corner,pinch the edges together.
  6. Make a swirl inwards towards right angle. Do the same until you reach the other edge to get a twisted pattern on the edges and sealing the filling.
  7. Do the same to all the slices and filling. Heat oil to deep fry.Deep fry in low medium heat until both sides are golden brown in batches of 3 to 4 at a time.
  8. Drain over absorbent paper. Serve hot as it is with no dips .

Notes

  1. Place the tightly rolled log in the refrigerator for ten minutes and then cut into discs.
  2. Doing so the ghee and roll dough get a bit firm making it easy for us to work.
  3. Place the cut discs also in the refrigerator for five minutes and then roll,so the layered stay intact when rolling and filling.
  4. You can use flour to sprinkle in between each rolled disc but rice flour gives a crispy cover.
  5. The same can be done with a sweet filling with fried grated coconut , fried cashew nuts + raisins , poppy seeds.Cool and add sugar to taste with cardamom powder.
  6. You can make a mince meat filling substituting the chicken in the recipe.