Daily Archives: September 12, 2015


Thakkali jam / Tomato sweet

Share Button


image1
 
Preparation time : 20 minutes
Cooking time      : 15- 20 minutes
Serves                : 6 members
 
Description
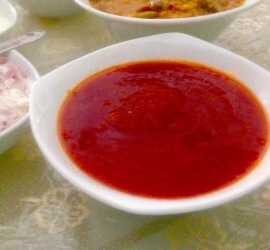
Through out Tamil Nadu the ravuthar community (Tamil speaking Muslims) in each district have their own version of a sweet served with biriyani at weddings and festivals mainly. It’s usually made with a vegetable as that’s the age old tradition. But now the new age fruits and bread sweets are very much in. In Palghat-Coimbatore region we serve the white pumpkin sweet called as pusanikka mittha which is rarely made at homes but served only in weddings, festivals or gatherings where the cooks come and cater. Here, Deep South in tirunelveli at hubby dear’s place it’s beetroot sweet or tomato sweet served with biriyani’s authentically which is made at all homes as well. Now a days they serve pineapple jam, raw papaya sweet etc… my mother-in- laws special is adding Apple bits to the beetroot jam . The tomato sweet takes first place though as its always access able in the local market. They use the country verity tomatoes alone as it gives a sweet and sour taste to the dish. It depends on each individual as how they like to have their sweet… To have it with the biriyani (like hubby dear does) or in the end after you are done with your meal (like I do). The sweet is served beside the biriyani on the same plantain leaf or plate. The gloss with the seeds of the tomato popping to inject a dose of freshness is sure a killer with sharpness, acidity and sweet to balance. This recipe is simple, keeping it so to give respect for the ingredients used. It’s one of those dishes that go wrong the minute you try to over complicate it. The valve of simple traditional fare that has travelled in its original from from one generation to the other. Taste may be evolving, but nothing can replace the original dishes that our ancestors patiently created to achieve the maximum possible flavors with pleasure.


Ingredients
Quantity
Tomato ( country variety not the hybrid ones )1 kg
Sugar2 cups or to taste
Cardamom powder1/4 teaspoon
Salta pinch
Ghee3 tablespoons
Cashew nut2 tablespoons chopped to bits
Raisins1 tablespoon

 
Method

  • Cut each washed whole tomato with a sharp knife in a cross pattern on the bottom half way, keeping the top intact.
  • Bring a large pot of water to boil that can accommodate the entire lot of one kg tomatoes in it. Add the half way cut whole tomatoes and keep covered for five minutes over medium flame.
  • Remove from heat and cool completely. Drain the tomatoes, retaining the water. Peel the skin of each tomato.
  • Blitz the peeled tomatoes in a food processor making sure not to grind the seeds. We need a purée that’s not very coarse but smooth with the tomato seeds whole.
  • Pour this tomato purée into a non stick pan and reduce the water content in it. Takes about 10-15 minutes. Keep stirring occasionally making sure not to burn the bottom.
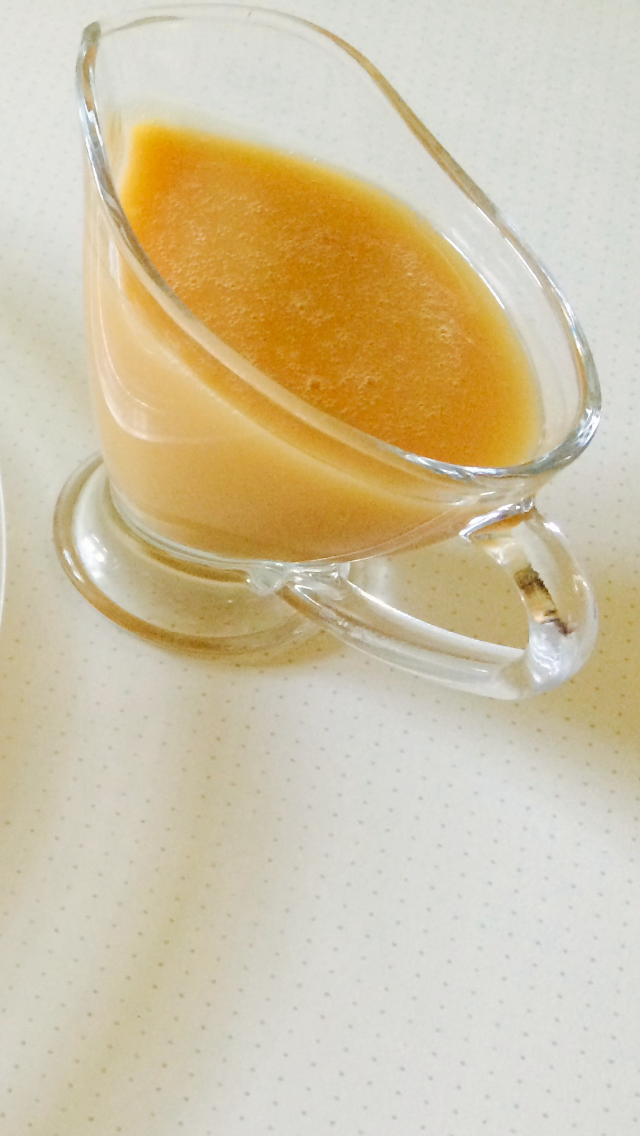
  • Add sugar, a pinch of salt and cardamom powder. Mix well. The tomato purée becomes loose once the sugar melts. Cook until you get a semi thick purée that gets to look glossy.
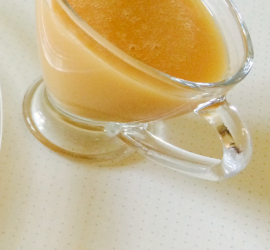
  • Taste and adjust sweetness to taste. Remove from heat. Heat ghee, add the cashew bits and raisins. Fry to golden. Pour over the prepared tomato sweet. Mix well and serve at room temperature with biriyani.

 
Notes

  • The reserved tomato boiled water can be used to make rasam or can be added to any savoury dishes instead of water.
  • Make sure not to purée the boiled peeled tomatoes too much. The beauty of this sweet is in seeing the whole seeds once cooked that add a pop to the dish with a slight crunch too.
  • After adding sugar, if the tomato purée is cooked for longer than needed it tends to get to a halwa consistency. So make sure to remove it from heat once it gets to a semi think gravy consistency.


Dalcha

Share Button

 
image1(1)
 
image2(1)
 
image3
 
Preparation time : 15 minutes
Cooking time      : 25 minutes
Serves                : 4 members
 
Description
The word dalcha and the dish by itself is originally very own to Hyderabad cuisine. I have no idea as how this mighty dalcha landed up in all ravuthar (Tamil Muslim) homes as a must side dish for biriyani. The ravuthar’s of the southern districts of tamilnadu are unique, sharing similarities with Sri Lankan cuisine and using un usual ingredients like pandan leaves, dried tuna, poppy seeds, urugai or whole limes that are pickled in salt and used in various preparations. Each district and home have their own variations of the dalcha with slight change of the use of vegetable combination with mutton bones + fat + dal. This recipe is that I learnt from my mother-in-law which is a like through out the tirunelveli region. The dalcha recipe, allows the true characters of the vegetables used to shine, resulting in a creation far greater than the sum of their parts. There is no better way than to rely back to our roots and cook the old school way. I remember, in a wedding reception of one cousin bother in the family where the groom was ravuthar and the bride a mappla (malayali Muslim). We were served a grand malabar feast with layered biriyani. All the old women were shouting out loud asking for dalcha saying, the biriyani is shocking us.. Get us some dalcha. The rest of us around were all giggles as the ravuthar’s just can’t have biriyani with out their dalcha. True blue old haunts we are. I instantly sensed the gap in understanding food from place to place. yet again more to know, more to learn and more to understand as always.


Ingredients
Quantity
Yellow split peas / Toovar dal1 cup
Bengal gram ( Kadala paruppu)3/4 cup
Oil1 teaspoon
Mutton bones + fat 100 grams
Turmeric powder1/4 teaspoon
Ginger paste1/4 teaspoon
Garlic paste1/4 teaspoon
Egg plants1/4 kg each cut into 4 slices
Drum stick1 cut into finger length pieces
Yellow pumpkin1 slice cut into cubes
Raw mango peeled1 , cheeks cut into long thick pieces + seed
Big Onion 1 sliced
Small onionsone hand crushed
Green chillies6
Tomatoes2 medium sized chopped
Coriander leaves2 tablespoons chopped
Saltto taste
Red chilly powder1 teaspoon
Turmeric powder1/4 teaspoon
Cumin powder1/2 teaspoon
Fennel powder1/2 teaspoon
Coriander powder1 teaspoon
Tamarind pulp4 tablespoons or to taste
Coconut paste5 tablespoons

Ingredients to temper

Ingredients
Quantity
Gingely oil2 tablespoons
Mustard seeds 1 teaspoon
Fenugreek seeds1/4 teaspoon
Cumin seeds1/4 teaspoon
White urad dal1 teaspoon
Curry leaves1 tablespoon
Small onions1/2 hand chopped
Ginger garlic paste1/4 teaspoon each


Method

  • Heat a small pan with one teaspoon of oil. Add ginger and garlic paste. Sauté to crisp and golden. Top with the cleaned mutton bones and fat. Stir well for a minute or so until the colour of the bones and fag change. Remove from heat and keep is aside.
  • Pressure cook both the dals, the sautéed mutton bones + fat and turmeric powder with just enough water to well cooked. About 2-3 whistles. Open the pressure cooker only after the pressure in the whistle subsides.
  • In a large pot, mix the cut egg plants, drum stick, yellow pumpkin, raw mango, big onion slices, small onion crushed, slit green chillies, tomatoes, coriander leaves, salt to taste, red chilli powder, cumin powder, fennel powder, coriander powder. Mix well. Add just enough water to boil the mixed vegetables and cook to 3/4 done.
  • Add tamarind pulp and cook the vegetables to done. Drain excess water from the pressure cooked dal. Mash the pressure cooked dal and bones with the bake of a big spatula to smooth. Add it to the cooked vegetables. Mix well. Add coconut paste and bring to boil.
  • Check seasoning for salt, sourness and chilli. All the three must be more than required as only then when tempered. The dalcha tastes correct.
  • Heat the oil,add fenugreek seeds, mustard seeds, urad dal and cumin seeds. Once they crackle. Add the curry leaves and small onions. Once the small onions are golden. Add the ginger and garlic paste. Sauté to brown and crisp. Pour over the pot of dalcha.
  • Immediately pour a ladle of dalcha into the tempered hot vessel and swirl getting in all the flavours of the tempered pot into the dalcha. Pour into the dalcha pot and mix well.
  • Serve hot along with biriyani, ghee rice (nei choru) or coconut milk rice (thenga choru) as a side dish.


Sulu’s crab fry

Share Button


image2

image1

Preparation time : 15 minutes
Cooking time      : 20 minutes
Serves                : 4 members

Description
The first time I got to taste crab was at my aunt Thasneem’s place in chennai. Crab was never cooked or served in our homes before. My first try, I did get mesmerized with sweet taste of the crab flesh and the most interesting part was to fight out the shells to get the flesh part. At that point of time as a kid it felt like a treasure hunt game to me. As we enjoyed the crab, mom at home started to cook it as well. Here at hubbies place, it’s just my father-in-law and me who enjoy the crab. Latter my boy and hubby dear’s niece joined in. I know to prepare the crab in two ways. One is typical Indian and the other oriental. This recipe was shared to me by my best buddy sulu and that’s why this dish has such a name. The fried spices lend well to create delicious flavor profile The day I gave this dish a try at my home kitchen, I had my boy out of his bed early. Him being some one who loves to sleep, there has to be a great source of motivation to get him out of his bed each morning. The aroma of this dish did it for him where he was beside me asking for a taste even before the dish was cooked. My mind just travelled to my friend sulu’s home as she’s got four boy’s and imagine the situation there. A side of this kind of dish is perfect with almost any kind of meal. What more do you need, lift the dish straight to the table and serve with loads of love.


Ingredients
Quantity
Crab1 kg
Whole Peppercorns3 tablespoons
Whole coriander seeds2 tablespoons
Fennel seeds1 tablespoon
Ground big Onion paste2 cups
Turmeric powder1 teaspoon
Saltto taste
Ginger garlic paste1 tablespoon
Coconut oil4 tablespoons
Curry leaves2 teaspoon


Method

  • Dry roast whole peppercorns, whole coriander seeds and fennel seeds separately until a good aroma arises making sure not to burn the spices. Cool completely and powder the spices together in a food processor.
  • Heat 2 tablespoons of coconut oil in a wide pan. Add the onion paste and sauté to translucent until raw smell is not there. Top with Ginger and garlic paste. Sauté to crisp.
  • Add the powdered dry roasted masala powder, turmeric powder, crab and salt to taste. Toss well for a minute. Add little water, cover and cook stirring occasionally for 10-15 minutes or until cooked through. Remove from heat.
  • Heat the remaining coconut oil in another pan. Add the curry leaves. Once they splutter. Pour the cooked crab gravy over and mix well. Simmer for 5 minutes letting all the flavours infuse and oil floats on top.
  • Serve hot with boiled white rice or chapathis.

Monaco biscuit canopies

Share Button


image2(1)

image1(1)

Preparation time : 15 minutes
Cooking time      : 10 minutes
Serves                : 6-8 people


Description

By gone days of utter innocence of flipping magazine pages as a kid just gazing at all the colour full pages of attractive advertisements and movies stars. The image of Monaco biscuits stacked up with edible goodies over it always made me drool with the scheduled time table of food served at boarding school. I always wondered how it would taste and who serves such stylish visually attractive food at homes ?? Even then not realising that my passion was food and cooking. The Monaco image just vanished away from my mind as days, months and years passed by. Having to entertain some guests at home, I was fed up with the regular starters I always serve. Pondering around in my mind for an easy but impressive starter…. The image of my by gone days of the Monaco biscuits that haunted me just popped up in my mind. Well now was the time to execute the image to reality. I remember seeing cheese cubes, olive slices, tomato bits on top the biscuits. I had none of the above in my pantry. I just assembled the biscuits with ingredients That I thought might taste good. Had a fast taste before serving to guests. My fantasy of tasting the canopy in style was thrown in to the bin with reality taking over but the taste was sure worth the wait after all the by gone years.


Ingredients
Quantity
Monacco salted biscuits1 packet
Red , yellow and green capsicumchopped each colour 1/8 cup
Sweet corn3 tablespoons
Carrot1 small grated
Boiled eggs2 chopped ( optional)
Boiled Chicken bits1/2 cup ( optional)
Mayonnaise1/2 cup
Tomato sauce4 tablespoons
Sugar1 tablespoon
Saltto taste
Red chilli powder1/4 teaspoon


Method

  • Mix mayonnaise, sugar, salt, tomato sauce and red chilli powder together until the sugar dissolves. Taste and adjust seasoning. Keep aside.
  • Mix the chopped red, yellow and green capsicum with sweet corn and carrot. Add the mayonnaise mix to the mixed veggies and mix well.
  • Just before serving. Assemble the canopy with topping each biscuit first with the veggie mayonnaise mix, sprinkle with chopped boiled eggs and top with a chicken piece.
  • Serve immediately or else the canopies tend to get soggy.

Notes

  • Vegetarians can avoid the egg and chicken used. Instead can opt for boiled potatoes, paneer, broccoli flower lets etc..
  • Let your imagination rule and create your favourite taste canopy.

Chicken -65 bajji

Share Button

 
image2
 
image1
 
Preparation time : 20 minutes + one hour marination time
Cooking time      : 3-4 minutes for each batch deep fried
Serves                : 6 members
 
Description
My first cousin brother’s Newly wedded wife brought a big casserole on her first visit to mom’s place. She opened the casserole in the tea table. The smell from the casserole just travelled out into each one of us on the table.. Eagerly peeped into the casserole and saw the age old regular bajji bits. I was like “umm it’s just bajji..”. She served it to all of us and with my first bit was surprised as it was no way a normal bajji but a chicken bajji and that’s where the aroma just took all of us in table for a spin. I immediately got the recipe from her and got to know its not just a chicken bajji but a chicken – 65 bajji. The outer cover crisp with the chicken really soaked with spicy flavours, moist and succulent. I could not stop with a few and had to force fully ban myself from them to keep up to the standards of being a decent sister- in- law in front of the newly wedded bride. Once they were gone, ran to the table to taste a few again but it was sheer disappointment with the casserole being wiped out clean. My put up decency attitude punished me for sure. Back home and the first thing was to try the chicken-65 bajji. It was a big hit with being added to our regular menu and is a must on the ifthar table every alternative day while breaking our fast.


Ingredients for the chicken

Ingredients
Quantity
Bone less chicken 1/4 kg cut into very tiny bits
Ginger garlic paste1/4 teaspoon each
Chilli powder 1 teaspoon
Turmeric powder1/8 teaspoon
Curd1/4 cup
Cinnamon1 inch piece
Cloves2
Cardamom1
Pepper powder1/4 teaspoon
Cumin powder1/4 teaspoon
Fennel seed powder1/4 teaspoon
Garam masala powder1/4 teaspoon
Lime juice1/2 lime
Vinegar1/4 teaspoon
Saltto taste


Ingredients for the bajji batter

Ingredients
Quantity
Gram flour1 cup
Rice flour1/4 cup
Red chilli powder1/2 teaspoon
Asafoetidaa pinch
Saltto taste
Soda salt1/4 teaspoon
Orange red food coloura pinch (optiona)
Water1/2 cup or more
Oilto deep fry


Method

  • Grind all the ingredients together except for chicken mentioned under the chicken ingredients to a smooth paste.
  • Marinate the cleaned chicken in the ground masala for one hour or more.
  • Cook the chicken bits with the marinated masala to done and dry with out adding water . Remove from heat and cool completely. (I follow up to this step in advance and store the chicken bits in the refrigerator for easy access later when pressed for time)
  • Mix all gram flour, rice flour, red chilli powder, soda salt, asafoetida and food colour together.
  • Add water gradually and mix well to get a semi thick batter that’s lump free.
  • Heat oil to deep fry. Dip each chicken piece into the batter making sure the batter is coated well all around. Drop into hot oil and deep fry to crisp and golden. They will pop up once cooked. Drain and serve hot as it is. No dips needed as it tastes Devine by itself.

Home made instant caramel sauce

Share Button


image1

Preparation time : 5 minutes
Cooking time      : 5-6 minutes
Serves                : 5 members

Description
My recent love for any thing with caramel is on zooming high rate. When I crave for any thing sweet, the first thing that pops up in my mind is silk, smooth, melt in the mouth golden caramel . The first time I got to taste this goodness was at my friend’s place in Exeter, United Kingdom . It was on a rare day that we both alone went shopping together wondering the very English streets, enjoying every second of our girl time in style. She took me to a chocolate shop, where I bought a few expensive chocolate boxes for home and to be gifted to my in- laws. Just before billing I grabbed a packet that was placed in the billing counter. Back home the entire family started to taste the chocolates one box after the other. Only when this packet was tasted I got to know it was caramel squares with rock salt in them. Melt in the mouth goodness that sure did hit the right spot. At that moment I just lost myself with the caramel taking over me. I made sure to hide the entire packet and eat it all by myself. Shame less, greedy, mean me… My kids were small then but even that didn’t stop me from doing so. I know each mom in this world has her own secret of doing such silly things. Ever since.. Caramel is on my top list no matter what form it is in. I always buy ready made caramel sauce and stock  it up in the refrigerator. Drizzle it over any thing and every thing possible. Once, I needed the caramel sauce to be drizzled over a dates cake and found none. But I needed the caramel sauce for sure. I remembered saving a recipe for instant caramel sauce. Searched and found it . Followed the recipe and there I had a caramel sauce that was a million times better than the store brought liquid ones. This  was  smooth, thick, gooey and like silk. A recipe for sure keeps.  Now the problem is.. A lot more of licking will be done to the caramel sauce adding tons of calories into the fat me

Ingredients
Quantity
Sugar 3 cups
Butter 50 grams
Water 1 teaspoon
Vanilla essence 1/4 teaspoon
Cream 2 cups
Salt a pinch

Method

  • Heat sugar with water over a wide pan. Do not stir. Once the sugar melts and is caramelised to a light brown colour.
  • Add butter and mix well. Remove from heat adding a pinch of salt.
  • Add cream and vanilla essence. mix vigorously to combine to get a thick gooey caramel sauce. Taste and adjust sugar and salt.


Stuffed chicken semiya in bread omelet

Share Button

image1(1)

Preparation time :  30 minutes
Cooking time      :  40-45 minutes
Serves                :  8 members
Recipe source    :  saaliha Salam

Description
As sauté, fry n bake is nearing its third anniversary. I was just going through the picture gallery in my files to see all the images that have been used with recipes in sauté, fry n bake. My heart skipped a beat when I saw two images that were taken during the first anniversary celebration that has been ideal with out being posted with the recipe. Unfortunately both the images were of dishes brought for the first recipe swap by fellow sauté, fry n bake family member saaliha Salam. Well now the reason for the delay in posting was because the recipes she had e- mailed were of the new age short writing meaning new short spellings for an entire word. The laziness in me just put it off every time I wanted to post it but three years is to much though . Saaliha Salam , a cheerful down to earth, very beautiful girl as I know her has been very supportive in sauté, fry n bake and what ever I do from the start. She was one Among the first few who agreed to join in for the first recipe swap celebrations . This dish sure was a hit and vanished in seconds lining all our tummies with bits and pieces. I expected this dish to win the recipe swap competition, though it didn’t .. It won my heart for sure as my love for stuffed things is always on a high. With a big fat sorry from my side for this three year’s late post, my humble request that all of us try this recipe and compensate the delay.

Ingredients
Quantity
Semiya1cup
Boneless chicken200 gms
Onion1 Small
Tomato chopped2 tablespoons
Green chilli2 chopped
Chilli powder3/4teaspoon
Turmeric powder1/4teaspoon
Coriander powder1teaspoon
Crushed ginger garlic3teaspoon
Thick coconut milk1/2cup
Lemon juiceone lemon
Garam masala powder1/2teaspoon
Coriander leavesfew chopped
Curry leavesfew
Saltto taste
Oil and ghee1 tablespoons of each

Method

  • Cook chicken with little pepper crushed, garlic and salt.shred the chicken. Reserve the stock.
  • Heat 1tablespoon ghee in a pan and roast the semiya to light brown.
  • In a pressure cooker heat little oil and ghee.sauté onion till light brown.Add ginger paste ( 11/2teaspoon ) garlic paste(11/2teaspoon),green chilli,tomatoes and saute well.
  • Add turmeric powder,chilly powder and coriander powder. fry for a minute.Add roasted semiya and 1cup water(including the stock),1/4cup shredded chicken and salt(beware as stock has salt.Cover the lid and keep in low flame for just one whistle.Then remove from flame.
  • After 10 minutes open the lid and add garam masala,lemon juice,coriander leaves, curry leaves,and coconut milk. Mix well and keep in sim for 5 minutes.Remove from heat.


Ingredients
Quantity
Bread6(remove crust and cut into very small pieces)
Eggs4
Milk3/4cup
Pepper1/2teaspoon
Coriander leavesfew chopped
Saltto taste

How to proceed

  • In a bowl beat the eggs.then mix all the other ingredients.In a greased non stick pot(small) layer half of d bread mix.Then layer semiya chicken masala,press and level with a spoon.
  • On top spread the remaining bread mix and fill the sides with egg mix.Cover and cook for 15 minutes in low flame .
  • Then turn over to the other side carefully n cook for another 10 minutes.
  • Remove and cut into wedges and serve hot.

Notes

You can bake the same in a preheated oven at 180 degree Celsius for 40 minutes .


Pressure cooker dates cake with home made instant caramel sauce

Share Button


image3


image2


image1


Preparation time : 15 minutes
Cooking time      : 35-40 minutes
Serves                : 8 members
 

Description
Baking cakes is always a fancy thing but most of us are not comfortable with the technique it takes to bake it in an oven. There is always an ease when it’s done in our every day use pressure cooker that we feel more confident and sure. Like wise I had to make a dessert to be taken to my in – laws place for a feast where we had hubby dears NRI cousins visit all of us. I was pressed for time and opted to come up with some thing with the available ingredients at home. Checked the pantry and the refrigerator. My eyes went strait to the huge packet of dates in the refrigerator which are left overs from fasting time. Now it’s a sweet dish with dates being the main ingredient . A pudding.. Or may be a microwave cake.. Umm no no let me come up with some thing using a pressure cooker as its so much in now a days. I remember going through a pressure cooker cake that used cake crumbs to bake a cake. Keeping that in mind I substituted the cake crumbs with fresh bread crumbs and gave a try with fingers crossed. Pressure cooked for 3 whistles as I do for caramel pudding . Checked but the cake was not done so pressure cooked once again for another one whistle. The cake was cooked through . The cake was even better than my imagination but I felt I needed to serve it with a sauce. Chocolate ganache was the first option but my new fond  love for caramel sauce opted for the caramel sauce. Made a quick instant version just before heading to the feast venue . Dessert time , served the cake drizzled with the caramel sauce to all . Waiting for results … Hubby dears niece Murshitha with her eyes popping out say’s chachi this is yum . When I mentioned saying its a pressure cooker cake. She immediately asked for the recipe , her elder sister sabura followed with a recipe please soon after . Passed the recipe and Murshitha did give a try with great results except that her caramel sauce didn’t get that golden colour . A few days back I received a message from mushidha’s hubby saying ” loved the cook book, even though I can’t read Tamil.. Certainly has improved the food in my house. Thank you ” what more do you need , I felt so humbled and touched that my recipes has brought in a bit of joy at their home.


Ingredients
Quantity
Fresh Bread crumbs 3 cups ( blitz bread slices in a food processor to a powder with out adding water to get crumbs )
Eggs 4
Sugar 3/4 cup powdered
Dates 1 cup seeds removed
Walnuts 1 cup coarsely crushed
Salta pinch
Vanilla essence 1 teaspoon
Butter to grease the mould
Method
  • Beat eggs and salt together. Gradually add the powdered sugar little by little and beat well to combine.
  • Add the fresh bread crumbs and mix well. Top with the dates ,nuts and vanilla essence. Mix well.
  • Grease a cake mould with butter generously. Pour the cake mix and cover with foil paper.
  • Double boil in a pressure cooker with two inches boiling water. Place a ring mould over the water, place the covered cake mould on top of the ring. Close the pressure cooker .
  • Place the whistle over the cooker lid and pressure cook for 4 whistles in medium heat . Remove from heat , Let the heat subside. open, remove the cake and cool completely.


Instant caramel sauce 
Ingredients
Quantity
Sugar 3 cups
Butter 50 grams
Water 1 teaspoon
Vanilla essence 1/4 teaspoon
Cream 2 cups
 

Method
  • Heat sugar with water over a wide pan .Do not stir. Once the sugar melts and is caramelised  to a light brown colour.
  • Add butter and mix well. Remove from heat adding a pinch of salt .
  • Add cream and vanilla essence. mix vigorously to combine to get a thick gooey caramel sauce. Taste and adjust sugar and salt .
How to serve
  • Run a dry sharp knife over the edges of the cooled cake. Turn over on to the serving plate .
  • Pour the caramel sauce over the  cake and serve.
  • For individual servings, place a square cake piece into a bowl. Pour caramel sauce and serve.