Almond biscotti

Share Button

image (42)

Preparation Time : 20-25 minutes

Cooking Time : 40 -42 minutes + cooling time in between for 25 minutes

Serving : 5-6 members

Description

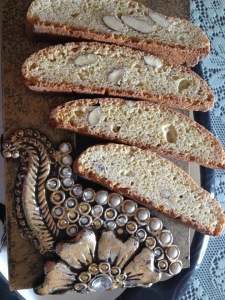
Almond biscotti . Biscotti  are hard Italian biscuits , traditionally served with tea , coffee , wine or port for dipping . Biscotti means twice baked . This second baking makes the biscuit hard and dry but they remain exquisitely tasty . My first try with biscotti was a very nervous experience as I didn’t know head or tail about biscotti . This time with great confidence went ahead and was done hassle free . As biscotti can be stored for two weeks . I did have them in my pantry for quite some time . The day the biscotti was over and the air tight container was into the sink , the same evening I got another packet of MARKS&SPENCERS  pistachio biscotti  from my friend meera aboo thamby all the way from U.K . The only difference being my almond biscottis were bigger in size , the pistachio biscotti were finger sized nibbles . I guess the biscotti bug just didn’t want to let go me , helping me to pile more calories as usual .

Ingredients

Ingredients
quantity
all purpose flour3 1/4 cups
baking powder1 tablespoon
salt1/3 teaspoon
sugar1 1/2 cups
unsalted butter melted 10 tablespoons
large eggs3
vanilla extract1 tablespoon
aniseed ( fennel ) ground2 teaspoon
whole almonds1 cup heaped toasted and coarsely chopped
egg white1

Method

  1. Position rack in center of oven and preheat to 350°F. Line baking sheet with parchment paper. Sift flour, baking powder and salt into medium bowl. Mix sugar, melted butter, 3 eggs, vanilla extract and ground aniseed in large bowl.
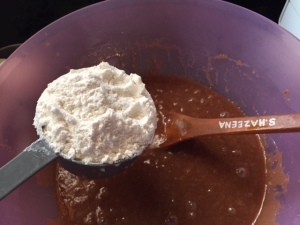
  2. Add flour mixture to egg mixture and stir with wooden spoon until well blended. Mix in almonds.Divide dough to equal half. Using floured hands, shape each dough half into 13 1/2-inch-long, 2 1/2-inch-wide log.
  3. Transfer both logs to prepared baking sheet, spacing apart. Whisk egg white in small bowl until foamy; brush over top and sides of each dough log.Bake logs until golden brown (logs will spread), about 30 minutes.
  4. Cool logs completely on sheet on rack, about 25 minutes. Maintain oven temperature.Transfer logs to work surface; discard parchment paper.
  5. Using serrated knife, cut logs on diagonal into 1/2-inch-wide slices. Arrange slices, cut side down, on same baking sheet. Bake 12 minutes. Turn biscotti over; bake until just beginning to colour, about 8 minutes.
  6. Transfer to rack and cool. (Can be prepared 1 week ahead. Store in airtight container at room temperature.)

Peanut butter cup cakes with cherry preserve filling and peanut butter cream

Share Button

image (33)

Preparation Time : 30 minutes

Cooking Time : 20 -25 minutes

Serving : 8- 10 members

Description

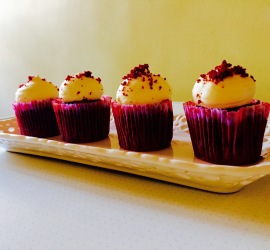
Peanut butter cupcakes filled with cherry preserve and topped with peanut butter cream. This might sound less felicitous but will win enormous fame once consumed. The creamy peanut butter cream en-lobed with the crunchy peanut butter cup cakes will be a never before experience. Its so much fun to bite into these knock out taste bombs. Mygirl anisha is all crazy about cup cakes in the recent . I have to admit i have just started my hands onto the mighty cup cakes. My cup cakes do not look appealing enough to the eyes but i assure you , it will satisfy your tummy . As cup cakes are to my girl , peanut butter is to me . I just cannot resist the mighty creamy peanut butter which always gets the devil out of me . I always have 2 jars of peanut butter in stock (along with nutella ) one for regular kitchen use and the other for myself . The myself jar goes through a lot of lickousis while I really need a break and Iet myself loose and be seduced by pure captivation . Well , You need to tickie and treat your taste buds once in while . Isn ‘t it ????

Ingredients for the cup cake

Ingredients
Quantity
Unsalted butter100 grams at room temperature
Sugar 200 grams
Eggs2
Crunchy peanut butter75 grams
Milk50 ml
Vanilla essence1 tablespoon
Flour250 grams
Baking powder 1 1/2 tablespoon
Cherry preserve5 tablespoon for the filling

Ingredients for the peanut butter cream

Ingredients
Quantity
Unsalted butter50 grams at room temperature
Smooth peanut butter 150 grams
Double cream50 ml
Icing sugar 200 grams
Decorative colour buttonssprinkles , sweets of your choice

Method

  1. Preheat oven to 180 degree Celsius . Line a cup cake tin with paper cases . Sift flour and baking powder three times to combine both together well .
  2. Cream butter in an egg beater to white and creamy . Add sugar , continue to beat until creamy . Add one egg at a time , beating well after every addition to blend well .
  3. Top with the crunchy peanut butter and beat well . Mix milk and vanilla essence together in another bowl and set aside .Add 1/2 the flour and baking powder to the egg and butter mixture , mix well .
  4. Top with the milk and vanilla . Mix well , then add the rest of the flour . Mix well until the batter is soft , scraping down the sides of the bowl with a spatula . Fill the cup cake cases to 2/3 .
  5. Bake in the oven for 20 to 25 minutes  ( my cup cakes were baked in 20 minutes ) or until a skewer inserted into the Center comes out clean . Remove from the oven and cool completely .

Method for peanut butter cream

  1. Cream butter to white and creamy . Add the smooth peanut butter .
  2. Beat well and add cream and combine well .
  3. Switch off the mixer and add the icing sugar , and whisk until creamy but firm . If its soft to pipe , add more icing sugar .

How to proceed

  1. Make a hole in the Center of the cooled cup cakes with a corer . Fill with 1 teaspoon of cherry preserve .
  2. Then re – cover with a small piece of cake . Use piping bag fitted with star – shaped nozzle to pipe the peanut butter cream over the cup cakes .
  3. Top with the decorations of your choice  And Serve .do not store the cup cakes in the refrigerator , keep them in an air tight container in room temperature . Will stand for 2-3 days

Chocolate chip cookies

Share Button

image (45)

Preparation Time : 25 minutes

Cooking Time : 12 – 15 minutes

Serving : 4-6 people

Description

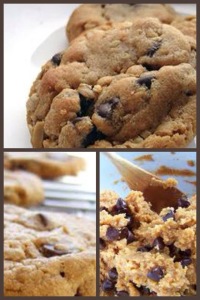
Chocolate chip cookies . I don’t fancy cookies much but my daughter ANISHA likes cookies a lot . Good that a lot of things I would never attempt to try are liked by my kids , so I end up giving the dish a try . It’s helped me widen my culinary skills . These cookies are a delicate , alchemical infusion of flavours and textures . the best part is while baking , the surprising array of aroma that fills our  home . It’s even better than eating the cookies  . When hubby came home for lunch , he was like what have you baked ?? With a board smile on his face . These cookies had a crisp edges and a moist Center . Hubby does not like anything that’s too crisp so had to cook the cookies to his liking . Wanting to take a few cookies to my elder mother – in – laws( my father – in – laws elder brothers wife )  place  as it was her birthday that day but nothing was left as we all gobbled the entire lot . The chocolate chips that bursts  in between every bite is a surprise and makes you want to eat more . Truly an impeccable indulgent .

Ingredients

Ingredients
Quantity
unsalted butter1/2 cup
dark brown sugar3/4 cup , ( incase you don't have brown sugar use normal sugar )
sugar3/4 cup
large eggs2
vanilla essence1 teaspoon
chocolate chips1 cup
flour ( maida )2 1/4 cups
baking soda3/4 teaspoon
salt-1 teaspoon

Method

  1. Evenly position 2 racks in the middle of the oven and preheat to 375 degrees F. ( 180 degrees Celsius ) Line 2 baking sheets with parchment paper or silicone sheets.
  2. Melt butter in the microwave or a sauce pan . Cool slightly. Whisk the sugars, eggs, butter and vanilla in a large bowl until smooth.
  3. Whisk the flour, baking soda and salt in another bowl. Stir the dry ingredients into the wet ingredients with a wooden spoon; take care not to over mix. Stir in the chocolate chips .
  4. Scoop heaping tablespoons of the dough onto the prepared pans. Wet hands slightly and roll the dough into balls.
  5. Space the cookies about 2-inches apart on the pans. Bake, until golden, but still soft in the center, 12 to 16 minutes, depending on how chewy or crunchy you like your cookies. Transfer hot cookies with a spatula to a rack to cool. Serve.
  6. Store cookies in a tightly sealed container for up to 5 days.

Red velvet cake

Share Button

image (21)


Preparation Time : 30 minutes

Cooking Time : 30 – 35 minutes

Serving : 8 members

Description 

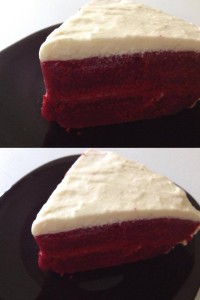
Red velvet cake . A recipe that has been in my must try list for a very long time . I waited to get the right food colouring as I wanted a deep red colour to my cake . The food colour was sourced from Malaysia through my mom . It was the day after Father’s Day . My parents were here till lunch and were leaving there after . Wanted to surprise my dad with this red velvet cake as he loves cakes , desserts and pastries . even though it was a day after Father’s Day as its better late than never , Started of with the cake with my daughter ANISHA beside me . Not having  two equal sized cake tins . Went ahead by baking the entire cake mix in one big cake tin thinking I shall cut through horizontally and sandwich with cream cheese icing in between . But I didn’t get the height that I expected after the cake was baked . So finally what I did was cut the cake into two equal semi circles . Not having enough time to cool them completely as my parents were about to leave in some time . I started applying the cream cheese in between the cakes . It looked good and to the level of 1/4 inch of cream cheese icing as I  wanted but after a while the 1/4 inch was all sucked into the cakes and became a white lining in between . Then my cream cheese icing started giving me trouble as it was extremely hot here then . Had to freeze the icing very frequently to keep the required consistency as wanted . Some how made the cake , managed to take pictures ( took a picture of the semi circle but looked odd so stuck to this one wedged slice ) served it to dad and the smile he had while eating it just threw away all the havoc I had to go through to get   the cake together . My kids were signalling to my hubby and my mom about how my dad was enjoying his red velvet cake and making fun of the love between  me and my dad ( we daughters are always daddies girls isn’t it ? ) Mom, as usual was just controlling dads intake of this calorie culprit.I was over whelmed with joy that my job was done , serving dad his favourite   piece of cake made with love . I did manage and pack some with my parents. The left over was served to all of us at home , my hubby’s niece alfina, her kid zahil and nephews Rabbani and Mohamed Zahil just didn’t want his mom alfina to stop feeding him and to add upon to all this the last two pieces were served to my sons friend morishal ‘s parents who had dropped in home as a surprise visit after a wedding reception attended at my place . A semi circle red velvet cake served to this many people was the biggest surprise to me !!!

Ingredients

Ingredients
Quantity
All purpose flour / maida1 cup
Corn flour 2 tablespoons

Method

  1. Remove 2 tablespoons of flour from 1 cup flour and replace it with 2 tablespoons of corn flour .
  2. Sift together three times and use as demanded in the recipe .
  3. For this recipe I used 2 1/2 cups all purpose flour / maida .
  4. Removed 5 tablespoons of flour and replaced it with corn flour .
  5. Always measure after shifting the both the flours together .

Ingredients for the cake 

Ingredients
Quantity
Unsalted butter to grease same sized cake pans
cake flour(not self-rising)2 1/2 cups
salt1 teaspoon
cocoa powder1/4 cup
sugar1 1/2 cups
canola oil1 1/2 cups ( I used sunflower oil instead )
large eggs2 at room temperature
red food colouring 1/4 cup
pure vanilla extract1 teaspoon
buttermilk 1 cup
baking soda1 1/2 teaspoons
white vinegar 2 teaspoons

Method for the cake

  1. Heat oven to 350 degrees. Generously butter two 9-by-2-inch round cake pans. Sprinkle with flour, and tap out the excess; set aside.
  2. In a medium bowl, whisk cake flour, salt, and cocoa; set aside.In the bowl of an electric mixer fitted with the paddle attachment, combine the sugar and oil, and beat on medium speed until well combined.
  3. Add eggs, one at a time, beating well after each addition. Add food colouring and vanilla, beat until well combined.
  4. Add flour mixture, alternating with buttermilk, scraping the sides of the bowl with a rubber spatula as needed.
  5. In a small bowl, mix baking soda and vinegar until combined. Add to batter, and beat for 10 seconds. Evenly divide batter between the prepared pans.
  6. Bake until a cake tester inserted in the center Of each cake comes out clean, 30 to 35 minutes. Transfer to a wire rack to cool in the pans for 5 minutes.
  7. Remove from the pans, and return to the rack to cool completely.  Allow cakes to cool completely before icing.

Cream cheese icing  ingredients

ingredients
Quantity
cream cheese, softened 450 grams
unsalted butter, softened120 grams
vanilla extract1 teaspoon
icing sugar, sifted2 1/2 cups
salt a pinch

Icing method 

  1. With an electric mixer, blend together cream cheese and butter until smooth.
  2. Reduce speed to low, and blend in icing sugar, salt and vanilla extract. Increase speed to high, and beat until light and fluffy.

How to proceed

  1. Apply a thick layer of cream cheese  icing on top of one cooled cake .
  2. Place another cooled cake over and sandwich together .
  3. Apply the remaining cream cheese icing all around and on top of the cake evenly  .
  4. Cut into equal size wedges and serve .

Notes 

  1. Make sure you use cake flour not self raising flour for the cake .
  2. Make sure all the ingredients for the cake are at room temperature .
  3. Place the cream cheese icing in the fridge until needed to be used as the icing tends to loose its firmness in hot weather .
  4. Store the cake in the fridge and it stays fresh for 3-4 days .
  5. The brand name of the red food colour that i have used is rayner’s red concentrated food colouring .
  6. Be careful with the red food colouring as it stains the cloths you wear as well as your kitchen counter .

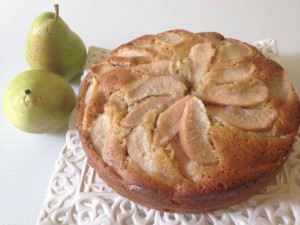
Pear cake flavoured with ginger , honey and butter milk

Share Button

image (20)

Preparation Time : 30 minutes

Cooking Time : 40 – 50 minutes

Serving : 8 members

Description

Pear cake flavoured with honey , ginger and butter milk . A recipe I came across in a magazine . I just love fruits in my cakes . This recipe did take me straight to the pear cake I never miss out while on my visit to kodaikanal  in daily bread , pastry corner .  They bake their goodies every day , fresh with limited stock .if luck favours you on your visit , you get fresh baked goodies  or else it’s sold out and the pastry shop is empty .   Their pear cake is much sought after one.having a lot of fresh pears in hand from my head over heels madness in Bangalore . Tried my hands on this recipe of pear cake Inspired to bake on a damp , drizzling day .  My home was filled with an aromatic flavour of pear and cake together . the cake was moist , soft and melt in your mouth with crunchy pear pieces on the top .gratifyingly delicious , tasted exactly like kodai pastry corner’s pear  cake . Excited about the out come of the cake did post the pictures in all the food groups I am a part of in the world wide net . Recipe requests poured in so had to post this cake recipe here today ( I wanted to post red velvet cake but it can wait right ) . This cake recipe is apt for home – bakers . My hubby and myself almost had more than a slice for every meal :-))

Ingredients

Ingredients
Quantity
Soft Butter4 tablespoons + little to grease the cake tin
All purpose flour / maida 1 cup + extra to dust the cake tin
Sugar 1/2 cup ( measure and powder ) + little to sprinkle on top of the pears
Vanilla essence1 teaspoon
Egg1
Baking powder 1/2 teaspoon
Baking soda / soda bi carbonatea pinch
Butter milk 1/2 cup
Salt a pinch
Honey 2 tablespoons
Ginger grated 1/2 teaspoon
Pears2 peeled and thinly sliced ( do this in the last minute before you lay the pear slices over the top of cake batter , to avoid dis - colouring of pears )

Method

  1. Grease a cake tin with little butter and dust with flour all around .
  2. Pre- heat the oven to 180 degree Celsius .
  3. Beat butter and powdered sugar together till pale and fluffy . ( I used an electric egg beater ) Add the egg and beat well . Sift the flour , baking powder and baking salt together .
  4. Add this flour mix to the egg mixture and mix well .
  5. Incorporate the buttermilk and combine well .
  6. Finally add salt , honey , vanilla essence and grated ginger . Mix well . Pour the cake batter into the prepared greased cake tin .
  7. Arrange the pear slices in a decorative fan pattern and sprinkle sugar over them .
  8. Bake in the pre – heated oven for 35 -40 minutes or more until a tooth pick or skewer inserted in the Center comes out clean . ( my cake took 50 minutes to be cooked ) once cooked , cool .cut into wedges , Serve warm or at room temperature as it is .
  9. Can substitute pears with apples , strawberries , mangoes etc

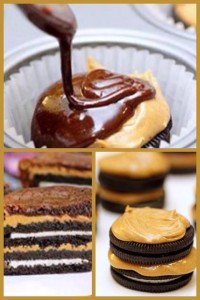
Oreo and peanut butter brownie cakes

Share Button

image (19)

Preparation Time : 30 minutes

Cooking Time : 18 -20 minutes

Serving : 10 members

Description

Ingredients

Ingredients
Quantity
flour8 tablespoons
sugar10 tablespoons
cocoa powder 4 tablespoons
baking powde2 teaspoons
egg2
milk 6 tablespoons
oil 6 tablespoons
salt a pinch
vanilla essence1 teaspoon

Other ingredients

ingredients
Quantity
Oreo Cookies24
creamy peanut butter1/2 cup

Method

  1. Preheat oven to 350 degrees and line a 12 muffin cup baker with paper liners.
  2. Prepare brownie mix , by mixing all the ingredients for brownie together . Set aside .
  3. For each cupcake cup spread 1 teaspoon of peanut butter over 2 Oreo cookies and stack them on top of each other.
  4. Place oreo stacks into the cupcake lined muffin cups.
  5. Spoon 2 tablespoons of brownie batter over each stacked oreos and let it run down the sides of the cookies. If you have left over brownie batter, bake separately in a separate baker or muffin tin.
  6. Bake cookies and brownies for 18 to 20 minutes, until brownies are cooked through. Let cool completely then serve.
  7. Store these cakes in air tight containers in room temperature . Stays moist for 2-3 days .

Rainbow marble cake

Share Button

Preparation Time : 30 minutes

Cooking Time : 40 – 50 minutes

Serving : 8 members

Description

Rainbow marble cake . I have been wanting to make this cake for a long time . Did get the food colours sourced from abroad through my parents . But some how I kept postponing . Well day before yesterday was my birthday :-) . No kids at home , just hubby and me . And as usual hubby dear forgot its my birthday . So every thing at home was normal . By “11 ”  o clock hubby calls and wishes me … Having made a normal lunch wanted to pep up the mood at home so I decided to bake  a cake . Thought of Black Forest but the cream … Hubby and myself at home umm .. then just skipped to my long wanted quest to bake a rainbow marble cake without the frosting wanting to cut down a little calories . I already had a recipe noted in my hand written cook book from a food blog called Mallu kitchen . But still just surfed the net for more recipes related to rainbow marble cake . I liked neigella lawsons recipe . Took note of it . Compared both the recipes and found the Mallu kitchen recipe more easy to follow with ingredients easily available in my pantry . Baked the cake finally and wolla , it was colourful ( really cheered me up ) , light , aromatic and soft . Just fell in love with the cake that I just wanted to gaze and admire the cake not wanting to eat it . Thank you mallu kitchen , (reshma nooh ) for your simple to follow recipe that worked wonders . Cut the cake celebrated , hubby was surprised about the colours in the cake . I did mention about a forum called home bakers guild / face book,  before in which  I am a member . Was so dame excited about the out come of the cake , I immediately posted  the picture in home bakers guild ( to show off ) . Before going to bed just checked what’s going on in the web world of mine . Could not believe that my post had crossed a 100 likes . The excitement in me boomed even more . Went to bed wits a heart filled with joy and a board smile . The next day I get a message from the admin mr . Kp balakumar that my rainbow marble cake post has been selected for the HALL OF FAME files in the guild . What more could you ask for as a birthday gift . I was on cloud nine . I got to realise one thing that nothing brings more joy to me like cooking does : -)

Ingredients for the cake

Ingredients
Quantity
Butter3/4 cup at room temperature
Flour1 1/2 cup
Eggs3
Sugar1 1/2 cup
Baking powder1 teaspoon
Milk3 tablespoons
Vanilla essence1 teaspoon
Food colourred , blue , green , yellow , pink , purple - 1 teaspoon each

Ingredients for the frosting

Ingredients
Quantity
Butter70 grams at room temperature
Icing sugar sieved 150 grams
Milk1 to 2 tablespoons

Method for cake

  1. Beat butter and sugar together till light and soft .
  2. Add one egg at a time , adding a little flour if your egg shows signs of curdling .
  3. Add milk , vanilla essence , rest of the flour and baking powder . mix till just blended .
  4. Divide the batter equally in six bowls .
  5. Add one teaspoon of each food colour into each bowl and mix well .

Ingredients for the color

Ingredients
Quantity
1red
2yellow
3green
4blue
51/2 teaspoon red + 1/2 teaspoon yellow = to get orange
61/2 teaspoon blue + 1/2 teaspoon red =to get purple

Method

  1. Take six tablespoon measures or equal measure spoons and start with purple colour cake batter , keep pouring one spoonful of each colour in the center of a greased baking bowl .
  2. Repeat the same until all the colour cake batters are over .
  3. Bake in a preheated oven at 180 degree Celsius for about -40 to 50 minutes . ( I checked at 40 minutes , my cake was a bit un cooked so cooked exactly for 50 minutes ) .
  4. Check if cooked by inserting a skewer or a tooth pick in the center of the cake . If it comes out clean , the cake is cooked . Remove and cool completely .

Frosting

  1. Beat butter and icing sugar together till light and fluffy . Add milk if the frosting is too thick . Spread on top of the completely cooled cake and decorate as you wish . Cut and serve .
  2. This recipe is as I took note from the food blog Mallu kitchen .


Cake pops

Share Button

image (18)

Preparation Time : 40 minutes

Cooking Time : 10 minutes if using store brought cakes

 Serving : 6 members

Description

Cake pops . Some thing I got to know by mistake , when I was in search of a good red velvet cake recipe in the google . Was so surprised and wanted to try it then and there as it looked and sounded so interesting . As this dish needs a lot of imagination , creativity which will for sure put people served spoilt of choice . Having no equipments needed for making the cake pops  , still went ahead making sure I will manage and bring the pops out in flying colours . My first problem was not having pop sticks . Just got some lollipops and chopped the sticks alone . I did use some tooth pick for some pops as the lollipop sticks were not enough . Then I had to make a  cake pop stand . Came up with an idea using thermocol sheets . Then for embellishments used chocolate chips , coloured cheery bits , coloured balls and coloured cumin sweets ( jeeraga muttai ) . The out come was so satisfying . I learnt a lesson that never ever complain about not being able to source ingredients at your place . Instead just go ahead substitute it with easily available ingredients locally which makes things much more easy. I made this when my kids were not around so wanted to share the calories . Sent it over to my friend Reshma as she is blessed with 3 lovely children and adding calories to her too  :-))))

Ingredients

Ingredients
Quantity
Lollipop sticks ( I got some lollipops and chopped out the sticks alone )
Pre- made cake( any flavour of choice , I used vanilla sponge cake and red velvet cake . Just go ahead and cheat with ready made cakes ... No harm )
Cake pop stand( I made one at home with thermocal sheets, my craft classes at school was put into use ) ,
Icing of choice ,
Embellishments( I made use of all the locally available embellishments )

Step 1

          Break the cake up and whiz it in a food processor to creat small crumbs .

Step 2

  1. For 2 cups of cake crumbs add 1/2 a cup of icing which is creamy like cream cheese frosting or butter cream .
  2. Mix well to get it well combined . Add more cake or icing until you have a sticky mix that holds together but isn’t wet .

Step 3

  1. Roll balls using your hands or a small ice cream scoop to get a smooth finish .
  2. Place the balls on a tray lined with foil paper and pop in the freezer for 30 minutes to get firm .
  3. I placed a small ball of red velvet cake mixed with butter cream frosting in between the sponge butter cream mixture cake to add a surprise and more colour to some of the cake pops .

Step 4

  1. Melt chocolate of choice in the microwave or double boil .
  2. Place the melted chocolate in a deep mug or jar so that the cake pop can be dipped into the chocolate .
  3. Dip the end of the lollipop stick into the chocolate and push it into a cake ball .
  4. Dip the ball into melted chocolate , allow the excess to drip off and then place it into the styrofoam to dry .

Step 5

  1. Decorate cake pops with embellishments as follows . Drizzle melted chocolate over in a contrasting colour . Sprinkle edible glitter , chocolate shavings , silver balls , colour bits , coloured cherry bits over the top of pops . Roll pops in sprinkles , chopped nuts etc …
  2. Serve in a styrofoam , craft foam or in a designated cake pop stand . Can wrap each pop in a cellophane bag and tie it with a piece of ribbon .

All In one Biscotti

Share Button

aiob

Preparation Time : 20 minutes

Cooking Time : 35 minutes

Serving : 4 members

Description

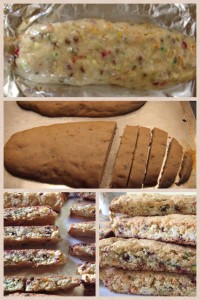
All in one Biscotti . A recipe i tried from the magazine recipes,my brother darvesh sent me as a surprise last month. The first time i got to know about biscotti it was really new to me. Was wondering if it would be soft, crunchy or hard. Loved the rustic shape though. Wanting to try it out for a long time.The previous other recipes i had for biscotti were so long and difficult to follow. This recipe was so simple and had no butter used with a combination of mixed nuts and dried fruits. The recipe was just in one paragraph and i followed it religiously and worked perfect. I have elaborated the recipe a bit than as it was in the magazine so that its more easy to follow and my picture collage will help to. The measurements mentioned in the recipe gives you atleast 25 to 30 pieces of biscotti. I ended up sending a few over to one cousins place and a friends place (Reshma Riyaz).In the good intention of sharing my calories.It’s all in the game right.

Ingredients

Ingredients
Quantity
Maida
250 grams + extra to dust
Sugar250 grams
Baking powder2 teaspoons
Pistachio50 grams
Dried apricots 50 grams chopped
Dried cherries50 grams ( I used a combination of 4 different colours )
Chocolate chips50 grams
Whole Almonds 50 grams
Eggs3 lightly beaten
Vanilla essence1 teaspoon

Method

  1. Preheat oven to 200 degree Celsius . Mix all the ingredients together except for eggs .
  2. Gradually stir in the eggs to get a thick enough mixture to roll . You will not need all the egg . ( I used all and had difficulties while baking as the sugar started to melt my log got too moist ) devide the mixture into two equal portions .
  3. Using maida quickly roll the two portions into logs . Gently place them on a lined , greased baking tray and bake for 20 to 25 minutes . Be careful not to burn the base .
  4. Once finished baking , remove and cool the logs for 5 to 8 minutes . Then slice into one inch thick pieces .
  5. Place them back equally apart from each other on the same lined , greased tray and bake for another 10 minutes at 170 degree Celsius . Cool completely .
  6. Serve immediately or can be stored in air tight containers for two weeks and had .

Dulce de leche cream cheese brownies

Share Button

delche

IMG_0403

IMG_0404

IMG_0407

IMG_0410

IMG_0411

IMG_0413

IMG_0415

IMG_0416

IMG_0417

IMG_0422

IMG_0423

IMG_0424

IMG_0425

IMG_0426

IMG_0428

IMG_0431

IMG_0433

IMG_0434

IMG_0435

IMG_0437

IMG_0438

Preparation Time : 1 hour 30 minutes

Cooking Time : 30 – 35 minutes

Serving : 6 to 8 members

Description

This was what I posted in the foodie group home bakers guild for the master chef Mondays post in face book .

Hello talented bakers . This is Hazeena Seyad , a next door , day to day home maker (BAKER – A CLUELESS BAKER ) from Nellai ( Tamilnadu ) who is passionate about cooking and food . But baking and me are far apart from each other as Baking is too precise for me . I cook with a pinch of this and that . Being a ravuthar Muslim ( Tamil speaking Muslim ) where we don’t have a single authentic dish that demands us to bake . Guess that’s where the baking got far apart from me. As a kid at home with a working mom , who seldom cooked for us during holidays and the only things she baked were chilli cheese toast and cauliflower bake in a tiny imported oven that is in working condition till date . Having done my schooling in a boarding school where our daily breads , puffs , tea cakes , cookies to our birthday cakes were baked every day fresh in the school bakery . I grew up with the aroma of baking through out my childhood days . Still all this was not enough to motivate me to try my hands in baking . I started to bake as a newly wedded bride , with all my attempts failing royally , followed with great embarrassment . Baking became a lost story in my mind and system until few years back when I saw Rachel Allen bake a quiche de Lorraine on the telly . Got the recipe from my friend Pallavi who just gave me approximate measurements which worked pitch perfect . Took me nearly 2 years after that to try my hands on cakes and cookies and I realised that Baking makes me focus on weighing the sugar , on sieving the flour That I found calming and rewarding because in fairness , it is sort of magic . You start of with all this desperate stuff such as butter and eggs and what you end up with is totally different and delicious :-)) .

I strongly believe that the little baking i do now a days is because of my best buddy gazeena sulu kunahmed as when we were kids together in boarding school , god infused the baking spark into her , a tiny bit just splashed and got into me as I was near here :-)) . The minute I got to see my name in this season of master chef monday posts , I got dead nervous as I am paired with the most sophisticated bunch of bakers . I just wished dec 16 th would be skipped in the calendar . Broke my head over what to post and finally stuck to this simple dulce de lycée , cream cheese brownies .

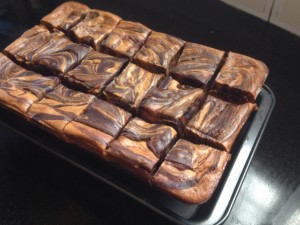
Oh, the joy of brownies , The black ones with the oozing fudge, The brown ones with powdered sugar, The white ones with chocolate chips but this one is the ultimate with the goodness of dulce de lycée , cream cheese and brownie . All in one bite Brownie .

Hope this post gets viral as all the other previous master chef Monday posts . Happy baking to all and here’s the recipe .

Brownie ingredients

Ingredients
Quantity
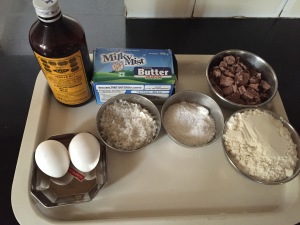
Unsweetened chocolate4-5 ounces , coarsely chopped
Butter8 Tablespoons (1/2 cup) - chopped into pieces
vanilla extract1 teaspoon
1 1/4 cups of sugar1 1/4 cups
slightly beaten eggs2
All purpose flour1/2 cup
kosher salt1/2 teaspoon

Dulce de leche/Cream Cheese ingredients

Ingredients
Quantity
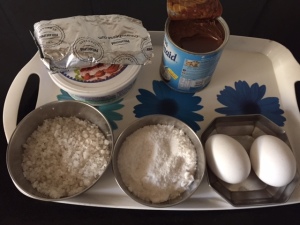
sweetened condensed milk1 (14oz) can
cream cheese at room temp8 ounces
sugar1/4 cup
vanilla extract1 teaspoon
kosher salt1/4 teaspoon
egg at room temperature1

Method for Dulche de Leche

  1. Find a heat proof bowl that fits snugly into a heavy pot. Fill the pot about an inch high with water.
  2. *Make sure the bowl doesn’t touch the water* Bring the water to a simmer. Empty the can of sweet milk into the bowl and place it over the simmering water.
  3. Cover with foil and cook for about 2-3 hours depending on how dark you want the dulce de leche to be.
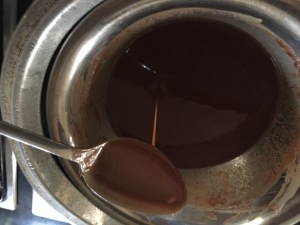
  4. Stir the milk about every 20 minutes or so. Once you have the desired colour, remove the bowl from the heat. Stir until the mixture is smooth and set it aside to cool.
  5. You can use the simmering pot of water again for the brownies. Add more water if necessary.

OR

  1. Just pressure cook the condensed milk tin with water just above the condensed milk tin for one whistle and then on a very low flame for another 40 minutes .
  2. Remove from heat , wait for the cooker to cool down completely and then remove the condensed milk tin . Cool completely and use . ( this is what I do one day in advance or I have 2 tins of dulce de leche stored in my refrigerator all ready always , makes things more easy )

Method for Brownies

  1. Preheat the oven to 325F. Line an 8×8 inch square baking pan with foil and lightly spray or butter.
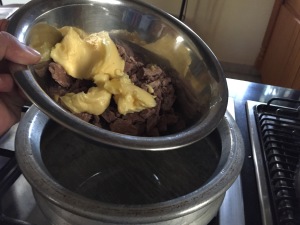
  2. Set aside.double boil the chopped chocolate and butter into a heat proof bowl. Stir just until everything is melted as smooth. Remove from heat.
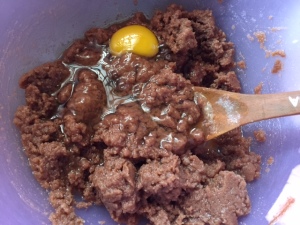
  3. Using a large spatula or wooden spoon, stir in the vanilla extract and sugar. One at a time, add the eggs, beating well (using spoon) after each addition.
  4. Stir in the flour and salt. Mix vigorously until it becomes shiny and starts to pull away from the sides of the bowl. Set the batter aside.

Method for Cream Cheese

  1. In a medium bowl, beat the cream cheese until it becomes creamy (about 30 seconds.) Add the sugar, vanilla, and salt. Beat to combine.
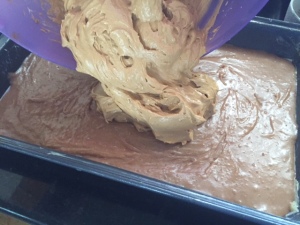
  2. Add the egg and beat for about 20 more seconds. Slowly add the dulce de leche. If it’s still warm, add a small amount to the cream cheese, wait a few seconds and beat it in.
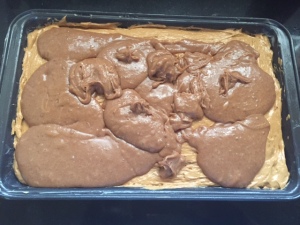
  3. Gradually add the remaining dulce de leche and beat until completely combined with the cream cheese. Scoop out 1/2 cup of the brownie batter and set it aside.
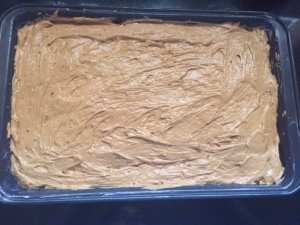
  4. Pour the remaining batter into the prepared pan and spread it around into an even layer. Pour the dulce de leche/cream cheese mixture over the brownie layer.
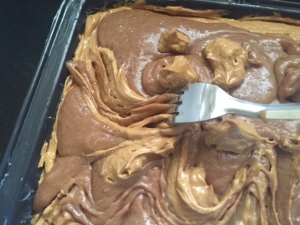
  5. Drop in the remaining brownie batter using a spoon or spatula. With a butter knife, carefully swirl the brownie batter into the dulce de leche.
  6. It’s alright if the batter is too thick in some spots. Try not the mix the ingredients too much, just enough to make things interesting. Bake for 35-45 minutes.
  7. Or until the center is just slightly film. Don’t worry if it jiggles around, it will harden as it cools off. Remove from the oven and cool completely before cutting.
  8. Store in an air right containers at room temperature and can be had for four days .