Malaysian apam balik

Share Button

image (7)

IMG_8512

IMG_8533

IMG_8534

IMG_8536

IMG_8537

IMG_8538

IMG_8541

IMG_8542

IMG_8544

IMG_8545

Preparation Time : 40 minutes

Cooking Time : 3-4 minutes for each pancake

Serving : 3-4 members

Description

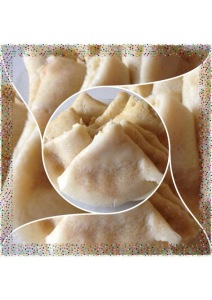
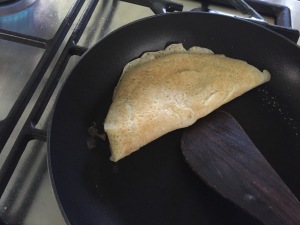
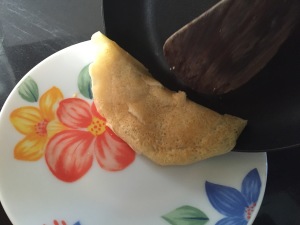
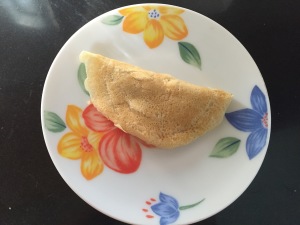
Malaysian apam Balik . A street food wonder very own to Malaysia . I came across this deceptively simple recipe in the world wide net and just loved the combination of ingredients that are always available in my pantry but never ever thought about coming up with such a dish . These pancakes look plain on the outside but take a bite and the filling hits you on the right spot . these pancakes are made either thin and crisp or a bit thicker like pancakes . I tried both ways . My vote goes for the thicker version as the sugar melts and soaks up the pancake and when you bite in , its got that pillowy effect with the goodness of the filling oozing out with a delicious surprise .  I made this for break fast and it was slurped away in seconds and got every one sweet talking on the table :-)) .

Ingredients Malaysian peanut pancakes

Ingredients
Quantity
Flour / maida 1/2 cup
Baking powder 1 teaspoon
Rice flour1/2 cup
Egg1 beaten
Salt to taste
Coconut milk1/2 cup
Water 1/2 cup
Butter4 tablespoons

Ingredients Filling

Ingredients
Quantity
Roasted peanuts3/ 4 cup
Sugar 1/4 cup
Cream style corn3/4 cup
Grated coconut3/4 cup

Method

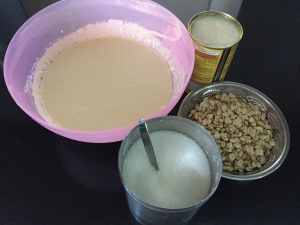
  1. Grind the roasted peanuts coarsely . Mix all the ingredients for the pancakes together to get a loose pouring consistency batter . Cover and set aside for 30 minutes . Heat a non – stick pan ( I used my appam kadai ) ,
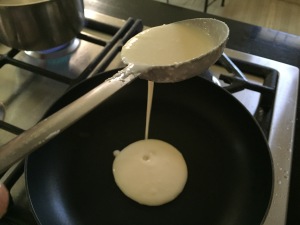
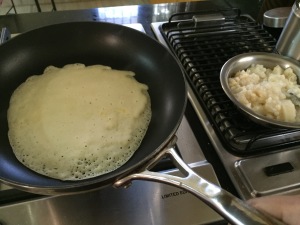
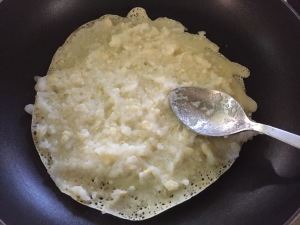
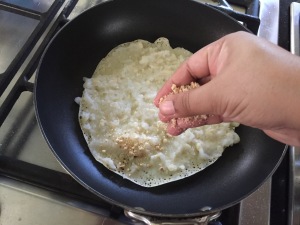
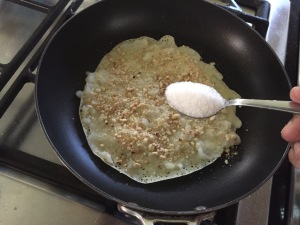
  2. Pour 1/3 cup batter over and swirl pan to cover the base and sides of the pan . When bubbles start to appear , sprinkle sugar , followed by 2 tablespoons each of peanuts ,
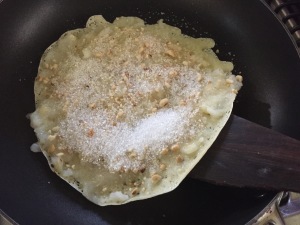
  3. Cream corn and grated coconuts evenly onto the batter . Dot with a teaspoon of butter and allow pancakes to cook for 3 to 4 minutes until golden brown .
  4. Fold pancake into 1/2 using a spatula . Remove and serve hot . Repeat with remaining batter and filling . Serve hot immediately .

Coconutty lychee pudding

Share Button

image

Preparation Time : 15 minutes

Cooking Time : 10 minutes + 3 hours or more to set the pudding in the freezer .

Serving : 10 members

Description

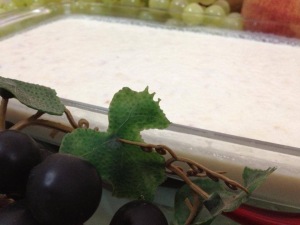
Coconutty lychee pudding . A pudding that I came up with by combining and demystifying two puddings together  . I combined  the ingredients of tender coconut pudding and added coconut milk and lychees to it and got a wonder full  mix of tropical flavoured Asian pudding . The marriage of our keralas very own tender coconut pudding with asian lychees is sure addictive and leaves you weak  kneed . My daughter didn’t fancy it much but I was blown away as it was light ,  high in taste  And full of life . The coconut milk flavour with the lychees and rose water melded into one another that lead to a homey charm pudding . A complete seduction to all your Senses that spell instant wow …..


Ingredients

Ingredients
Quantity
whole tinned lychees10 + few more to garnish
Thick coconut milk2 cups
sugar1/4 cup or to taste
reserved lychee juice1/2 cup
Tender coconut water1 cup
Tender coconut flesh of one tender coconut
rosewater ( paneer )1/4 teaspoon
gelatine 2 1/4 tablespoon

Method

  1. In a blender, combine the lychees , tender coconut flesh and coconut milk blend until smooth.
  2. Pour the coconut-lychee mixture into a big bowl and stir in the sugar, reserved lychee juice, and rose water . Mix well until sugar dissolves and set aside . Soak gelatine in tender coconut water for 5 minutes in a small bowl .
  3. Bring 3 cups of water to boil in a sauce pan . Place the soaked gelatine tender coconut mix inside the boiling water and keep stirring until the gelatine dissolves and gets to a runny syrupy consistency mixture . ( This is called double boiling ) Cool down to room temperature .
  4. Pour into the coconut lychee mixture and whisk well to combine. Pour into a large container and place in the freezer for 3 hours . once set remove and place in the refrigerator over night .it won’t set completely like a moulded gelatine dessert, but it will be a soft pudding. Serve chill garnished with lychees .

Pressure cooked rasagullas

Share Button

image (6)

Preparation Time : 20 minutes

Cooking Time : 5 minutes

Serving : 5-6 members

Description

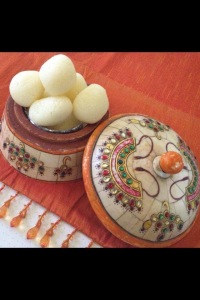
Rasgullas or rasagullas . I am still not sure about how to spell or pronounce the word right but have been eating it from my childhood days . Those days dad used to go to Bombay , Surath  and Calcutta very often related to his business . On his return , he always used to get us things and sweets from those places and if it was Calcutta we always got tins of rasgullas . Not having tin openers at home then . A big struggle would go on to break the tin . Myself and my brother would wait impatiently gazing on when we would get our share of this divine white ball . Once the tin is open each one is served with one ball each and the rest is stored in the refrigerator . Only after this tin is over the next is opened . ( dad used get 3 tins always and that was standard ) through out the day and night what ever I do  let it be playing , watching the telly to studying or anything my mind would always spark every now and then with this mighty sugar syrup drunk white wonder ball . The second spark hits my mind , I am there in front of the open refrigerator with a rasgulla in my mouth . Not wanting to finish of eating  it soon . I used to suck the sugar syrup first and then keep chewing the rest for quite some time . I was a very wired little crazy creature . Never did I think I will end up making this at home but a recipe shared by aara sheik in home chefs guild ( a foodie group I am a member of in Facebook ) was so easy to follow and I wanted to try it out then and there . Last night when I got a call from Asiya Omer ( a food blogger , a liker of sauté , fry n bake and the second prize winner of the completion that was held in our page ) that she might come over to my place to catch up . I wanted to make some home made goodies for her and the only ingredient at home was milk ( no eggs , so could not bake a cake ) and immediately the first thing that came to my mind was aara sheiks easy fluffy rasgullas . Made them and did serve it to Asiya Omer . Well I am back to square one with the spark in mind and moments of nigella lawsons way of sneaking towards the refrigerator and adding more calories into me .

Ingredients

Ingredients


Quantity

Full cream milk1 litter
Lime juice 3 tablespoons
Sugar 2 cups
Water4 cups

Ice cubes

Method

  1. Boil milk and when it just reaches boiling point add lime juice . When the milk curdles add in ice cubes . This will help the paneer to stay soft . Wash the paneer in water and strain in a muslin cloth .
  2. Wrap it loosely , press and knead for 7 minutes with the cloth on . Remove from cloth . Roll into small balls and set aside . Make sure there are no cracks it’s very important .
  3. Add water and sugar in a pressure cooker and bring to boil . Once it’s boiling add rasagulla balls into it . Close the pressure cooker lid , place the weight and pressure cook for one whistle and 5 minutes more on medium flame .
  4. Take away from flame and let the pressure release on its own . Open lid to find puffed up rasagullas . Cool to room temperature and enjoy .

Notes

  1. No need to make sugar syrup just dissolve the sugar before pressure cooking the rasagullas .
  2. Make sure there are no cracks when you roll the rasagullas .

Chicken nibbles

Share Button

image (3)

Preparation Time : 1 hour for marination + 15 minutes

Cooking Time : 3-4 minutes for each batch of chicken  deep fried

Serving : 4-5 members

Description

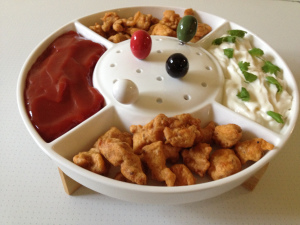
Having my son home with me after he finished his boarding life as a student had to greet him home with an inviting spread on the table . There are days when you are pressed for time and not in the mood to play around ingredients and cook for too long and get your self stuck in the kitchen . This time the reason being me wanting to be with my boy more to enjoy his presence at home than whiling  away my time in the kitchen . So   just want ahead instantly with what i had stocked at home and went according to the flow of what came to me  confidently knowing that my boy loves chicken bits deep fried to crisp .  Lost in touch a bit with his likes and dis – likes about his food habits as he’s been in boarding for his entire schooling and collage . That’s nearly around 16 years and kids as they grow to become teenagers they do tend to become strangers to parents in a way mainly because of the new need of so called privacy as getting to be adults . They become more silent ( mainly boys ) that every thing is a mystery now to be solved on our own , observing them through out .   oops coming back to the dish . As deep frying the chicken I had my boy around coming into the kitchen asking me what’s cooking ? It smells so good . Gave him the first lot out of the pan and he just gobbled the entire lot .  I was just admiring my boy the true motherly way and enjoying his presence every bit for all the lost time with him before .

Ingredients

Ingredients
Quantity
Bone less chicken bits 500 grams
garlic2 flakes
Light soya sauce1 teaspoon
chilli sauce2 teaspoon
chilli powder1 teaspoon
saltto taste
pepper 1 teaspoon
green chilli3 crushed
egg1
cornflour2 tablespoon
Flour / maida2 tablespoon
water1/ 4 cup or lesser to get a coating batter

Method

  1. Blend all the mentioned above ingredients together except for chicken and water . Check consistency of ground paste and add water to get a semi loose coating consistency batter .
  2. Marinate boneless chicken bits in this marinade for one hour or more . Heat oil to deep fry to medium heat .
  3. Deep fry the marinated chicken bits with a good coating of batter in batches to golden brown in colour for about 2 minutes .
  4. Drain and Serve hot with tomato ketchup , mayonnaise and French fries .

Notes

Vegetarians can do the same with cauliflower , panner ,soya chunks , potato or mixed vegetable bits .


Malaysian black rice pudding with coconut milk

Share Button

image (1)

image (2)

Preparation Time : 40 minutes

Cooking Time :  25-30 minutes

Serving : 5-6 members

Description

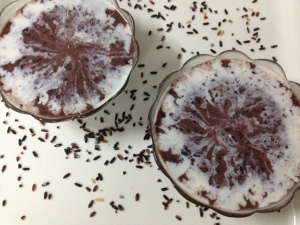
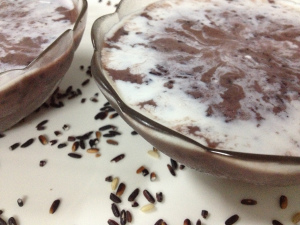
Malaysian black rice pudding or authentically known as bubur pulut hitam  in Malaysia and neighbouring countries in Singapore and Thailand . The first time I heard about this pudding ( it’s more like a thick porridge actually ) was through my aunt Shameem who was invited over for lunch to a friends place for Diwali where they served this black beauty to her .  It’s not an easy job to get a good review from my aunt so this made sure that this mighty pudding is a sure must try . I did take note of the recipe from the telly through the hit series of food safari . Seeing the host of this show Maeve O’Meara go “umm ummm ” eating this pudding Was another intimation that made sure this one recipe is for keeps as this is her signal of saying the dish is too good to resist . Now the next problem is getting black rice to prepare this sweet Devine dish . Any out of station trip is not complete with out a gourmet shopping done for me . Like wise on a trip to chennai was going through the stuff in a gourmet store ( amma nana  ) and to was delighted to see black rice . Grabbed two packets and the first thing I did when back home was to cook the black pudding as all the other ingredients required are every day cupboard friendly  at home . As cooking half way , I was like how can rice with sugar and coconut milk taste really good . There’s no ghee , nuts or any thing to be added as well . But my doubts were put to shame as this black rice has an aromatic flavour that just soothes your taste buds and soul together . The colour does put you off but once you dig in , it’s hard to resist yourself from another  helping . As usual I ended up gulping the entire lot with just one bowl had by hubby dear . ( shameless me :-)) ) after nearly a year or so after my try over this black rice pudding . We were invited to my hubbies niece engagement in a place called sivagankai in tamilnadu . My first time to that place and I was excited to see the cultural and culinary difference there . We were served lunch and the first thing served on the plantain leaf was the Malaysian black rice pudding . My eyes popped  out literarily  as I just could not under stand how did this dish end up in this corner of the world . Later to my surprise I was informed when asked that this is very famous dish here in kaaraikudi ( a neighbouring town )  where most of the chettiar community people of that region are linked to Malaysia through  business . On my way back home this did bring a board smile to me thinking a dish that has travelled all the  way  from Malaysia to kaaraikudi a decade ago has just caught your attention a few months ago . Well  culinary knowledge is a never ending journey and that’s why I guess I am in love with it.

Bubur pulut hitam

Ingredients

Ingredients
Quantity
black rice1 cup
Water 3 cups
Salt1/4 teaspoon
sugar1/2 cup or more to taste
Thick coconut milk 2 cups

Method

  1. Wash and soak rice in 3 cups of water for 30 minutes . Add 1/4 teaspoon salt and pressure cook for 2-3 whistles .( the authentic way is to slow cook in a heavy bottomed pan with a lid for 3-4 hours ) rice will be cooked but still wet .
  2. Stir in sugar and 1 1/2 cups coconut milk and bring to a boil over high heat, then reduce heat to low and simmer, uncovered, stirring occasionally, until mixture is thick and rice is tender but still slightly chewy for about 10 minutes.
  3. Remove from heat and cool to warm or room temperature . Just before serving, stir pudding . Serve in individual pudding bowls topped with a good drizzle of remaining coconut milk on top .

Cheese crisps

Share Button

image

Preparation Time : 40 minutes

Cooking Time : 3-4 minutes for each batch deep fried

Serving : 4-5 members

Description

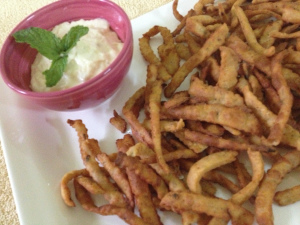
Every holiday of my daughter here at my place with out my son- in – law ( wait a sec people , Uff comedy nights with kapil’s repeat telecast on air , it’s just not letting me go ahead here with you all . Have changed the channel and now I can peacefully be with you all ) is a real hard task for me to keep her entertained here . And every now and then end up in the kitchen with some wired experiments  together . This snack was also done on a similar day as such by both of us . My gal Anisha likes a local savoury snack called diamond cuts and was craving for it . So we wanted to make it at home . I took all the required ingredients out but my gal made a big fuss saying no way are you going to use flour ( maida ) substitute it with wheat flour . The health freak in her does bug me always  and I was so sure this dish is going to be a flop show with soggy wheat diamond cuts . Told her and she was like no way mom .  Fine request accepted , then she says why not make a twist of adding Italian flavours by adding cheese and dried herbs . I was like go ahead and do what you want to and silently helped her with her demands as I hate it when other people get bossy over me at my kitchen . She changed the diamond shape to strips and deep fried .drained  and it was soggy . I was all giggles , teasing her . But once cool and at room temperature it was crisp . She just took over and knocked me out teasing me in return . We made a mayonnaise dip and devoured the entire lot watching the telly not knowing how much each one of us ate . In one hours time I could feel my chest   burn with acidity and felt as if all the cheese just stuck to my heart . Started walking vigorously and my gal was like what’s wrong with you mom ? I told her what was going on with in me and she laughed her guts out saying you should always have portion control over what ever you eat . Nothing got into my head as all I wanted was the irritating sensation in me out of my soul . As I started feeling a bit better my gal is like ” mom , even I am feeling the same as what ever you mentioned ” I burst out laughing teasing her to the core and there she was walking vigorously just like me :-)) . All in all a day that we took turns to tease each other but later we did find out that the culprit that caused the acidity was the mayonnaise dip and the over eating as well . So happy portion eating peeps .

 Ingredients

Ingredients
Quantity
Wheat flour1 cup
Cheddar cheese grated 1/4 cup ( I used amul cheddar cheese )
Milk1/2 cup
Black pepper powder1/2 teaspoon
Mustard powder1/2 teaspoon
Baking powder 1/2 teaspoon
Oil1 teaspoon
Dried herds 1 teaspoon ( oregano , thyme , rose Mary , basil )
Salt to taste ( be careful as we are adding cheese that is salty too )
Oilto deep fry

Method

  1. Mix all the above ingredients together except for oil and milk . Add milk and knead to a smooth dough .
  2. Set aside for half an hour . Roll the dough out to a big , thin circle . Prick all around with a fork . Cut into long thin strips . Heat oil to deep fry to medium heat .
  3. Fry the thin strips in batches to a light golden brown . Drain and cool completely to get a crisp texture . Serve with any dip of your choice . Tastes good as is is as well .
  4. Can be stored in air right containers up to 4 /5 days at room temperature .

Falooda

Share Button

2015-09-04 12.15.31-1

2015-09-04 12.14.13

2015-09-04 12.14.06

Preparation Time : one hour

Cooking Time : 15-20 minutes

Serving : 2 members

Description

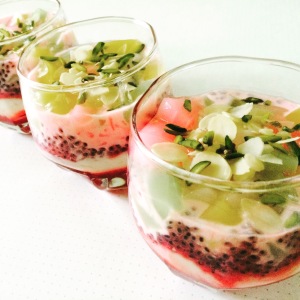
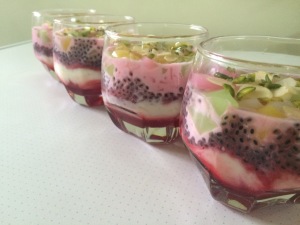
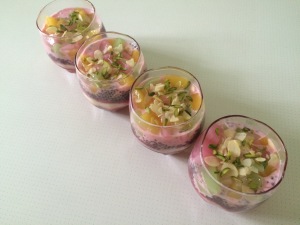
Falooda is an authentic Indian dessert drink that flourished during the Mughal rule . A drool worthy dessert with very little effort . I first got to know about falooda through my friend sulu . She mentioned about an incident during her holidays in Calicut about how a gang of cousins went out to eat ice- cream and they saw the next table seated girls having a tall glass of colour full ice cream . They ordered for the same and its name was falooda and tasted horrible . From then on I never ever attempted to order or have falooda . My other buddy sindhu had gone on an excursion to kanyakumari from school . After her trip she did mention and rave about having ice cream at a place called tirunelveli and it was so yum . That was the first time in my life I got to hear about such a place existed in this world not knowing my entire life had to be spent there :-)) when my marriage was fixed , I did enquire Sindhu first about this place .  After I was married  , every one used to rave about the cherry shake and falooda served at ARASAN BAKERY  ( the same place that sindhu had her ice cream ) here in tirunelveli . To be on the safer side even then I used to have the cherry shake and omit ordering the falooda . Then finally on my trip to Bombay( it was addressed so then )  once my uncle ordered for falooda in SUK SAGAR  and forced me to try it .  Being very hesitant did taste a spoon full and to my surprise it was divine . I ended up devouring it no time . Now falooda is on my must have list on every trip to Mumbai and I ended up making this magical and exotic treat at home with the name falooda always lending a whiff of nostalgia to me .

Ingredients

Ingredients
Quantity
Chilled Milk2 cups
Sugar to taste
Vermicellione hand full boiled
Rose Syrup or rooh afzah2to 3 tablespoons
Basil seeds ( sabza vethai in Tamil )1 tablespoons soaked in water
Vanilla icecream / kulfi 1 to 2 scoops for each glass
jellyany flavour , cut in to small cubes.( I usually use a combination of 3 colours and flavours )
Cashew nuts 3 tablespoons chopped
Pistachio 3 tablespoons chopped
Almonds blanched skin peeled and chopped - 3 tablespoons

Method

  1. Chill the cooked vermicelli by placing it in the refrigerator until needed .
  2. Soak the basil seeds in water for abt 45 min, they will puff up and double in size.then boil them for 5 minutes and drain.In a tall glass add cooked chilled vermicelli , basil seeds and rose syrup / rooh afzah .
  3. Mix sugar to taste with chilled milk and mix well until sugar has dissolved completely . Place an inverted tablespoon or dessert spoon at a 45º angle over the falooda glass and pour the milk over the spoon.
  4. The milk will slide gently to form a layer over the syrup and won’t get mixed with the bottom layer.garnish with jelly cubes and nuts. top it with a scoop of vanilla ice cream / kulfi and Serve chilled .

Notes

  1. make jelly as per packet instructions and use .
  2. I personally prefer kulfi to ice cream to be added to the falooda as it gives an authentic Indian touch to the dish .
  3. You could serve the falooda on a small plate by placing the kulfi first , topped with vermicelli , rose syrup , basil seeds and garnished with nuts and jelly . Omit the milk here .

Almond biscotti

Share Button

image (42)

Preparation Time : 20-25 minutes

Cooking Time : 40 -42 minutes + cooling time in between for 25 minutes

Serving : 5-6 members

Description

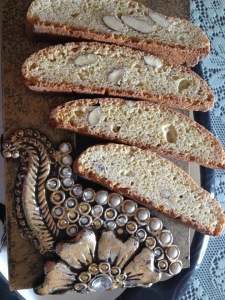
Almond biscotti . Biscotti  are hard Italian biscuits , traditionally served with tea , coffee , wine or port for dipping . Biscotti means twice baked . This second baking makes the biscuit hard and dry but they remain exquisitely tasty . My first try with biscotti was a very nervous experience as I didn’t know head or tail about biscotti . This time with great confidence went ahead and was done hassle free . As biscotti can be stored for two weeks . I did have them in my pantry for quite some time . The day the biscotti was over and the air tight container was into the sink , the same evening I got another packet of MARKS&SPENCERS  pistachio biscotti  from my friend meera aboo thamby all the way from U.K . The only difference being my almond biscottis were bigger in size , the pistachio biscotti were finger sized nibbles . I guess the biscotti bug just didn’t want to let go me , helping me to pile more calories as usual .

Ingredients

Ingredients
quantity
all purpose flour3 1/4 cups
baking powder1 tablespoon
salt1/3 teaspoon
sugar1 1/2 cups
unsalted butter melted 10 tablespoons
large eggs3
vanilla extract1 tablespoon
aniseed ( fennel ) ground2 teaspoon
whole almonds1 cup heaped toasted and coarsely chopped
egg white1

Method

  1. Position rack in center of oven and preheat to 350°F. Line baking sheet with parchment paper. Sift flour, baking powder and salt into medium bowl. Mix sugar, melted butter, 3 eggs, vanilla extract and ground aniseed in large bowl.
  2. Add flour mixture to egg mixture and stir with wooden spoon until well blended. Mix in almonds.Divide dough to equal half. Using floured hands, shape each dough half into 13 1/2-inch-long, 2 1/2-inch-wide log.
  3. Transfer both logs to prepared baking sheet, spacing apart. Whisk egg white in small bowl until foamy; brush over top and sides of each dough log.Bake logs until golden brown (logs will spread), about 30 minutes.
  4. Cool logs completely on sheet on rack, about 25 minutes. Maintain oven temperature.Transfer logs to work surface; discard parchment paper.
  5. Using serrated knife, cut logs on diagonal into 1/2-inch-wide slices. Arrange slices, cut side down, on same baking sheet. Bake 12 minutes. Turn biscotti over; bake until just beginning to colour, about 8 minutes.
  6. Transfer to rack and cool. (Can be prepared 1 week ahead. Store in airtight container at room temperature.)

Sweet potato balls

Share Button

image (41)

Preparation Time : 10 -15 minutes

Cooking Time : 10- 15 minutes

Serving : 4 members

Description

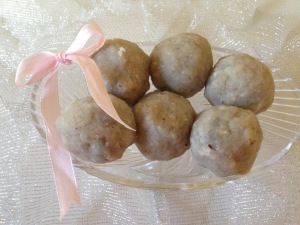
Sweet potato balls . A simple 3 ingredient wonder that I learnt at my mother – in – laws place . This dish is uncomplicated and ready in a few minutes . At mom’s place we mix boiled , peeled and mashed sweet potatoes with thick coconut milk and sugar to a porridge consistency or just have boiled and peeled sweet potatoes as it is . The natural sweetness and aroma of the sweet potato just melts you . These sweet potatoes are seldom eaten in any other form except boiled . While sweet potatoes are in season my home is over loaded with them from our farm . Once I did take a huge box full of these balls to my moms place . We ended up having a bunch of cousins for dinner . So these sweet potato balls also were served at the table . To my surprise my cousin Ahmed shah( shabu’s ) wife zarina loved it a lot and its my boy afzar’s favourite snack too . This pucker – inducing heavenly sweet ball took centre stage on the table .  This absolutely addictive drool worthy dessert snack is ridiculously easy to make With very little effort . It’s a must try dish for beginners .

Ingredients

Ingredients
Quantity
Boiled sweet potatoes 1/4 kg
Sugar to taste
Coconut grated1/4 cup
Salt1/4 teaspoon

Method

  1. Boil washed and cleaned sweet potatoes to soft and cooked through In 4 cups of water and salt .
  2. Usually I pressure cook them for 4 whistles . Cool completely , peel and mash the sweet potatoes .
  3. Add sugar to taste and grated coconut . Mix well . Roll into lemon size balls and serve at room temperature .

Nutella sandwich curl buns

Share Button

image (40)

Preparation Time : 1 hour -30 minutes

Cooking Time : 20-30 minutes

Serving : 6-8 members

Description

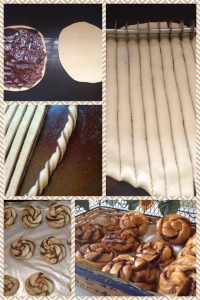
Nutella sandwich curl buns . My daughter ANISHA had e- mailed me an collage of step by step picture of this bun . Looked so appealing to the eyes with excellence oozing out from every glimpse .  then and there wanted to give a try but with no recipe in hand just had to save the  picture .last morning , my daughter ANISHA started of saying she wants to try her hands in making these Nutella buns .( I feel so good about getting to name dishes :-))  )  I told her , with no recipe in hand how can we go ahead . then i remembered , A few days back I had made cater   pillar chicken stuffed buns . The bun was really soft and moist . So decided to follow the bun recipe from the cater pillar buns . ANISHA started of by measuring the ingredients and sieving the flour . From there onwards she disappeared and I had to do the rest to finish the buns . But finally she went around saying I made these Nutella sandwich curl buns . The pleasure and liberty these kids have with us parents is so joyful  to the heart and soul , no matter how old they grow . Hot Nutella sandwich curl buns out of the oven . I was surprised with the unpredictable , artistic out come of using a new simple technique by twisting and curling the sandwich strips which created magic . Served the buns warm and they were devoured in no time . Quite an elaborate and  lengthy   Recipe apt for a relaxed weekend cooking .

Ingredients

Ingredients
Quantity
all-purpose flour2 cups
warm milk¾ cup
instant yeast1 teaspoon
baking powderpinch
sugar1/2 teaspoon
salt1 teaspoon
egg1 (lightly beaten and divided in half)
melted butter1 tablespoon
oil2 tablespoon
milk powder1 tablespoon

Method

  1. Sieve the flour, then add milk powder, baking powder, sugar, yeast and salt. Then add the oil, butter and half the egg (reserve the other half for brushing the bread later) and mix together.
  2. Now add the milk gradually whilst kneading. You might not need it all, so add it sparingly until your dough is nice and soft. If more milk is needed to get a soft dough consistency, warm a litte more and use.
  3. Knead for a good 8-10 minutes. The more you knead the softer the bread results will be.Touch a bit of oil with your fingertips and apply all over the ball of dough.
  4. Cover in a bowl and set aside for 40mins to an hour for it to double in size.Divide the dough into 2 equal sections. Start rolling each one into an oval/rectangular shape, about quarter inch or less thickness.
  5. apply Nutella all around one rectangle evenly . Cover with the other rectangle and sandwich them together .cut the sandwich into equal strips about 1/4 inch each .
  6. Twist each strip to get a curl and roll into a circle . Do the same with all the strips . keep covered with a wet damp cloth for 30 minutes . Brush with the remaining egg all around the surface of the buns .
  7. Preheat an oven to 180 degree Celsius and bake for 20 – 30 minutes until the buns are cooked through and has a golden colour . remove from oven and brush with melted butter .
  8. And keep covered in a damp wet cloth until needed to be served . Serve hot , warm or at room temperature .