Apricot whip

Share Button

image (34)

Preparation Time : 30 minutes

Cooking Time : 15 minutes + 4 hours or more to set in the refrigerator .

Serving : 10 members

Description

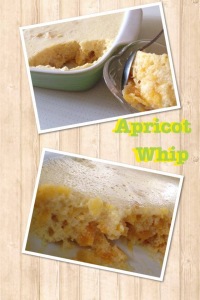
Apricot whip . A dessert that’s light , easy to make with very few ingredients ,high on taste and a strait forward recipe . The apricots add extra wickedness . This dessert is a perfect end to a meal And goes swiftly out of sight . The best apricots I have tasted till date are the ones that were shared with me by my class mate laila mehrabhi from Iran . They were long , finger length with a small seed inside . It was a light brown colour on the outer and a pale pink inside . The flavour of the sun was so dominating with a slight sourness and really sweet . Chewy and a taste bomb . I did try my luck to get similar apricots on my trip to Saudi Arabia and the Middle East but nothing near what laila shared with me . I guess , it tasted so delicious because I was given just one apricot and being in a boarding school you know our hunger and strong appetite for food . What ever my hunt has not come to a stop still ….

Ingredients

Ingredients
Quantity
Apricots 200 grams
Eggs3
Milk1 cup
Sugar3/4 cup
Gelatine3 tablespoons
Warm water1/4 cup
Vanilla essence1 teaspoon

Method

  1. Remove seeds from the apricots and boil them in 2 cups of water and cook to smooth . Cool and blend to a corse pulp . Add sugar and egg yolks . Cook on low heat mixing well for a few minutes not letting to boil .
  2. Add milk and vanilla essence . mix well and set aside . Soak gelatine in warm water and mix well till it dissolves completely . Mix into the apricot milk mixture . Beat the egg whites to stiff .
  3. Then carefully fold the egg whites into the apricot mixture . Pour into a pudding tray or bowl . Place in the refrigerator to set for four hours or more .
  4. ( Over night is better , in case you don’t have that much time , leave in the freezer for 3 hours , once set , place back into the refrigerator ) Serve chill .

Cornflakes crusted chocolate pudding

Share Button

image (32)

Preparation Time : 40 minutes

Cooking Time : 15 minutes + setting time in freezer for 1/2 an hour for each layer .

Serving : 10 members

Description

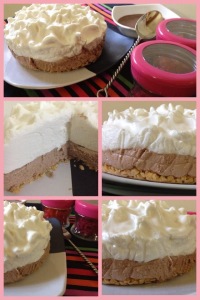
Cornflakes crusted chocolate pudding . A sweet demeanour with a mix of flavours ,  colours and textures Which will satisfy the cravings of the dessert devil in any one . A recipe which was sent to me hand written through post by shantha Gopinathan pillai ammuma from kollam . As mentioned before shantha ammuma is ambika pillai’s mother . A very humble , soft spoken , confident lady . The one thing I learnt from her was to follow your heart and be passionate and keep yourself busy with what you love to do the most . As my growing up as a kid was in a boarding school . Every passing day , I was introduced to some thing new practically , mentally , physically  and in all means . Life was an adventure there to keep up to the demands of the elite life style and surrounded with kids from all around the globe . Every day at the dinning table I was introduced to all sorts of new food items that I didn’t know existed . From cornflakes , tinned fish , peanut butter , home made banana jam , Kerala chammanthi podi , fish/ prawn / dates pickle …….. The list can go on and on … As at home we just stuck on to the country  ( naattu , naadan ) staple style of cooking . Used to wonder from where all this is being sourced . finally got to know about a shop called MOHANS  STORES  in ooty . one outing went there along with my parents and I was like a kid in a candy store , wanting all the things possible there . Even till date when ever I visit ooty I make it a point to visit Mohans stores  and am spoilt of choice ( as they have extended their shop to house hold articles and antics also ) . Folks don’t miss making this pudding and visiting MOHANS  STORES by chance you get to go to queen of the hills ooty .

Ingredients for the base

Ingredients
Quantity
Crushed cornflakes1 heaped cup full
Melted butter 1/4 cup
Powdered sugar ( icing powder ) 1/4 cup

Method for base

  1. Mix all the above ingredients together and line and press towards the base of a spring foam or a greased and lined pudding tray / bowl with cling film making sure you have extra on the sides to lift easily ,
  2. Once the pudding is set . Set aside in the freezer until the next filling layer is ready .

Ingredients for the filling

Ingredients
Quantity
Icing sugar170 grams
Butter85 grams
Egg yolks2
Cream 1 cup ( 4 oz )
Cocoa powder 1 1/2 tablespoons full ( i used drinking chocolate as was out of stock of cocoa powder in my pantry , that's why it's got a light brown colour )
Vanilla essence1 teaspoon
Gelatine2 teaspoon dissolved in 1/2 cup water

(place the dish over hot water on a stove top and dissolve the gelatine – double boiling)

Method for the filling

  1. Beat all ingredients mentioned above except for gelatine with the help of an electric egg beater one after the other till thick and smooth .
  2. Cool the gelatine to room temperature and mix into the chocolate mix .
  3. Pour over the cornflakes base and place in the freezer until the top layer is ready .

Ingredients for the top layer

Ingredients
Quantity
Egg whites4
Sugar powder ( icing sugar ) 4 oz or to taste
Gelatine2 teaspoons ( soak in 1/2 cup water and place the dish over hot water on a stove top and dissolve the gelatine - double boiling )
coolroom temperature
Vanilla essence 1 1/2 teaspoons full

Method

  1. Take a deep bowl . Wipe with a dry cloth making sure its clean with no water or any grease in the bowl . ( this helps the egg whites to get stiff soon ) .
  2. Beat the egg whites to stiff With the help of an electric egg beater .( even the egg beater should be free of grease and wetness ) . Turn the bowl over your head and the egg white should not drip or drop over to your head .
  3. It should be light , fluffy and stuck to the bowl itself . Add icing sugar little by little and keep beating with the electric egg beater . Add the cooled , room temperature gelatine little by little and the vanilla essence all along with the electric egg beater on .
  4. The mixture turns into a stiff marshmallowy mixture . Pile this mix over the chocolate filling . ( I just made a pokey pine sort of design on top by inserting a spoon in and pulling out to add more glamour to the pudding ) .
  5. Place in the freezer for 1/2 an hour or until set . Replace in the refrigerator . Remove before serving .
  6. If set in a spring foam just un clip the spring foam , remove the outer ring , Cut and serve chilled . If set in a pudding tray / bowl lined with cling film .
  7. Lift the pudding with the help of extra cling film and carefully peel the cling film . Replace over a serving plate , cut and serve chilled . can garnish with nuts and grated chocolate .( I didn’t do so as my pudding looked Devine , {no self praising please }) .

Sent from my iPhone


Gulab jamun cheese cake

Share Button

unnamed

image (75)

image (9)

Preparation time : 25 minutes

Cooking Time     : 15 minutes + 3 hours or over night in the refrigerator to set.

Serving               : 8-10 members

Description

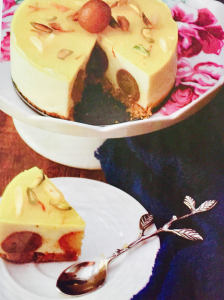
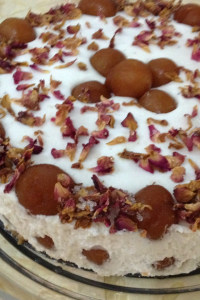
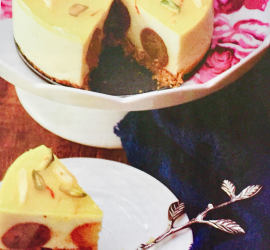
Gulab jamun cheese cake. It’s nearly more than a year since I made this dessert the very first time for the first anniversary of sauté, fry n bake.  I have made it at least more than six times after that but some thing or the other just keeps me away from posting this mighty fusion dessert always. I guess the new tried experiments excite me leaving way to over taking the older trials. As the saying goes old is gold. I just happened to check my picture gallery and found so many interesting pictures that are just put to sleep with out posting. So have made up my mind to post the old trials first from now on and get to the new trials in order later. Coming to this dessert. Fusion dishes are the in thing now that’s a change from the moaning  thundering dullness of predicted menus. I still remember my first home science class was about not to mix too many cuisines  when hosting a party. Well now a days it’s just the vis- versa. Besides, it’s fun to do something outside the scoop of your comfort zone, right ? I always make sure that a fusion dish does not turn into a confusion. Here the cardamom and rose flavour helps to balance and marry with the cheese cake with a global edge. This dessert was one among the best liked dessert on the first anniversary of sauté, fry n bakes dessert table spread. In fact I, myself didn’t get a tiny bit to taste that day. This cheesecake fusion idea will swing you into the on going deevali festive mode like never before and sure is damn addictive too. So hope you all enjoy trying this fusion dessert recipe that’s eclectic, fun, an expression of my  craving and love for the cuisines of the planet .

 Ingredients

Ingredients
Quantity
mini gulab jamuns30 pieces
fresh cream250 gm whipped with 75 gm powdered sugar
Digestive biscuits15 crushed
Melted butter 3 tablespoons + 1 teaspoon to grease the spring foam
rose water 1 tablespoon
agar agar / china grass10 grams soaked in 1 cup water
Cream cheese1/2 cup
vanilla essence1 teaspoon
cardamom powder 1/2 teaspoon
dried rose petals2 teaspoons or more to decorate

Method

  1. Mix crushed digestive biscuits with melted butter 3 tablespoons to get a bread crumb texture . Place over the bottom of a greased spring foam . Press gently and place in the refrigerator to set .
  2. Take a pan and cook agar agar / chic a grass with rose water and 1/4 cup water until agar agar dissolves completely and cool to room temperature .
    In a bowl, cream the cheese and make it smooth.
  3. Add the agar agar mixture to it and mix well. Now fold in the whipped cream with one teaspoon of dried rose petals . place a layer of gulab jamuns tightly all around the set biscuit layer . Pour in half of the cheesecake mixture.
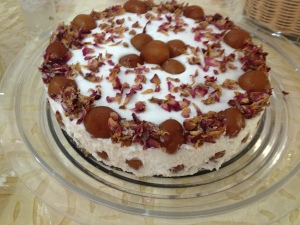
  4. Spread a layer of gulab jamuns again and top with rest of the cheese cake mixture.Level and set in the refrigerator for 3 hours or more . Garnish with more gulab jamuns all around the top . Sprinkle dried rose petals and serve chilled .

Deconstructed egg pudding

Share Button

image (62)

Preparation Time :  20 minutes

Cooking Time : 15 minutes + 3 hours to set the pudding in the freezer

Serving : 6-8 members

Description

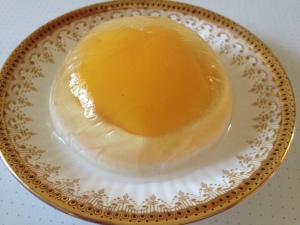
I always am awe struck with the term deconstructing a dish as you have to be a genius to do so . As I know I have nothing to do with being a genius nor these high end dishes will not be appreciated in the table at home . I never attempt to do such stuff in my kitchen  . But watching chef Heston Blumenthal in the telly having so much fun with his deconstructed version of food . I shock myself and made up my mind to do some thing in a small way at least . Well being inspired is important but getting to practise the inspiration is the way to do things and better your self isn’t it . Having such thoughts in mind still didn’t get the nervousness out of me . The guilt in me with the comfort zone that I created for myself was the obstacle to be broken here. I just put aside this guilt in me , cheating myself . Whiling my time away watching the telly as usual , I get to see chef Rachel Allen do an easy dessert with peaches that looked fantastic and was so very much like an egg in appearance . I hastily transcribed the recipe from the show on the telly to my stained hand written recipe note  book. Gave this pudding a try when my daughter and son – in – law were home on a holiday . Every one were like ” why are you serving eggs after dinner ” ? I just smiled and asked them to taste . The first mouth full , every one had raised eye brows and loved it to bits . They sure did like the trick played on them about the deconstructing part . So my quest on taking a hand in my kitchen playing with food like chef Heston Blumenthal was done through chef Rachel Allen’s simple recipe . The inspiration drawn from one chef and accomplished through another chef . Wired but done any ways .

Ingredients

Ingredients
Quantity
Butter1/4 teaspoon to grease
Cream2 cups
Tinned peaches 1 tin ( 500 gm )
Water1 cup
Vanilla essencefew drops
Vegetarian gelatine 6 tablespoons
Sugar to taste

Other things needed

Individual pudding bowls – few
Cling film

Method

  1. Grease all the individual pudding bowls with oil spray or butter . Line each greased pudding bowl with cling film pressing towards the bowl and leaving 1/2 inch of the cling film above the pudding bowl ( this helps to remove the cling film easily before serving the pudding ) .
  2. strain the tinned peaches . Reserve the syrup from the tinned peaches . place 1/2 whole pitted tinned peach cut side facing up in the bottom of the cling film lined pudding bowl .
  3. Add one cup of water and sugar to taste to the peach syrup . Bring to boil and dissolve the sugar . Microwave 3 tablespoons of vegetarian gelatine with 2 tablespoons of the sugar syrup for 30 seconds to dissolve and watery .
  4. Cool a little and add to the peach sugar syrup and mix well . Pour over the peach in the pudding bowl just enough to cover the peach .
  5. Place in the freezer for one hour to set . Mix cream , sugar to taste and vanilla essence together and heat in low flame to dissolve the sugar .
  6. Do not boil . Microwave 3 tablespoons of vegetarian gelatine with 2 tablespoons of water for 30 seconds to dissolve and watery . Cool a bit and add to the cream mixture .
  7. Pour this cream mixture over the set peach jelly in each individual pudding bowl to 1/2 inch thick . Place in the freezer to set for another 2 hours .
  8. Once set re – place in the refrigerator until to be served . Just before serving , invert the pudding over a plate , remove the pudding bowl . Peel off the cling film and serve chilled .

Dulce de leche

Share Button

image(34)

image(35)

Preparation Time : nil

Cooking Time : 40 minutes

Serving : as required

Description

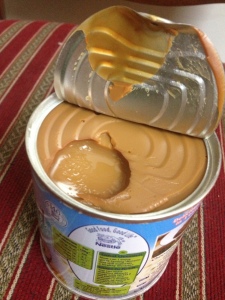
Dulce de leche . Till date I really don’t know the real pronunciation of this South American word .  Well it’s nothing but an American confection prepared by slowly heating sweetened milk to create a substance that derives its taste from the Maillard reaction, changing flavor and colour . Literally translated and it means “candy of milk” or “candy [made] of milk”, “milk candy”, or “milk jam” . I first got to know about this deadly ingredient when I came across a recipe of a brownie that used dulce de leche in them . Loving the marble effect on top of these brownies did take note of the recipe . Wanting to give it a try had to make dulce de leche . Was so nervous and scared to pressure cook a tin of condensed milk . Went ahead and it worked perfect resulting in a caramel coloured mass of sweet . As it takes a while to cook and cool down before wanting to use it as an ingredient , after my first try I always make it in a batch of two or three tins together and make sure to get the dolce de leche done a day before so it’s handy and convenient . The left over dulce  de leche can be stored in the refrigerator until needed for next time . This magical ingredient is used in cheese cakes , cakes , puddings , Banoffe pies , tarts , ice creams and so many other desserts . You just have to be more creative to use this ingredient as it tastes good as it is .so gear up peeps to add a hell lot more of calories with this fatty Devine culprit .

Ingredients

Ingredients
Quantity
Condensed milk 1 tin
Water enough to cover the tins

Method

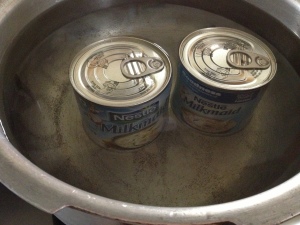
  1. Place a flat round pressure cooker with condensed milk tin in the Centre  . Pour water just up to the top of the condensed milk tin .
  2. Make sure the condensed milk tin is immersed in water well . Place over heat . Cover and pressure cook over medium heat for 40 minutes .
  3. Remove from flame and wait for the whistle heat to subside . Then open the pressure cooker lid and cool completely .
  4. Remove condensed milk tin from the cooled water . The condensed milk tin might be a bit hot still .
  5. So set aside to cool completely and then open the condensed milk tin . Your home made dulce de leche is ready to be devoured .

Notes

  1. Make sure the water is just above the condensed milk tin and the condensed milk tin is immersed in water well before pressure cooking .
  2. Cool cooked condensed milk tin well and then open .
  3. I usually made these a day ahead when required to save time .
  4. When making it’s better to make a set of two or three and store in the fridge so it’s handy to use when pressed for time .

Dragon fruit pudding

Share Button

image (2)

image (41)


image (27)

image (3)

Preparation Time : 20 minutes

Cooking Time : 20 minutes + 3 hours setting time in the freezer

Serving : 6 – 8 members

Description

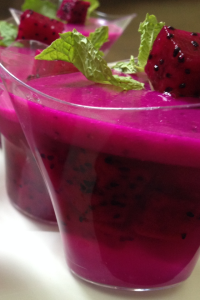
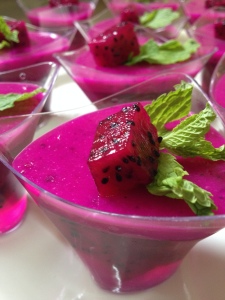
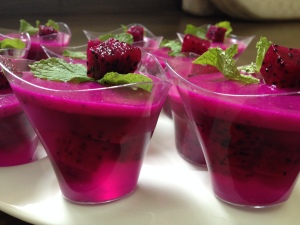
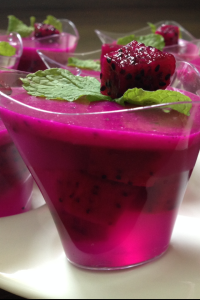
A dessert I came up with instantly to take over to a family gathering at my daughters place . My daughter kept reminding me about 2 dragon fruits in the refrigerator asking me to do something with it . The lazy bug in me when on a holiday just didn’t let me want to get into the kitchen . Finally with no other go had to do something with in four hours time as we were to start for the family get together on time . A pudding to set soon , the only cheats short cut option in mind was to use china grass / agar agar but dragon fruit alone would taste bland so pared it up tender coconut that was there at my daughters place . Started cutting the dragon fruit and with utter surprise found the dragon fruit to be a deep pink colour . My first time seeing a dragon fruit in this colour as usually we get only the white ones . Went ahead with my plan and the results were a vibrant coloured , awesome tasting pudding , Terribly simple to make and very impressive . Took  it for the family get together and it was the talk of the event leaving a mark in every ones memory . As usual I clicked pictures to post and share with all of you . My gal also clicked a few pictures saying she is going to post it on face book in a foodie group ( Kovai foodies ) where there was a food photography contest going on . The excitement of the out come of the pudding over took the news about the food photography contest at that point of time and a forgotten story there after . In a weeks time my gal calls me and conveys the message saying she won the second prize in the food photography contest . I was over whelmed and proud as a mother and the creator of the dessert . That one moment of a genius spark  that helped me invent this pudding took my gal places .

Ingredients

Ingredients
Quantity
Red dragon fruit 2 big peeled and cubed
White dragon fruit 2 big peeled and cubed
Tender coconut water5 cups
Tender coconut flesh3 tender coconuts ground to a smooth purée
Sugar to taste
China grass / agar agar 20 grams

Method

  1. Soak 10 grams of china grass / agar agar in 3 cups of tender coconut water for ten minutes . Place it over medium flame and keep stirring until the china grass dissolves . Takes about ten minutes . Add sugar to taste . Remove from heat , strain and cool for 4-5 minutes .
  2. Place 3 cubes of white dragon fruit and 3 cubes of pink colour dragon fruit into individual pudding cups 3/4 way . Pour the cooled tender coconut water mixture over making sure the dragon fruit cubes are immersed into the tender coconut water mixture .
  3.  Place in the freezer for 30 minutes to set . The first layer is done . For the second layer , soak the remaining 10 grams of china grass / agar agar in 2 cups of tender coconut for 10 minutes .
  4. Blitz the remaining red and white coloured ( I used only red coloured dragon fruits ) Dragon Fruits together making sure to keep the seeds whole but to get a coarse purée . Set aside .place the second batch of soaked  tender coconut water and china grass / agar agar over medium flame .
  5. Keep stirring occasionally to dissolve the china grass / agar agar for ten minutes . Add sugar to taste . Remove from heat . Cool for five minutes .
  6. Mix together the puréed dragon fruit pulp with the ground tender coconut purée .mix the above mixed purée to the cooled second batch of tender coconut  china grass / agar agar mixture gently making sure it’s not lumpy but smooth semi thick batter like . Check sweetness and add more sugar if needed .
  7. Pour over the set first layer of the pudding to one inch thick . Place in the freezer again to set for another 30 minutes .
  8. Remove from freezer and replace in the refrigerator until to be served .Serve chill garnished with two cubes of dragon fruit cubes and a spring of mint on top .

Malpua

Share Button

image (28)

Preparation Time : 30 minutes

Cooking Time : 30 -35 minutes

Serving : 8 members

Description

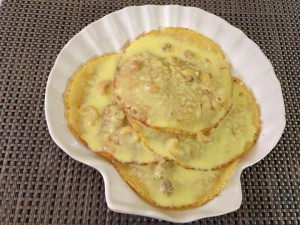
Malpuas are rich , soft deep fried pancakes which are soaked in saffron flavoured sugar syrup and eaten warm , topped with rabdi or almonds and pistachios . This recipe is an instant version to the authentic recipe . This sweet doesn’t take much skill or any special equipment to pull off . Sure this sweet will high lighten your Diwali table with a succession of celebration and a great meal. Much of the prep for the dessert can be done in advance , leaving you more time with your loved ones as festive time is together time . The pillowy malpuas soaked in the sugar syrup and topped with rabdi are gooey , chewy and delicious that are outstanding when served warm . Top with a scoop of vanilla ice cream which serves as a timeless combination . This dessert is packed in with quite a lot of calories , but all of us can do with an occasional treat , cant we ??? And get a taste of happiness.

Main Ingredients

Ingredients
Quantity
Flour / maida3 cups
Semolina1/4 cup
Milk2 litres
Sugar1/2 cup + 2 cups for sugar syrup
Ghee / oilto deep fry
Saffrona pinch soaked in 1/4 cup warm milk
Baking soda1 teaspoon
Cardamom powder2 teaspoons
Fennel seeds2 tablespoons
Crushed cashew nuts1/4 cup
Raisinssoaked in water 1/4 cup
Salta pinch
Yellow food colora few drops ( optional )

Method for sugar syrup

  1. In a heavy bottomed pan , add 2 cups of sugar and 1 1/4 cup of water . Bring to boil adding a pinch of cardamom powder .
  2. Boil for about 15 minutes in medium heat . Remove from heat and set aside .
  3. The syrup should be warm and not too hot when you put the fried malpuas in it .

Method for the malpua

  1. Boil milk with 1/2 cup sugar . Reduce it to 3/4 the amount . Cool down to room temperature .
  2. Take semolina in a big vessel . Pour the milk and let it soak for 15 minutes.
  3. Now add the flour , baking powder , cardamom powder , yellow food colour and salt . Mix well with a whisk or an electric egg beater making sure no lumps are in the batter .
  4. Add fennel seeds , saffron soaked in warm milk , cashew nuts and raisins . Mix well with your hands .
  5. The batter consistency must be like of dosa batter consistency . Set aside for three hours . ( You can start of with making the rabdi now , step -3 ) Heat ghee in a small non – stick pan with edges .
  6. Once hot , lower the flame for a minute . Pour a ladle full of batter . It will take a round shape . Let one side cook for a minute , flip over to cook on the other side .
  7. When done , remove and put it into the warm sugar syrup . Leave for 30 seconds , remove and set aside . Do the same with the remaining batter . Serve warm with rabdi .

Ingredients for Rabdi

Ingredients
Quantity
Milk4 cups
Sugar2 tablespoons
Rose water1 teaspoon
Green cardamom powder1 teaspoon
Almondsa few
Pistachiosa few
Yellow food colorfew drops ( optional )
Cream1/4 cup
Saffrona pinch

Method for Rabdi

  1. Blanch the almonds and pistachios, peel and slice them thinly. Bring the milk to the boil then cook slowly on low heat for at least half an hour.
  2. Stir frequently and let the cream thicken at the edge of the pan. Add all the other ingredients and mix well . Remove from heat and cool down.

Note

  1. Make sure not to soak the malpuas in sugar syrup for too long.

Banoffe pie

Share Button

image(12)image(13)

Preparation Time : 1 hour + setting time in the refrigerator

Cooking Time : 30 – 40 minutes

Serving : 8 members

Description

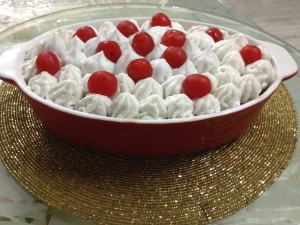
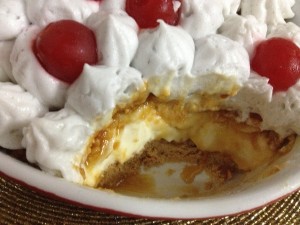
Banoffe pie , a name that was raved about in all the foodie groups i  am a part of . Getting to look at the pictures posted I was like this must be some rocket science that’s not apt for me .  But I did save a recipe thinking will give it try some day to kill time and keep myself busy . Not sure how the pudding would taste I made a very small portion . The difficulty in this pudding is making the caramelised treat – dolce de leche , once that is ready in hand it only requires some quick assembling and setting it in the refrigerator . Dolce de leche is the in thing in desserts now a days and the best part being it taste exactly like the South Indian sweet pal kova or to be precise more like seen pal which is the first milk of the cow after it’s given birth that’s left over a wood stove top to reduce and caramelise  along with sugar . A good example on how the world revolves  around food with the same dishes but depicted  in different ways to suit culture and food habits . Oops , coming to pudding again . An amalgamation  of different flavours and textures in each layer that simply works as a flavour burst in one spoon full in your mouth . Exotic , yet simple and delicious that’s stress free when prepared ahead to a more relaxed meal for you and your guests .

Ingredients

Ingredients
Quantity
Condensed milk1 tin
Digestive biscuits10 to 15 crumbled
Butter50 grams
Bananas sliced 3 big
Whipped cream2 cups
Icing sugar5 tablespoons
Cherries to decorate

Method

Step 1

In pressure cooker place the condensed milk tin with water covered till the neck of the tin. Cook this for about 15 – 20 mins until 4 to 5 whistles in medium heat .
Once the cooker is cooled, remove it carefully & place it under the running water to cool. Once its cooled remove the tin cover & keep it in the fridge for it to cool for some more time or over night . ( I do this step a day before ) dulce de leche is ready .

Step2

Tip the biscuit crumbs into a bowl.Add the butter and mix in. Spoon the crumbs into a greased pudding bowl or spring form in the bottom . Press firmly  .( can do the sides as well to get a pie ) Chill in the freezer for 10 minutes.

Step3

Spread the Dulce le leche base evenly over the biscuit base. Now place the banana slices on top of the dolce de leche .

Step 4

Whip the whipping cream with icing sugar untill still peaks. Fill the piping bag with whipped cream & fill the top  with 2 inch thickness whipped cream. (I used the star tip to get this flower design)

Step 5

Garnish the top with cherries & chill in it the fridge for about 2 hours. If you are impatient like me, than put it in the freezer for about 1/2 hour & its ready to serve chilled .


Mars cornflakes crackle bites

Share Button

image(2)

Preparation Time : 10 minutes

Cooking Time : 10 -15 minutes

Serving : 6 – 8 members

Description

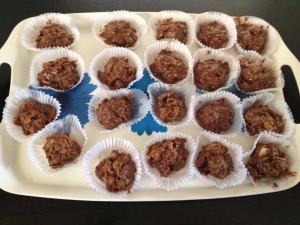
Mars cornflakes crackle bites . A really simple four ingredient wonder recipe that I came across in UAE food guild which can be made with effortless ease . Wanted to give it a try immediately but as eid ul azha was to come in a few days , saved it for later and to be celebrated on that day . This was done in a jiffy  of 20 minutes . Served it to my hubby’s niece azrin and nephew ahraf . They were like from where did you buy it and just didn’t want to believe that I made These cute , little   party nibbles . This drool worthy dessert will feed a crowd in fine fashion . have a few left , ( even after we all almost had a few after every meal ) that’s been packed for my girl ANISHA ( who is a chocoholic ) can’t wait to get her verdict on this sweet culprit that is a complete seduction to all your Senses :-)) .

Ingredients

Ingredients
Quantity
Mars chocolate bars(200 grams ) 4 pieces chopped
Butter50 grams
Cornflakes2 cups
Almond flakes or chopped 1/4 cup
Cup cake paper moulds few

Method

  1. In a non stick pan melt butter and mars chocolate chunks and melt to get a nice , gooey sauce consistency in medium heat .
  2. Then add the cornflakes and almond flakes . Mix well .
  3. With the help of teaspoon drop 2 teaspoons of this mixture into a greased cup cake paper mould and chill it in fridge for 15 mins only . .If u chill for more time , it becomes like eclairs hard..not crispy crunchy .
  4. Later u can store all in a air tight glass container.

Notes

  1. Those who want kids to eat walnuts you can dip walnuts or whole almonds in this sauce….kids will  love it too…

Fruit Mosaic glass jelly

Share Button

fm1

fm2

fm3

Preparation Time : 10 minutes

Cooking Time : 10 minutes + 3 hours or more of refrigeration for the jelly to set

Serving : 8 – 10 members

Description

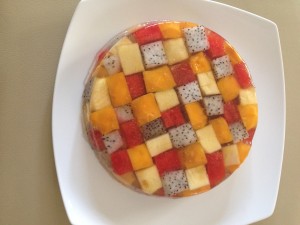
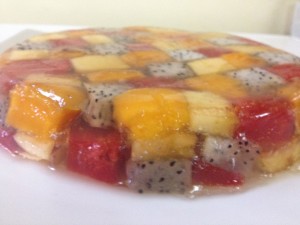
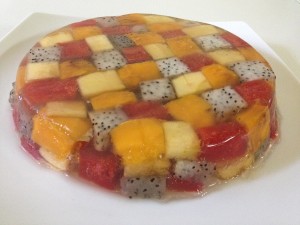
This mosaic fruit glass jelly made with your choice of mixed colored fruits makes a stunning and easy dessert for the family and to entertain guests effortlessly with a vibrant , Refreshing and light look . This dessert requires only minimal ingredients including gelatine and mixed fruits of your choice to make. Don’t forget to get the kids involved as well . They sure will love to work beside you . To make a good mosaic fruit glass jelly ensure the fruits used are firm and just ripe. To make the jelly you need 3 to 4 cups of water to about 2 tablespoons of gelatine. However, in this recipe, I use a higher ratio of gelatine to make sure the fruits are well encased.You can use almost any type of fruits to make this mosaic fruit glass jelly . Just remember to avoid fruits that contain bromeliad such as fresh pineapples, papaya, kiwi, guava and fig. Bromeliad breaks down gelatine causing it to lose its thickening properties.

Ingredients

Ingredients
Quantity
Gelatine4 tablespoons
Sugarto taste
Water4 cups
dragon fruit1 cup
Applescubed 1 cup
Water melondeseeded and cubed 1 cup
Ripe firm mangocubed 1 cup
Vanilla essencefew drops
Butter2 tablespoons to grease

Method

  1. Pat dry the cubed fruits with the help of a clean kitchen towel and set aside .In a small bowl, sprinkle gelatin over 1/4 cup water , let it soften for 5 minutes.
  2. Heat sugar with water in a saucepan over medium-high heat until sugar dissolves . Remove from heat, stir in softened gelatine and mix well until dissolved, then stir in vanilla essence .
  3. Arrange fruits in a round , greased pan alternatively in two layers to get a vibrant colourful glass jelly tightly . So when you pour the gelatine liquid the fruit cubes don’t wobble around but stay intact .
  4. Pour gelatine mixture over, pressing fruits gently to submerge the fruits completely making sure the gelatine liquid is all around , bottom and top of the fruits . (remove some if necessary.)
  5. Place in the freezer for at least 3 hours to set , then replace in the refrigerator until to be served . To un mould the glass jelly , run a wet sharp knife all around the jelly .
  6. Then dip bottom of container in hot water for about 5-10 seconds. Invert onto a serving platter, and shake firmly to release.
  7. If not serving immediately, return to refrigerator. Cut and Serve cold as it is .