Methi roti

Share Button

methiroti

Preparation Time : 1 Hour 10 minutes

Cooking Time : 1 1/2 minutes for each roti

Serving : 4 members

Description

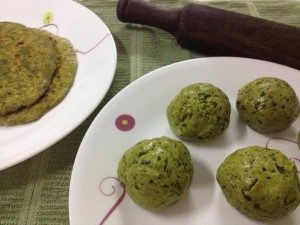
Methi chapathi . A vegetarian delight which is healthy and delicious . These green coloured chapathis are full of nutritional boost that will make them a staple at home . I did start making these chapathis at home very recently . As methi leaves were not available at my place all these years . I used to source them from my moms place most of the time before . when I was newly married and just started to cook along with my mother – in – law , I had got a bunch of methi leaves from home . all excited about cooking a new dish at in – laws place , I geared up to prepare methi chicken . Finished cooking and it tasted good .I was just so very curiously waiting for every ones verdict in the lunch table . Every one ate the chicken but the methi leaves were just put away into the waste plate . Was wondering what went wrong ??? When I ate , gosh the methi leaves were so rough and fibrous . Called mom to find out what went wrong , repeated the entire recipe as to how I prepared the dish . Every thing I did was right except for the cleaning the methi leaves which was done in a wrong way . We have to separate the leaves alone from the stem . I chopped the stem and leaves together as we do for other greens . What a fool , I was ……. Oops , even till date I do make such silly flaws in the kitchen :-)))) regardless of your devotion to food and experience in the kitchen , even the simplest thing might turn reverse at times .which helps you as a solution to sharpen your kitchen skills and fancy a challenge .

Ingredients

Ingredients
Quantity
Wheat flour2 cups
Fresh methi ( fenugreek ) leaves
1 bunch ( 1 cup )
Small onions5
Ginger1/4 inch piece
Garlic1 flake ,
Coriander leaves1 teaspoon
Turmeric powdera pinch
Cumin powder1/2 teaspoon
Green chilli1
Garam masalaa big pinch
Curd1 tablespoon
Oil1 tablespoon
Waterlittle if required
Saltto taste
Sugar1 teaspoon
Butter or ghee to garnish

Method

  1. Remove the fenugreek leaves alone . Wash and soak the fenugreek leaves in 1/4 teaspoon of salt and 1 teaspoon of sugar added to a big bowl of water . Set aside for 1/2 an hour .
  2. Blitz small onion , ginger , garlic , green chilli , coriander leaves and drained fenugreek leaves in a food processor just to crush them to a coarse mixture .
  3. Add all the ingredients to the crushed mixture . Mix well . Add water if needed to get a smooth dough . Set aside for 1/2 an hour .
  4. Roll into equal lemon size balls . Dust wheat flour and roll each ball to a round shaped chapathi .
  5. Heat a tawa . Place the rolled chapathi over and cook undisturbed for 30 seconds . Turn over and do the same .
  6. Turn over once more and cook until the chapathi is cooked through and you find small brown spots appear all around the chapathi .
  7. Top with a dot of butter or just spread with a spoon dipped into ghee all over the chapathi on one side .
  8. Serve hot with any gravy of your choice .

South Indian style baby corn stir fry

Share Button

IMG_5903

southbaby

Preparation Time : 30 minutes

Cooking Time : 30 minutes

Serving : 6 members

Description

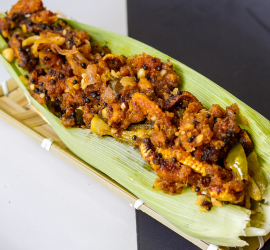
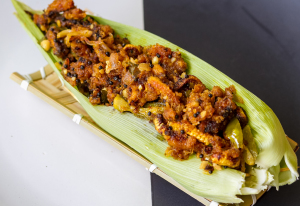
South Indian style baby corn stir fry . This dish is adhitya bhels recipe from NDTV GOOD TIMES . I loved the innovative concept of how he used this vegetable in a typical South Indian style . The South Indian twist makes it more interesting . i have made a few changes from his recipe to match my comfort zone as I do always . As you start to chew this dish you feel a combination of new flavors burst in your mouth but as you tend to swallow it feels like its just like how mummy makes it . Any thing deep fried is irresistible to me ( actually any form of FOOD is irresistible to me now a days ) . Wonder why all that tastes good is a taboo for us to be consumed . The pain and mental stress we female non – stop foodies have to go through is un imaginable . 24 hours a day your mind is stuck with food being around you in the kitchen , on the table , in your mind , on your telly , in the laptop , in your social networks , in the food related groups on the net , in your dreams …. The list can just go on and on . Finally all you get to do is treat yourself with every thing through your eyes , smell through your nose , but nothing much should be done through your mouth . At times when you think come on once in a while its ok , go ahead and treat yourself … you do dive in and hog . just as you finish , you instantly feel your soul being pumped with guilt and your heart getting heavier . so the joy of soul full food is there in you only till you finish eating . I pity all my fellow folks who ever are going through this as I am . But ultimately , one cannot think well , love well , sleep well , if one has not dined well !!!!!

Ingredients

Ingredients
Quantity
Baby corn500 grams cut into thin long strips
Ginger garlic paste1/4 teaspoon each
Chilli powder1 tablespoon
Rice flour1/2 cup
Lemon1 /2 lime
Turmeric powder 1/4 teaspoon
Garam masala powder1/4 teaspoon
Corn flour1/2 cup
Coconut oil 2 teaspoons
Small onion 6 chopped
Ginger crushed1/4 teaspoon
Curd2 tablespoon
Oilto deep fry
Green chillies4 , slit into 4
Curry leavesfew
Coriander leaves1 teaspoon chopped ,
Roasted Peanuts1 tablespoon crushed

Method

  1. Marinate baby corn with lime juice , ginger garlic paste , turmeric powder, chilli powder, garam masala powder and salt to taste for 10 minutes .
  2. Add rice flour and corn flour and mix well , Adding little water to coat both the flours around the baby corn .
  3. Deep fry the baby corn to crisp .Drain and set aside . Heat coconut oil , add mustard seeds . Once they crackle add small onions , slit green chillies , grated ginger and curry leaves .
  4. Saute for a minute in low flame . Add the curd and fry till they curdle . Add the fried baby corn and saute for another two minutes .
  5. Garnish with coriander leaves and crushed roasted peanuts . Serve hot as a starter or a side dish .

Kolhapuri vegetable masala

Share Button

kolhapuri

Preparation Time : 45 minutes

Cooking Time : 20 minutes

Serving : 4 to 5 members

Description

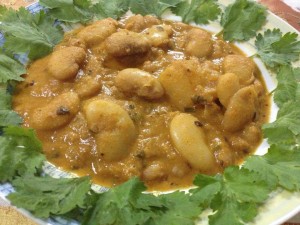
Kolhapuri vegetable masala . Any thing to be cooked in non – vegetarian is a cake walk for me but vegetarian cooking ??????? in recent , hubby prefers vegetarian food . I am put into the pressure of vegetarianism ( cooking and eating ). I know very few vegetarian graves and mostly based with onion and tomato gravy ( Can’t think of managing without these versatile staple veggies { oops tomato is a fruit } ) . This dish is made with kolhapuri masala which is made with dried coconut . Has an entirely different taste . kolhapuri masala recipe was from the net but I have made my quite essential twists and turns to jazz up the dish to suit our pallet at home . The boiled peanuts used gives the dish a dash of romance . Out of the Blue , I managed to create a delicate , alchemical infusion of flavors and textures in a vegetarian gravy . Hurray ….:-)))))

Ingredients for kolhapuri masala

Note : Can be stored in the freezer for few days

Ingredients
Quantity
Dry coconut1/4 cup , ( copra , coparai thenga )
Dry red chillies8 or to taste
Turmeric powder1/4 teaspoon
garlic5 cloves
ginger1 inch piece
poppy seeds(khus-khus)1 tablespoon
sesame seeds1 tablespoon
onions1 cup chopped
tomatoes 1 1/2 cup chopped , ( I just blitzed the tomatoes in a blender to a coarse pulp )
salt to taste
Oil3 tablespoons

Method for kolhapuri masala

  1. Combine all the ingredients given above except for onions, tomatoes, salt and oil .
  2. Grind to a smooth paste using little water. Heat oil and saute onions till brown add tomatoes saute till oil separates.
  3. Add the above paste and salt, saute till oil comes above cool and store.

Ingredients for vegetarian kolhapuri 

Ingredients
Quantity
White board beans 1 cup fresh or dried ( I used dried ones that were soaked over night and boiled )
Peanuts1/2 cup boiled
Potatoes 1 cup cubed and boiled
kolhapuri gravyaccording to taste ( above made gravy )
garam masala powder1/4 teaspoon
Oil2 tablespoons
Coriander leavesto garnish
Saltto taste

Method for Gravy

  1. Heat oil in kadhai or a non stick pan add the kolhapuri gravy masala , garam masala , salt and little water adjusting the consistency of the gravy.
  2. Mix well . Cover with a lid and bring to boil . Add the boiled white board beans , peanuts and potatoes . Mix well .
  3. Simmer the gravy for five minutes letting all the flavours infuse into each other till oil separates .
  4. Check the consistency of the gravy . Taste and adjust . garnish with chopped coriander leaves.
  5. Serve hot with chapathis , pooris , naan or kulchas.


Cucumber relish salad with cheese dressing

Share Button

cucumber

Preparation Time : 15 minutes

Cooking Time : 10 minutes to cook sweet corn kernels

Serving : 4 to 6 members

Description

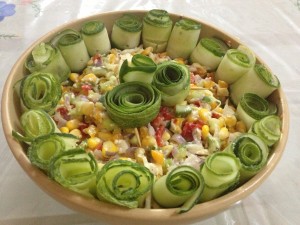
Cucumber relish salad with cheese dressing . A salad I came up with when I had to have a grand spread on the table for lunch when my brother visited my place after three years on a holiday to India with his family from United Kingdom . The food habits that the NRI people follow does challenge you a lot at times . I had to come up with four different salads with each tasting different making sure not to repeat the vegetables used as well . Some how I managed to pull it of and this cheesy fatty culprit did shine among the four salads on display ending with a clean whipped empty bowl that was removed after the lunch . The difficulty in putting up a salad is that it’s not a melting one pot dish with flavors let to infuse into each other . In a salad bowl, you put in the different things. You want the vegetables – the lettuce, the cucumbers, the onions, the green peppers so on so forth to maintain each of their identity along with a dressing that marries each one of the vegetables used perfectly . You have to be prepared to appreciate the difference in taste , texture and color . Gear up people for a mouth full of different munching .

Ingredients for cheese dressing

Ingredients
Quantity
Cheese spread5 tablespoons
Butter milk2 tablespoons
Hung curd2 tablespoons
Mayonnaise2 tablespoons
Vinegar1 teaspoon
Sugar1/4 teaspoon
Garlic powder1/4 teaspoon
Salt + pepper to taste

Method for dressing

  1. Mix all the above ingredients together to get a smooth thick mass of dressing .
  2. Taste and adjust seasoning , set aside .

Other ingredients

Ingredients
Quantity
Big Cucumber1 1/2 chopped
Apple1 chopped
Canned Pineapple4 slices chopped
Red pepper1/2 chopped
Onion1 chopped
Cooked Sweet corn Kernels 1/2 cup

To Decorate 

  1. Thin long slices of cucumber’s with skin done with the help of a potato peeler .

How to proceed 

  1. Mix all the chopped fruits and vegetables together .
  2. Toss with the cheese dressing with the mixed chopped fruits and vegetables . Taste and adjust seasoning .
  3. Place in the refrigerator until required to be served .
  4. Roll the thin cucumber slices into roses and decorate to your choice . ( in case the roses don’t stay intact ,use tooth picks to secure them together ) serve chill .

Fruit Mosaic glass jelly

Share Button

fm1

fm2

fm3

Preparation Time : 10 minutes

Cooking Time : 10 minutes + 3 hours or more of refrigeration for the jelly to set

Serving : 8 – 10 members

Description

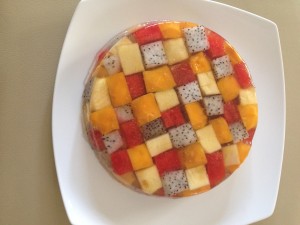
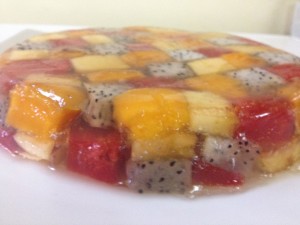
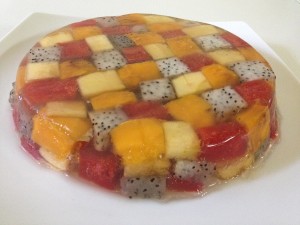
This mosaic fruit glass jelly made with your choice of mixed colored fruits makes a stunning and easy dessert for the family and to entertain guests effortlessly with a vibrant , Refreshing and light look . This dessert requires only minimal ingredients including gelatine and mixed fruits of your choice to make. Don’t forget to get the kids involved as well . They sure will love to work beside you . To make a good mosaic fruit glass jelly ensure the fruits used are firm and just ripe. To make the jelly you need 3 to 4 cups of water to about 2 tablespoons of gelatine. However, in this recipe, I use a higher ratio of gelatine to make sure the fruits are well encased.You can use almost any type of fruits to make this mosaic fruit glass jelly . Just remember to avoid fruits that contain bromeliad such as fresh pineapples, papaya, kiwi, guava and fig. Bromeliad breaks down gelatine causing it to lose its thickening properties.

Ingredients

Ingredients
Quantity
Gelatine4 tablespoons
Sugarto taste
Water4 cups
dragon fruit1 cup
Applescubed 1 cup
Water melondeseeded and cubed 1 cup
Ripe firm mangocubed 1 cup
Vanilla essencefew drops
Butter2 tablespoons to grease

Method

  1. Pat dry the cubed fruits with the help of a clean kitchen towel and set aside .In a small bowl, sprinkle gelatin over 1/4 cup water , let it soften for 5 minutes.
  2. Heat sugar with water in a saucepan over medium-high heat until sugar dissolves . Remove from heat, stir in softened gelatine and mix well until dissolved, then stir in vanilla essence .
  3. Arrange fruits in a round , greased pan alternatively in two layers to get a vibrant colourful glass jelly tightly . So when you pour the gelatine liquid the fruit cubes don’t wobble around but stay intact .
  4. Pour gelatine mixture over, pressing fruits gently to submerge the fruits completely making sure the gelatine liquid is all around , bottom and top of the fruits . (remove some if necessary.)
  5. Place in the freezer for at least 3 hours to set , then replace in the refrigerator until to be served . To un mould the glass jelly , run a wet sharp knife all around the jelly .
  6. Then dip bottom of container in hot water for about 5-10 seconds. Invert onto a serving platter, and shake firmly to release.
  7. If not serving immediately, return to refrigerator. Cut and Serve cold as it is .

Potato gnocchi with mushroom herby brown butter

Share Button

potato

Preparation Time : 40 minutes

Cooking Time : 30 minutes

Serving : 5 to 6 members

Description

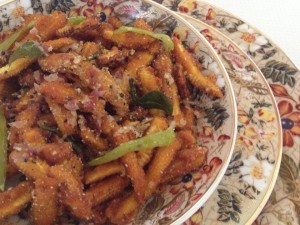
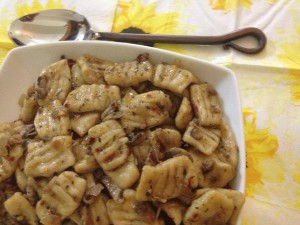
Potato gnocchi with mushroom herby burnt butter .An Italian origin dish served as an entree alternative to soup or pasta which is a sort of dumpling made with steamed potatoes , egg and flour . Served hot or warm .
Common accompaniments of gnocchi include melted butter (sometimes fried butter) with sage, pesto, and various sauces.
Like many Italian dishes, there is considerable variation in recipes and names across different regions of Italy . I am not sure which region this recipe is from . I did get to know about this wonder dish through the telly . From then , being wanting to give it a try . Finally one fine day started of very nervously , following the recipe that require a little effort but that makes it all the more worth while . Finished boiling the gnocchi and had to make a sauce now . I didn’t want to make the usual tomato or cheese based sauce that I make for pasta or any Italian dishes . Came across a recipe that used pumpkins and mushrooms with burnt butter and sage with gnocchi . Loved the idea and went ahead by omitting the pumpkin and substituting sage with mixed herbs . Though it looks and sounds less pretentious , works surprisingly well with all the elements coming together . I guess the butter did the magic here as every thing tastes better with a smear of melted butter . more butter used , more better in taste :-)) The gnocchi’s were soft and moist drunk with the fragrantly herby butter and stock . Every one in the table liked it except my boy , Afzar who missed his cheesy creamy sauce .

Ingredients for potato gnocchi

Ingredients
Quantity
potatoes (washed), peeled, quartered4 about 800 grams
Salt & ground white pepper to taste
egg lightly whisked1
plain flour2 cups ( 300 grams )
finely grated parmesan1/4 cup ( 20 grams )
Plain flour little to dust

Method for potato gnocchi

  1. Add enough water to a saucepan to reach a depth of 3 cm. Bring to the boil over high heat.
  2. Place potato in a metal steaming basket. Place steamer in saucepan (make sure base of steamer doesn’t touch the water). Steam, covered, for 15 minutes or until tender. (It’s best to steam rather than boil the potato.
  3. Boiling can saturate potato with water, which will increase the amount of flour required and result in a heavier gnocchi.) Transfer to a bowl and use a potato masher to mash until smooth.
  4. Season with salt and pepper.Add the egg and stir with a wooden spoon until combined. Add half the flour and parmesan and stir until combined. Add the remaining flour, in 2 more batches, until well combined and a firm dough forms. (If dough is too soft, add more flour.)
  5. Turn onto a lightly floured surface and knead until smooth. Line a baking tray with non-stick baking paper. Divide dough into 4 equal portions. Roll 1 portion into a 2 cm-diameter log about 30 cm long.
  6. Use a lightly floured knife to cut into 2cm pieces. Repeat with remaining dough portions.
  7. Lightly flour your hands and roll each piece of dough into a ball. Use your thumb to roll each ball over a floured fork. Place on tray.Bring a saucepan of salted water to the boil over medium heat.
  8. Add one-quarter of gnocchi (drop onto base of pan in a single layer, but don’t overcrowd as they can stick together) and cook for 3 minutes or until they rise to the surface.
  9. Use a slotted spoon to drain and transfer to a bowl. Cover with foil to keep warm. Repeat, in 3 more batches, with the remaining gnocchi.

Ingredients for Mushroom herby Brown Butter

Ingredients
Quantity
Butter4 tablespoons + 2 tablespoons extra
Mixed dried herbs - (basil , oregano , thyme , rose Mary , dill and sage) 2 pinches each
Maggi chicken stock1 cube
olive oil1 tablespoon
sliced mushrooms250 grams
Grated Parmesan cheese for serving

Method for Mushroom herby Brown Butter

  1. Melt 2 tablespoons butter with olive oil in large skillet then add mushrooms. Saute until tender and cooked down. Remove and set aside .
  2. Heat remaining butter in a large skillet over medium-low heat until melted. Add mixed dried herbs and continue cooking until butter turns a clear, dark amber, being careful not to burn.
  3. Add chicken stock cube to butter along with 1/4 cup warm water . Bring to boil . Add drained gnocchi to skillet with butter and stock, tossing to coat evenly.
  4. Add cooked mushroom slices, tossing to coat evenly.Season with salt ( be careful with salt as butter and the stock cube contains a lot of salt ) and pepper, and top with grated Parmesan cheese . Serve hot .

Notes

  1. These gnocchi’s stay moist and soft even the next day if kept in the fridge and heated in the microwave .
  2. The shape of my gnocchi’s are a bit different Than the regular shape as I didn’t get the original form of rolling with a fork right so just went ahead with what I felt comfortable with .
  3. Make sure not to over crowd the gnocchi’s while boiling them . Boil them in 3 – 4 batches .
  4. I used a little chilli flakes as well to spike up the herby butter sauce a bit . It’s optional and your choice to add or omit this ingredient .

Onion soup

Share Button

onion

Preparation Time : 10 minutes

Cooking Time : 20 minutes

Serving : 5 members

Description

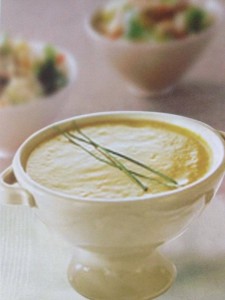
Onion soup . This is the basic method I follow to make a rich creamy soup at home . Not sure from where I learnt it . The first time I tried it out was with mushrooms when my brother Darvesh was sick and had to be given some soup ( I did avoid the butter and cheese then but everything tastes better with a smear of melted butter :-)) . just loved the creaminess the white sauce gives to the soup . From then on this has been my magical mantra for a creamy rich soup . I do the same with carrots , green peas and potatoes . Once wanting to make mushroom soup for dinner .. Started of but in between noticed that I had no veggies at all . Just went ahead with onions and the soup was Delicate , velvety , creamy and yum . Now a days when ever confused about what to do for dinner , any unexpected guests drop in home and pressed for time , the first in my menu list is onion soup . It rustles up a fuss free yet impressive brunch apt for any meal or time of day . What more do you need than soaking into good food with a relaxed ambiance .

Ingredients

Ingredients
Quantity
Onions1/4 kg sliced
Garlic1 big flake
Butter4 tablespoons
Pepperto taste
Saltto taste
Milk2 cups
Flour2 tablespoons
Grated cheese2 tablespoons

Method

  1. In a pressure cooker , fry the sliced onions along with salt to taste and garlic in two tablespoons of butter for ten minutes .
  2. Add four cups of water and pressure cook for 2-3 whistles . Remove from flame , cool completely and blend the onions to a puree . Strain and set aside .
  3. Melt two tablespoons of butter in a pan , stir in the flour and keep stirring and cook gently for about one minute . Remove the pan from heat and gradually stir in one cup of milk .
  4. Replace the pan on heat . Bring to boil , slowly stirring continuously until the white sauce thickens . Set aside .
  5. Mix onion puree , one cup milk , cheese , white sauce , pepper to taste and bring to boil and cook for 4-5 minutes letting all the flavors infuse together .
  6. Adjust the consistency by adding water or milk to get a semi thick following soup . Serve hot with garlic bread .

Note

  1. The same method can be followed by substituting 1/2 the amount of onions with mushrooms for mushroom soup , carrots for carrot soup , potatoes for potato soup or green peas for green peas soup .

Beetroot borscht

Share Button

IMG_5896

beetroot

Preparation Time : 10 minutes

Cooking Time : 12 -15 minutes

Serving : 4 members

Description

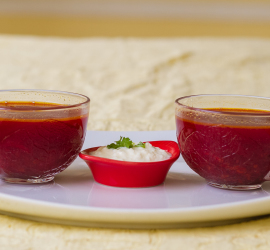
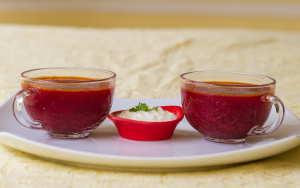
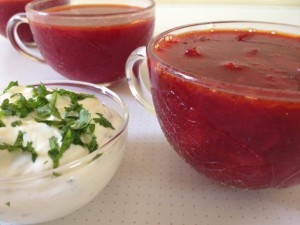
Beet root borscht . This is a clear hot soup originated from Ukraine . This hearty and delicious soup is known as red borscht because the beet root gives it a deep red hue . Simple to make , it’s cooked in oil , and features no cream , cheese , or thickening agent . Add all vegetables you want , and let the soup simmer until it is thick and gives out a wonderful aroma and color . Serve it bubbling hot , garnished with curd and celery and accompanied by toasted whole wheat bread , multigrain bread or just normal plain bread . This borscht is light on your tummy and goes swiftly out of sight . I made this borscht on a rainy day (this borscht is a winter soup ) because of the eye catching color it has and is really healthy to . Found the original recipe to be too bland so my twist was to add orange juice to spike up the taste with a bit of fruitiness along with sourness . Habit’s don’t stick if they are joyless and healthy decadence needn’t be an oxymoron . Well food has to be a pleasure , not an obligation . Right ???

Main Ingredients

Ingredients
Quantity
Beet root grated3/4 cup
Onion1/3 cup thinly sliced
Potato1/2 cup thinly sliced
Carrot1/2 cup grated
Cabbage3/4 cup shredded
Tomato 1/2 cup thinly sliced
Stock cube1 ( chicken or vegetarian ) - I used maggi chicken cube
Orange juice2 oranges
Olive oil1 teaspoon
Salt and pepperto taste
Water3 cups or more

Ingredients for garnishing 

Ingredients
Quantity
Sour cream / hung curd2 tablespoons
Celery / parsley4 teaspoon chopped

To serve along – Toasted bread .

Method

  1. Heat oil in a deep non – stick pan . Add onions and saute on a medium flame for one minute .
  2. Add beer root , potatoes , carrots , cabbage and tomatoes . Mix well and saute on a medium flame for another two minutes .
  3. Add 3 cups of water along with the stock cube . Mix well and simmer for 5-7 minutes , stirring continuously .
  4. Once the vegetables are cooked , pour the orange juice , season with salt ( be careful with salt as the stock cube contains a lot of salt ) and pepper to taste . Mix well . Taste and adjust .
  5. Serve hot garnished with sour cream / hung curd and chopped celery .

Ragi tacos

Share Button

ragi

Preparation Time : 40 minutes

Cooking Time : 25 minutes

Serving : 4 members

Description

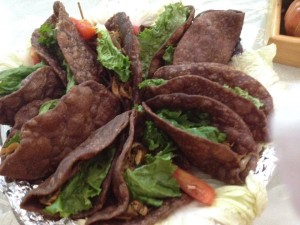
Ragi tacos , a dish that Nilofer had got for the recipe swap get together for the first anniversary of sauté , fry n bake . First let me introduce nifoler , who is my hubby’s niece . who , i have seen from a kid blooming into a beautiful girl . she was one among the first to confirm her participation in the recipe swap with so much enthusiasm and it was a joy to have her as well . The tacos looked colourful , vibrant and showed me a new way to use our local produce “ragi ” with imagination . The best part of this dish being its cooked using our traditional methods , but styled to look contemporary and of international standards . I just got a tiny bite from my hubby’s plate as by the time I could start my lunch the ragi tacos were wiped out clean . Nilofer was a bit worried as she had fried the ragi tacos even before she came for the recipe swap in the morning by 11 , in spite of her worries they were vanished in minutes . Make this for a mid week dinner , adding a style affair than the usual like . We ladies not only got to taste and get free recipes that day … ( Recipe swap ) but with an added bonus of friends to socialise was introduced for keeps in style .

Main Ingredients

Ingredients
Quantity
maida1 cup
ragi1 cup
butter beans / mushroom / paneerchicken bonelessshredded ( all together 3 cups )
fresh cream1/4 cup
cheeseto taste

Ingredients for masala powders

Ingredients
Quantity
chilli powder1 teaspoon
zeera powder1/ 4 teaspoon
pepper1/4 teaspoon
ginger garlic paste1/4 teaspoon
tomatoes1 small chopped
capsicum1 chopped
Saltto taste
Oil2 tablespoons + to deep fry
onion1 chopped
sugara pinch

Method for Dough

  1. Mix maida, ragi with warm water ,salt to taste and make a dough , press like puris, fold it to boat shape.

Method for filling

  1. Heat oil fry onion , ginger garlic paste , above said ingredients, with masala powders .
  2. Keep filling aside, make pooris fold it to boat shape , deep fry it and drain , then keep the filling and serve with cheese, cream, lettuce leaves garnished on top.

Notes

  1. Vegetarians can avoid the chicken and do the same . Recipe as and how nelofer posted .

Tandoori chicken salad

Share Button

tandoorisalad

Preparation Time : 20 minutes

Cooking Time : Nil –  If tandoori chicken is already ready in hand

Serving : 5 members

Description

Tandoori chicken salad . Salad was rocket science to me until I realized that its just a combination of raw vegetables with a dressing and few crispy garnishes to pike it up . This salad was the first salad that I came up with when I first started to cook but with out the tandoori chicken and the crushed pepper paped . From then till date , I religiously make this salad with a few twists every time a salad is required on the table as its fuss free , so simple to make , high in taste and all the ingredients are cupboard friendly at home . This salad is a great healthy eating option as there is no oil used . The nutritional boost of this salad will make it your go to food to beat the diet flunk . I made this salad when my friend meera aboo thamby had come over for lunch along with her family . Her hubby aboo ( Annan ) just loved this salad that he made sure to pack the left overs before they left . I made four salads and still this salad managed to stand out among them all . The best part being it was the easiest salad to pull of and even beginners can raise a lot of eye brows around .

Ingredients

Ingredients
Quantity
Tandoori chicken flesh shredded
1 cup
Carrot1/2 cup cut into strips
Onionssliced thinly 1/2 cup
Cabbageshredded 1/4 cup
Cucumber1 chopped
Tomato1 big chopped
Green chillies
4 chopped finely
Coriander leaveschopped 2 teaspoons
Lime juice1/2 lime
Salt to taste
Vinegar1 1/2 tablespoon
Pepper paped2 tossed over flame or microwaved for 30 - 40 seconds and crushed .

Method

  1. Mix tandoori chicken pieces , carrots , cabbage , onions , tomato ,cucumber , green chillies and coriander leaves together .
  2. Add salt , lime juice and vinegar and toss well . Taste and adjust .
  3. The salad must be a bit tangy . Place in the fridge until required to serve . Garnish with crushed pepper paped and serve .

Note

  1. Vegetarians can substitute with tandoori panner and do the same .
  2. Make sure you add the crushed pepper paped just before serving so that the paped stays crisp .