Home made ghee

Share Button

image (17)

Preparation Time : 20 minutes

Cooking Time : 25 to 30 minutes

Serving : 10 members or more

Description

Home made ghee . I learnt the art of making home made ghee from my mother – in – law .At moms place it’s more of busy buzz home style cooking as mom is a working woman . My in – laws place it’s  laid back leisure cooking ( I like  it at my in- laws place as cooking and food is my first love .) moms place every thing is store brought and in – laws place every thing is done from starch  that results in better taste what so ever . These facets raise home cooking to a sublime art form . In today’s busy life , the skilful use of subtle cooking would be some what daunting but taste and character to food comes from a treasure trove of home style recipes as such . We had a couple of cows at in – laws place so milk products were ample always . Every 15 days once my mother – in – law would prepare ghee . The entire street would be filled with the aroma of unique earthy ghee .This ghee was used only to make dosas , chappathi’s , on top of iddlis , white rice and iddi podi  for kids and guests mainly . My hubby keeps telling me about an incident that happened to him as a kid . In the lunch table he was offered ghee to have along with boiled white rice . He tilted the ghee bottle ( horlicks glass bottle ) and half of the ghee in the bottle just jumped out into his plate . My mother – in – law was like .. No way you are going to waste it , better eat every bit on the plate . Hubby dear felt heavenly while eating but the after results put him through a lot of un digestion , vomiting sensation and heaviness  in the tummy . Poor fellow till date he has an aversion towards ghee because of this …

Ingredients

Ingredients
Quantity
butter 4 cups ( I use cream that forms on top of the milk every day at home , preserved in a container in the freezer until the container gets full . Takes about 2 months or so . Then blitz the cream with water in a food processor to get butter out and use that butter )
Salt a pinch
Drumstick leaves1 small strand ( optional but adds a good aroma to the ghee )

Method

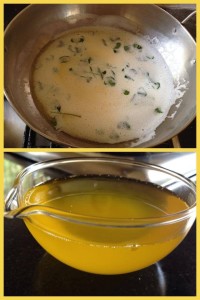
  1. Place butter , salt and drum stick strand in medium saucepan over medium-high heat. Bring butter to boil.
  2. This takes approximately 2 to 3 minutes. Once boiling, reduce heat to medium. The butter will form a foam which will disappear.
  3. Ghee is done when a second foam forms on top of butter, and the butter turns golden.
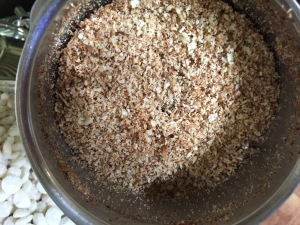
  4. Approximately 7 to 8 minutes. Brown milk solids will be in bottom of pan along with crisp drumstick strand .
  5. Gently pour into heatproof container through fine mesh strainer or cheesecloth. Store in airtight container being sure to keep free from moisture.
  6. Ghee does not need refrigeration and will keep in airtight container for up to 1 month or more .

Thikkadi

Share Button

FullSizeRender (3)

IMG_5611

IMG_5612

IMG_5609

IMG_5607

IMG_5617

FullSizeRender (2)

FullSizeRender (1)

FullSizeRender (8)

Preparation Time : 45 minutes

Cooking Time : 40 minutes

Serving : 10 members

Description

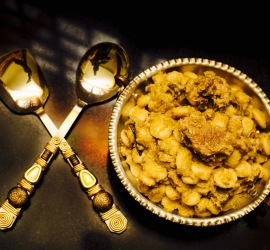
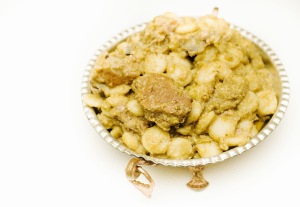
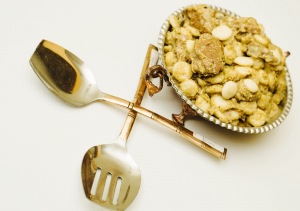
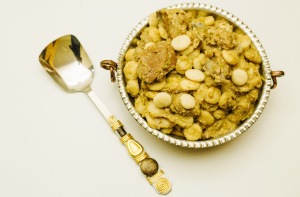
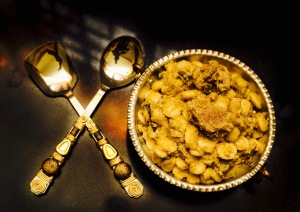
Thikkadi . An authentic one pot dish very own to the ravuthar community of the northern districts of Tamil Nadu . The southern districts make a similar dish called takkadi but the flour used is different and the texture and taste also differs . At home there is always a big  debate about which of theses two dishes tastes better .  This was one among the first dishes as a kid , I remember helping my grand mother to cook . All the kids were given each a ball of dough and asked to make thikkadis out of it . We cousins used to sit in circle with a huge plate ( thala ) placed in the Center and have a competition on who finishes first on rolling the thikkadis . My grand mother ( dads mom balkees perima ) used to make it in a huge vessel in a fire wood stove top mainly to be sent over to her married daughter’s homes . i wish you all could smell the fragrant Thikkadi simmering away with the smokiness of the fire wood . I love old school cooking . This dish may require a little effort but that makes the dish all the more worth while . I am on a mission to share lesser known family classic dishes to keep ravuthar cuisine alive . The real test of ravuthar food lies in how sleepy it makes you after you have it . The sleepier you feel , the better the dish . So happy eating and sleeping to all .

Ingredients

Ingredients
Quantity
Rice flour ( the rice flour that we use to make iddiappam 's )1 cup
Salt taste
Water 1 1/4 cup

Method

  1. Boil Water and salt . When it is bubbling hot add rice flour . Place a wooden ladle in the Center of the rice flour and water . Cover it with a lid and Let it stand for 2 minutes in low flame .
  2. Mix well, using the wooden ladle to combine the rice flour with the salted water making sure no lumps are formed . Remove from heat .
  3. Use your hands to knead it to a dough like we do for idiyappam. The dough will be boiling hot , dip your hands in to a bowl of cold water to avoid the heat felt on your hands while kneading once in a while .
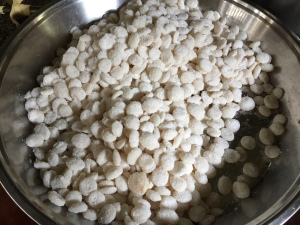
  4. Make small balls out of the dough and flatten them like gems chocolate .rub your hands with rice flour powder once in a while to avoid the dough sticking on to your palms .
  5. Usually I follow till this step , sprinkle some rice flour to the Thikkadi / dumplings and store them in a plastic cover kept in an air tight container and keep it in the refrigerator .
  6. ( I do this the previous day as at home every one likes to have Thikkadi for breakfast ) .

Ingredients for mutton gravy 

Ingredients
Quantity
Mutton 1/2 kg
Small onion chopped1 hand full
Green chillies slit 10 or to taste
Cinnamon1 inch piece
Cloves2
Cumin seeds1 teaspoon
Fenugreek seeds1/2 teaspoon
Coriander powder3 tablespoons
Oil3 tablespoons
Salttaste

Ingredients To fry and grind

Ingredients
Quantity
Coconut grated1 cup
Cumin seeds1 tablespoon
Coconut oil 2 tablespoons

Method

  1. Heat the coconut oil and fry the cumin seeds and grated coconut to a golden brown colour until you get a nice aroma of the fried coconut .
  2. Cool and grind to a corse powder with out using water and  Set aside .

Method for mutton gravy

  1. Heat oil in a pressure cooker . Add cinnamon , cloves , fenugreek seeds and cumin seeds .
  2. Once the fenugreek seeds crackle , top with small onions and fry to brown .
  3. Add the mutton , green chillies , coriander powder and salt to taste . Toss well and sauté for 5 minutes until the colour of the meat changes .
  4. Pour 6 cups of water to cook the meat and pressure cook for 3 whistles or until the meat is cooked through .taste and adjust the mutton gravy .

How to proceed

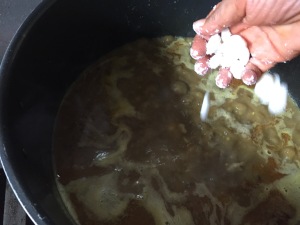
  1. Bring the cooked meat watery gravy to boil . ( Make sure you have enough gravy to cook the thikkadi / dumplings , add more water in case you need more gravy .then season the gravy ) Add 10 Thikkadi / dumplings at a time to the mutton gravy .
  2. In 5-8 minutes the Thikkadi / dumplings will float on top .
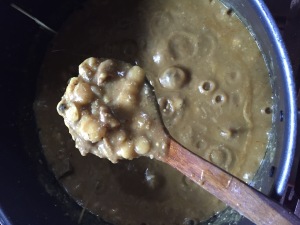
  3. Do the same until all the Thikkadi / dumplings are over . Once all the Thikkadi / dumplings are cooked and floats on top add the ground coconut coarse powder and mix well . Taste
  4. And adjust . Serve hot .

Athishaya pathiri

Share Button

IMG_4835-1

image (15)

Preparation Time : 30 minutes

Cooking Time : 55 minutes

Serving : 8 to 10 members

Description

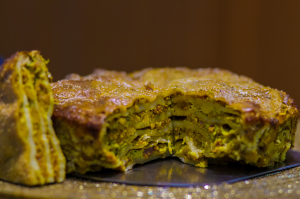
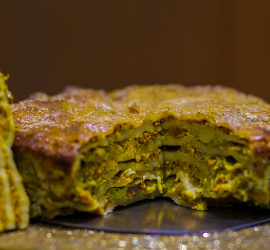
Athishaya  pathiri . An authentic malabar dish . Also known as the malabar lasagna as this dish is also layered like the lasagna . There is sweet version to the athishaya  pathiri which tastes equally good . Shall post the sweet version recipe soon . I first got to know about this dish on my visit to a grooms ( my hubbys cousin brothers daughter is married of to cochin ) place in Cochin . Was wonder stuck with the variety of food that was spread on the table . I made it a point to taste a tiny bit of every thing . All the dishes were mouth watering . the unique flavours took me to an era when food was not just a meal , but an elaborate feast . My  favourite was athishaya pathiri and another dish which was like a stuffed pie with rice flour steamed and sandwiched with prawn filling . Till date no idea what it’s called but tasted yum . Did ask people concerned for both the recipes but till date have not got it . Well some people don’t have the habit of sharing . Sharing a recipe is a friendship build , thats my motto . how do I get a recipe when I don’t know what it is called ? Some how managed and called my beloved malabar buddy sulu ( my saviour ) and explained to her about the dish . She was the one who let me know that it’s name is athishaya pathiri . The recipe that I am posting is also hers . Thank you sulu . finally made it and it was spot on the first time With full flavoured indulgence . the following week visited my moms place and was surprised to see athishaya pathiri on the table . Mom had got the recipe from a malabar friend of hers . I liked her ashishaya  pathiri better . As the food cooked by others , specially moms taste the best . Now the humble mighty athishaya pathiri is a part of our staple diet at home .

Ingredients for the crapes

Ingredients
Quantity
flour1 cup
egg1 ( I don't use egg as there is lot of egg in the dish already )
Milk1 cup
Sugar1/4 teaspoon
Saltto taste.

Method for crapes

  1. Mix everything together and gradually add milk until it forms a smooth loose batter. Add more water if required .
  2. Heat a non – stick pan and pour a ladle of batter and make thin crapes and set aside .

Ingredients for Chicken Filling

Ingredients
Quantity
medium onions4 chopped
shredded chicken (cooked)2 cups
Garlic paste1 teaspoon
ginger paste1 teaspoon
coriander leaves2 tablespoons chopped
Green chillies2 chopped
turmeric powder1/4 teaspoon
chilli powder1/2 teaspoon
gharam masala1/4 teaspoon
Oil3 tablespoons

Method

  1. The authentic filling has cashew nuts , raisins and boiled gram dal .
  2. Can add these ingredients as well to the filling .
  3. Can make it with mutton keema filling also .

Method for filling

  1. Saute the onions in hot oil until they become soft.
  2. Add the spices and then stir in the chicken and other ingredients until it becomes well mixed on medium heat for five minutes .
  3. Set aside and cool .

How To  proceed

Ingredients
Quantity
Eggs6
Milk1 cup
Salt to taste
Pepper powderto taste
Sugar little ( 1 1/2 teaspoons )
Ghee or coconut oil to grease to pour over the layers
Poppy seedsto garnish

Method

  1. Mix all the above ingredients together except for ghee or oil and poppy seeds , till the sugar dissolves well . And set aside . Pre heat an oven to 180 degree Celsius .
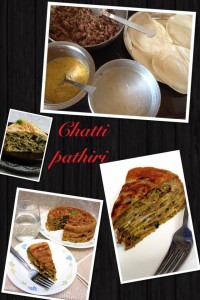
  2. Grease a baking pan about the same diameter as your crapes with ghee . Place a crape , top with filling , then pour the milk egg mixture over to cover the chicken filling . Pour 1/4 teaspoon of oil or ghee over .
  3. Repeat the same way until all the crapes , chicken filling and egg – milk mixture is over , making sure the crape is the final top layer . Pour the egg – milk mixture over the final crape . Topping with oil or ghee .
  4. Sprinkle with poppy seeds . Bake for 40 to 45 minutes in a pre heated oven until cooked through . Check by inserting a skewer into the middle of the chatti pathiri , if the skewer comes out clean .It’s cooked through .
  5. Remove . Cool completely . Run a knife all around . Turn over into a plate . Cut and serve hot .can use coconut milk instead of regular milk to add more taste and calories.
  6. Can be made over a hot tawa with sand , keeping the chatti pathiri layered vessel over the hot sand covered with a huge domed lid ( I use my iddli maker lid ), over a stove top on medium heat for 20 – 30 minutes or until cooked through )

Puttu

Share Button

image (14)

Preparation Time : 15 minutes

Cooking  Time : 10 – 12 minutes

Serving : 4 members

Description

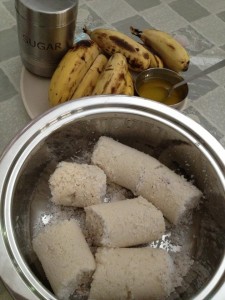
 Puttu , a Staple at home which I was fed and pampered With A lot. Being mother’s Day today wanted to dedicate my post to my beloved mother . So wanted to post a recipe which she makes often and is a staple at home . Puttu has been served to us steamed in a coconut shell , to puttu maker . First the coconut shells , then shifted to the puttu maker with five long puttu makers attached to it in aluminium , then to a puttu maker with one stick and finally we have settled with just the stick alone , that we stick to a pressure cooker without the mighty puttu is followed with the same authentic recipe . At my in-laws place they use another coarse rice flour powder that is fried with coconut which is called as thengaatta maavu . The colour of the puttu is also light brown in colour and they steam it piled up in an iddiappam plate . Finally it looks like coarse sand and is much more rough that the regular puttu . My choice is always the authentic kerala puttu. Every alternative days (actully every day) the puttu is there in the table . I just used to love it when my mom and grand ma mixes the puttu with the right amount of bananas , sugar and ghee. Mostly it’s done in a huge amount as all our cousins sit in a circle waiting for our share to be fed one after other . Oops this puttu is just taking me away from today’s dedication being my mom . Mom is a sophisticated , out spoken , loud, smart , business minded , always the center of attraction even till date sort of a person . My brother and myself are just the opposite to her like my dad . Soft spoken , shy and mostly like to be quite . There are people in this world who spend every day making important decisions , trouble shooting refereeing fights , nursing egos , doing damage control and multi tasking , They are called mothers- LINDA POINDEXTER . My mom is all that is mentioned above . The most apt phrase to explain my mother . Love you mom for what ever you are and being beside me through out from the time god infused me into you .

Needed

Puttu maker or Coconut shells ( thenga cherattai with holes in the bottom ) .

 Ingredients

Ingredients
Quantity
Rice Flour2 cups
Grated Coconut1 cup
Water 1 1/4 cup
Saltto taste

To serve

  1. Ripe bananas
  2. Sugar
  3. Melted ghee
  4. Grated Coconut Or Kerala pappadam
  5. Boiled green moong gram ( paccha payaru , siru payaru ) Or Kadala curry ( sundal kolambhu ) Or Hot ghee
  6. Powdered jaggery

Method

  1. In a large bowl, place the puttu powder. Add salt to taste to 1 1/4 cup of water and slowly add about 2 tbsps at a time to the puttu powder and mix it. Do not add all the water at once. It should be a bread crumb consistency and not form a dough.
  2. Normally 1 cup of water is sufficient to wet 2 cups of puttu powder so save the 1/4 aside and use it if needed .
  3. The right consistency of puttu powder is achieved when you take the prepared flour in your fist and close it to form shape. Leave aside this prepared rice mixture for an hour or two at room temperature.
  4. When the mixture sits, water is absorbed. After sitting time of 1 or 2 hours, if you find that the mixture is slightly dry, add a little more water and mix.sift this mix in a sieve , so that you get a crumb free , sand like puttu . An important tip I learnt from my grandmother .
  5. Add 2 cups water to the bottom vessel of the puttu maker or pressure cooker and allow to simmer till hot.Wet the puttu mould and lightly grease it. Place the round perforated disc with holes inside the puttu mould such that it fits well at the bottom of the mould.
  6. Place 2 tbsps of grated coconut at the bottom of the puttu mould. Carefully and slowly pour about 6 tbsps of the puttu powder from a height followed by another layer of 2 tbsps of grated coconut.
  7. Again layer with 6 tbsps of puttu powder and finish off with 2 tbps of grated coconut on the top. Place the lid over the puttu mould annd place the mould over the water vessel.
  8. Steam on high medium flame for 5-6 mts and 4 mts on low flame. Turn off heat and wait for 2 to 3 mts before removing the puttu from the mould with the help of a wooden ladle or skewer.
  9. Hold the puttu mould parallel to the serving plate and with the help of a long ladle gently push the bottom disc such that the puttu slides onto the plate. Serve hot with required accomplishments .

Note

  1. Can layer the puttu with dry mutton or beef roast along with the grated coconut , its yum .Make sure to sift the puttu mix before steaming , it’s gives a good soft texture to the puttu.

Dates pickle

Share Button

image(25)

Preparation Time : 20 minutes

Cooking Time : 30 minutes

Serving : 6 to 10 members

Description

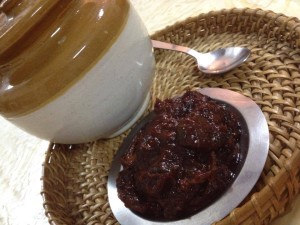
Dates pickle . A pickle that I make every year after the holy month of Ramadan as my refrigerator will be loaded with dates . The first dates pickle I tasted was when my buddy sulu got a bottle from her home . I still remember how I dipped my finger right in and  licked out the entire bottle With the goodness of tanginess , spiciness and sweetness all in one .   This combination of sweet encroaching into savoury territory was new to me as in ravuthar  cooking it is far from blasphemous and any ravuthar would raise their eyebrow at this idea .the sweet element with the savoury and tart together does high light  the flavours and creates a balanced pickle . This recipe is  sulus with slight changes tailor  made to fit my convenience . Two days back was in to a cleaning spear . Ended up cleaning my refrigerator too , finding loads of left over dates  as usual resulting in making dates pickle and now I have two huge jars full of dates pickle that are full of feisty contrasts with a symphony of sweet , savoury and tart .

Ingredients

Ingredients
Quantity
Dates(whole and deseeded) 250 grams
Ginger (chopped) 1 1/2 inch piece
Garlic 1 pod peeled cut length wise
Fenugreek seeds 1/4 teaspoon
Asafoetida 2 huge pinches
mustard seeds 1 tablespoon
Tamarind pulp1 tablespoon
Vinegar1 cup
Dry red chillies 7 to 10 ( whole )
Poppy seeds1 teaspoon soaked in little water
Raisins 15 grams
Jaggery1/4 cup grated
Nutmeg powdera pinch
Curry leaves1 sprig
Salt to taste
Gingely oil1/2 cup

Method

  1. Wash and drain the dates. Slice into halves.Grind the red chillies with vinegar to a smooth paste and keep aside.
  2. Grind together poppy seeds, raisins, jaggery and tamarind pulp to a smooth paste.Add the jaggery paste to the previously prepared vinegar paste and stir well.
  3. Heat gingely oil add mustard seeds , fenugreek seeds . once they crackle and garlic .  Remove the garlic and set aside .
  4. Add  ginger, curry leaves , asafoetida  and chilli vinegar jaggery paste . switch of the flame .
  5. Add the dates and fried garlic . Mix gently.To the above mixture, add nutmeg powder and required salt. Stir the dates pickle .
  6. Cool down completely to room temperature and store in an air tight ceramic container . Keep aside for two days.

Notes

  1. Make sure you use hard dates not soft ones as the soft dates tends to get mushy and gives a jam consistency to the pickle .
  2. Add hot water to get the desired consistency in case the pickle gets too thick .Soak the prepared pickle for 2 or more days .
  3. Make sure not to use a wet spoon or else the pickle gets spoilt .Store in the fridge and it stays for 6 months to a year.

Baklava

Share Button

image (11)

image (12)

bak3

bak4

bak3

baklast

Preparation Time : 4 hours

Cooking Time : 1 hour + 10 minutes for the syrup

Serving : 8 members

Description 

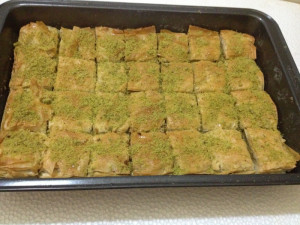
“Baklava ” I found this word so very difficult to memorise as it sounded wired and different to me the very first time . But the taste just didn’t let go of my soul as I was often rekindled with its crisp exterior with a satisfying texture , rich nutty middle and a sticky aromatic bright flavoured syrup that sure will unshackle your palate  . Till date I just can’t figure out what’s so inviting that makes me a die heart fan of this fatty culprit . I was introduced to this mighty sweet by my cousins Aashik and Fazeem who had bought a huge box full of baklava on a trip to the U.S . I remember , it was an assorted sweet box  and I just could not stop with two , wanting to taste all the assorted ones . Not knowing from where the dish originated or how they prepare it , used to just wait for the opportunity to have a few free baklavas always ( shameless me :-)) getting a real taste of a dish means travelling there , that’s where you will find the truest expression of its flavours , dining customs and whole way of thinking about food . To me it’s all done at home in front of my telly and that’s how while flipping channels came across a programme where they showed how baklava was made . Pains taking for sure , no wonder it tastes so good . Took note with out any precise measurements and that’s it . The lazy bug in me just didn’t let me want to try this dish out . My daughter Anisha also with utter excitement got a recipe from her collage library for baklava  , that was also saved but not put to use . Finally came across this recipe in the world wide net , saved it as usual . From then on any gourmet store  I went home shopping for ,the first thing in my to search list was phyllo pastry . This search went on for days to months to years from Coimbatore to Cochin to chennai to Mumbai to Pune and where ever possible . Did try my luck with my NRI relatives and friends but nothing worked . One fine day in chennai at AMMA NANA gourmet store ( with a confused state of mind , should I ask or not . As it’s always sorry mam ) Then I compromised  saying to myself , no harm in asking . Asked ” do you have phyllo pastry and the lady in the shop just pointed her fingers towards the first floor . Checked at the first floor and the man in counter just pulled a long blue coloured box  from the freezer and gave it to me with num reactions . I took it and jumped up ( seriously I did ) with a board smile and the num guy in counter controlling his laughter just smiled . I made sure to get another one as well . Stocked it in my freezer at home and felt proud as if I had accomplished the wish of owning a solitaire diamond was done . Waited for a real good celebration to try this recipe and made it following the recipe religiously to the core ( except for my cheat’s way of using the ready made phyllo pastry part ) for the first anniversary celebration of sauté, fry n bake . The results were more than perfect as even fussy hubby dear approved the baklava but I was dead nervous as I had Saaliha azim who has been living in Dubai through out her schooling and knows the real taste of this Middle eastern sweet treasure. I just pretended to be calm and composed when she was tasting until her verdict was out . She liked it and complimented saying it tastes really authentic . ( hope she meant it for real ) . Showed the pictures to my children and parents . My mom was flying high and extremely proud that her daughter has made baklava on her own that she kept telling tom , dick and Harry ( any one and every one ) about this , that embarrassed me a lot . I had no other option other than to make another batch to cater to my children and mom specially . Well only if you have eaten a baklava will you know why this middle eastern icon sweet has earned it’s spot in the global classics canon .

Ingredients for the dough

Ingredients
Quantity
All purpose flour1 1/3 cups
Salt1/8 teaspoon
Water1 tablespoon (more if needed)
Oil2 tablespoon
Apple cider vinegar1/2 teaspoon

Ingredients for the syrup

Ingredients
Quantity
Honey1/2 cup
water3/4 cup
Sugar3/4 cup
Cinnamon2 " Piece
Cloves5 to 6
Fresh orange peel2 " Piece

Ingredients for the filling

Ingredients
Quantity
Powdered cinnamon1 teaspoon
Allspice powder1/4 teaspoon
Coarsely powdered almonds1/3 cup
Coarsely powdered walnuts1/3 cup
Coarsely powdered pistachios1/3 cup
Granulated sugar1/4 cup
Ghee/ clarified butter (more if you need it)1/3 cup

Method

  1. Make the Phyllo dough. You can knead the dough by hand or using the food processor as I did.  Put the flour and salt in the processor bowl and pulse a couple of times to mix. Then combine the water, oil and apple cider vinegar ina small bowl and add to the flour.
  2. Knead until it comes together as a dough that’s sticks together initially and then becomes a smooth and elastic dough. Add a a tablespoon or so of water if your dough seems a little on the drier side.
  3. Shape the dough into a ball and place in a bowl coated with oil. Roll the dough till it is well coated with the oil and cover the bowl with plastic wrap. Let it rest for about 2 hours or longer. I ended letting my dough rest for about 6 hours before I started rolling it out!
  4. Now its time to start rolling out the dough as thin as you can. Divide the dough into 4 or 5 portions of equal size. Work with one portion at a time keeping the others covered so they don’t dry out.
  5. Place the dough on a well-floured surface and keep rolling out, dusting with flour whenever necessary, until you have rolled it out as thin as you can. Remember to also dust your palms and the rolling pin with flour.
  6. Lift the rolled out dough and stretch it on the backs of your hands as you would a pizza dough, just helps make it that much thinner. Otherwise just lift it up and carefully stretch it using your fingers without tearing it. Your dough should be thin enough to be almost transparent.
  7. Set aside the rolled out dough sheets on a well-floured surface. Repeat the process until your dough is used up. Flour well between each sheet so they do not stick to one another.
  8. You will not need to cover your dough with a wet cloth, as you do with boxed dough, it is moist enough that it will not try out. If you can make your Phyllo about the thickness of 2 sheets of copy paper and evenly rolled then that’s perfect.
  9. I divided my dough into 4 equal portions and then rolled each portion out into a square about 12” by 12”. Then I cut it into 4 equal squares. This gave me a total of 16 layers (each 6” by 6”) which I used as 4 layers of 4 sheets each for my Baklava.

Method

  1. You can make the syrup and the filling while the dough rests. To make the syrup, combine all the ingredients for the syrup in a medium sized pan/ pot and bring it to a boil, stirring until the sugar has dissolved.
  2. Turn the heat to medium and let the syrup boil for 10 minutes. Stir occasionally. Take it off the heat and strain out the solids. Keep the syrup aside until required. Do not chill but let is stay slightly warm.
  3. Now make the filling. Keep aside about 2 to 3 tbsp of the powdered pistachios and then mix together all the ingredients for the filling in a bowl, except the ghee/ clarified butter.

Method

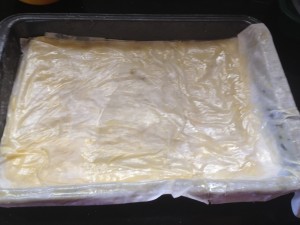
  1. Assemble the Baklava. Warm the ghee/ clarified butter slightly to make it easier to brush on. Brush the bottom and sides of your baking dish with ghee/ clarified butter. Place one sheet of Phyllo dough in the bottom of your baking dish.
  2. Brush it lightly (but well) with the ghee/ clarified butter. Place another sheet of Phyllo and brush with the ghee/ clarified butter again. Repeat this with three more Phyllo sheets and brush each layer with the ghee/ clarified butter.
  3. Spread one third the nut-spice mixture in a uniform layer. Then once again layer 4 sheets of Phyllo like before. Spread another one third portion of the nut-spice mixture.
  4. Once again layer another 4 sheets of Phyllo and then layer the remaining third of the nut-spice mixture. Top with 5 layers of Phyllo and finish off by brushing the top most layer of Phyllo well with the ghee/ clarified butter.
  5. You should have a 5-4-4-5 construction of Phyllo pastry layers (I used 4 sheets in every layer), though you can use as many layers as you want. Tuck the edges neatly suing a knife or spatula.
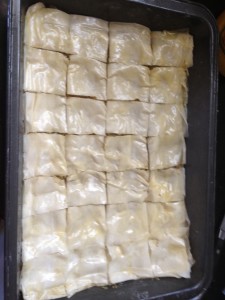
  6. Using a very sharp knife, cut the Baklava from the top through to the bottom, into desired shape and number of pieces. I cut mine into 16 squares.
  7. Now bake this at 180C (350F) for about 30 minutes and then take it out.Cut through the Baklava once again to make sure the cuts go all the way down to the bottom of your pan.
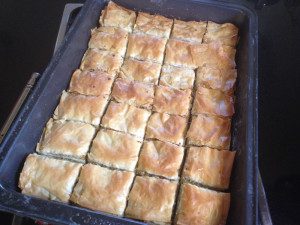
  8. Return the Baklava to the oven and bake for another 30 minutes or until the top is a beautiful golden brown.
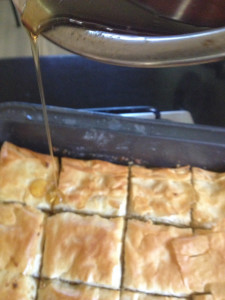
  9. Once the Baklava is done, take it out and gently pour the syrup evenly on the top of the hot Baklava making sure it goes through all the cuts.
  10. Pour as much as you can without letting the Baklava float in the syrup (I poured almost all the syrup I made, less about 2 to 3 tbsp of it). The syrup will soak into the Baklava during its overnight rest making it moist and juicy.

Method

  1. Let the Baklava cool and then cover it. Let it sit at room temperature overnight. The Baklava will have soaked up the syrup. Store and serve at room temperature, after dusting the top of each piece with the reserved powdered pistachios.
  2. You can warm it very slightly before serving if you prefer.
  3. The Baklava will keep at room temperature for about a week in an airtight container. It can also be stored in the fridge but warm it up before serving or it will be very hard. Serve the Baklava with coffee as a snack or as dessert.
  4. This recipe makes 16 small pieces.

Tips

     1.Remove all your rings, bangles and bracelets or any jewelry that might snag the dough before you start working on it. The dough becomes very    fragile as you roll it out and you want it to tear as little as possible, preferably not at all.

     2. Check that you cut out your Phyllo to the exact measurement of your baking dish. A pizza cutter is less likely to tear the Phyllo than a knife while cutting it.
     3. Small tears in your Phyllo are ok, and your dough will roll out thinner and easier with practise. Just try to keep a couple of “unblemished/ not-torn” sheets for the top most layers for a good finish to your Baklava.
    4. Use a wooden dowel or a thin wooden rolling pin to roll out the dough. This makes rolling out much easier and you will be able to roll out the dough quite thin.


Vaada

Share Button

image(19)

image(20)

image(21)

image(22)

image(23)

image(24)

Preparation Time : 40 minutes

Cooking Time : 40 minutes

Serving : 6 members

Description

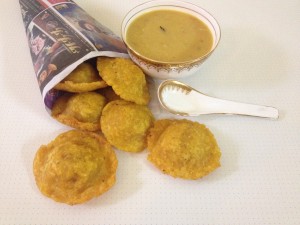
Vaada , is an authentic regional snack very own to the Muslim town of kayalpattinam near tirunelveli . Very often there is a barter system that happens with in our neighbours and relatives . Like wise once we did receive vaada from our neighbours ( family paediatrician too ) mr . Thamby mamas home . Every one at home were like ho “VAADA” , I didn’t know what it was ???? Sweet , savoury , tangy or what is this space craft like looking delicacy . All I knew about vaada was the Tamil word vaa da that meant come da :-)) . Tasted it and it was an oily crisp , chewy cover with a prawn filling . I didn’t like it at first but as you eat it gets more appetising and you start wanting more . Eating this snack is a good exercise for your cheek bones as it starts paining in a while because of the chewiness .     This snack was always relished when ever it was sent home by nachi amma ( mrs . Thamby ) or  at the beaches of kayalpattinam where they sell vaada with kari kanji or pickle . Never did I want to know how to make this dish as I didn’t fancy it much though I used to like it . Once in chennai we had gone to visit my hubby’s first cousin wahidha. She served us some home made hot vaadas . Tasted one and it was the best vaada that I have tasted till date . As the cover was crisp , light and not chewy . Wanted to get the recipe then and there but as Wahima was busy then just left it for after wards . Came across two recipes in the world wide net for vaadas , tried both and didn’t work out as expected . Finally got the recipe from Wahima and gave a try with my cook all grumbling and having a look like why can’t she give up if it doesn’t work .Me not wanting to give up or compromise at any cost went ahead and the results were pitch perfect just like wahimas vaadas . Served it while breaking our fast during the holy month of ramadhan and hubby very reluctantly took one . The first bite he took , his eye brows raised and eyes widened , following with who send this ? Taste’s really good and no pain of chewing as well . Happy , happy me  ( happier cook of mine actually ) as my quest of perfecting vaada was finally accomplished with flying colours like the passion of a true food lover .

Ingredients for the cover

Ingredients
Quantity
Rice 1 cup
Saltto taste
Turmeric powder1/ 4 teaspoon
Water3 cups
Puttu maavu ( powder ) 1 cup ( authentically kappi maavu is used . That's the grainy remains of shifted puttu powder . I used thenga otta maavu ( puttu powder fried with coconut that's fried to crisp and very coarse . I blitzed it and used )
Oil to deep fry

Method

  1. Pressure cook all the above ingredients together except for puttu maavu ( powder)  and oil to deep fry for 5 whistles .
  2. Cool and pulse ( not grind ) to a coarse mass of rice paste .
  3. Add one cup of puttu / kappi or thenga otta powder and knead to a dough with wet hands with out adding water .you get a sticky dough , set aside for 15 minutes and the dough become tight .

Ingredients for filling

Ingredients
Quantity
Onions 5 chopped
Green chillies 4 chopped
Coconut grated 1/4 cup
Salt to taste
Turmeric powder little
Curry leaves1 teaspoon chopped
Prawns20 cleaned
Maldives fish powder ( maasi in Tamil )1 tablespoon
Oil 1 tablespoon

Method for filling

  1. Mix onions , green chillies , turmeric powder , salt and prawn together . Heat one tablespoon of oil and saute the prawn mixture for 5 to 8 minutes .
  2. Add grated coconut , Maldives fish powder and curry leaves . Mix well and cool completely .

How to proceed

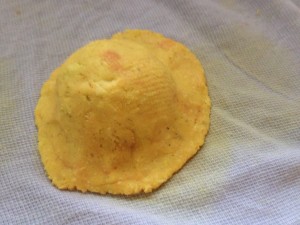
  1. Make lemon sized ball one slightly bigger than the other with the dough .
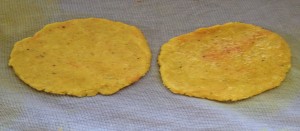
  2. Using a clean wet muslin cloth flatten both sized small ball of dough to your palm size ( bigger sized ball flattened a bit bigger ) with wet hands to 1/4 inch thick .
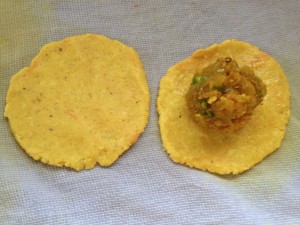
  3. Place 1 tablespoon of prawn filling over the small sized flattened round and close with the bigger flattened round .
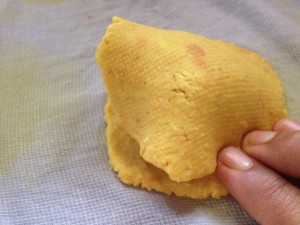
  4. Seal both the edges of the cover rounds together making sure to seal the filling inside .
  5. Do the same to all the cover dough and filling .( I usually do up to this point ahead , freeze , defrost and use when required ) .
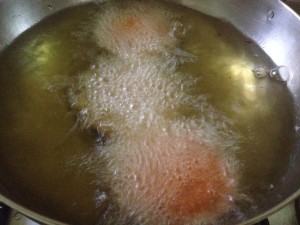
  6. Heat oil to deep fry and fry to a golden yellow colour and crisp for about 3-5 minutes in batches . Drain and serve as it is with kari kanji .

Note

  1. Any other filling can be used other than the prawn filling given but this is the authentic filling used .
  2. Make sure the outer cover does not crack  while flattening .
  3. Always use wet hands and a wet muslin cloth to flatten the rice dough to make things easier .

Chapati layered casserole

Share Button

image (7)

Preparation Time : 30 minutes

Cooking Time : 50 minutes

Serving : 8 movers

Description

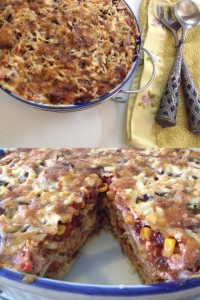
Chappathi layered casserole . A dish I came up with left overs at home . Usually when ever I have my daughter and son – in – law home on a holiday . My refrigerator is over loaded with left overs  mainly because of my flaw of not knowing to cook in limited addition . I can’t be blamed right away as when I was a beginner and learnt cooking from my mother – in – law , always had to cook in large because of the joint family system and number of members at home . ( Back to the dish please …. Oops … )one morning having no place to keep milk in the fridge , got wild and took out all the left overs and made up my mind to use everything and make a dish out of it . A sure fire solution for my left over problem . Had chapattis , chicken korma , ( previous day dinner left overs ) salsa , sweet corn and kidney beans ( left overs of the previous days taco Bar for breakfast  )all in one dish .. Umm … My mind just strait away went into a layered one pot casserole dish . The salsa had oozed out its juices from the mixed veggies , wanting to make it a thick spread . Thought of mixing curd but it will surely get more watery . So hung the curd and mixed with the salsa to get a creamy semi thick spread . Shredded the chicken from the bones in the korma and went ahead with my inner instincts and jazzed it up with cheese . Baked it and wolla  … A new dish that’s sure a crowd pleasure to suit every occasion with a mildly crisp exterior and a yielding inside was created .  My job done , I fed  every one at home with this left over dish with nothing being wasted with a twist of rich textural variation and flavours .

Ingredients

Ingredients
Quantity
Chapathis 8 or more
chopped boneless cooked chicken3 cups
Oil1 tablespoon
Onion 1 cup chopped
red pepper/ capsicum1/2 cup chopped
Kidney beans / Rajma beans 2 cups boiled to a mushy texture
sweet corn kernels1 cup boiled
chilli powder1 teaspoon
salsa 3 cups
hung curd 1 1/2 cup
jalapeno1 1/2 cup
grated cheese 1 1/2 cup
Coriander leaves 1 tablespoons finely

Ingredients for salsa

Ingredients
quantity
Onions1 chopped
Green chillies 3 or to taste chopped
Tomato4 to 5 chopped
Lime1/2
Coriander leaves 2 tablespoons chopped
Salt and pepperto taste

Method for salsa

  1. First, using a sharp knife, chop the tomatoes into approximately ¼ inch (5 mm) dice straight into a serving bowl. Next, chop the chilli very finely before adding it to the tomatoes.
  2. Add the onion, coriander and lime juice, and season with salt and freshly milled black pepper.Give everything a thorough mix, then cover and set aside .

Method for chapatti casserole

  1. Preheat oven to 350. Grease  a casserole dish large enough to fit chapattis . Heat  oil in a sauteing pan,  saute onion and red pepper for 5 minutes, until softened. Mix in chili powder, remove from heat, stir in boiled rajma  beans and corn.
  2. In another medium bowl, mix salsa and hung curd together . Layer chappathi first , then top with salsa mixture and sprinkle  chicken and jalapeno  over ,place a  chappathi again  , then the vegetables mixture and finally grated cheeses .
  3. Repeat 4 times, or until you reach the top of the casserole.  Stop layering once you reach the top of your casserole dish and make sure to top with cheese finally .
  4. Cover and bake for 25 minutes. Uncover and bake 10-15 minutes longer or until cheese is bubbly and browning.
  5. Let stand for 10 minutes before serving. Sprinkle with chopped coriander leaves  and cut into wedges and serve hot .

Note

  1. You can use parathas , Naans , rotis , tortillas or any form of bread or roti instead of chapattis .
  2. I used left over chicken from the previous day korma . In case you like spicy food , feel free to spike the chicken up with chilli powder and more seasoning to your choice .
  3. When mixing salsa with hung curd . Do not drain the water that has oozed out of the salsa . Mix it with the water , it helps to get a semi thick gravy consistency that leaves the chapattis moist even after baking .
  4. Vegetarians omit the chicken and follow the same recipe for a veggie version.

Rajma masala

Share Button

image (6)

Preparation Time : soaking of rajma over night + 20 minutes

Cooking Time : 40 minutes

Serving : 4 members

Description

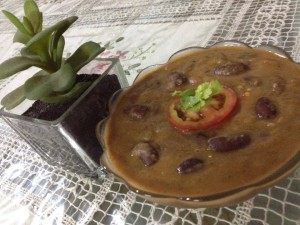
Rajma masala . A mouth smacking north – Indian vegetarian delight gravy . The velvety tomato onion based gravy that coats the soft rajma’s are Devine .at home I use boiled rajma just for breakfast alone to add a source of protein in take .the colour of the dish might put you of but the taste will do the rest . I ended up trying this dish when i had to prepare a vegetarian lunch for a north – indian friend of mine . she is placed in nellai for now as her hubby is a government officer .poor her , she misses every bit of north – India and her main problem being no one knowing Hindi in Nellai . I surprised her with a spread of  a  typical North Indian vegetarian menu . She went head over heels with this rajma masala and paneer stir fry with capsicums . Was so very nervous about serving North Indian food to a North Indian . Was glorified with her remarks and she wanted every thing on the table packed for her hubby . With a big Relief was happy that I did my job well . Now  ,   This gravy has become a staple at home  With another  bowl of goodness added into my daily menu :-))

Ingredients

Ingredients
Quantity
rajma (kidney beans)2 cups
large onions2
green chillies6
ginger 1 /4 inch piece
garlic 1 clove
medium tomatoes2
salt to taste
turmeric powder1/4 teaspoon
chilli powder1/2 teaspoon
coriander powder1 1/4 teaspoon
Oil4 tablespoons
garam masala1 teaspoon
Curd 2 tablespoons
cream2 teaspoons
cumin seeds 1 teaspoon
coriander leaves few to garnish

Method

  1. Soak the rajma for 24 hrs in water. wash it frequently to avoid odour.
  2. Pressure cook till soft with 1 teaspoon salt and 1 cup water.
  3. Finely chop one onion. grind the other onion with green chillies, garlic & ginger to a fine paste and keep aside. grind the tomatoes and keep it separately.
  4. In a deep vessel, add 4 tbsp of oil. heat the oil and add cumin seeds. then add the finely chopped onion and saute it till it becomes light brown and transparent.
  5. Then add the ground paste & fry till the raw smell goes.
  6. Add the tomato paste, curd, haldi powder, chilly powder , coriander powder and salt. cover for a few minutes in low to medium flame(till the gravy becomes glossy and the oil speparates )
  7. Then add rajma and make up the consistency of the gravy by adding water as required.
  8. Top with garam masala and fresh cream . Mix well . Taste and adjust .
  9. Garnish with coriander leaves and serve hot with any roti of choice .

Vadai moor kolambhu

Share Button

image (5)

Preparation Time : 30 minutes

Cooking Time : 25 minutes

Serving : 6 members

Description 

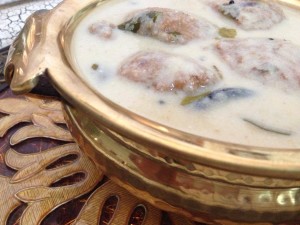
Vadai moor kolazlambu . A dish very own to my in – laws place . At mom’s place we make another version called mooru charu which is made  with white pumpkin’s . But I like my in- laws version better as its a well balanced dish with a sensational simple recipe bursting with mouth watering flavours . An ideal curry when you crave for home cooked comfort food . This curry is served for lunch with white boiled rice and with side dishes like any vegetable koottu  ( veggi with dal ) , spinach porial ,appalam and maasi sambhal ( dried Maldives fish fried with onions and tomatoes ) .  These side dishes combine with one another to create a perfect wholesome warming complete meal .As  I don’t fancy this butter milk based curry much , I was forced by my mother – in – law to give it a try . And When I did , it was a flavour packed curry high lighted with the soaked vadais floating in between . From then on , I never miss out filling my tummy with this full flavoured indulgent moor kozlambhu . These dishes are hard to be found in restaurants . So give it a try and celebrate with family and friends .

Ingredients  for masala paste

Ingredients
Quantity
Bengal gram Dhal(soak it for 20 minutes)1 tablespoon
Red dry chillies 6 to 8 or to taste
grated coconut1/2 cup
Cumin seeds1 teaspoon

Ingredients for the gravy

Ingredients
Quantity
Butter milk4 cups
Turmeric powder1/4 teaspoon
Salttaste
Small onions 1 hand chopped into tiny bits
Green chillies4 chopped
Ginger grateda pinch
Coriander leaves 1 teaspoon chopped
Ripe Tomato medium sized1 chopped
Curry leaves few chopped

Ingredients to temper

Ingredients
Quantity
Oil1 tablespoon
mustard seeds1 teaspoon
dry red chillies2 torn
curry leaves1 strand
Garlic2 flakes crushed
Asafoetida/ Hing1/4 teaspoon

Ingredients to grind for the Vadai

Ingredients
Quantity
bengal gram/Kadalai paruppu/Channa dhal1 cup
green chillies2
ginger grateda pinch
Salt to taste

Ingredients to mix with the Vadai

Ingredients
Quantity
Onion1 chopped
Curry leaves1 strand chopped
Coriander leaves 1 teaspoon chopped

Method for the kozlambhu

  1. Mix ground paste with gravy ingredients and mix well . Taste and adjust .
  2. Heat the bowl which has the butter milk mixture in low flame.Wait till it gets bubbles.make sure not to boil.It will not take more than 3- 5 minutes for the mixture to get heated up .Switch off the flame.
  3. In another pan add oil for tempering.Then add ingredients mentioned for tempering .
  4. Add the tempered ingredients to the curd gravy and mix well.Keep it aside.

Method for Vadai

  1. Soak the channa dhal for atleast 45minutes.Then strain the water from channa dhal.
  2. Add channa dhal,green chillies,ginger,salt and grind to a coarse paste.
  3. To the vadai batter add finely chopped onions,chopped curry leaves and chopped coriander leaves.
  4. Heat oil in a pan to deep fry and fry the vadais.Add the hot vadais to the moor Kuzhambu.
  5. Serve with hot boiled white rice .

Note

No harm in cheating using ready made Vadai’ s . As I do that very often .
Make sure not to boil the moor kozlambhu . Heat in medium flame , just enough to warm the moor kozlambhu .