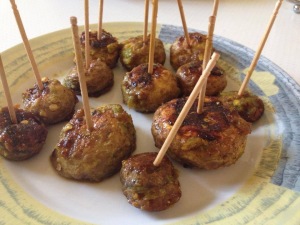
Chicken stuffed and baked in potato shells

Share Button

Preparation Time : 30-35 minutes

Cooking Time : 1 hour 20 minutes

Serving : 6-8 members

Description

Here is another snack that is not deep fried but apt for ifthar time while breaking your fast . It Was really yum that I just got a tiny bit to taste . This is a must try recipe folks .

Ingredients

Ingredients
Quantity
Potatoes4 medium
Capsicum1 (finely chopped)
Carrot1 (finely chopped)
Cooked shredded boneless chicken1 cup
Salt and black pepperto taste
Oil little
Chilli flakes to taste
Mayonnaise3 tablespoon
Hot tomato sauce 3 tablespoon
Sour cream / hung curd 3 tablespoons
cheese spread3 tablespoon (optional )
Vinegar1/4 teaspoon
Spring onions chopped 1/2 cup
Blue cheese or any cheese of choicegarnish
coriander leavesgarnishing

Method

  1. Preheat oven to 200 degrees C.
  2. Wash, dry and lightly rub the potatoes with oil ,salt and pepper to taste .Pierce the potatoes with a fork and place on a baking sheet.
  3. Bake for 1 hour or until easily pierced with a sharp knife.Remove from oven and cool.
  4. Once cool, slice the potatoes in half and scoop out the filling until you have a nice potato shell.Refrigerate potato shells until ready to finish.
  5. Mix mayonnaise , sour cream / hung curd , hot tomato sauce , cheese spread , vinegar , salt , pepper , chilli flakes , capsicum , carrots , spring onions and cooked chicken together and mix well . Taste and adjust .
  6. Spoon filling into potato shell.top with blue cheese or any cheese of your choice .Place the filled potatoes in a greased baking pan.
  7. Bake in a pre heated oven at 180 degree C for approximately 10 -12 minutes or until the cheese has melted .
  8. Remove from the oven.Sprinkle with coriander leaves and serve hot .

Note

  1. Cheese spread and blue cheese are optional .
  2. You can follow the same recipe avoiding both the cheeses .
  3. The scooped out potato flesh can also be added to the filling and mixed together .
  4. Vegetarians can substitute chicken with paneer / cottage cheese and follow the same recipe .

Mushroom stuffed fig – kum kum

Share Button

image (47)

Preparation Time : 30 minutes

Cooking Time : 1 1/2 minute if cooking in over stove top , if baking 5-7 minutes

Serving : 3-4 minutes

Description

Mushrooms stuffed fig Kum – Kum .a perfect bite size indulgent  dish  that  I came up with left over ingredients in my refrigerator . This dish makes for great party nibbles . Hubby has the habit of buying things in large quantity what so ever . Finally I am put to test to use and experiment with  the left over ingredients . Dried figs are always had as it is or I make a sweet dish with it . My recent liking towards sweet , hot , spicy and sour elements  together made me try my hands on this dish . It was a melange of textures and flavours . The pucker – inducing sweetness of the dried figs takes center stage in this dish . Wanted to serve this for lunch as a starter ( this dish is an ideal starter ) but as I had my hubby’s niece and nephew ( rahima zenofer and mohamed ) drop in by 11 o clock , so served it earlier as a brunch . ( thought of baking it in the oven as I had to serve it suddenly had to pan roast it ) . The dish did hit the right spot but turned out a way bit spicy . So I have made corrections in the recipe . Now … Why the word Kum – Kum in the dishes name ???? On my visit to Agra came across a dish named  raseela  Kum – Kum .( the dish was tomatoes stuffed with mushrooms in a gravy form )  The name sounded so catchy . Stored it in my mind and having the liberty to name this dish just added the Kum – Kum :-) .

Ingredients

Ingredients
Quantity
Dried figs 1 1/2 cups
Mushrooms30 numbers
Garam masala powder 1/4 teaspoon
Garlic grated 1/4 teaspoon
Ginger grated 1/4 teaspoon
Green chillies 1 teaspoon chopped finely ( I crushed them coarsely )
Lemon juice1 teaspoon
Milk2 teaspoon to dissolve saffron
Onions grated2 teaspoons
Oil 2 teaspoons
Saffron2 grams ( a pinch )
Salt to taste
White pepper powder1 /2 teaspoon or to taste

Method

  1. Soak the dried figs in luck warm water for 20 minutes .
  2. Drain , wipe and chop to make a paste .( I blitzed the soaked figs in a food processor to a corse paste ) .
  3. Add all the other ingredients except for the mushrooms , oil , milk and saffron . Season to taste .
  4. ( Season well as the mushroom caps do not have any seasoning added to it .if not seasoned well , the dish might result being a bland dish ) Remove the stems alone from the whole cleaned mushrooms .
  5. ( I chopped the stems and sautéed it in a little butter and added it to the fig mixture not wanting to waste the stems ) .
  6. Stuff each mushroom with a tablespoon full of fig mixture and set aside for 20 minutes .soak saffron in milk and set aside . In a pan ,heat the oil till moderately hot .
  7. Arrange the figs filled mushrooms in the pan and let them cook on low heat for 1 1/2 minutes .Turn the mushrooms over and cook for another minute .
  8. Remove the mushrooms from the pan , brush with saffron dissolved in milk and serve immediately with tooth picks poked into each fried mushroom.

Notes

  1. The mushroom can also be placed on a greased baking dish and baked in a moderately hot oven (180 degree Celsius ) for 5-8 minutes .
  2. You can substitute any non- veg or veg filling instead of dried figs .
  3. I marinated the mushroom caps also with some ginger garlic and green chilli paste but it turned out too spicy so just leave the mushroom as it is .

Grilled semolina cakes with mushroom ragout

Share Button

image (46)

Preparation Time : 25 -30 minutes

Cooking Time : 35 minutes

Serving : 5-6 members

Description

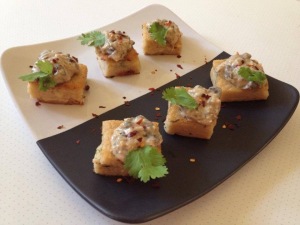
Grilled semolina cakes with mushroom ragout . A recipe I came across in a magazine where they had used polenta . Thinking I had polenta in hand started of with the recipe but then what I thought was polenta was couscous . My mind was set to prepare this dish so just didn’t want to stop . Not knowing what to do , I remembered a contestant in master chef India season 2 making sushi with semolina . With a spark of excitement ,substituted polenta with semolina and went ahead . Finally not having half the ingredients in hand that was demanded in the recipe . I had no other option other than to steel the idea and cook to my comfort level . Double checked making sure the semolina cake as well as the mushroom ragout tasted good . Assembled and while clicking picture’s , the entire family was in the dinning table . Rushed to the table and served . It was a hit with every one . This dish is a perfect vegetarian canopy that lends a rustic appeal to the succulent texture’s .  The boring semolina was created with a cracker of an idea into an exotic gourmet transformation that brought a lot of smiles at home :-)))

Ingredients for semolina cake

Ingredients
Quantity
Butter20 grams
Onion1 big chopped
Garlic4 flakes chopped
Dried herbs ( oregano , rosemary , thyme , basil )1/4 teaspoon each
Semolina1 cup
Water or chicken/ vegetable stock 2 1/2 cups ( I used 2 maggi chicken stock cubes with water )
Salt + pepperto taste , ( if using stock cubes avoid salt as the stock cubes contain a lot of salt )
Parmesan cheese50 grams grated ( I didn't use to omit a little bit of calories )
Oil50 ml + extra

Ingredients for mushroom ragout

Ingredients
Quantity
Mushrooms 1 packet sliced ( I used button mushrooms )
Butter20 grams
Onion 1 chopped
Garlic3 flakes crushed
Fresh cream 1/4 cup
Flour ( maida ) 1 tablespoon full
Milk1 cup
Dried herbs( oregano , rosemary , thyme , basil ) a big pinch each
Chilli flakes + salt + pepperto taste
Coriander leaves to garnish

Method for semolina cake

  1. Heat butter in a pan . Sauté onion and garlic to translucent . Add dried herbs , chilli flakes and pepper powder .
  2. Pour stock or water along with stock cubes . Bring to boil .
  3. Add semolina little at a time , stirring constantly , making sure no lumps are formed and semolina is cooked through to form a thick paste consistency like uppma .
  4. Takes about 6-8 minutes to cook . add grated cheese and mix well .
  5. Grease a flat cake tin or tray with oil and pour the semolina cooked mixture in .
  6. Spread the mixture equally all over , levelling the top .cool completely .
  7. Then cut into equal shaped squares with the help of a wet knife .
  8. Heat a griddle with little oil ( I used my dosa tawa ) and grill the semolina cakes to a light golden brown colour and a crisp outer layer .

Method form mushroom  ragout

  1. Heat butter in a pan .
  2. Sauté onion , garlic and sliced mushrooms for 5 minutes until the mushrooms are cooked through and water content evaporates .
  3. Add flour and sauté for a minute .
  4. Pour milk and cream , keep stirring until it gets to a thick creamy sauce .
  5. Season with salt , pepper , chilli flakes and dried herds . Taste and adjust .

How to proceed

  1. Place a teaspoon full of mushroom ragout above each grilled semolina cake .
  2. Garnish with coriander leaves and serve hot .

Chocolate chip cookies

Share Button

image (45)

Preparation Time : 25 minutes

Cooking Time : 12 – 15 minutes

Serving : 4-6 people

Description

Chocolate chip cookies . I don’t fancy cookies much but my daughter ANISHA likes cookies a lot . Good that a lot of things I would never attempt to try are liked by my kids , so I end up giving the dish a try . It’s helped me widen my culinary skills . These cookies are a delicate , alchemical infusion of flavours and textures . the best part is while baking , the surprising array of aroma that fills our  home . It’s even better than eating the cookies  . When hubby came home for lunch , he was like what have you baked ?? With a board smile on his face . These cookies had a crisp edges and a moist Center . Hubby does not like anything that’s too crisp so had to cook the cookies to his liking . Wanting to take a few cookies to my elder mother – in – laws( my father – in – laws elder brothers wife )  place  as it was her birthday that day but nothing was left as we all gobbled the entire lot . The chocolate chips that bursts  in between every bite is a surprise and makes you want to eat more . Truly an impeccable indulgent .

Ingredients

Ingredients
Quantity
unsalted butter1/2 cup
dark brown sugar3/4 cup , ( incase you don't have brown sugar use normal sugar )
sugar3/4 cup
large eggs2
vanilla essence1 teaspoon
chocolate chips1 cup
flour ( maida )2 1/4 cups
baking soda3/4 teaspoon
salt-1 teaspoon

Method

  1. Evenly position 2 racks in the middle of the oven and preheat to 375 degrees F. ( 180 degrees Celsius ) Line 2 baking sheets with parchment paper or silicone sheets.
  2. Melt butter in the microwave or a sauce pan . Cool slightly. Whisk the sugars, eggs, butter and vanilla in a large bowl until smooth.
  3. Whisk the flour, baking soda and salt in another bowl. Stir the dry ingredients into the wet ingredients with a wooden spoon; take care not to over mix. Stir in the chocolate chips .
  4. Scoop heaping tablespoons of the dough onto the prepared pans. Wet hands slightly and roll the dough into balls.
  5. Space the cookies about 2-inches apart on the pans. Bake, until golden, but still soft in the center, 12 to 16 minutes, depending on how chewy or crunchy you like your cookies. Transfer hot cookies with a spatula to a rack to cool. Serve.
  6. Store cookies in a tightly sealed container for up to 5 days.

Garlic murukku

Share Button

image (44)

Preparation Time : 25 minutes

Cooking Time : 5-6 minutes for each batch deep fried

Serving : 4 members

Description

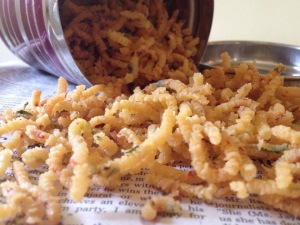
Garlic Murukku . This was a kitchen experiment that my daughter ANISHA came up with . She is on a holiday at my place with out her hubby ( that’s the high light this holiday as its the rarest of rare’s  that I get her alone ) . The joy of having her here is  an OMG experience . I am making maximum use of our girl time together shopping , eating out , watching movies , cooking , gossiping …… ( the list is endless )we were both just talking about something and suddenly my daughter is like I feel like eating murukku’s . We just got into the kitchen and started of . The beauty of this recipe is that it comes together very quickly . My girl is so bossy in the kitchen and I don’t like it when people tell me what to do when I cook . But finally we came up with a flavour full Murukku with complexity of garlic that lends an added textural surprise . Murukku’s always bring a sense of ceremony attached to it with nostalgia . Summer holidays  were celebrated at my grand parents place in palghat with home made traditional nibbles filled in huge air tight containers , kept beside the dinning table . So we kids could eat them when ever we wanted as hunger has no time and can strike any where  especially when with cousins :-))

Ingredients for the dough

Ingredients
Quantity
Rice flour1 1/2 cups , ( I used the normal iddiappam rice flour )
Oil1/4 cup for the flour + to deep fry
Water little to make a dough


Ingredients for Garlic paste

Ingredients
Quantity
Garlic 2 cloves
Dry red chillies4
Curry leavesfew
Green Chillies2
Saltto taste

Method

  1. Blend the garlic , dry red chillies , curry leaves , green chillies and salt together to a coarse paste , adding little water if required .
  2. Add this ground paste to the rice flour and mix well .Heat oil and add it to the rice flour mixture .
  3. Mix well adding very little water to get a dough consistency .
  4. Take little dough , fill into the murukku press and press over the hot oil .
  5. Deep fry till crisp and golden in colour . The hissing sound stops once the murukku’s are done .
  6. Drain and set aside for some time for the oil to drain and cool a bit . Do the same with the remaining dough .
  7. Keep stored in air tight containers and serve when required .

Deconstructed cutlet pie

Share Button

image (43)

Preparation time : 35-40 minutes

Cooking Time : 25 – 30minutes

Serves : 4 members

Description

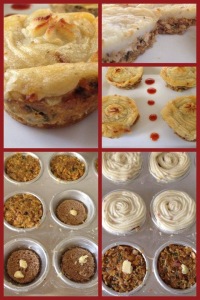
Deconstructed cutlet pie . I first came across this deconstrution of a dish in a satellote tv channel competition held among chefs . At first I didn’t understand what it meant , mainly because most of the dishes deconstructed by the chefs were new to me . Only after watching a few episodes , my mind suck in the real concept . It’ s just that you have to use the same ingredients used for a dish and reconstruct it to another form . Simple but you have to be innovative , that’s the key to deconstructed. I will not take credit for this dish as I came across this recipe in a food blog called mallu kitchen run by Reshma Nooh of Cochin . Tried it and wolla it was yum . I have used brown bread for the base as I was out of stock of white bread . It tasted exactly like cutlet but was served in pie form . Have to mention how one naned dish mean different things around the globe . Wired but its true . CUTLET in lndia means the round (or any desired shaped ) patties mainly made with potato mixed with other ingredients of choice , coated in bread crumbs and shallow fried . But the same word CUTLET in Australia means a find cut part of meat with its bone neatly carved (we call it as mutton chops in lndia ) . So folks where ever you are make sure the dish in mind is what you think it is . ….

Ingredients

Ingredients
Quantity
Bread10 slices ( edges cut and cut small circles in the size that fit exactly into your muffin tray or ramekins )
Butterto grease and to dot
Egg1
Cutlet mixture3 cups
Mashed potato mixture3 cups

Ingredients for cutlet mixture

Ingredients
Quantity
potato1/2 kg ( boiled , peeled and mashed )
chicken200 gm (boneless )
Turmeric powder 1/4 tea spoon
onion3 chopped
garam masala powder 1/4 tea spoon
green chillies4 crushed
ginger garlic paste 1/2 tea spoon
chilli flakes 1 tea spoon
coriander leaves 2 table spoon chopped
mint leaves1 table spoon chopped pepper
saltto taste
lime juice 1/2 lime

Method for cutlet mixture

  1. boil chicken with turmeric powder , ginger garlic paste and salt to taste . Cook till dry n shred the chicken .
  2. Heat 2 tablespoons of oil in a non stick kadai . Add onions and green chillies and fry to translucent .
  3. Add all the other ingredients one by one except for lime . Sauté till all the flavours infuse together .
  4. Remove from flame and add lime juice .Mix well taste and adjust set aside and cool .
  5. can substitute chicken with mutton keema or fish . Vegetarians can add paneer , soya chunks or more veggies like carrot , beet root , cauliflower , cabbage , beans , green peas and capsicum .

Ingredients for potato mash

Ingredients
Quantity
potatoes400 grams
butter chopped20 grams
hot milk1/4 cup
Salt to taste
Pepper to taste
Chilli flakesto taste
Maida 1 tablespoon

Method for potato mash

  1. Peel potatoes and cut into large pieces . Cook in a large saucepan of boiling salted water for 20 minutes or until very tender but not falling apart.
  2. Drain potatoes well. Return to saucepan over low heat.
  3. Shake pan gently until any remaining water evaporates. Using a potato masher, roughly mash potatoes.
  4. Add butter , maida and hot milk , to potatoes. Beat with a wooden spoon until fluffy. Season with salt , chilli flakes and pepper . Set aside .

How to proceed

  1. Pre heat an oven to 180 degree Celsius .
  2. Grease a muffin tray or ramekins with butter . Place the bread circles on the bottom . Dot with butter . Mix the egg with the cutlet masala .
  3. Top about 1 1/2 tablespoons of the cutlet mixture over the bread . Level it . Dot with butter .
  4. Pipe the potato mash over the cutlet layer or can just spread evenly over . Finally dot with butter .
  5. Bake in the pre heated oven for 20 to 30 minutes until you get a golden crust on top . Remove and cool .
  6. Run a knife around . Turn into a plate . Place the cutlet pie straight with the potato mash layer on top .
  7. Serve hot with tomato sauce or any dip of your choice .
  8. vegetarians can avoid adding one beaten egg and chicken ( add veggies , soya chunks or paneer instead ) to the cutlet mixture and follow the same recipe for the veg version .
  9. Leave the vegetarian cutlet mixture a bit moist , so after you bake your cutlet pie does not turn dry .


Left over mixed mini idli

Share Button

image (42)

Preparation Time : 10 minutes

Cooking Time : 10-12 minutes

Serving : 4 members

Method

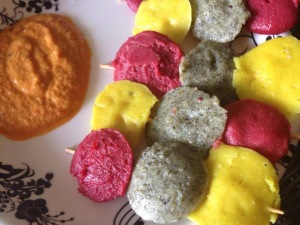
Week end breakfast special with left over that transpired into a colourful visual treat. Left over beet root poriyal ground and mixed with idli batter for the deep pink colour mini idli , left over spinach ground and mixed with idli batter for the light green mini idli and left over bottle gourd kootu ( bottle gourd cooked with dal ) ground with turmeric powder and iddli batter for the yellow coloured mini idli . No artificial colours added and a sure hit with kids at home . Skewered in tooth picks and served with tomato chutney .


Paruppu urundai kuzhambhu

Share Button

image (26)

Preparation Time : 35 minutes

Cooking Time : 30 minutes

Serving : 4-5 members

Description

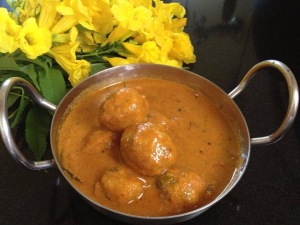
Paruppu urundai kulambhu . A typical Tamil dish . Those who don’t follow the Tamil language here goes the translation of this dishes name . Paruppu means dall , urundai means round that they refer to the round dall koftas here and kulambhu means gravy . So this dish is a tamarind based gravy flavoured with sambhar powder and enhanced with dall koftas . Its had for lunch with boiled white rice along with a poriyal or a kootu and an appalam . This dish is a mainstay in all the tamil households and every mom has her own take on it . My daughter ANISHA being a vegetarian , I was forced into learning all these dishes and every one at home relishes it to . So no complaints . At home we make a similar curry called kola urundai kulambhu . The only difference being we add minced meat koftas instead of the dal koftas . These sort of home style food items are unaffected by changing trends and some thing you turn to all year round . Once in a while there is no harm in stepping back in time , going back to the roots and cooking the old school way as our ancestors did !!!!  Gives us a chance to be loyal to old traditional recipes :-)))

Ingredients For urundai

Ingredients
Quantity
Toor dal /thuvaram paruppu 3/4cup
small onion 3 chopped
coconut grated 2 tablespoons
Dry Red chillies 4
fennel seeds 1/4 teaspoon
Cumin seeds 1 teaspoon
chopped coriander leaves 4 tablespoons
Salt To taste

Ingredients For Gravy

Ingredients
Quantity
Tamarind/puli1 big gooseberry size
small onions 1/2 cup
Garlic10 flakes
Tomato 1 chopped
Sambar powder 4 to 5 teaspoons
Turmeric powder1/4 teaspoon
Jaggery 1/4 teaspoon
SaltTo taste

Ingredients To grind

Ingredients
Quantity
Coconut grated 1/2 cup
onion1 medium

Ingredients To temper

Ingredients
Quantity
Sesame oil 3 tablespoons
fenugreek seeds1/4 teaspoon
Mustard seeds 1 teaspoon
cumin seeds 1 teaspoon
curry leaves2 sprigs

Method for paruppu urundai

  1. Soak toor dal for 2 hours . In a food processor ,first grind jeera,fennel seeds , red chillies,coconut to a coarse powder.
  2. Then add the toor dal (soaked,water drained )and grind coarsely.(little bit finer than we grind for masala vada)(don’t add water)Add chopped onions,salt,coriander leaves and mix well.
  3. Make small balls out of the ground batter and steam it by placing in a greased idly plates and steam it for 10 to 12 minutes.Cool down a bit(but let it be still warm),and again shape tightly,to make it perfect shaped koftas.

Method For Gravy

  1. Extract tamarind juice,keep a side,grind the coconut and onion to  a fine paste,keep a side.Heat a kadai,with oil and add the tempering items and  temper. Add garlic,onion and fry till golden brown.Then add the chopped tomatoes and fry for a minute.
  2. Add the tamarind extract,sambar powder,turmeric powder and fry for a minute .add the ground coconut masala and fry until oil separates .
  3. Add water and bring to boil and simmer until raw smell has gone .Lower the flame and add the urundais ( dall koftas ) one by one carefully.
  4. Boil in medium flame until all the balls float on the top(6 mins approx),by this time it would have got cooked.
  5. Do not stir till this stage. simmer for 4 mins add the jaggery . taste and adjust seasoning and the kuzhambu is ready .

Notes

  1. If you are beginner to cooking you can follow the steaming the urundai method confidently.
  2. The direct adding method is time saving,if you are confident on yourself you can just go ahead and try.
  3. You can use channa dal also for making the urundais. Or mixture of both dals, I have tried all the ways, makes no difference.
  4. Serve with any veggie kootu and appam (south Indian paped ) as side dish to this curry with hot boiled white rice .

Chick peas kebab

Share Button

image (40)

Preparation Time : over night soaking + 30 -40 minutes to boil the chick peas

Cooking Time : 1-1/2 minute for each batch cooked

Serving : 3-4 members

Description

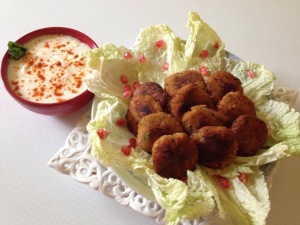
Chick peas Kabaab . A dish I came up with when wanting to make a salad with millet grains, chick peas and pomegranate . Washed and pressure cooked the millet grains but then came to know that the husks were not removed from the millet grains . It had a grainy , muddy taste and could not use it and went strait into the bin . The remaining boiled chick peas and pomegranate kernels had to be used in some way and I came up with a Kabaab . Used all the ingredients I would for shammi kabaabs but spiked it up with pomegranate kernels For an extra dash of flavour . Fried and served it with a simple cooling sour cream dip and it was delicate , warm and lightly spiced  . The sweetness of the pomegranate and light spice of the chillies elevate this humble kabaab to a delicious side dish . Started with one dish in mind and ended with inventing and turning basic ingredients to a fun , power packed side dish , starter , snack or a packed lunch item instead , with an experience of an extraordinary culinary contrast .

Ingredients

Ingredients
Quantity
White dried chickpeas2 cups
Cumin powder 1/2 teaspoon
Ginger garlic paste1/4 teaspoon
Onion1 chopped
Garam masala powder1/4 teaspoon
Green chilli 1 chopped
Oil to shallow fry
Mint leaves few chopped
Coriander leavesfew chopped
Chilli powder 1 teaspoon
Lime juice 1/4 teaspoon
Salt to taste
Pomegranate kernels3 tablespoons

 Method

  1. Soak chickpeas overnight.
  2. Pressure cook until soft. Will require at least 4-5 whistles on medium flame.
  3. Drain out excess water. Heat oil. Add slit green chilly, chopped onion and ginger garlic paste.
  4. Once onions appear soft add chick peas, chilli powder , garam masala powder , cumin powder and salt. Mix well.
  5. Turn off the heat. Add coriander leave and mint leaves . cool the mixture completely .
  6. Grind this mixture in a mixie jar without adding water.
  7. Now mix lime juice and pomegranate kernels and Knead for a minute to form a smooth dough.
  8. Now take the chickpea dough and make round small tikki’s. heat oil to shallow fry in a non stick pan and fry to golden colour on both sides .
  9. Serve hot with sour cream dip .

Ingredients Sour cream

Ingredients
Quantity
Sour cream 1 cup ,( can use hung curd also )
Saltto taste
Cumin powder 1/4 teaspoon
Coriander leaves chopped few
Chilli powder3 pinches

Note

  1. Mix all the above mentioned ingredients together except for chilli powder .
  2. Garnish with chilli powder . Chill in the refrigerator and serve .

Vendakai paal curry

Share Button

image (39)

Preparation Time : 15 minutes

Cooking Time : 20-25 minutes

Serving : 3-4 members

Description

Vendakai paal Kari . A side dish very own to my hubby’s place which is simple , yet an inventive approach to cooking with focus on using local ingredients .  Usually this side dish is served in most Muslim house holds through out the Nellai district with each house having their own twist and version to it . The basic of this dish is same by adding thin and thick extracts of the coconut  but the other ingredients may vary and most households garnish with maasi ( Maldives dried fish powder ) here at hubby’s place they don’t add maasi . This dish is one among my favourite side dishes . Once my grand ma balkees perima ( dads mom ) had come to my hubby’s place to visit me on a two days trip . My grand mom being a fussy person about food and every thing around , I had to take extra care to satisfy her needs . She loves fish and fish is one among the best local produce that Nellai is best known for . Made fish curry with other side dishes for lunch , one being vendakai paal Kari . My fussy grand mom liked the vendakai paal Kari so much that she just could not stop raving about it in a hilarious way though !!!Well,  who would have expected this simple lesser known but much more flavourful and interesting side  dish would impress her taste buds to this extent . Till date this dish fills my mind with soaked wealthy emotions of memories about my grand mom balkees perima . Miss her tons and loads as she is no more :-((

 Ingredients

Ingredients
Quantity
Tender small ladies finger 1/4 kg cut into finger size
First coconut milk thick extract1 /2 cup
Second coconut milk thin extract 1/2 cup
Small onionsone hand full chopped
Tomato 1 big chopped
Green chillies 2 slit
Coconut oil1 tablespoon
Cumin seeds1/2 teaspoon
Curry leaves few
Chilli powder1/4 teaspoon
Turmeric powdera pinch
Saltto taste

Method

  1. Heat coconut oil in a non – stick pan . Add cumin seeds and curry leaves . Once they crackle add small onions , green chillies and ladies finger .
  2. Saute until the ladies finger changes colour and gets dry without being sticky .
  3. Add the tomato and saute until it lets out all its juices and gets to a mushy pulp .
  4. Add salt , chilli powder and turmeric powder . Mix well adding thin second extract of the coconut .
  5. Cover and cook the ladies finger . Once cooked and the thin extract has evaporated , add the thick first extract of the coconut .
  6. Simmer and let the coconut milk infuse into the ladies finger for a few minutes and when oil separates , remove from heat and serve hot as a side dish with white rice or chapatis .

Notes

  1. Wash the ladies finger whole . Pat dry with a napkin .
  2. Then cut and use . In case the ladies finger are wet , it tends to get sticky and mushy .
  3. You can do the same with French beans , drum sticks and potato fingers . ( use fennel seeds instead of cumin seeds with drum stick and potatoes .)