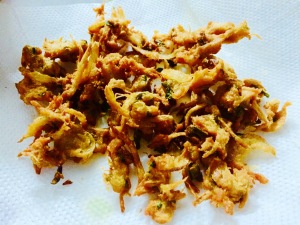
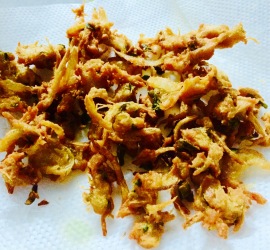
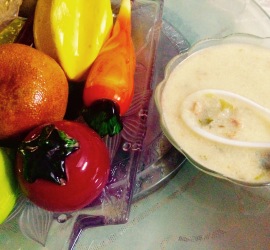
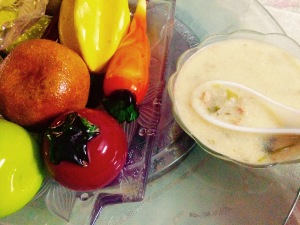
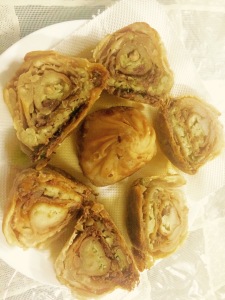
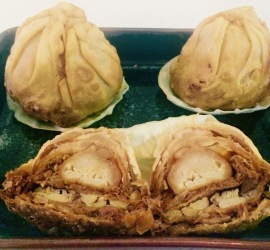
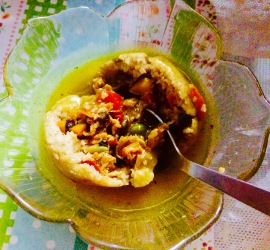
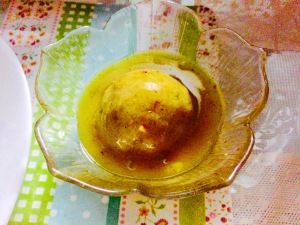
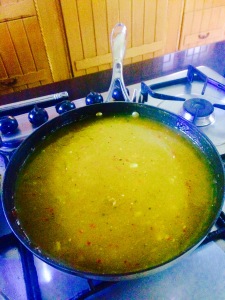
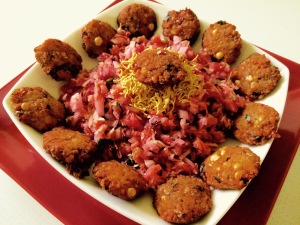
Chicken pakoda

Share Button

image1(1)

image2(1)

image3

image4

image5

Preparation Time   : 25 minutes

Cooking Time        : 15 minutes

Serving                  : 6 members

Description

As a new bride, very rarely did I get an opportunity to dine out. Mainly because of the few good restaurants we had at hubby dear’s place (oops my place too). I remember a new restaurant named neelambari was open and out of the blue we ended up there for dinner. I ordered chicken pakoda for starters and it was yummy yum. There after on our every visit to the hotel the chicken pakoda was a must. A few years later, the restaurant was shut down and back to square one with no going out to dine. The chicken pakoda did haunt me every now and then. Once I had gone to help hubby dear’s aunt- sara amma for a party arranged at her home. She was prepping for some thing and asked her what it was? She told chicken pakoda for starters . I could hear the bells ring in my heart but it paused immediately when the though came in… Will it taste like the one in neelambari restaurant?? If yes, hurray or else just keep craving. I made sure to take note about the ingredients to the procedure. Waited for the star moment to give it a try and it tasted perfect exactly like the neelambari hotel chicken pakoda. The trick was to add hot oil to the batter to get crisp pakoda’s creating a spark. I have been making this simple to make pakoda’s from then on but every time I re- check with Sara amma once again as it’s made only during the Iftar day’s taking our table by storm always.

Ingredients

Ingredients
Quantity
Bone less chicken 1/4 kg cut into chunks
Red chilli powder1 teaspoon
Turmeric powder1/4 teaspoon
Ginger garlic paste1 teaspoon
Salt to taste .

Method for chicken

  1. Marinate cleaned chicken with all the above ingredients for half an hour. Pressure cook for one whistle with out water.
  2. Once the whistle sound subsides. Open and boil until the the cooked chicken bits get dry. Cool and shred the chicken pieces.

Other ingredients

ingredients
Quantity
Big onions4 sliced
Curry leaves few chopped
Green chillies3 chopped
Red chilli powder1 teaspoon or to taste
Ginger1/4 inch piece grated
Chick pea flour / besan / kadala maavu1 cup
Rice flour100 grams
Hot oil 5 tablespoons
Salt to taste
Soda salt 1/4 teaspoon
Cashew nuts 2 tablespoons cut to bits
Oil to deep fry

Method for chicken pakoda

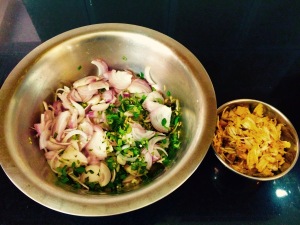
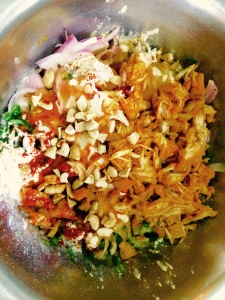
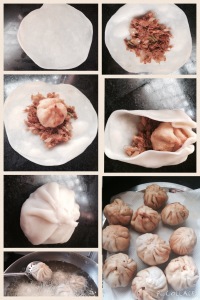
  1. Mix all the ingredients together mentioned above except for oil to deep fry along with the chicken shredded.
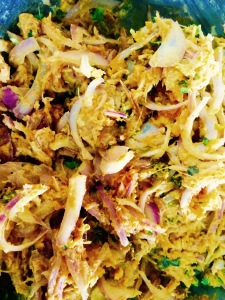
  2. Mix well with out adding water and set aside for ten minutes. The onions will let out enough moister to the batter to get a sticky thick mass and the hot oil added also helps to give a crisp pakora.
  3. Heat oil to deep fry. Drop one tablespoon of batter into to the hot oil in batches.
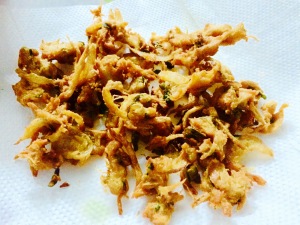
  4. Deep fry to crisp and golden in color.
  5. Drain and serve hot as it is with no dips.

Kaima kanji

Share Button

image1

Preparation Time   : 20 minutes

Cooking Time        : 30 minutes

Serving                  : 10 members

Description

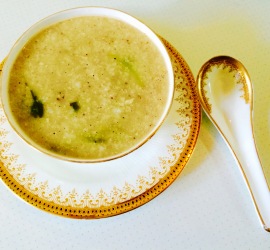
All the men at home like the kayalpattimam Kari kanji (mutton kanji ) that’s made with rice, veggies, dal and mutton. It is tasty and filling but we ladies like the light version of kanji with less masala and white in colour with lots of coconut milk to soothe the empty stomach as you break your fast. So the debate of which kanji is to be made while breaking the fast is a big problem every single day . My mother- in- law came up with a genius idea of making the kanji the way we ladies like it but with an addition of a light mince meat gravy to it. As we can not taste what we have cooked due to fasting, the million dollar question of how does it taste was revealed only the Iftar table. We ladies of the house ( my mother- in- law , my co- sister and myself ) with crossed fingers awaited the results and it was in deed a pleasant result with all the men whole heartedly giving a thumbs up. A big solution to the debate was born and the sensational recipe bursting with mouth watering flavours was added to our regular menu at home. This is how I started to learn little tips and tricks that are perfect for the home cooks like us to see food served to be celebrated and enjoyed with exotic blends to suit all kinds of tastes.

Ingredients for kanji

Ingredients
Quantity
broken basmati rice1 1/2 cup heaped
fenugreek seeds 1/4 teaspoon
cumin seeds 1/4 teaspoon
garlic flakes5
small onions6
green chillies 2slit
coriander leaves chopped1 teaspoon
mint leaves1/2 teaspoon
thick coconut milk 2 cups
water 8 cups
salt taste
ghee 1 table spoon mustard seeds 1/4 teaspoon
cinnamon 1
clove 1
cardamom 1
curry leaves4
ginger garlic paste 1/4 teaspoon

Ingredients for minced meat

Ingredients
Quantity
Minced meat 1/4 kg
Red chilli powder1 teaspoon
Tomato1 big chopped
Small onions one hand chopped
Ginger garlic paste1/2 teaspoon
Salt to taste

Method for kanji

  1. Pressure cook, washed rice, small onions, garlic flakes, green chillies, mint leaves, coriander leaves, fenugreek seeds, cumin seeds along with the water for 4 to 5 whistles.
  2. Add salt to taste and coconut milk. Mix well adjust the consistency to a flowing thick porridge adding water if needed. Bring to boil.

Method for minced meat

Mix all the ingredients mentioned for minced meat together. Add 1/4 cup water and pressure cook for one whistle in medium flame.

How to proceed

    1. Pour the cooked minced meat mixture into the boiled rice kanji. Mix well and adjust seasoning.
    2. Heat ghee in a pan, crackle the mustard seeds, add the cinnamon, clove, cardamom, cut small onions 4, curry leaves and ginger garlic paste.
    3. Fry to brown and crisp and pour over the kanji and mix well. Serve hot with samosa, cutlet and paruppu vadai.

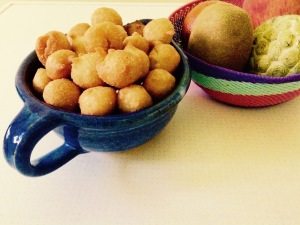
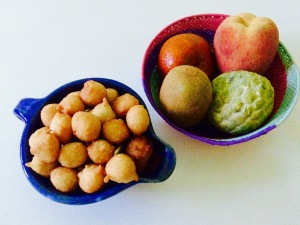
Coconut milk semolina sweet balls

Share Button

image1(2)

image2

Preparation Time   : 10 minutes + 30 minutes to soak

Cooking Time        : 5 minutes for each batch deep fried

Serving                 : 6-8 members

Description

Very rarely did my mother-in-laws mother-nannima ( that’s how we called her ) visit us when we were in a joint family set up but the few times of her visit she would cook some family style meals or make appalam’s. Very simple, tasty and soul full food for sure. Towards her last few years, she did stay with all of us. Harm less soul in her own space but never wanted cold food or thin dosas. Other than these two demands… All she wanted was a lot of love . She would tell stories to the little ones ( my kids ) at home. I was called for only to cut her nails and check her meals before being served to her. She kept complaining ( this is when she lost her eye sight completely) about rats biting her toe thumb. We all were really worried and did the needful immediately. A week passed by and she kept complaining the same. One day, we were all chit chatting in the living room and suddenly heard nannima shout out rat, rat.. We ran in to see my nephew (brother-in-laws one year old son) biting her toes. We grabbed him and all of us laughed our guts out seeing the actual rat.. Stories and memories to be cherished of living in a joint family…. Coming to the dish… This was one snack that nannima would make for tea on her visits. The first time I had this full flavoured indulgence, I had to ban myself from eating it as it just went in non- stop. A few days back was craving for this home cooked comfort snack and felt lost as I didn’t know the recipe. With my fingers crossed asked my mother- in- law and luckily she did know. Made it but the authentic flavour of nannima’ hands  that offered warmth and a sense of well being and satisfying carvings were surely missing.  I curse myself for not taking note of the hearty recipes she used to cook for us… I can’t be blamed though as I was just in my teenage when all this happened ….

Ingredients

Ingredients
Quantity
All purpose flour / maida1 cup
Semolina / rawa1/2 cup
Sugar1 cup
Salta pinch
Cardamom powder2 teaspoons
Soda salt1/4 teaspoon
Coconut milk1 cup ( might require less or more depending on the quality of flour used )
Oilto deep fry

Method

  1. Mix all the ingredients together except for oil to deep fry. Add coconut milk little at a time to get a thick bajji batter consistency.
  2. Set aside for half an hour. The batter might get too thick as the semolina swells. Add little more coconut milk to get to the right bajji batter consistency. (at times this Taste and Check seasoning.
  3. Heat oil to deep fry. Drop balls out of the batter in batches and deep fry to crisp and golden in color. Drain and serve hot.

Jeeraga kanji

Share Button

image1(1)

Preparation Time   : 15 minutes

Cooking Time        : 20 minutes

Serving                  : 4-6 members

Description

My earliest food memory is fresh home made Cooked jeeraga kanji made over a firewood stove top in huge batches at my grand mothers house ( dads mom) in coimbatore during the holy month of Ramadan. We kids were never allowed to the back yard as the fire wood would be burning in high flames. The kanji would borrow the smokiness from the fire wood stove top imparting a subtle aromatic flavour. some how the food always tasted better then. The kanji would be distributed to my aunts homes and served to all of us while breaking out fast with my uncles,cousins and aunts. I still remember getting things on the table in bits and pieces… Not enough for sure.  With in a fraction of a second a million things would be going on in the table. We cousins would discuss about that as our bed time story before going to sleep. I did try making this kanji over the firewood stove top wanting to relish the by gone taste of the dish. But failed for sure. I guess the magic was in my grand mothers hands scoring high on flavours and there sure is some thing therapeutic about her comfort food.  Till date I have not enjoyed an ifthar like that as it was such a refreshing wonderful way to round off and end a celebratory meal… Delicious, satisfying and soulful food made with loads of love.

Ingredients

Ingredients
Quantity
Jeeraga sala / samba rice1 cup
Moong dal1/2 cup
Small onion 6 whole
Garlic flakes 4 whole
Green chillies3
Grated Coconut 1/2 cup
Cumin seeds1/4 teaspoon
Ghee 1 tablespoon
Cinnamon1 inch piece
Cloves 1
Cardamom1
Big onion1 chopped
Ginger paste1/4 teaspoon
Mint leaves8
Coriander leaves1 tablespoon chopped

Method

  1. Dry roast the moong dal lightly until a good aroma arises, making sure not to burn as well.
  2. Pressure cook washed rice, moong dal, garlic, small onion, green chilies with five cups of water for five whistles.
  3. Heat one teaspoon oil and fry the grated coconut and cumin seeds to a deep golden color. Cool and grind to a Coarse paste.
  4. Mix the ground coconut paste to the boiled rice and mix  well. Adding more warm water if needed to get a semi thick pouring consistency liquid. Bring to boil adding salt to taste. Check seasoning.
  5. Heat ghee, add cinnamon, clove and cardamom. Once they crackle add chopped onions and fry to translucent. Top with ginger paste and fry to crisp. Pour over the kanji. Mix well. Garnish with coriander leaves and mint leaves. Serve warm with paruppu vadai and chicken or mutton samosa.

Sweet and savoury filled pumpkin’s /erachi nirachathu

Share Button

image2(1)

image3

image7

image8

image9

image10

image1

Preparation Time  : 50 minutes

Cooking Time       : one hour

Serving                 : 5 members

Description

I really am not sure from where my love for malabar food started as the only malabar connection I had was my best buddy sulu and a few home made treats she would bring to school after every holiday. The first time I really got to relish a typical malabar treat was when I was taken along with a heard of people ( around 30-40 of us… Gosh we were a crazy heard ) to see a bride  for my moms first cousin brother in Kerala. Cant remember the name of the place but the house was in between a rubber forest, lush green and silent. We were served a grand spread of snacks and tea . Every snack on the table was home made and all the snacks were so different and my first time for sure. The bride was equally good looking like the grand spread and we made sure to add her to our crazy heard. Even till date I keep telling my mom that afsina aarrs is the best looking daughter- in- law of our family. Later I got to know the pappla’s are known for their fondness for good food. Palagaram or savoury snacks are loved by the entire community and had between meals. This snack recipe was taken from my moms recipe book which was gifted to her by a pappla friend . Though the book has stained pages, she has never made this snack for us being her true lazy to cook self. I made it with two minds following the recipe as it had two fillings one sweet and the other savoury. Wanting to be loyal to the recipe went ahead with the method for filling but changed the dough ingredients a bit as I felt the given dough ingredients would give the dish a chewy cover. The multiple layers of cover and fillings add to its unique flavours. A very indulgent snack but worth every calorie and when eating a malabar fare you should forget about your waist line.

Ingredients for mince filling

Ingredients
Quantity
Minced meat200 grams
Turmeric powder1/4 teaspoon
Red chilly power1/4 teaspoon
Coriander powder1 teaspoon
Salt to taste
Big Onions2 chopped
Green chillies4 chopped
Ginger garlic paste1 teaspoon each
Garam masala powder1/2 teaspoon
Coriander leaves1/4 bunch chopped
Oil 2 tablespoons

Method for mince filling

1. Mix cleaned mince meat with turmeric powde, red chilly powde, coriander powder, salt to taste and little water together. Cook to done and dry consistency.
2. Heat oil in a kadai, add onions and green chillies. Fry to light brown in color. Top with ginger and garlic paste. Fry to crisp. Add boiled mince meat, garam masala powder and coriander leaves. Mix well and remove from heat. Cool completely and keep aside.

Ingredients for egg filling

Ingredients
Quantity
Eggs4
Sugar2 tablespoons
Ghee 2 tablespoons
Cashew nuts 2 tablespoons cut into bits
Raisins 2 tablespoons
Cardamom powder 4 pods powdered finely
Salt a pinch

Method for egg filling

1.Beat eggs with sugar and salt.
2.Heat ghee in a frying pan. Add cashew nuts and raisins. Fry to a golden brown color. Pour the beaten eggs and scramble adding cardamom powder. Remove and cool completely.

Ingredients for the cover

Ingredients
Quantity
Ingredients for the cover 250 grams
Saltto taste
Oil1/4 cup
Water enough to get a smooth dough

How to proceed

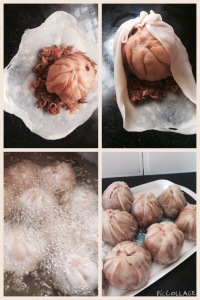
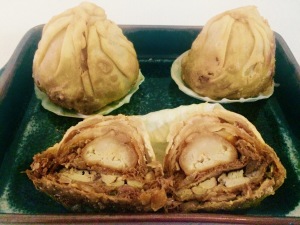
  1. Take a small ball of dough. Roll out to a 6 cm round. Place one teaspoon of egg filling in the middle. Get the edges of the circle together towards the center to get a pumpkin shape. Pinch off excess flour from the top. Heat oil to deep fry. Fry the filled pumpkin shaped pot to a golden color. Drain and set aside. ( I did ten pieces similarly at a time making it easier )
  2. Roll a bigger round out of the dough about 10-12 cm which is bigger than the first circle. Place two teaspoons of mince filling in the center. Top with the first egg  filled deep fried pumpkin. Bring the edges of the circle toward the center covering the first small pumpkin. Pinch of the excess dough. Deep fry in hot oil to a golden brown color. Drain and keep aside.
  3. Do the same repeatedly with bigger rolled dough rounds each time and filling alternatively with egg filling and mince filling. Deep fry each time you stuff a filling.
  4. Four layers is good enough but you want a smaller pumpkin’s you can stop with three layers. If using three layers make sure to use two layers of mince filling and one layer of egg filling.

Chicken stuffed wheat semolina dumplings with tangy and sweet orange juice

Share Button

image1 (2)

image2 (2)

image3 (1)

image4 (2)

Preparation Time  : 40 minutes

Cooking Time      : 30 -35 minutes

Serving               : 5-6 members

Description

I was honored by another fellow foodie page called kayal Samayal to be the judge for a contest run on their page with the thyme being chicken and oranges. The thyme was selected by me the great thinking let every one around also break their head to come up with new recipes like I do. Faiza( Kayal Samayal admin ) and myself were a bit worried initially as there were no posts and then one after the other they just poured in leaving me in a fix to judge the best dish. I was blown away with the innovative ideas and dishes that were posted for the competition. At that point of time I came up with this recipe in mind and stored it. I have been wanting to share the recipes of the Kayal Samayal contest but as most of the recipes are in Tamil… My laziness to translate it to English is just not letting me go ahead. Coming back to this dish… I remember one contestant of master chef India not sure which season  as well making sushi with upma. I just borrowed that idea of upma is easy to mould into any shape we want to and went ahead with this dish. Made the upma with wheat semolina for the healthy option. My cook asked me more than three times if she had to deep fry the dumplings as she is so used to what my brain will signal her to do next but it was a big no this time with me sticking to the healthy way perfect for a hot summer day. It was packed with a sweet and sour punch delivering a serious hit of vitamin c. The dish was shared to cousins homes and served at the table at home. It was a big no from hubby dear but every one else called up and got the recipe… Which means it’s worth a recipe to be shared…. Letting you all making this your own recipe, filled with your own stories.

Ingredients For the dumplings cover

Ingredients
Quantity
wheat semolina1 cup
Chicken stock cubes2
Water3 cups
Butter 1 tablespoon
pepper powder 1/4 teaspoon

Method for the dumpling cover

  1. Heat water with stock cube, pepper and butter. Mix well until butter and stock  cube dissolves.
  2. Taste and adjust salt as stock cubes contain a lot of salt. Bring to boil. Add the wheat semolina slowly as you keep stirring vigorously making sure no lumps are formed for about 8- 10 minutes until semolina is cooked and gets together to a slightly sticky mass.
  3. Remove from heat and cool completely.

Ingredients For the stuffing

Ingredients
Quantity
Boneless chicken 1/4 kg
Ginger garlic paste1/4 teaspoon each
Salt taste
Turmeric powder1/4 teaspoon
Onions 5 big chopped
Green chillies4 chopped
Mixed vegetables - carrots , beans , cabbage , green peas chopped and boiled in water with salt 1 cup
Garam masala powder 1/4 teaspoon
Mint leaves few
Coriander leavesone hand chopped
Pepper powderto taste
Oil2 tablespoons

Method for chicken stuffing

  1. Pressure cook cleaned chicken, salt, turmeric powder, ginger garlic paste and little water for one whistle.
  2. Bring to boil and Reduce the water. Cool completely and shred the chicken to treads ( I run it in the food processor for a second ).
  3. Heat oil in a non stick board pan. Add onions and fry to translucent.
  4. Add green chilies, boiled chopped mixed vegetables, shredded chicken, mint leaves, coriander leaves, salt, garam masala powder and pepper to taste.
  5. Mix well and lower the flame and keep stirring for 3 minutes letting all the flavours infuse together.
  6. Remove from heat, cool and set aside.

Ingredients For the orange sauce

Ingredients
Quantity
orange juiceof 6 oranges
garlic2 teaspoon chopped
green chillies6 chopped
cumin powder1/2 teaspoon
Red chili flakesto taste
Sugar to taste
corn flour 2 tablespoons diluted in 2 tablespoons of water
Chat masala powder1 teaspoon
oil1 tablespoon

Method for orange sauce

  1. Heat oil in a wide pan. saute garlic and green chillies for 2 minutes. Add cumin  powder and salt.
  2. pour the orange juice and cook for 2 minutes with red chili flakes and sugar to taste.
  3. Taste and adjust seasoning. Add diluted corn flour paste to  thicken a bit to a gooey  sauce. Remove and set aside.

How to proceed

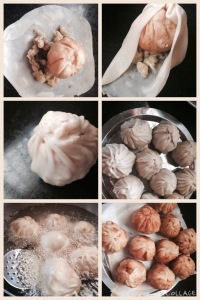
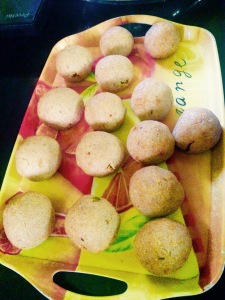
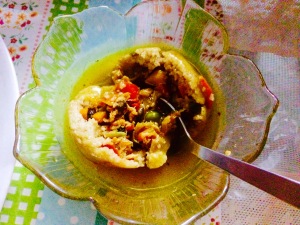
  1. Take a lemon size ball of cooled semolina and flatten to a round disc of 1/4 inch thick with the help of greased hands.
  2. Place 1 tablespoon full of stuffing in the center and bring the edges of the semolina disc towards the center and roll to a ball with no cracks.
  3. Do the same to all of wheat semolina and chicken stuffing.

Ela Ada

Share Button

image1

image2 (1)

image3

image4 (1)

image5 (1)

image6 (1)

image7

image8

image9

image1 (1)

Preparation Time    :  30 minutes

Cooking Time        : one hour + 20 minutes

Serving                  : 5 members

Description

I get nostalgic about this dish as it reminds me of my lazy summer vacations and days filled with delicious food. I don’t remember seeing an empty table at my grand parents place in Palghat at any point of time in my entire lif. Three meals with home made snack’s for tea in the evening was a must every day. The remaining time we had the snack’s container… You can call it a drum as it was so huge and all the salt water marinated pickles from raw mangoes, pineapples, cranberries ( kalakaaei)….uff my mouth is watering thinking about all that. My grand father was a true blue foodie and made sure we had brunches in between while watching a movie , a cricket match or wrestling match in the telly. All the while my grand father making his presence with us giving good company. Me being the only grand daughter then was not pampered at all as my grand parents were fed up of having four daughters in a row. So I grew up with a lot of boys around me but I had my aunts who were all just with in ten years elder than me. So they were like my cousins rather than my aunts. Ela Ada was one snack that was there on the table nearly every alternative day and sure was taken for granted then. Only after my marriage did I realise I have fallen hard for how these home style unique recipes… Legacy of my grand mother worth their weight in gold let me reconnect with my ravuthar heritage. Well… Dining trends come and go but the nostalgic unforgettable table experience sure does endure our loved ones too as we can’t get those memorable by gone good old days.

Ingredients for the filling

Ingredients
Quantity
Jackfruit Puree3 cups
Powdered Jaggery3 cups
Ghee1/2 cup
Salta pinch
Grated coconut 1/2 of a small coconut

Method

  1. Remove the fruit bulbs, deseed them. Pressure cook in a cooker  for 3 whistles, with about ½ cup water. Allow to cool naturally and grind to a smooth paste to get jackfruit purée.
  2. Heat a heavy bottomed Kadai add the jaggery. Dissolve the jaggery in about 1 cup of water.Strain and remove the impurities. Wash the kadai and pour back the jaggery syrup into the kadai.Let it boil on medium heat till one string consistency.
  3. Then add the pureed jackfruit and cook on medium heat, stirring once in a while to avoid burning.
  4. Do not cook on high flame.Once all the moisture is absorbed and the mixture starts thickening add the ghee little at a time or whenever you feel the mixture sticking to the bottom. Keep stirring and cooking till the mixture leaves the sides of the kadai.
  5. Add grated coconut and a pinch of salt. mix well. Take’s about one hours time to get to a gooey thick consistency. Remove from flame and let it cool naturally.

 Ingredients for the cover

Ingredients
Quantity
Rice flour2 cups
Salt a pinch
Hot water2 1/2 cups
Banana leaves 3 leaves cut into note book size
Coconut oil1 tablespoon

Method for cover

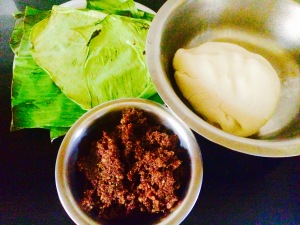
Mix rice flour, salt and hot water together to get a smooth, loose pliable  dough. Keep covered until needed to be used.

How to proceed

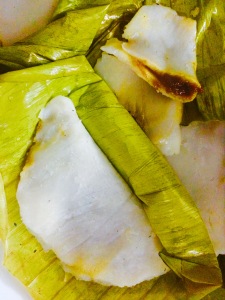
  1. Apply coconut oil over the note book size cut banana leaves. Place them over the stove top on medium heat so the leaves become soft and foldable.
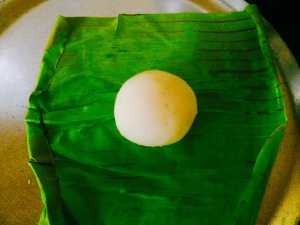
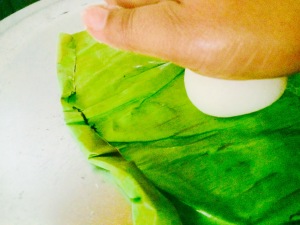
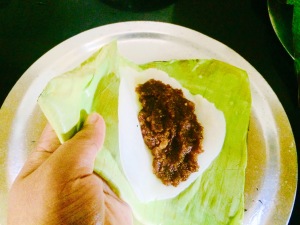
  2. Take a lemon size ball of dough and knead well. Roll to a ball with no cracks. Place over the greased banana leaf. With the help of your greased Palm, press gently to flatten.
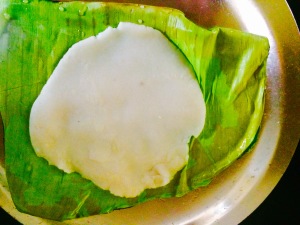
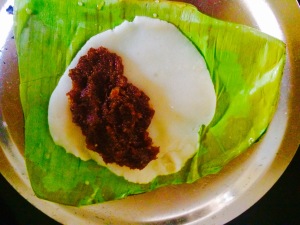
  3. Turn over and press again going all around the round disc making sure it’s equal and gets to a thin round disc. Place one tablespoon of cooled filling on one side of the circle.
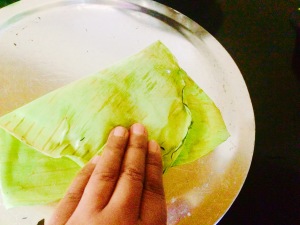
  4. Fold over with the banana leaf to get a semi circle. Press the edges together over the top of the banana leafy gently but making sure it’s sealed well.
  5. Do the same with all the filling and cover dough. Steam in a idli vessel for 10-12 minutes and serve hot .

Notes

  1. Make sure to knead the dough well only then you get ela Ada with no cracks.
  2. You can use just jaggery and grated coconut alone for filling When pressed for time or crave this dish when jackfruits are not in season I do the cheats way of using ready made chakka  varatti  ( double horse brand ).
  3. Mix a little powdered jaggery and grated coconut to it and use.

Layered moon samosas

Share Button

image5

image2

image4

image6

Preparation Time   : 1 hour

Cooking Time        : 35 minutes

Serving                  : 8 members

Recipe source       : Pavithra elangovan

Description

There are a few dishes that I don’t cook but have particular individual’s cook it when ever they drop by to visit me . Like wise, my nanny cum cook from moms place fathima used to make  samsa’s ( that’s how she pronoun’s it- samosa ) that were rustic looking,Devine in taste and high in calorie’s and my comforting childhood favourite.This snack is usually made as an offering in huge amounts (500 -1000 pieces) during the holy month of Ramadan in mosques by people willing to distribute to those fasting.fathima makes this snack every year with her sister and mother and does so. This has actually made her an expert in this dish. When ever she makes this at home, I just keep taking note of the procedure but never attempted to give a try. I came across a similar recipe in a fellow foodie blogger pavitra elangovan’s blog with a more posh look but a sweet snack. I followed her recipe to the core with no changes but just opted for a savoury non vegetarian filling. Quite a pains taking job but worth the work when you have a bite into this indulgent snack. The layers of distinct crumbliness and the twisted pattern used to seal the edges together add so much glamour to the snack. It’s always a challenge with food to get both taste and texture right. For an extra touch of indulgence  gear up to spoil all your loved ones with these tempting treats. I assure you they will earn you loads of brownie points.

Ingredients for the Layered cover

Ingredients
Quantity
Flour1/2 cup
Rice flour 1 teaspoon
Salta pinch
Oil to deep fry

Method for the layered covering

Mix all the ingredients together mentioned above for the layered covering. Add little water and knead to a dough that is slightly stiffer than a chapathi dough. Keep aside covered for fifteen minutes.

Ingredients for Filling

Ingredients
Quantity
Boneless chicken1/4 kg
Ginger garlic paste 1/4 teaspoon each
Saltto taste
Turmeric powder1/4 teaspoon
Onions5 big chopped
Green chillies 4 chopped
Mixed vegetables - carrots , beans , cabbage , green peas chopped and boiled in water with salt 1 cup
Garam masala powder1/4 teaspoon
Mint leavesfew
Coriander leavesone hand chopped
Pepper powderto taste
Oil2 tablespoons

Method for chicken filling

  1. Pressure cook cleaned chicken , salt , turmeric powder, ginger garlic paste and little water for one whistle.
  2. Bring to boil and Reduce the water. Cool completely and shred the chicken to treads ( I run it in the food processor for a second ).
    Heat oil in a non stick board pan. Add onions and fry to translucent.
  3. Add green chilies, boiled chopped mixed vegetables, shredded chicken, mint leaves, coriander leaves, salt, garam masala powder and pepper to taste.
  4. Mix well and lower the flame and keep stirring for 3 minutes letting all the flavours infuse together. Remove from heat, cool and set aside.

Other ingredients to brush in between each layer of disc

ingredients
Quantity
Ghee / oil 1/2 teaspoon for each layer
Rice flour1 teaspoon for each layer

How to proceed

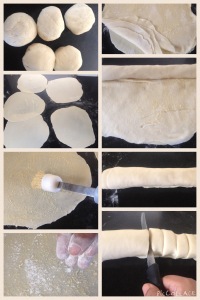
  1. Divide the dough into equal five lemon size balls. Roll each ball into 8 1/2  to 9 inch equal circles. Brush 1/2 teaspoon ghee on one side of the first rolled round disc.
  2. Sprinkle one teaspoon rice flour on top of the brushed ghee. Slightly rub it all over.Place another rolled disc on top and do the same with ghee and rice flour.
  3. Stack all the five rolled discs with applying ghee and sprinkling rice flour in between each disc. Once they are stacked up , using a rolling pin,slightly roll with little pressure to get even circles.
  4. Make sure not to give too much pressure. Starting from one end make a tight roll.Cut the tight roll into 10-11 equal one inch thick slices.Dust rice flour on one slice, with out using much pressure roll with a rolling pin to 3- 3 1/2 inch disc.
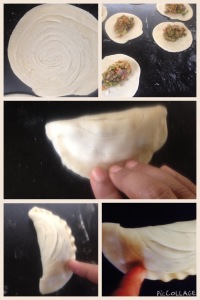
  5. Fill with 1 1/4 teaspoon of cooled filling in the centre. Apply water around the edges. Close to get a semi circle.starting from the left corner,pinch the edges together.
  6. Make a swirl inwards towards right angle. Do the same until you reach the other edge to get a twisted pattern on the edges and sealing the filling.
  7. Do the same to all the slices and filling. Heat oil to deep fry.Deep fry in low medium heat until both sides are golden brown in batches of 3 to 4 at a time.
  8. Drain over absorbent paper. Serve hot as it is with no dips .

Notes

  1. Place the tightly rolled log in the refrigerator for ten minutes and then cut into discs.
  2. Doing so the ghee and roll dough get a bit firm making it easy for us to work.
  3. Place the cut discs also in the refrigerator for five minutes and then roll,so the layered stay intact when rolling and filling.
  4. You can use flour to sprinkle in between each rolled disc but rice flour gives a crispy cover.
  5. The same can be done with a sweet filling with fried grated coconut , fried cashew nuts + raisins , poppy seeds.Cool and add sugar to taste with cardamom powder.
  6. You can make a mince meat filling substituting the chicken in the recipe.

Vadai kachubar chat

Share Button

image1 (7)

Preparation Time   : 20 minutes if using store brought Vadai’s or else
1 hour

Cooking Time        : 10 minute if using store brought Vadai’s or else 20 minutes

Serving                  : 6-8 members

Description

The need for simple and Un complicated recipes are always in demand and if it is during the holy month of Ramadan….. It the more welcome for sure. Here at hubby dear’s place we ladies (cousins, relatives and neighbors) have night prayers at one house. As the prayer lasts for an hour or more. We take turns to bring some thing to munch with a sulaimani tea after the prayers are over while chatting and catching up on that day’s updates. Usually it’s always a home made deep fried snack. Once my friend meera aboo Thamby had got a bhel like salad which was a great hit. All ladies with great enthusiasm got the recipe as well. We were all blown away with the recipe being so easy yet an innovative way to use up the left over paruppu Vadai’s which is a must on the ifthar table every day in all house holds here. From then on wards, It has been added to my Iftar table and is my comfort bowl of goodness to munch around when ever I feel like eating after I break my fast. This salad can be made by ordinary people who like to perform extra ordinary feasts for their tables (like me) and add it to their routine family meals as well. It’s with such spectacular variety and uniqueness with practical simplified methods that let you achieve smiles on the table at home.

Ingredients

Ingredients
Quantity
Paruppu Vadai's    10 to 12
Carrot 1 medium size grated finely
Cabbage1/4 cup grated finely
Beetroot 1/4 of a whole medium size beetroot grated finely
Onion 1 grated finely
Tomato 1 chopped finely
Boiled peanuts2 teaspoons ( optional but gives a nice taste . I didn't use as it was not there in my pantry at home )
Green chilly1 chopped
Coriander leaves1 teaspoon chopped
Lime juice 1/2 a lime
Saltto taste
Sev 1/4 cup to garnish
Chat masala1/4 teaspoon to sprinkle ( optional )

Method

  1. Mix all the ingredients together except for paruppu Vadai’s, sev and chat masala powder.
  2. Mix well. Taste and adjust seasoning. Place in the refrigerator until needed to be served.
  3. Just before serving, crumble the paruppu Vadai’s and toss over the chilled salad.
  4. Sprinkle chat masala powder and sev . serve immediately.

Notes 

  1. I add left over samosa sheets cut into bits and deep fried to crisp also instead of paruppu Vadai’s at times.
  2. You can add crushed pepper paped, kakra as well along with the Vadai’s for another variation.

cake truffles

Share Button

image1 (6)

image3 (7)

image4 (4)

image5 (4)

image6 (4)

image7 (3)

image8 (3)

image9 (3)

image10 (2)

image11 (1)

image12

image2 (6)

Preparation Time   : 30 minutes + 1 hour setting time in the refrigerator

Cooking Time        : 2-4 minutes

Serving                  : 8 members

Description

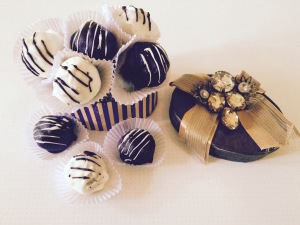
Having a big bowl full of carrot cake that I made for my mother- in- laws (my father- in- laws elder brothers wife) birthday. I didn’t want to repeat the same as I do always by making a trifle pudding. Remembered the lovely Apple cake balls that my aunt (mom’s last sister) would bring on her every visit while holidays from a shop called mec rennit (and the black halwa from buhari restaurant.. My am drooling in buckets here as Typing) in chennai. The cake balls are  dipped into colored sugar glaze. Wanting to do some thing similar to that . Just mixed up the left over cake, cream cheese frosting that I used for frosting the birthday cake and left over whipped cream that was used to make a mousse. Now a big confusion as I have never ever made a sugar glaze before so decided to just dip it into melted chocolate as it has been in my refrigerator for quite some time. Went ahead and it worked wonders more than I did expect. The cake truffles were moist on the inside and the chocolate  covering was melt in the mouth with a soothing effect. I drizzled more chocolate over the set truffles and served them in small cup cake holders. Wolla… All done with me  getting to know yet another dish added to my list of easy yet eye pooping recipes to impress and share as gifts well.

Ingredients

Ingredients
Quantity
Cake crumbled 2 cups ( cake of choice - here I have used spiced carrot cake )
Cream cheese3 ounce
Softened Butter 1 teaspoon at room temperature
Dark Chocolate1 cup chopped ( I used morde dark compound chocolate )
White chocolate1 cup chopped ( I used morde white compound chocolate)

Method

  1. Mix together the cake crumbs, cream cheese and  butter. Mix well. Taste and add powdered sugar if needed ( it’s optional ). Mix well to get a slightly wet mixture which is easy enough to roll into a ball.
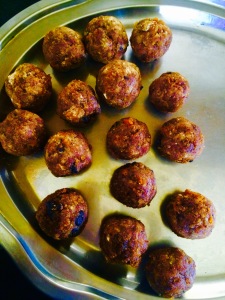
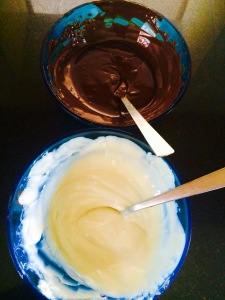
  2. Make big goose burry size even balls out of the cake mix. And place in the refrigerator for 30 minutes. Place the chopped white and dark chocolates in separate microwave safe bowls that are not wet and greasy but clean.
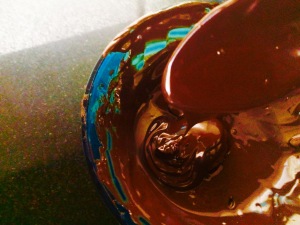
  3. Microwave each bowl separately for a minute. Remove and mix well with a dry spoon after 30 seconds to get a runny flowing consistency chocolate with no lumps. In case the chocolate is still hard with lumps.
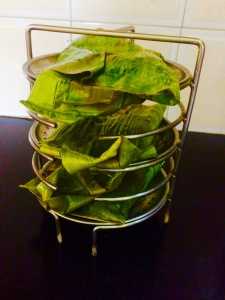
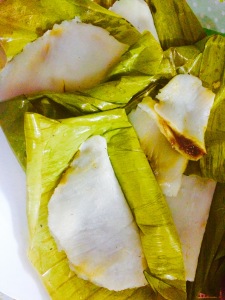
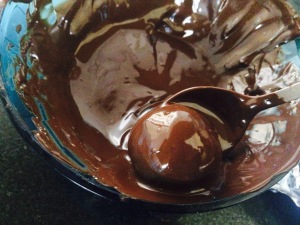
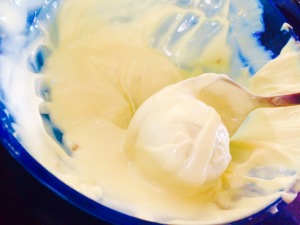
  4. Microwave for another 30 seconds and mix well. Drop a cake ball into the liquid chocolate bowl. Toss well gently making sure not to break the cake ball and to coat the chocolate over the ball all around with the help of a spoon.
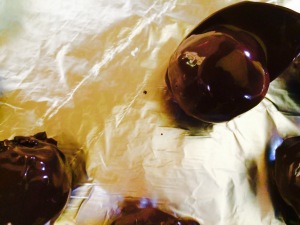
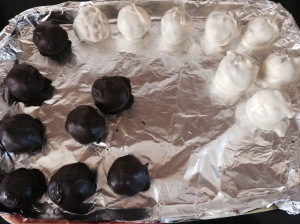
  5. Do the same to all the balls alternatively in both white and dark chocolate with separate spoons. Remove and place them 1/4 inch apart from one another on a flat tray lined with foil.
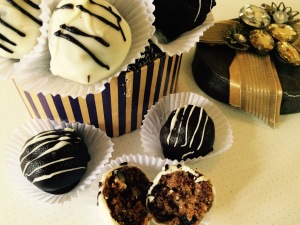
  6. Place in the refrigerator to set for 30 minutes or more. Once set, drizzle white chocolate over the dark chocolate truffles and drizzle dark chocolate over white chocolate truffles to add more glamour.
  7. Place in the refrigerator until needed to be served. Place these chocolate truffles over a small cup cake holder. serve and enjoy.