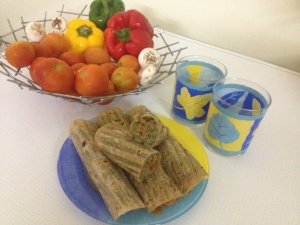
Home made pesto wheat veggie Katti roll

Share Button

image1

image2

image3

image4

image5

image6

Preparation time : 20 minutes
Cooking time       : 30 minutes
Serves                  : 2-3 members


Description

Katti rolls.. This word did really get me confused when I first got to see it in a menu card at a restaurant as a teenager. I knew what the dish was but didn’t know how to pronounce the word right. With a thousand doubts if it’s kaathi, kati, katti or some thing else, I remember how safely I just pointed it out to the person taking the orders and there he looked at me and told aloud “katti rolls”. Uff the relief I got with in me that no one got to know about this shame full flaw in me and made sure to repeat the word many times to register it in me before I forget and make a fool out of myself yet again. As a teenager (actually always) we all are in the desperate need to project our selves in a good manner always which is not possible at any stage of life with the reality of we getting to Learn with our every day life experiences. Those silly days of hope, dreams, joy and sorrow in little things… Coming to the dish, I was pushed into a situation where I had to come up with an innovative idea to serve chapathis for dinner at home as every alternative day it’s chapathis for dinner at home. Seeing all the sad faces at the table with their chapathis on their plates, I cheered them all up with this Italian twist to our Indian katti roll. Sure did bring a spark on the table with hubby dear raising his eye brows with his first bite which is the best sign rating a dish as passing out with flying colours. My job done, happy me about the dish and mainly getting another new recipe to share with you all.


Ingredients
Quantity
basil 2 cups (at times I substitute with 1 cup mint + 1 cup coriander leaves or equal amounts of all the three)
Parmesan cheese
1/2 cup grated
toasted walnuts or pine nuts1/2 cup (I used pine nuts)
Salt to taste
garlic 4 cloves
olive oil 3 tablespoons


Method For the Pesto Sauce
In a blender add all the ingredients and mix till a semi-fine paste is achieved.


Ingredients for the veggie filling
Ingredients
Quantity
Vegetables(carrots, beans, cabbage, cauliflower, capsicum, mushrooms and green peas)3 cups chopped
Olive oil 1 tablespoon
Garlic flakes 2 crushed
Dried herbs -(oregano, thyme, basil) 1/4 teaspoon each
Chilli flakes to taste
Salt to taste


Method for filling
Heat olive oil. Add crushed garlic, chopped vegetables, dried herbs, chilli flakes and salt to taste. Sauté until the vegetables are 3/4 cooked and crunchy.Other ingredients
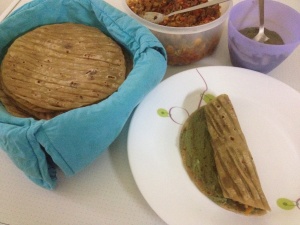
Cooked Chapathis- 4 grilled to get Lines on them. (I grilled them to add more glamour to the dish, you can use normal chapathis as well)

How to proceed

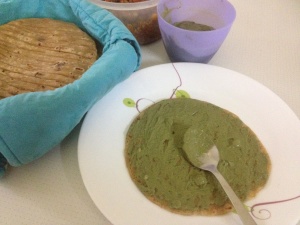
  • Apply pesto over one side of the grilled chapathis.
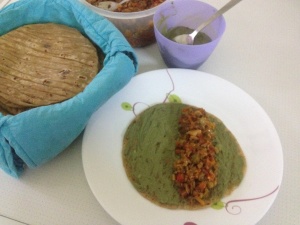
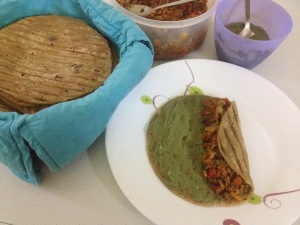
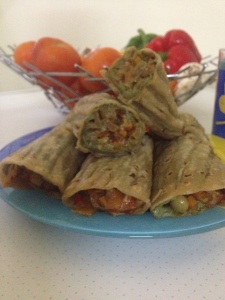
  • Place the veggie filling in the middle to get a line. Fold tightly to get a roll.
  • Cut to equal halves or serve as it is warm.

kutha

Share Button

image4

image3

image2

image1

Preparation time : 15 minutes
Cooking time       : 35-40 minutes
Serves                  : 8 members

Description

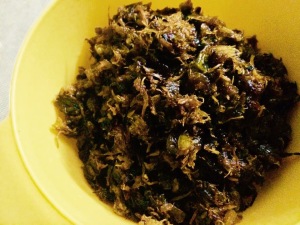
Kutha… I know the word sounds wired as in Hindi it means dog. I felt the same way when I first got to know about this dish too. A recipe with few ingredients but time consuming one with Divine results. The technique of caramelizing the onions and the meat in low  heat did let me learn the art of slow cooking. The surprise element being the tenderness of the meat as its slow cooked . No idea from where my mother- in- law learnt this dish as I have never seen this dish on the table else where at any other relative’s place. The colour of the dish might put you off as its in a very dark shade of brown but the taste sure will let you feel soothed with its sweet element popping in from the onions along with the caramelized flavour. This is served as a side dish for ghee rice (nei choru) but it goes well as a side for any thing and every thing possible. At times when I have left overs, I use it as a stuffing for any savoury snack too.


Ingredients
Quantity
Bone less mutton 1/2 kg
Big onions 1 kg sliced
Green chillies 20 ground coarsely
Coconut oil 1/4 cup
Method
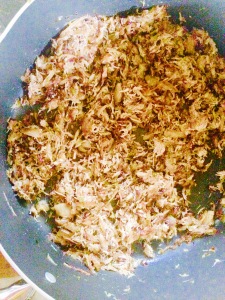
  • Pressure cook the cleaned meat to done. Reduce the water to dry. Cool completely and shred the meat by pulsing in a food processor to get threads of meat.
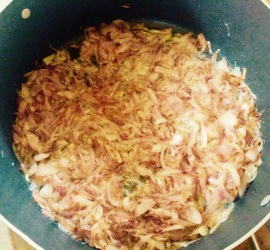
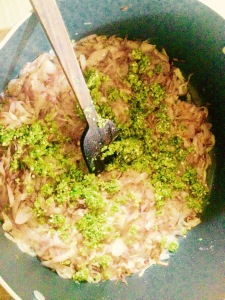
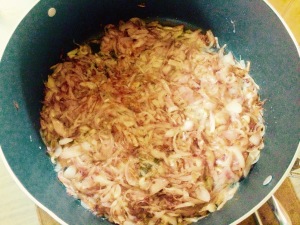
  • Heat the coconut oil in a non-stick wide pan. add the sliced onions. Sauté to caramelise for 20 minutes in medium heat. Add salt to taste and green chillies. Mix well and sauté for another five minutes.
  • Add the shredded meat and sauté for 15 minutes to brown in very low heat. Remove from heat and serve hot as a lip snaking side dish.

Notes

  • This is a slow cooked dish, so you have to be patient while cooking.
  • I start cooking with this dish and remove it from heat only when I am done with the rest of cooking.
  • Always use a non-stick pan as it helps not to get burnt and in very low heat as well.


chocolate cups

Share Button

image1
 
image2
 
image3
 
image5
 
image6
 
image7
 
image8
 
image9
 

Preparation time : 10 minutes + setting time about 15-20 minutes
Cooking time       : 1 minute
Serves                  : 6 -8 members


Description
Getting to see all the foodie groups in face book with posts of these chocolate cups made. I had added this to my to do list. Finally made it when my parents and dads friend and his family dropped in for lunch. The recipe was so very easy with great results. I was not confident at all about pulling this of as my inner instincts kept telling me it’s not going to work out. The moment of truth was when I had to remove the silicon molds carefully out of the set chocolate cups. When done, I did do a dance jumping up in joy. Now chocolate has been added to my experimenting list for new and old recipes to be tried out.  From then till date, it’s been a recipe I rely on when pressed for time to do desserts. The best part being, you can fill the cups with any thing possible  letting you be more creative on every attempt. An apt recipe to be made with kids and beginners. The joy in eating the chocolate cups sure does bring a spark to elders, youngsters and kids with no difference at all.


Ingredients
Quantity
Morde dark chocolate compound chopped 1 cup
Morde white compound chocolate chopped 1 cup
Silicon molds few


Method
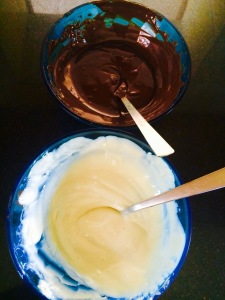
  • Place the chopped dark and white chocolate compounds in separate clean microwave safe bowls.
  • Microwave for one minute each one at a time. Remove and mix well to with a dry spoon to get a gooey mass of chocolate with no lumps.
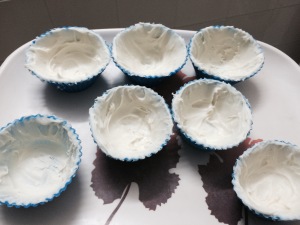
  • Pour one small ladle into silicone molds of choice. Turn and roll the chocolate all over by rotating the molds making sure the chocolate has coated all over well evenly.
  • Pour the excess out into the melted chocolate. Do the same until all the chocolate has been used up.
  • Place the silicon molds in the refrigerator for one hour to set.
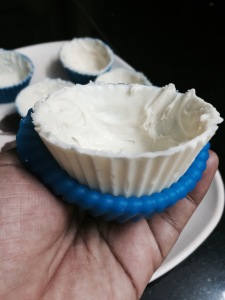
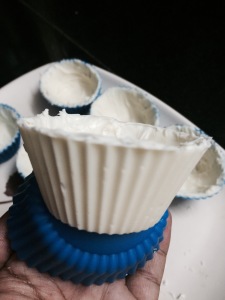
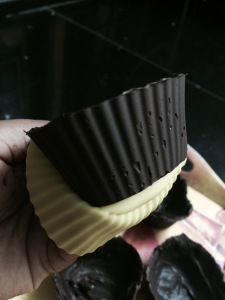
  • Repeat the same with white chocolate. Remove the set molds just before serving. Carefully peel the silicon molds to get chocolate cups.
  • Fill the cups with any sweet treat of choice and surprise your loved ones with bliss.


Notes
  • Make sure there is no water in the chocolate, the vessels or spoon used. It’s very important as the chocolate does not set.
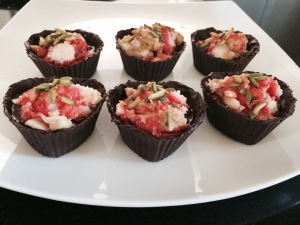
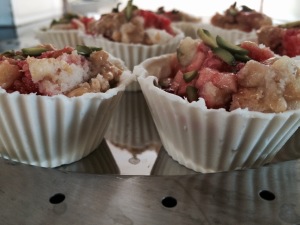
  • I have filled the cups with cake, mixed fruits, custard and nuts. Choice is yours with ice cream, any pudding etc..
  • You can de-mould the cups, fill and place in the refrigerator ahead. remove from refrigerator just before serving as these cups tend to melt due to humidity.
  • Get creative and make marble cups with a mix of both white and dark chocolate together.

Moist carrot cake

Share Button

image1

image2

image3

image4

Preparation time : 30 minutes + another 30 minutes to assemble the cake
Cooking time       : 45-50 minutes
Serves                  : 8-10 members
Recipe source     : chow.com

Description
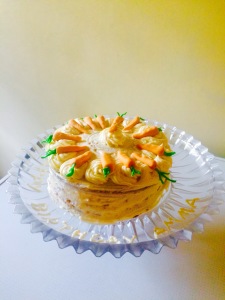
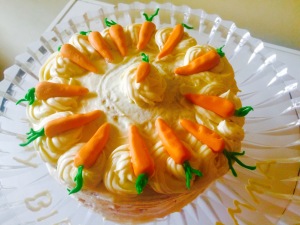
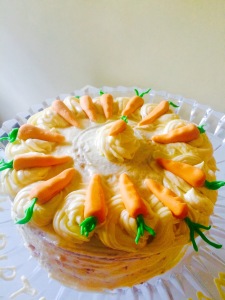
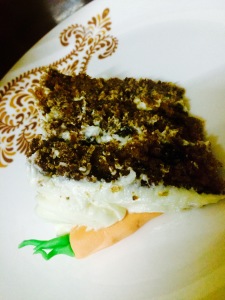
Mahmutha rabbani… My father-in-laws elder brothers wife. A lady I admire in all means and my main motivation to write my first cook book. To me if you admire some one, you should go ahead and tell them.Wanting to give a surprise to on her birthday by baking a cake and  to bake a cake for an elderly person is a serious job to be done keeping in mind about the health issues. I googled a lot and settled down for a carrot cake from chow.com. I had to follow the recipe religiously as when it comes to baking a cake, you just can’t play with the ingredients  or measurements as the more precise you are the better the results. I was very happy with the cake from its rise, texture, aroma to taste. Started assembling the cake and that’s when all the problem started. The cream cheese frosting started to get too loose as it was very humid here, had to shift to an air conditioned room and continue. When my job was done.. The cake looked like a leaning tower of Pisa.. Now what do I do about this.. some how managed and made the cake look decent enough. With my fingers crossed took the cake to her place and she insisted we cut it at her elder sons place. My tummy had more butterflies now as the cake started leaning again and was worried about it traveling around though to the next door.  The cake was cut and we all enjoyed our piece of cake. Late in the night I get a call saying the cake was too good and hubby dears cousin brother gobbled up the entire lot. What more do you need.. This leaning tower of Pisa was in deed a blonder with a wonder…

Ingredients
Quantity
Flour / maida2 cups
Baking soda2 teaspoons
Baking powder2 teaspoons
Salt1/2 teaspoon
Ground cinnamon3 teaspoons ( might seem like a lot but I assure you it adds so much more flavour)
Nutmeg powder1/2 teaspoon
Eggs4
Vegetable oil1 1/4 cup
Sugar1 cup
Brown sugar 1 cup
Vanilla essence2 teaspoons
Grated Carrots3 cups
Chopped walnuts pecans - 1 cup ( you can use cashews + almonds instead )
Raisins1 cup ( I didn't use as I don't like it in my cake )
Cream cheese frosting ingredients
Ingredients
Quantity
Cream cheese8 ounce softened
Butter1/2 cup softened
Sugar powdered2 cups
Vanilla essence1 teaspoon
Method for cake
  • Preheat oven to 180 degree Celsius.
  • Prepare two nine inch greased cake pans with parchment paper.
  • Mix the dry ingredients flour, baking powder, baking soda, salt, cinnamon powder, nutmeg powder together.
  • In another bowl whisk together eggs, oil, both sugars and vanilla essence for a minute.
  • Add the mixed dry ingredients to the whisked wet ingredients and mix for two minutes. Add grated Carrots, nuts and raisins.
  • Pour the batter into prepared two cake tins equally and bake for 45-50 minutes. Test doneness by inserting a tooth pick into the middle of the cake. If it comes out clean, the cake is cooked through. Cool completely.

Method for frosting

Beat cream cheese and  butter creamy. Add powdered sugar and beat for a minut . Mix in vanilla essence and use to frost the cake.

How to proceed
Fill the frosting in between the two cooled cakes,  all over and top evenly. Decorate to choice. Cut and serve.
Notes
The frosting tends to get too loose If placed out side at room temperature so place it in the refrigerator once mixed, until to be used over the cooled cakes.

Tricolour kuli paniyaram

Share Button


image1


image2


image3


Preparation time : 30 minutes
Cooking time      : 20 minutes
Serves                : 4-6 members


Description
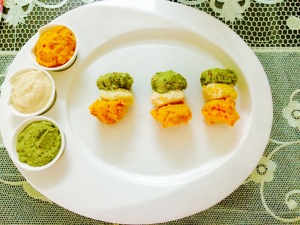
Happy Independence Day to one and all.. How many of you have celebrated Independence Day at your homes??  Well I, myself haven’t. I was taken Aback to see how the Pakistan’s celebrate their Independence Day at their homes through another face book group. The house is decorated with green balloons, small flags all around and food to the thyme of their flag displayed with a cake to cut and celebrate. What an awesome way to celebrate and immune our kids with patriotism.. I have made up my mind to do so from next year on wards… And wish we all do the same with no difference in caste, creed or colour.. Jai ho.


1.Ingredients for carrot chutney
Ingredients
Quantity
Carrots1 cup chopped
Tomato1 small chopped
Small onion5
Garlic flakes2
Tamarinda small pinch
Saltto taste
Coconut1/4 cup
Coriander leavesvery little
Dry red chillies4 to 6
Gingely oil1 tablespoon
Asafoetidaa pinch


Method for carrot chutney
Mix all the above mentioned ingredients in a microwave safe bowl. Mix well and microwave on high for 6 minutes. In between at an interval of 3 minutes toss once and microwave again. Cool completely and grind to a smooth paste. Add very little water if needed. The consistency of the chutney should be of a spreading consistency not too thin and watery or not too thick.  Taste and adjust seasoning and set aside. Incase you don’t have a microwave just fry all the ingredients separately  in gingely oil until the ingredients are 3/4 cooked. Remove cool and grind to get a chutney.


2.Ingredients for Coriander mint chutney
Ingredients
Quantity
Coconut1/4 cup
Gingera tiny piece ( just a tit bit size )
Coriander leaves with stem1/4 cup
Mint leaves8
Green chillies 4 to 6
Tamarinda pinch
Saltto taste
Curry leaves2
Jaggerya tiny piece
Method for the coriander mint chutney
Grind all the above ingredients together to a smooth paste of semi thick spreading consistency by adding very little water. Taste and adjust seasoning and set aside.


3.Ingredients for white coconut chutney
Ingredients
Quantity
Coconut grated1 cup
Fried gram2 tablespoons
Green chilli1
Saltto taste


Method
Grind all the above together adding very little water to a smooth paste in a food processor.


4.Ingredients for kuli panniyaram 
Ingredients
Quantity
idli batter2 cups
small onions1/2 hand chopped
green chillies1 chopped finely
ginger1/4 inch piece grated
curry leavesfew chopped
coriander leavesfew chopped
soda - bi - carbonatea pinch
cumin seeds1/4 teaspoon
saltto taste
waterlittle
oil4 tablespoons
Method
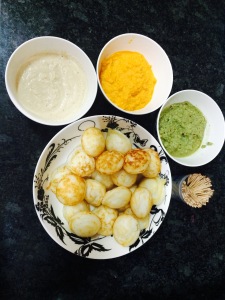
  • Mix all the above ingredients together except for oil, to get a semi loose consistency batter. Set aside for 10 minutes.
  • Heat a non–stick kuli pariyaram griddle with 1/4 teaspoon oil in each dent on the griddle.
  • When oil is hot, pour 1 1/2 tablespoons full of batter mixture into each dent and cook for 30 seconds.
  • You will find bubbles on top of the batter in each dent, then turn the kuli pariyarams over with a help of a spoon or a kuli pariyaram stick.
  • Cook again for a minute on medium heat till cooked through.
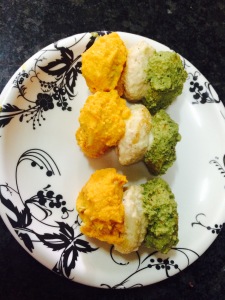
  • Remove, cool a bit and toss over each chutney. Poke into tooth picks to the colour of our Indian flag and serve.

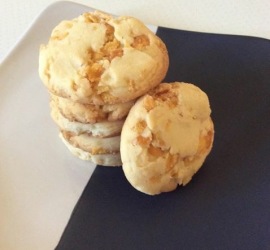
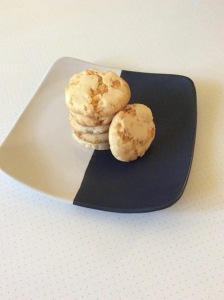
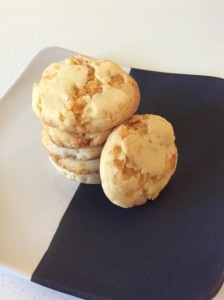
No egg cornflakes cookies

Share Button

image1

image2

image3


Preparation time : 25 minutes

Cooking time      : 10 -12 minutes

Serves                 : 4 members

Description

Cookies and biscuits have traveled with me from the start.. I can say. As a little one, I remember my entire aadhi clang (uncles, aunts, grand ma, cousins to all ) dunking in parle – G biscuits into hot tea as soon as we wake up sitting around the dining table starting our day with gossips and stories of else where from the daily news Papers read aloud . The joy of the dunked in soft, melt in the mouth biscuit brings to you is sure Devine and when the biscuit falls into the tea.. That moment of disappointment is a sure loss. The joy and loss of food in my little heart was itched for ever. The surprising element… Till date we all pack parle -G biscuits for my NRI nephews to enjoy as we did and they seriously are in love with the dunking part. Then came the daily routine of cookies at boarding school every morning at 10.30 which out tea break. This sure was an over dose and brought an aversion towards biscuits and cookies. Never have I dunked in cookies in school to keep up to the standards of elite around me. Now my boy loves his biscuits and cookies. The first grab when shopping from any counter is packets of biscuits and he hates to share it with others. So for his sake my journey with biscuits and cookies continue to treat him and mother him with a lot of love. These cookies were made to impress him on one of his holiday visits when home. As always, no sharing and the entire lot lined his tummy alone.


Ingredients

Ingredients
Quantity
Cornflakes2 cups crushed
Flour / maida1 1/4 cup
Sugar powdered finely3/4 cup
Butter200 grams
Baking powder1/8 spoon
Salta pinch
Cashew nuts1/2 cup crushed
Vanilla essencefew drops

Method

  • Preheat oven to 180 degree Celsius.
  • Cream butter, sugar and vanilla essence together.
  • Mix in all the dry ingredients – flour, baking powder, salt, cornflakes and crushed cashew nuts. Knead to get a dough.
  • Form dough into walnut sized balls.
  • Place on cookie sheet and flatten with a spoon dipped in water. (I used a round cookie cutter to get equal sized round cookies)
  • Bake for 10- 12 minutes.
  • Cool on pan for a minute or two, then transfer to a rack to cool completely.
  • Store in air tight container for a week or so and enjoy when needed.

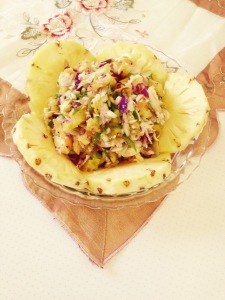
Mecedonia pineapple salad

Share Button

image1

Preparation time : 15 minutes
Cooking time       : nil
Serves                  : 4 members

Description 
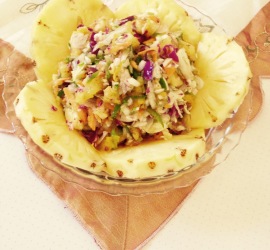
Pineapples always reminds me of a silly incident that happened with my brother. My brother was sent over out of station for textile purchase once in a while with a fellow senior sales man from our textile shop to learn the tricks of our family Bussiness. On one such visit to Bangalore, in the middle of the night when asleep the senior sales man (sundhar Ji – that’s how we call him) wakes up my brother. My brother wakes up to see an un – known man in front of him. He jumps out of bed howling.. The person says.. “it’s me sundharam” with his face all swollen up to a level of not identifying him. They go around all the streets in the mid night to consult a docter and finally end up in the government hospital and find out the reason being pineapples.. (God alone knows the real reason though)  I know sounds crazy but they both had late night dinner and on their way by walk to the hotel… Sundar Ji had two long slices of pineapple from a road side shop. Till date we bully him asking if he wants pineapple’s.. Well now, coming to the salad. A simple salad that I ended up making with available ingredients at home. Tossed and put together in minutes with great results for sure. A recipe apt for beginners too..

Ingredients for salad 
Ingredients
Quantity
Pineapple chopped1/2 cup
Cucumber2 chopped
Onion1 chopped
Carrot1 small grated
Capsicum1/4 chopped
Red cabbageshredded 3 tablespoons
Green chilly 1 chopped
Coriander leaves choppedfew

Ingredients for dressing
Ingredients
Quantity
Garlic paste1/2 teaspoon
Lime juice2 tablespoons
Sugar1 tablespoon or more to taste
Saltto taste
Soya sauce1 teaspoon
Olive oil1 teaspoon

Method  
Mix lime juice, sugar, olive oil, garlic paste, soya sauce and salt to taste together. Mix well unlit sugar dissolves. Taste and adjust seasoning. Mix all the salad ingredients together. Pour the dressing over and toss well. Keep in the refrigerator until to be served. Serve chilled.

Kozli lode prawn biriyani

Share Button

image1(5)

image2(4)

image3(3)

Preparation Time  : 30 minutes

Cooking Time       : one hour

Serving                : 4-5 members

Description

I am always taken aback with the flavour’s, taste, pairing of ingredients and recipes of the malabar cuisine. This biriyani was on my try list for quite some time. The curry leaves used in the biriyani put me off as my grand mother always told curry leaves are only for chutney’s. But this biriyani did prove me wrong as the curry leaves along with the home made garam masala elevated the dish to another level. Well now this Malayali connection is taking to me an interesting incident that happened a few days back. Our sauté, fry n bake family member kavitha Vivek messaged me asking me for a sweet potato recipe. I did send her the links of a few dishes. She replied saying” Akka I remember the story of a live in maid bringing sweet potatoes for you and you trying some new recipe… I can’t find the story in any of the above recipes.. Which is that one Akka”. I felt out of the world as my little story got a place in her heart and she related to the dish with my foodie memory. I did let her know how I felt and she replied saying” yes Akka, your stories are so true, practical, down to earth like Malayalam movies that it steels our hearts!! No show off, no dreams, no exaggerations. It’s so real.. I can visualise it sitting here. I was flattered with this one of a kind compliment for sure as one among my dreams as a kid was to do journalism and I strongly feel I am satisfying myself with the freedom to pen down my food related memories here which has got a place in all your hearts to live and visualise it adding more drama to my humble home made preparations. letting way of an opportunity to learn and share with one another.

Ingredients for the gravy

Ingredients
Quantity
Prawns 1 kg cleaned
Basmati rice2 cups
Big onion 6 sliced
Small onion 1 hand full chopped
Curd 1 cup
Green chilies 20 slit
Tomato 4 big chopped
Ginger paste 1 1/4 tablespoons
Lime juiceof 1 lime
Coriander leaves 1 cup chopped
Curry leaves8 leaves
Ghee 1 cup
Turmeric powder 1/4 teaspoon
Coriander powder 2 teaspoon
Saltto taste

Garam masala powder ingredients

ingredients
Quantity
Cinnamon2 inch piece
Fennel seeds1/2 teaspoon
Cardamom3
Cloves3
Pepper corns 1/4 teaspoon

Method for the gravy

  1. Heat ghee add sliced big onions and small chopped onions. Fry to brown.
  2. Top with green chillies, ginger paste and curry leaves. Fry to crisp. Add turmeric powder, coriander powder, tomatoes, curd, prawn and salt.
  3. Sauté until mushy and oil separates. Cook to half done adding little water. Top with coriander chopped, lime juice and powdered garam masala powder. Simmer until ghee floats on top.
  4. Remove From heat and cool completely.

Ingredients to garnish

Ingredients
Quantity
Curry leaves one hand deep fried to crisp and drained
Cashew nuts 2 teaspoons fried to golden in ghee
Raisins 2 teaspoons fried in ghee to golden

Ingredients for rice

Ingredients
Quantity
Basmati rice2 cups
Cardamom6
Pepper corns10
Cinnamon1 inch piece four
Turmeric powder 1/4 teaspoon
Salt to taste

Fry roast all the ingredients for garam masala separately until a nice aroma arises with out burning the spices. Cool and powder the spices

Method for rice

Soak washed rice in water for 15 minutes. Boil 8 cups of water with all the above mentioned Ingredients except for curry leaves. Add soaked and drained rice . Cook the rice to 3/4 done. Drain.

How to proceed

  1. Take a heavy bottomed vessel. Spread two ladles of rice, top with one ladle of prawn gravy, sprinkle with chopped coriander leaves, few fried cashew nuts, fried raisins and crisp curry leaves.
  2. Keep layering until all the rice and prawn gravy is over. Heat a griddle on high heat, place the layered biriyani vessel over and close with a lid  tightly.
  3. Cook for fifteen  minutes in medium flame in dum. Serve hot with dates pickle and pappadam.

Notes

  1. Make sure the prawn gravy is hot, sour and salty more than required as when layered with rice it tastes perfect.
  2. You can do the same with chicken, mutton, beef or fish.
  3. Vegetarians can opt for mushrooms, cauliflower, channa, panner or mixed vegetables instead of prawn.
  4. Once you drain the rice, you need to work fast or else the rice gets grainy.
  5. Can do the layering and dum process of the biriyani in an electric rice cooker and cook to done. ( I do this as its hassle free and once done it stays warm also in keep warm mode )


Brain omelette

Share Button

image1(4)

image2(3)

image3(2)

image4(2)

image5(2)

image6(1)

Preparation Time     : 15 minutes

Cooking Time          : 4 -3 minutes for each omelette

Serving                    : 2 members

Description

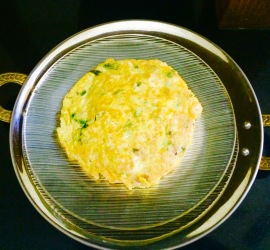
Cooking is an art form from home made rustic authentic dishes to gourmet dishes or innovative dishes. The key to perfecting the art of cooking is attained with a delicate balance of flavour’s, aroma and taste which comes after years of practice and tasting. We need to understand each individual ingredient and marry them together. Once you achieve this, your food is guaranteed to transport you to another level. Like wise this simple omelette took me years to master the art of cooking it right. I know it’s just an omelette but then I failed on every try with the right colour to the spongy texture and crisp cover its supposed to have. As always my try’s with error and practice made me perfect with this simple dish. The beauty of this dish lies in the fact that it can be cooked at the last minute. The crisp outer cover, spongy cooked egg with oozy brain pieces and bite of the onions is to die for. Make sure to have it hot and once in a blue moon as this fatty indigent culprit can easily shoot up your cholesterol level.  happy trial and error to all of you.

Ingredients

Ingredients
Quantity
Goats brain2 cleaned and each cut into 6 pieces
Eggs4
Small onions1 cup chopped
Green chillies 2 chopped
Coriander leaves few chopped
Cinnamon1/4 inch piece
Clove 1
Coriander powder2 pinches
Ginger garlic paste 1/8 teaspoon ( a pinch of each )
Red chilli powder 2 pinches
Turmeric powder 1/8 teaspoon
Salt to taste
Cracked pepper to taste
Ghee 5 tablespoons

Method 

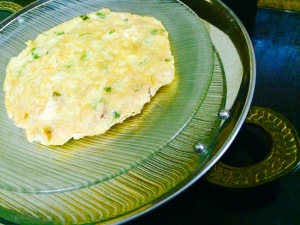
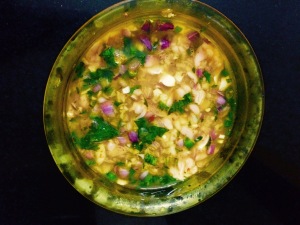
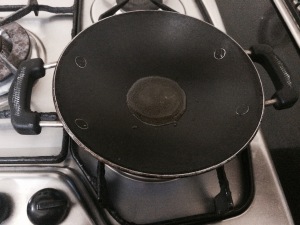
  1. Powder the cinnamon and Clove together. Mix all the ingredients together. Heat a shallow kadai with 2 tablespoons of ghee.
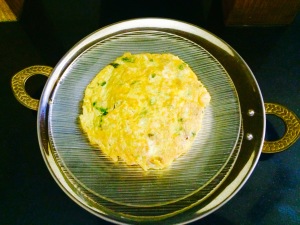
  2. Pour half the mix (about two ladles) and cook to done on both sides for 2 minutes each in medium low heat to a golden yellow colour.serve hot

No butter Black Forest cake

Share Button

image11

image1(3)

image2(2)

image3(1)

image4(1)

image5(1)

image6

image7

image8

Preparation Time    : 40 minutes

Cooking Time         : 40 minutes

Serving                   : 8-10 members

Description

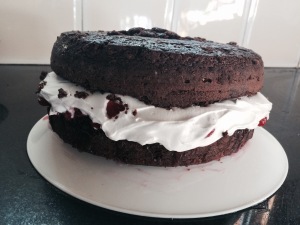
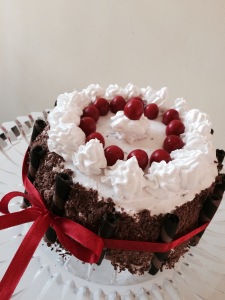
The first time I baked  a Black Forest cake was years before following the same recipe. I didn’t read the recipe well with innocence of not knowing how precise baking a cake is required, resulting in a big mess. My cake was cracked on the top with the middle not cooked. I still remember cutting the cake into half with out checking if it’s cooked through. The cake batter all over both my hands. I was in tears but some how managed to cook them again in the microwave oven for a minute to done. Layered the cake and assembled it but when cutting the cake, it was rock hard. I came to a conclusion that baking and me are far apart from one another and never ever attempted to bake a cake ever again. I did bake a lot of savoury delights on the run and slowly to sweet tarts and cheese cakes. Yet again cake never coming to my mind. Then one fine day made up my mind to break the fear in me and baked a chocolate cake which again didn’t rise well. Not giving up this time made an orange almond cake the following week and there it was a perfect yum cake baked by me finally. There after on every occasion to celebrate I make sure to bake a cake just to let go off the fear from me for sure. Like wise this cake was baked for my in- laws wedding anniversary. A home made cake sure does spread in a lot of joy with its aroma from the time it starts to bake. This cake was a sure fire hit vanishing in seconds  with me getting just a small bite. It was music on my tongue with perfect harmony of sweet goodness and taste that let temptation take over my senses. Well this cake is the kind of thing that you should eat quietly on your own enjoying it in your mind and body with a slice of excellence. I ended up with the cake in my mind through out the day and when going to bed too. Crazy breed me !!!

Ingredients for the cake

Ingredients
Quantity
Flour / maida 2 1/8 cups
Sugar2 cups
Cocoa powder3/4 cup
Baking powder1 1/2 teaspoon
Baking soda 3/4 teaspoon
Salt3/4 teaspoon
Eggs 3
Milk 1 cup
Vegetable Oil 1/2 cup
Vanilla essence1 tablespoon

Method for the cake

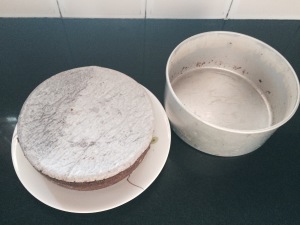
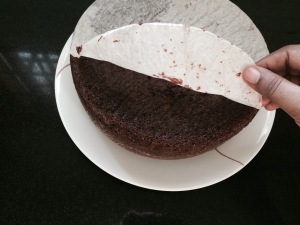
  1. Preheat oven to 175 degrees Celsius. Grease and dust flour to two 9 inch round cake pan’s. Cover the bottom with parchment paper.
  2. mix all the dry ingredients from flour, sugar, cocoa powder, baking powder, baking soda and salt together. Beat  wet ingredients from eggs, milk, oil and vanilla essence together separately in another bowl until well combined.
  3. Add the dry ingredients to the wet ingredients in three batches mixing well to incorporate. Pour the batter equally into the two round pans.
  4. Bake for 30- 35 minutes in the middle rack. Check with a tooth pick inserted in the middle of the cake. If it comes out clean it’s done or bake further for 5 more minutes.
  5. Remove  the cake tins from the oven and cool completely over a wire rack.

Ingredients for filling

Ingredients
Quantity
Pitted tinned cherries20 ounce / 1 big tin
Sugar 1 cup
Cornflour 1/4 cup
Vanilla essence1 teaspoon
cherry juice1/4 cup from the tinned cherries

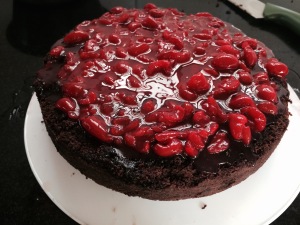
Method for filling

Combine all the above mentioned ingredients together with no lumps. Cook over low heat until thick, stirring constantly to get a gooey mass of filling. Remove and cool completely.

Other ingredients

ingredients
Quantity
Whipped cream 4 to 5 cups ( I used blue bird brand two packets )
Sugar powder 1/3 cup
Whole cherries10 to decorate
Grated chocolate 2 bars or more to decorate

How to proceed

  1. whip cream to packet instructions with powdered sugar to stiff peaks.
  2. Cut each cake to equal half horizontally with the help of a sharp knife to get four layers of cake.
  3. Place one cake layer,  spread with 3/4 cup cherry mix. Top with one cup whipped cream. sprinkle grated chocolate over. ( I omitted this as I didn’t want my cake to be too sweet)  Top with second layer of cake.
  4. repeat the cherry mix,  whipped cream layers and chocolate grated. (I used only two layers here) you could use up to three or four layers doing the same leaving the top most layer with just a cake.
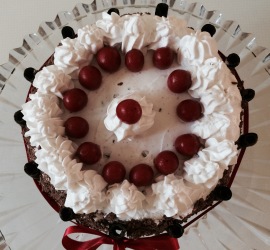
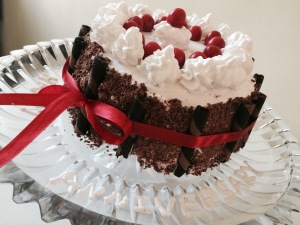
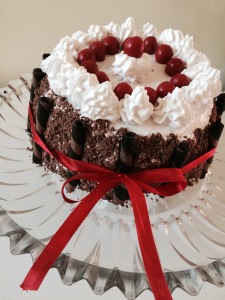
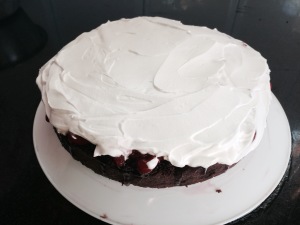
  5. frost sides and top evenly with the whipped cream with the help of a spreading spatula. Cover the sides with grated chocolate gently.
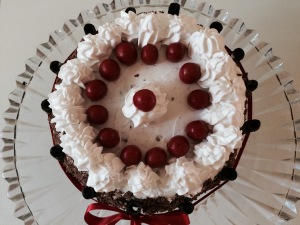
  6. Fill the remaining whipped cream into a pipping bag with nozzle of choice. Decorate as you wish. Garnish the top with whole cherries.
  7. Once the cake is done, place in a cool place or refrigerator until needed to be served.