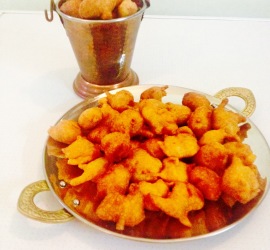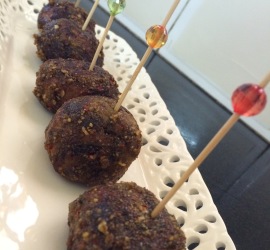
Chicken -65 bajji

Share Button

 
image2
 
image1
 
Preparation time : 20 minutes + one hour marination time
Cooking time      : 3-4 minutes for each batch deep fried
Serves                : 6 members
 
Description
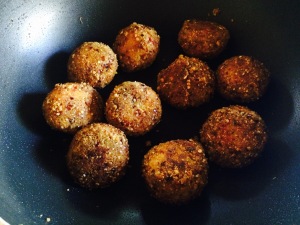
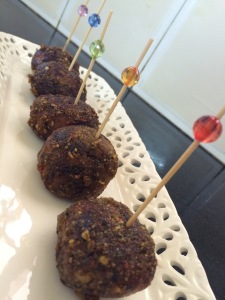
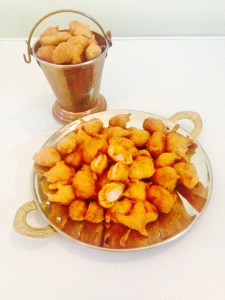
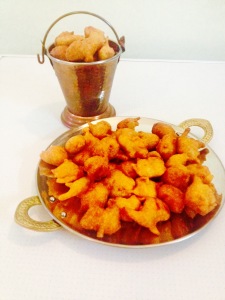
My first cousin brother’s Newly wedded wife brought a big casserole on her first visit to mom’s place. She opened the casserole in the tea table. The smell from the casserole just travelled out into each one of us on the table.. Eagerly peeped into the casserole and saw the age old regular bajji bits. I was like “umm it’s just bajji..”. She served it to all of us and with my first bit was surprised as it was no way a normal bajji but a chicken bajji and that’s where the aroma just took all of us in table for a spin. I immediately got the recipe from her and got to know its not just a chicken bajji but a chicken – 65 bajji. The outer cover crisp with the chicken really soaked with spicy flavours, moist and succulent. I could not stop with a few and had to force fully ban myself from them to keep up to the standards of being a decent sister- in- law in front of the newly wedded bride. Once they were gone, ran to the table to taste a few again but it was sheer disappointment with the casserole being wiped out clean. My put up decency attitude punished me for sure. Back home and the first thing was to try the chicken-65 bajji. It was a big hit with being added to our regular menu and is a must on the ifthar table every alternative day while breaking our fast.


Ingredients for the chicken

Ingredients
Quantity
Bone less chicken 1/4 kg cut into very tiny bits
Ginger garlic paste1/4 teaspoon each
Chilli powder 1 teaspoon
Turmeric powder1/8 teaspoon
Curd1/4 cup
Cinnamon1 inch piece
Cloves2
Cardamom1
Pepper powder1/4 teaspoon
Cumin powder1/4 teaspoon
Fennel seed powder1/4 teaspoon
Garam masala powder1/4 teaspoon
Lime juice1/2 lime
Vinegar1/4 teaspoon
Saltto taste


Ingredients for the bajji batter

Ingredients
Quantity
Gram flour1 cup
Rice flour1/4 cup
Red chilli powder1/2 teaspoon
Asafoetidaa pinch
Saltto taste
Soda salt1/4 teaspoon
Orange red food coloura pinch (optiona)
Water1/2 cup or more
Oilto deep fry


Method

  • Grind all the ingredients together except for chicken mentioned under the chicken ingredients to a smooth paste.
  • Marinate the cleaned chicken in the ground masala for one hour or more.
  • Cook the chicken bits with the marinated masala to done and dry with out adding water . Remove from heat and cool completely. (I follow up to this step in advance and store the chicken bits in the refrigerator for easy access later when pressed for time)
  • Mix all gram flour, rice flour, red chilli powder, soda salt, asafoetida and food colour together.
  • Add water gradually and mix well to get a semi thick batter that’s lump free.
  • Heat oil to deep fry. Dip each chicken piece into the batter making sure the batter is coated well all around. Drop into hot oil and deep fry to crisp and golden. They will pop up once cooked. Drain and serve hot as it is. No dips needed as it tastes Devine by itself.

Home made instant caramel sauce

Share Button


image1

Preparation time : 5 minutes
Cooking time      : 5-6 minutes
Serves                : 5 members

Description
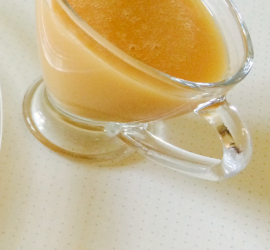
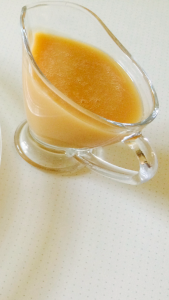
My recent love for any thing with caramel is on zooming high rate. When I crave for any thing sweet, the first thing that pops up in my mind is silk, smooth, melt in the mouth golden caramel . The first time I got to taste this goodness was at my friend’s place in Exeter, United Kingdom . It was on a rare day that we both alone went shopping together wondering the very English streets, enjoying every second of our girl time in style. She took me to a chocolate shop, where I bought a few expensive chocolate boxes for home and to be gifted to my in- laws. Just before billing I grabbed a packet that was placed in the billing counter. Back home the entire family started to taste the chocolates one box after the other. Only when this packet was tasted I got to know it was caramel squares with rock salt in them. Melt in the mouth goodness that sure did hit the right spot. At that moment I just lost myself with the caramel taking over me. I made sure to hide the entire packet and eat it all by myself. Shame less, greedy, mean me… My kids were small then but even that didn’t stop me from doing so. I know each mom in this world has her own secret of doing such silly things. Ever since.. Caramel is on my top list no matter what form it is in. I always buy ready made caramel sauce and stock  it up in the refrigerator. Drizzle it over any thing and every thing possible. Once, I needed the caramel sauce to be drizzled over a dates cake and found none. But I needed the caramel sauce for sure. I remembered saving a recipe for instant caramel sauce. Searched and found it . Followed the recipe and there I had a caramel sauce that was a million times better than the store brought liquid ones. This  was  smooth, thick, gooey and like silk. A recipe for sure keeps.  Now the problem is.. A lot more of licking will be done to the caramel sauce adding tons of calories into the fat me
Ingredients
Quantity
Sugar 3 cups
Butter 50 grams
Water 1 teaspoon
Vanilla essence 1/4 teaspoon
Cream 2 cups
Salt a pinch

Method

  • Heat sugar with water over a wide pan. Do not stir. Once the sugar melts and is caramelised to a light brown colour.
  • Add butter and mix well. Remove from heat adding a pinch of salt.
  • Add cream and vanilla essence. mix vigorously to combine to get a thick gooey caramel sauce. Taste and adjust sugar and salt.


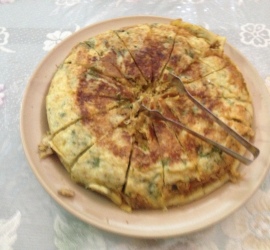
Stuffed chicken semiya in bread omelet

Share Button

image1(1)

Preparation time :  30 minutes
Cooking time      :  40-45 minutes
Serves                :  8 members
Recipe source    :  saaliha Salam

Description
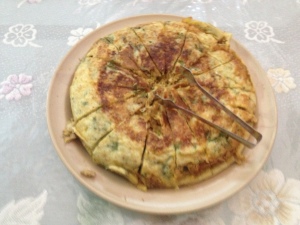
As sauté, fry n bake is nearing its third anniversary. I was just going through the picture gallery in my files to see all the images that have been used with recipes in sauté, fry n bake. My heart skipped a beat when I saw two images that were taken during the first anniversary celebration that has been ideal with out being posted with the recipe. Unfortunately both the images were of dishes brought for the first recipe swap by fellow sauté, fry n bake family member saaliha Salam. Well now the reason for the delay in posting was because the recipes she had e- mailed were of the new age short writing meaning new short spellings for an entire word. The laziness in me just put it off every time I wanted to post it but three years is to much though . Saaliha Salam , a cheerful down to earth, very beautiful girl as I know her has been very supportive in sauté, fry n bake and what ever I do from the start. She was one Among the first few who agreed to join in for the first recipe swap celebrations . This dish sure was a hit and vanished in seconds lining all our tummies with bits and pieces. I expected this dish to win the recipe swap competition, though it didn’t .. It won my heart for sure as my love for stuffed things is always on a high. With a big fat sorry from my side for this three year’s late post, my humble request that all of us try this recipe and compensate the delay.

Ingredients
Quantity
Semiya1cup
Boneless chicken200 gms
Onion1 Small
Tomato chopped2 tablespoons
Green chilli2 chopped
Chilli powder3/4teaspoon
Turmeric powder1/4teaspoon
Coriander powder1teaspoon
Crushed ginger garlic3teaspoon
Thick coconut milk1/2cup
Lemon juiceone lemon
Garam masala powder1/2teaspoon
Coriander leavesfew chopped
Curry leavesfew
Saltto taste
Oil and ghee1 tablespoons of each

Method

  • Cook chicken with little pepper crushed, garlic and salt.shred the chicken. Reserve the stock.
  • Heat 1tablespoon ghee in a pan and roast the semiya to light brown.
  • In a pressure cooker heat little oil and ghee.sauté onion till light brown.Add ginger paste ( 11/2teaspoon ) garlic paste(11/2teaspoon),green chilli,tomatoes and saute well.
  • Add turmeric powder,chilly powder and coriander powder. fry for a minute.Add roasted semiya and 1cup water(including the stock),1/4cup shredded chicken and salt(beware as stock has salt.Cover the lid and keep in low flame for just one whistle.Then remove from flame.
  • After 10 minutes open the lid and add garam masala,lemon juice,coriander leaves, curry leaves,and coconut milk. Mix well and keep in sim for 5 minutes.Remove from heat.


Ingredients
Quantity
Bread6(remove crust and cut into very small pieces)
Eggs4
Milk3/4cup
Pepper1/2teaspoon
Coriander leavesfew chopped
Saltto taste

How to proceed

  • In a bowl beat the eggs.then mix all the other ingredients.In a greased non stick pot(small) layer half of d bread mix.Then layer semiya chicken masala,press and level with a spoon.
  • On top spread the remaining bread mix and fill the sides with egg mix.Cover and cook for 15 minutes in low flame .
  • Then turn over to the other side carefully n cook for another 10 minutes.
  • Remove and cut into wedges and serve hot.

Notes

You can bake the same in a preheated oven at 180 degree Celsius for 40 minutes .


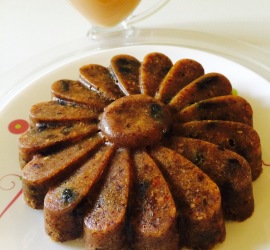
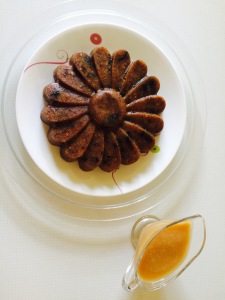
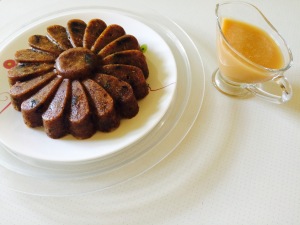
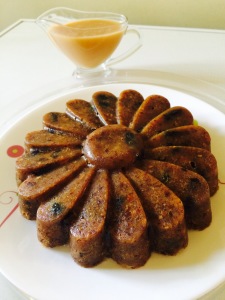
Pressure cooker dates cake with home made instant caramel sauce

Share Button


image3


image2


image1


Preparation time : 15 minutes
Cooking time      : 35-40 minutes
Serves                : 8 members
 

Description
Baking cakes is always a fancy thing but most of us are not comfortable with the technique it takes to bake it in an oven. There is always an ease when it’s done in our every day use pressure cooker that we feel more confident and sure. Like wise I had to make a dessert to be taken to my in – laws place for a feast where we had hubby dears NRI cousins visit all of us. I was pressed for time and opted to come up with some thing with the available ingredients at home. Checked the pantry and the refrigerator. My eyes went strait to the huge packet of dates in the refrigerator which are left overs from fasting time. Now it’s a sweet dish with dates being the main ingredient . A pudding.. Or may be a microwave cake.. Umm no no let me come up with some thing using a pressure cooker as its so much in now a days. I remember going through a pressure cooker cake that used cake crumbs to bake a cake. Keeping that in mind I substituted the cake crumbs with fresh bread crumbs and gave a try with fingers crossed. Pressure cooked for 3 whistles as I do for caramel pudding . Checked but the cake was not done so pressure cooked once again for another one whistle. The cake was cooked through . The cake was even better than my imagination but I felt I needed to serve it with a sauce. Chocolate ganache was the first option but my new fond  love for caramel sauce opted for the caramel sauce. Made a quick instant version just before heading to the feast venue . Dessert time , served the cake drizzled with the caramel sauce to all . Waiting for results … Hubby dears niece Murshitha with her eyes popping out say’s chachi this is yum . When I mentioned saying its a pressure cooker cake. She immediately asked for the recipe , her elder sister sabura followed with a recipe please soon after . Passed the recipe and Murshitha did give a try with great results except that her caramel sauce didn’t get that golden colour . A few days back I received a message from mushidha’s hubby saying ” loved the cook book, even though I can’t read Tamil.. Certainly has improved the food in my house. Thank you ” what more do you need , I felt so humbled and touched that my recipes has brought in a bit of joy at their home.


Ingredients
Quantity
Fresh Bread crumbs 3 cups ( blitz bread slices in a food processor to a powder with out adding water to get crumbs )
Eggs 4
Sugar 3/4 cup powdered
Dates 1 cup seeds removed
Walnuts 1 cup coarsely crushed
Salta pinch
Vanilla essence 1 teaspoon
Butter to grease the mould
Method
  • Beat eggs and salt together. Gradually add the powdered sugar little by little and beat well to combine.
  • Add the fresh bread crumbs and mix well. Top with the dates ,nuts and vanilla essence. Mix well.
  • Grease a cake mould with butter generously. Pour the cake mix and cover with foil paper.
  • Double boil in a pressure cooker with two inches boiling water. Place a ring mould over the water, place the covered cake mould on top of the ring. Close the pressure cooker .
  • Place the whistle over the cooker lid and pressure cook for 4 whistles in medium heat . Remove from heat , Let the heat subside. open, remove the cake and cool completely.


Instant caramel sauce 
Ingredients
Quantity
Sugar 3 cups
Butter 50 grams
Water 1 teaspoon
Vanilla essence 1/4 teaspoon
Cream 2 cups
 

Method
  • Heat sugar with water over a wide pan .Do not stir. Once the sugar melts and is caramelised  to a light brown colour.
  • Add butter and mix well. Remove from heat adding a pinch of salt .
  • Add cream and vanilla essence. mix vigorously to combine to get a thick gooey caramel sauce. Taste and adjust sugar and salt .
How to serve
  • Run a dry sharp knife over the edges of the cooled cake. Turn over on to the serving plate .
  • Pour the caramel sauce over the  cake and serve.
  • For individual servings, place a square cake piece into a bowl. Pour caramel sauce and serve.

Tropical pudding

Share Button

IMG_4790-1

image1(1)

image2(1)

image3(1)

Preparation time : 10 minutes
Cooking time      : 1 -2 minutes + setting time in the refrigerator for 6 hours or overnight
Serves                 : 6-8 members

Description
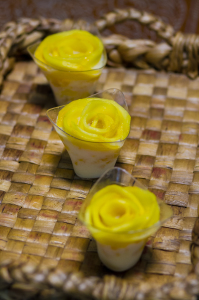
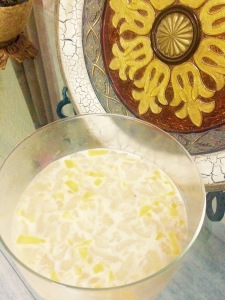
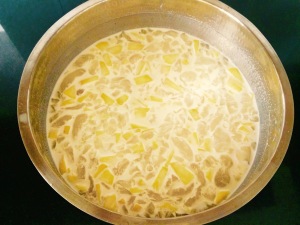
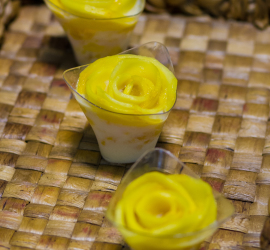
Sending over food to people who really cook well gets me loose on my knees and if it’s to my father-in-laws place it’s even worse. Every year in the holy month of Ramadan, I make sure to share biriyani with all my close and dear ones. This year I just wanted to surprise every one with a dessert, snack and a main course instead. This dessert was sent over to my father-in-laws elder brother and younger brothers homes. As the entire holy month of Ramadan was extremely hot and humid, I wanted to make a dessert that was light with no eggs and less sugar. I was going through all my recipe links and I saw the tropical punch mock tail link that has ripe mangoes, tender coconut and palm fruit in it. The bulb moment… with a splash of spark in my mind, why not make a pudding with this same combination?? Tender coconut pudding is a regular at home which I can make when blind folded as well… I just added ripe mango bits and crushed Palm fruits to my regular tender coconut pudding. The results were too good with the recipe being asked from both my father-in-laws place. The little remains at home was relished by me alone.. Enjoying that moment of having it all for myself and not to share.. (Shame less, greedy, greedy me)

Ingredients
Quantity
condensed milk 1 cup
tender coconut water 1 cup + 1/4 cup to soak the gelatin
milk 1 cup
Vegetarian gelatin 3 and a 1/2 tea spoons
Tender coconut flesh of 1 tender coconut
Ripe mango 1 peeled and chopped
Palm fruits 8 peeled and crushed with hands

Method

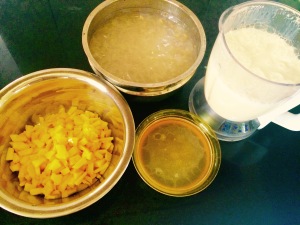
  • Soak gelatin in a microwave safe bowl with 1/4 cup tender coconut water. Set aside to bloom for 5 minutes.
  • Blend tender coconut water, milk and condensed milk together. Pour into wide vessel. Mix in the tender coconut flesh, chopped mangoes and crushed palm fruits. Mix well.
  • Microwave the bloomed gelatin for 30 seconds to dissolve. Cool to room temperature.
  • Mix the cooled gelatin into the tropical pudding mix and pour into a pudding tray or individual cups.
  • Place in the refrigerator to set for six hours or overnight and serve chilled.

Notes

  • In case you don’t have a microwave, you can Double boil the gelatin till dissolved and gets to a liquid running consistency. Cool completely and use.

Muhallabia

Share Button

IMG_5826

image1

IMG_3400 (1)

Preparation time : 10 minutes
Cooking time       : 15 minutes
Serves                  : 8-10 members

Description
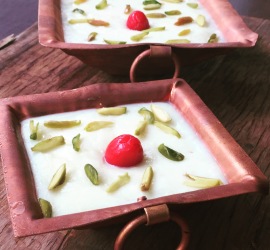
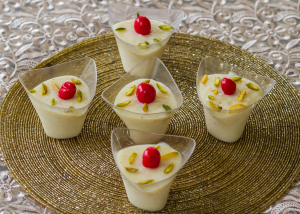
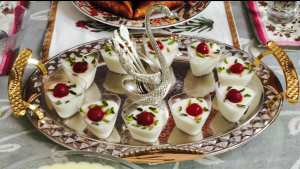
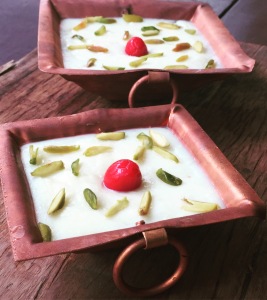
An Arabic sweet dish that tastes very close to our Indian firni and kheer but with a totally another avatar. The rose flavour with the almonds give the right texture and aroma to the dish. The first time I made it, I was not sure if it would be liked by all but this simple dish was the talk of the table. I had set it in very tiny individual serving bowls thinking if it’s not good each person gets to eat just two spoons full to gulp it in with out difficulty. To my surprise every one made sure to take a second helping. The simplest dish that i least had hope over won that day. Food always gives me a run to understand it… It’s Some thing like being confused about the some one special always. One minute it’s like I know in and out of him-(food) confidently and then the next second it’s like is he -(food) telling me the truth -(taste wise)?
Am I being fooled? – (with the taste being bad)
what do I do now??? – (how do I get the taste right)
My love story with food is a never ending story that’s been going on steady for ages now. No complaints as I am loving every moment of this love struck affair with food.

Ingredients
Quantity
Milk 3 cups
Rice flour 1/4 cup
Cornflour1 teaspoon heaped
Ground almonds 3/4 cup ( soaked in hot water whole for a minute , skin peeled , almonds dried and then ground to a powder with out water )
Salt a pinch
Sugar 1/4 cup or more to taste
Rose water 1 tablespoon
Rose essence 2 to 3 drops ( optional but I use as the locally available rose water is not of good quality)

Ingredients to garnish

ingredients
Quantity
Pistachios few skin peeled and chopped
Tinned Cherries few

Method

  • Dilute rice flour, corn flour, salt and sugar with 1/4 cup or more of the measured milk with no lumps.
  • Heat the remaining milk and bring to boil. Lower the flame and Gradually add the dilute rice flour paste, stirring vigorously making sure the mix has no lumps and the mix does not stick to the bottom. Cook for 5 minutes on low heat.
  • Add the ground almonds and keep stirring to mix well and get a smooth semi thick batter. Finally add the rose water and rose essence (optional) and mix well.
  • Remove from heat. Pour into a pudding bowl or individual pudding cups. Bring it down to room temperature, the crust will look set by now. Garnish and decorate with tinned cherries and pistachios.
  • Place in the refrigerator to chill for four hours or overnight. serve chilled.

Katta metta podi kuli paniyaram’s

Share Button

image1
 
image2
 
image3
 
Preparation time : 30 minutes
Cooking time : 20 minutes
Serves : 4 members
 
Description
I am getting into a habit of serving only home made goodies for any one who drops in for a brunch at home. Good for me as I am learning the art of coming up with new dishes with cupboard friendly ingredients from my pantry with in a limited period of time (it surely does feel like the master chef mystery box challenge) but a very bad news for my cook and help at home. As the minute I start looking into my refrigerator for veggies, fruits, leftovers and a quite panicked walk in my store-room… They get to know that’s it our peace is shattered for the next one hour or more. Initially they would just gaze at me thinking what is this mad lady up to.. Now a days they are so used to it that as I am working on a dish, my cook asks me should I prep to coat the snack or are you going to steam it… My help comes up with how should I chop these veggies for the next dish.. We make a great team and slowly even they have started to enjoy as I do. The best part, they know no dish is supposed to go out of the kitchen with out a picture being taken. Even at times when we are running late to entertain our guests… They both so sweetly switch on all the lights in the kitchen gearing up for a photo shoot and ask “amma, light poothuma.. Ellai off panna va” which means is the light enough or do we have to switch it off. Oops coming to the dish… This dish was also born as such with a time frame to entertain my friend Sheela and her two little kids coming over for tea. Her son just went head over heels with these paniyaram’s and in fact Sheela did ask me to send over the same dish on his birthday a few days back, just to surprise him. I did and I am sure this will be itched with in him for ever to be cherished, shared and forwarded with his friends, cousins, his children and his grand children too..
 
Ingredients for coriander mint chutney

Ingredients
Quantity
Coconut 1/4 cup
Ginger a tiny piece ( just a tit bit size)
Coriander leaves with stem 1/4 cup
Mint leaves 8 leaves
Green chillies 4 to 6
Tamarind a pinch
Salt to taste
Curry leaves2
Jaggery a tiny piece

Method for the coriander mint chutney
Grind all the above ingredients together to a smooth paste of semi thick spreading consistency by adding very little water. Taste and adjust seasoning and set aside.
 
Sweet chutney

Ingredients
Quantity
dates8
jaggery1 table spoon
black salt1/4 tea spoon
tamarind pulp2 table spoons
saltto taste
chilli powder1 tea spoon
cumin powder1/2 tea spoon
Method
1. Boil all the ingredients together with little water for 8 minutes.

2.Cool and blend to a smooth paste. Keep aside.

Ingredients for kuli panniyaram 

Ingredients
Quantity
idli batter2 cups
small onions1/2 hand chopped
green chillies1 chopped finely
ginger1/4 inch piece grated
curry leavesfew chopped
coriander leavesfew chopped
soda - bi - carbonatea pinch
cumin seeds1/4 teaspoon
saltto taste
waterlittle
oil4 tablespoons

Method

  • Mix all the above ingredients together except for oil, to get a semi loose consistency batter. Set aside for 10 minutes.
  • Heat a non-stick kuli pariyaram griddle with 1/4 teaspoon oil in each dent on the griddle
  • When oil is hot, pour 1 1/2 tablespoons full of batter mixture into each dent and cook for 30 seconds.
  • You will find bubbles on top of the batter in each dent, then turn the kuli pariyarams over with a help of a spoon or a kuli pariyaram stick
  • Cook again for a minute on medium heat till cooked through. Remove and keep aside.

Other ingredients

Ingredients
Quantity
Oil 1 tablespoons
Idli powder / gun powder 1 to 1 1/4 cups

How to proceed

  • Heat oil in a non-stick pan. Add the coriander mint chutney and the sweet chutney. Mix well and bring to boil and cook until thick and saucy. Taste and adjust seasoning
  • Add the kuli panniyarams and toss well by moving the pan making sure all the chutney is being soaked by the kuli paniyaram’s evenly all over.
  • Once no chutney is remaining, sprinkle the idli powder all over and toss well. Lower the flame and roast the kuli paniyaram’s for 5-6 minutes tossing every now and then, making sure to get a crisp golden outer crust with out burning them. Poke tooth picks into each crisp kuli paniyaram’s and serve as a finger food in style.

Notes

  • At times I make the same by substituting with our regular tomato chutney and white coconut chutney. Following the same method for a savory version.

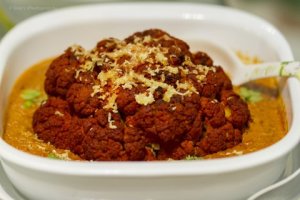
Cheesy whole stuffed gobi with butter masala

Share Button

image1
 
image2
 
image3
 
image4
 
image5
 
image6
 
image7

Preparation time : 30 minutes
Cooking time : 1 hour 10 minutes
Serves : 6-8 members

Description
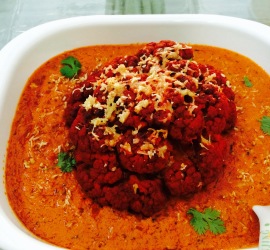
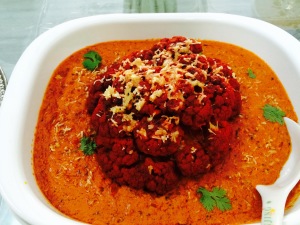
Having to entertain vegetarian guests is always a ride over a rocky road for me as I know very little vegetarian gravies or dishes. With the hype of me being addressed as a great cook and entertainer through food (no self praising please..), I have to push myself to keep up to the demands. This dish was made for a gang of friends that I got to connect through the new age world wide net getting to see each other for the very first time with most of them being vegetarian’s. I always wanted to do a whole cauliflower dish. This time I wanted it to be a whole tandoori cauliflower. Prepped and did so but last minute, I was short of any veggie or panner to be added to a butter gravy. The whole grilled cauliflower was sitting right next to the gravy in the kitchen counter. My brain sparked with an idea and I just placed the whole cauliflower tandoor over the gravy and there was the dish that happened with in a fraction of a second in my mind. This dish was vanished with five star rating from all. I had to pat myself for this genius idea (self praising again… Please stop it) so my two individual dishes got attracted to each other, fell in love and got married finally…giving way for all of us to relish their sweet little love story too.

Cheesy stuffed Whole gobi tandoori with butter masala

Step -1 

Ingredients for the cauliflower tandoori

Ingredients
Quantity
Whole Cauliflower1 medium size
Chaat masala powder 1/2 teaspoon
Cream 1 teaspoon
Garlic paste 1/2 teaspoon
Ginger paste 1/2 teaspoon
Lemon juice 2 teaspoon
Red chilli powder 1 teaspoon or to taste
Salt to taste
Cumin powder 1 teaspoon
Garam masala powder 1/2 teaspoon
Oil 1/ 4 teaspoon
Hung curd 1/2 cup
Red food color little ( optional)

Method for the cauliflower

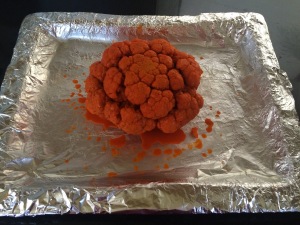
  • Clean the whole cauliflower by removing the side stalks, leaves and the stem to a level that the cauliflower remains whole and when place on a plate stands straight with out tilting over to the sides.
  • Drop the whole cleaned cauliflower into a bowl of boiling water (not over the flame) with salt. Let it remain for ten minutes, helping worms and other impurities come out. Remove and wash well. Cool completely and wipe with a cloth to remove excess water and dampness.
  • Grind all the ingredients mentioned above except for the cauliflower to a smooth paste. Check seasoning. Apply and rub all over the whole cauliflower and marinade for four hours in the refrigerator.
  • Pre heat oven to 180 degree Celsius for ten minutes. Place the marinated cauliflower over a baking tray lined with foil paper that’s greased with oil. Bake for 30-40 minutes until a nice crisp crust is formed. Remove and set aside.

Step -2 

Ingredients for stuffing

Ingredients
Quantity
Panner 250 grams crumbled
Cashew nuts 2 tablespoons chopped
Raisins 1 tablespoon
Poppy seeds (khus - khus) 2 tablespoons
Grated cheese 2 tablespoons
Green chillies 2 chopped
Salt to taste
Mozzarella + Parmesan cheese grated 1/2 cup

Method

  • Mix all the above ingredients together. Taste and adjust seasoning.
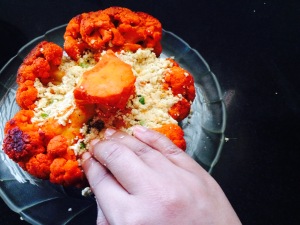
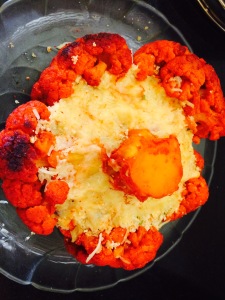
  • Turn the roasted whole cauliflower up side down. Stuff it with the planner filling tightly in between the stalks of stem. Top with half the grated mozzarella and Parmesan cheese. Grill for 5 to 8 minutes in a pre heated oven or microwave for 1 minute in the microwave to melt.
  • Remove and cool completely. Sprinkle the remaining mozzarella and Parmesan cheese over the top of the cauliflower and grill again for 5-8 minutes or microwave for a minute until the cheese melts. Keep aside.

Step -3

Ingredients for the butter gravy

Ingredients
Quantity
cashew nut 50 grams
melon seeds 50 grams
(Soak together in warm water for 30 minutes and make fine paste.)
Finely chopped onions 1/2 kg
Oil 1/ 4 cup
Ginger garlic paste 2 tablespoons
Tomato paste 1/4 kg ( blanch the tomato ,remove the skin and mark it into paste. )
cardamom 3
cloves3
cinnamon 1/2 inch stick
Chilli powder 1 tablespoon
Coriander powder 1 tablespoon
Cumin powder 1 teaspoon
Turmeric powder 1/4 teaspoon
Tomato sauce 2 teaspoon
Butter 2 tablespoons or less
Cream 1/4 cup
Dry fenugreek or kasuri methi 1 teaspoon
Garam masala powder 1/4 teaspoon
Cardamon powder 1/4 teaspoon
Red colour 1/4 teaspoon

Method
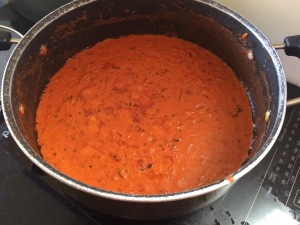
In a non stick pan add oil, cardamom, cloves & cinnamon. sauté for a minute. add chopped onions, sauté till golden brown.
Add ginger garlic paste, sauté till the raw smell goes then add tomato paste, cook in slow flame and keep stirring to avoid burning, (this step is very important). Add cashew & melon paste, chili powder, coriander powder, turmeric powder, cumin powder, cardamom powder and tomato sauce. Mix well and sauté until oil floats on top. Add water to get the desired gravy consistency and boil with butter. Sprinkle dry fenugreek, red colour and garam masala powder. cook for another two minutes. Taste and adjust seasoning. Remove from heat.

Step -4 

How to assemble and serve

  • Pour the butter gravy on to a flare shallow large plate. Drizzle cream all over.
  • Place the cheesy stuffed grilled whole cauliflower in the center of the butter gravy.
  • Garnish with coriander greens and serve hot with rotis or pulao’s.

Kashmiri noon chai

Share Button

images1
 
images2
 
images3
 
images4
 
images5
 
Preparation time : 5 minutes
Cooking time       : 45-50 minutes
Serves                  : 2-3 members
 
Description
Kashmir…. I always remember seeing this place in my parents honeymoon pictures… Resulting with me being born there after ….every third person there did mention saying I look like a Kashmiri which made me blush for sure as to me kashimiris are the best looking people on earth. Those days of watching doordharshan programs as a kid. I remember watching a documentary where they showed how a meat based dish was made in Kashmir with a white thin butter milk based gravy but the name of the dish didn’t register in my mind. I got to by heart the name just recently. All I knew about Kashmiri cuisine was just that and later the rogan josh and dum aloo. It was a dream come true to visit Kashmir for me. On one tedious day while traveling to gulmargh from Sri nagar we stopped for tea. Me not being a tea person just was wondering around the place. My son-in-law enquire if they serve noon chai. I was like.. What’s that? He explained to me saying its a salty tea that’s made only in Kashmir and Ladakh. The foodie in me just wanted to give a try and I ordered one too. The first sip I took.. Just hit the right spot and was very much to my liking, like a light watery soup. From then on the entire week I drank only noon chai in Kashmir where ever I went getting me addicted to it with each place having its own version with slight changes of the same chai. The Kashmiri guide did mention saying that noon chai helps to give a glow to the skin. Do I need any more reasons not to get addicted to this noon chai!!
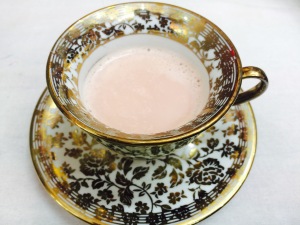
Made sure to get the chai dust and here I am in the opposite tip of Kashmir, near kanyakumari sipping away noon chai soothing my soul every now and then like the Kashmiris do…
 

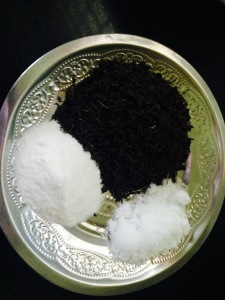
Indgredients
Quantity
Green tea leaves 2 tablespoons (authentically a special tea leaf is used but green tea is close to it as well)
Cardamom 5 pods crushed
Salt 1 teaspoon
Soda salt 1 teaspoon
Cinnamon1 inch stick
Star anise 1
Milk 2 cups
Sugar 1 tablespoons
Pistachios5 peeled and chopped
Almonds 2 peeled and chopped
Water 2 cups

Method

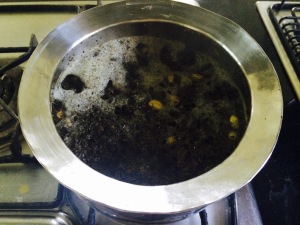
  • Heat 2 cups of water and bring to boil. Add cardamom, cinnamon and star anise. Boil for two minutes.
  • Add the green tea leaves, salt, sugar and soda salt. (be careful while adding the Soda salt as the water arises and over flows out of the pot).
  • Boil in low flame for 30-40 minutes.
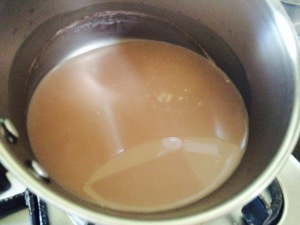
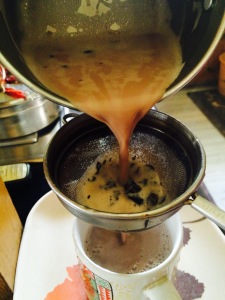
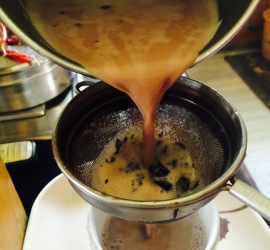
  • Add milk and bring to boil. Strain. Serve hot with chopped nuts.

 
Notes

  • I always follow the recipe up to the third point in large amounts. Cool completely and store in the refrigerator for a month or so. When needed I add milk and boil. This way it’s more easy.

Luqaimat- Arabic sweet dumplings

Share Button

image1
 
image2
 
image3
 
image4
 
image5
 

Preparation time : 5 minutes + 1 hour and 15 minutes for the batter to double
Cooking time      : 3-4 minutes for each batch deep fried
Serves                 : 6-8 members


Description
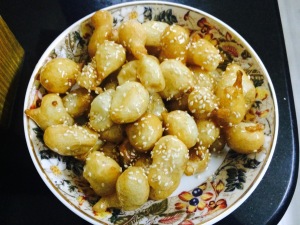
On my return from a holiday in Dubai, hubby dear’s niece sabeena gifted me a huge bag full of edible goodies. Back home went through the entire lot of goodies and found every thing to be so useful and new to me. The ready mix Arabic dumpling box was a boon which helped me to entertain guests for brunch and during the holy month of Ramadan to break out fast. The dumpling ready mix box lasted for three servings.. There after when the dumplings were on demand at home I felt lost thinking who do I ask for the next batch from Dubai letting go off as always. Recently I came across a recipe in the name of luqaimat in a foodie group with an image looking similar to the dumplings I made.  Googled to find out it’s the same dumplings with its authentic name being luqaimat. Took note of two easy recipes and tried both and had to settled down with combining both the recipe’s that was exactly like my previous luqaimat’s light, airy, soft centres with a crisp exterior. I thank sabeena for the edible gifts that let me learn another new recipe for keeps and to share with you all.


Ingredients
Quantity
Flour / maida3 1/2 cups
Instant Yeast 1 1/4 teaspoon
Salt 1/8 teaspoon
Sugar 1 teaspoon
Warm water 2 1/2 cups
Oilto deep fry
Ingredients to toss
Ingredients
Quantity
Honey to taste
White sesame seeds to sprinkle
Method
  • Mix flour, yeast, salt and sugar together.
  • Gradually add the luck warm water to the flour mix making sure no lumps are formed to get a sticky batter
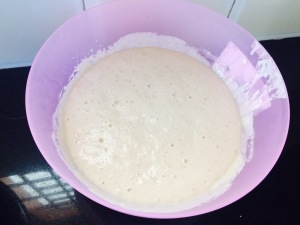
  • Cover the batter with a wet damp cloth and let it double in size for 1 hour to 1 hours-15 minutes.beat the batter with hands four times in a gap of 15 minutes each in the first hour of doubling.
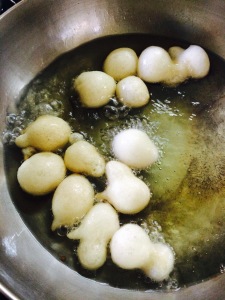
  • Heat oil to deep fry. Drop a teaspoon of batter to get small balls (I preferred to use my hands to drop balls). They pop up and float on the top. Reduce the flame and fry to a light golden color and crisp for about 3-4 minutes in total for each batch. Drain.
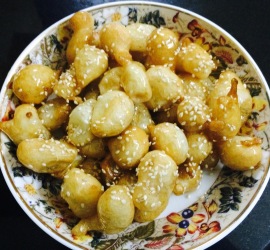
  • Drizzle with honey when the luqaimat balls are hot. Toss well and sprinkle white sesame seeds on top and serve immediately.

Notes

  • Always deep fry the luqaimat dumplings just before serving and toss over honey when the dumplings are hot.
  • The authentic way to toss the luqaimat dumplings is with a syrup made with sugar, water, orange blossom water, rose water and honey. I prefer just honey (when pressed for time which is the case always) as its easy and adds a sticky texture and good taste.
  • I have used instant yeast here, in case you are using dry yeast. Add sugar and 1/4 cup luck warm water to the yeast and dissolve. Set aside to foam and rise. Then mix with the flour and remaining luck warm water.