Deconstructed Samosa

Share Button

FullSizeRender (17)

FullSizeRender (16)

FullSizeRender (15)

FullSizeRender (14)

FullSizeRender (13)

FullSizeRender (12)

FullSizeRender (11)

FullSizeRender (10)

Preparation time  : 34-40 minutes
Cooking time       : 15 minutes for filling + 3-4 minutes for each batch deep fried
Serves                 :  6-8 members

Description

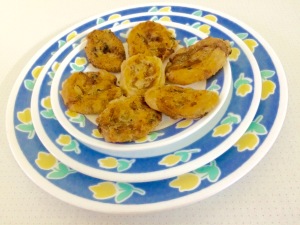
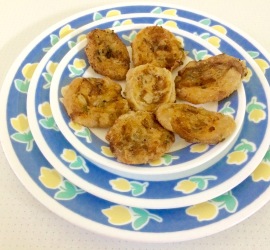
The deconstructed version of any dish sure does excite me a lot. This is a deconstructed version of our regular samosa ‘s. The huge one triangular calorie culprit is made into small bite size pinwheel’s here which is so easy to munch letting you feel the same soothing effect. These desi – inspired posh snack is guaranteed to chase away your blues. The clever new tweak to this classic is a tribute done to this soul Warmer that you will love. These deconstructed therapeutic comfort snack never fails to make you feel indulgent as these have comforted generations and truly endured the test of time. Try these lighter, brighter and much more modern treasure trove delicacy that will sure raise eye brow’s of your loved ones. What an amazing reinterpretation done to the Indian staple that’s turned humble to naughty. All the best peep’s for an exciting gamble to unshackle your regular palette where you need not burn a hole in your pocket’s by visiting restaurant’s , instead just add more verity to home cooking.

Ingredients for the dough

Ingredients
Quantity
Flour/maida1 cup
Semolina2 tablespoons
Saltto taste
Oil3 teaspoons
Cold water1/3 cup
Cumin seeds1/4 teaspoon

Method

  • Mix all the ingredients together to get a soft dough. Do not knead too much.
  • Cover with a damp clean cloth and rest for 15 minutes.

Ingredients for filling

Ingredients
Quantity
Boiled mashed potato2 cups
Cumin seeds1/4 teaspoon
Green chilly1 chopped
Mango powder1/4 teaspoon
Saltto taste
Coriander leavesfew chopped

Method

  • Mix all the ingredients together. Taste and adjust seasoning.
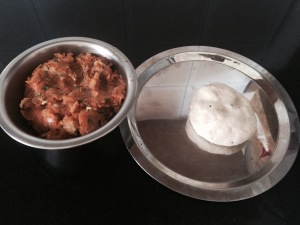
  • Divide the mix into two equal portions.

Other ingredients

Ingredients
Quantity
Flour / Maida3 tablespoons
Water1/2 cup
Oilto deep fry

How to proceed

  • Mix flour with 1/2 cup water and set aside.
  • knead the dough for a minute. Divide dough into two equal parts.
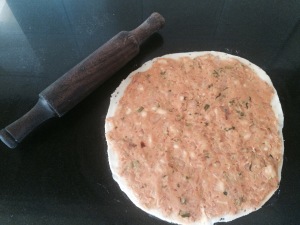
  • Roll each dough ball into eleven inch diameter. Spread one part of the potato filling evenly over rolled dough. Press slightly.
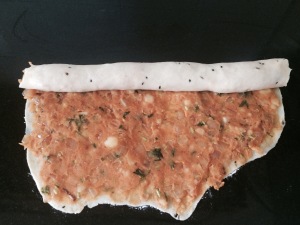
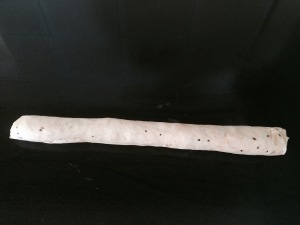
  • Roll the dough sheet gently but firmly to get a neat firm log. Seal the edges with water. Roll the log gently 6-7 times to keep it together.
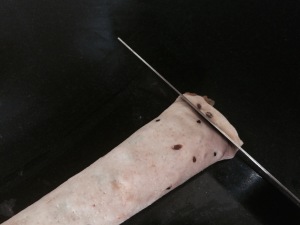
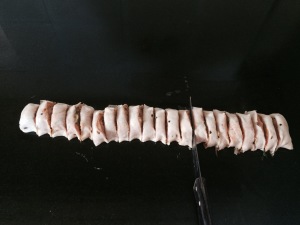
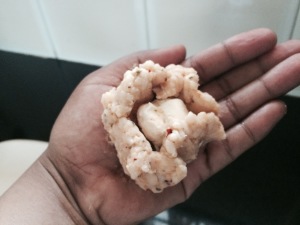
  • With the help of a sharp knife, slice both the ends about one inch long. Then slice the log to half inch thick pieces to get about 13-15 pieces.
  • Press pine wheels slightly to flatten a bit.
  • Repeat the same with the remaining dough and potato filling.
  • Heat oil to deep fry. Dip the deconstructed samosa pieces into thin batter and drop into medium hot oil in batches of six pieces at a time.
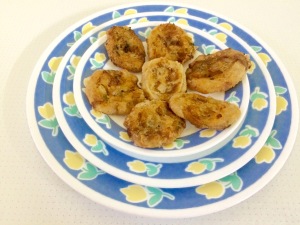
  • Deep fry to golden and crisp. Drain and serve hot with tamarind sweet chutney, mint chutney.

Caramel Bread Pudding

Share Button

FullSizeRender (9)

FullSizeRender (8)

FullSizeRender (7)

Preparation time  : 15 minutes
Cooking time       :  30 minutes
Serves                 :  5 members

Description

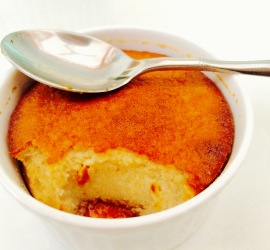
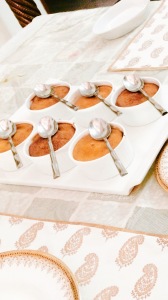
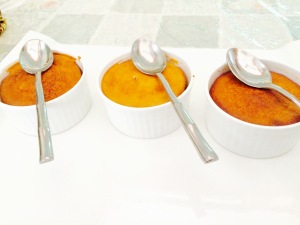
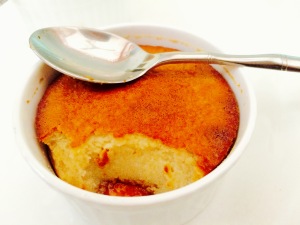
I always make caramel pudding my version that I learnt from one of my aunts which is an ever fail recipe. I once served that version to hubby dear’s niece Zenofer and she told me, she likes her mothers version better. From that day, I have been wanting to try her mother’s ( wahitha’s ) version which has bread in it. I got the recipe from wahitha and made it for an evening high tea party at home. I didn’t get to taste the pudding as I made just eight individual servings and I was expecting more guests that evening. I kept an close eye on how well the caramel pudding was being welcomed by the guests. Every bit of the pudding was vanished letting me to craze once again about the taste of the pudding. But being left with no left over’s sure is a good sign of a lip smacking dessert that’s for keeps. This dessert works wonderfully at all times of the day, whether for breakfast, as a snack or as a quick happy Dessert. A sure legendary dessert loved by all that was popular at up market restaurants and private posh parties in the late seventies. For a country that pays close attention to the texture, aroma, color and taste of the food we consume, it comes as no surprise that this check’s every home that has earned its pride of place here. while the manner of making this humble desert Varies from country to place to region across the world. Now I leave it to you all to give a try to this version and let me know the results before I get to give my next try of this caramel bread pudding.

Ingredients
Quantity
Bread slices6
Eggs2
Milk1 cup
Sugarto taste + 5 tablespoons to caramelize
Vanilla essence1/4 teaspoon

Method

  • Heat a pan with 5 tablespoons of sugar with one teaspoon of water. Let the sugar dissolve and get to a deep golden syrup.
  • Pour the caramel into the vessel in which the pudding has to be made. Set aside to set for ten minutes.
  • Blend all the other ingredients together in a food processor. Pour this mix over the set caramel.
  • Steam for 30 minutes covered with foil paper. Remove and serve hot, warm or chilled over night in the fridge and then de- molded.

Vella Pola

Share Button

FullSizeRender (6)

FullSizeRender (5)

FullSizeRender (4)

FullSizeRender (3)

FullSizeRender (2)

FullSizeRender (1)

FullSizeRender (27)

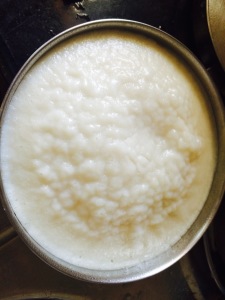
Preparation time : 24 hours / 8 hours to ferment + 3/4 hours to soak the rice + 25-30 minutes to grind the batter
Cooking time      : 10- 15 minutes
Serves                : 4 members

Description

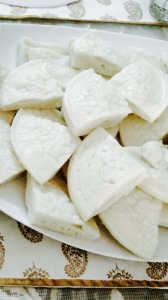
The minute I got to see these vella pola at a relatives place in Kerala, I was reminded about a similar white steamed bread served to us once a year for Easter feast in boarding school. But this was entirely different from those Easter treats. I made sure to get the recipe and tried it out when I had guests for lunch. Keeping my fingers crossed followed the recipe. Nervousness was killing me as the vella pola’s were being steamed. Removed them and waiting to de – mould them once a bit cool. The first one I de – mounded came out easy, airy and light as it must be. I made sure to taste it and it was pitch perfect. A big hit on the table as well with the North Indian guests who were having it for the first time. These sort of cutting edge regional food’s excite me a lot as you can’t find them in restaurants but only in homes that are delicious tribute to our motherland. These culinary bonanza recipes that you get to learn from one another that are rarely documented but stored in mind through mouth of word from one generation to the other always top popular charts for me. Give the ready to eat kit’s and food court junk a miss and get into making these knock out home made Indian food being loyal to our roots the old school way.
Ingredients
Quantity
Basmati rice1 cup
Cooked rice1/2 cup
Grated coconut1 cup
Sugar1/4 cup
Yeast1 teaspoon
Soda - bi - carbonate1 teaspoon
Semolina Water1/4 cup
Saltto taste

Method

  • Soak basmati rice for four hours. Cook semolina with 3/4 cup of water and Cool completely.
  • Grind soaked rice with grated coconut. Add cooked rice and grind further to a smooth paste adding very little water.
  • Mix ground rice mix with cooked semolina, soda – bi – carbonate, yeast sugar and salt. Combine well.
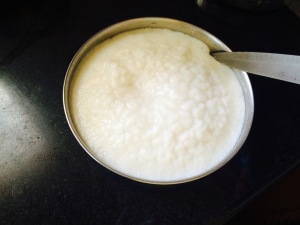
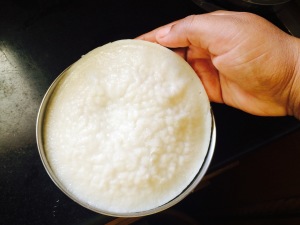
  • Place covered in a warm place for eight hours or over night to ferment .
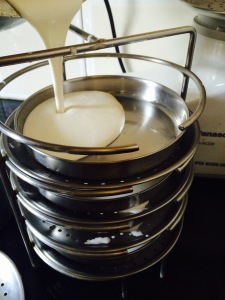
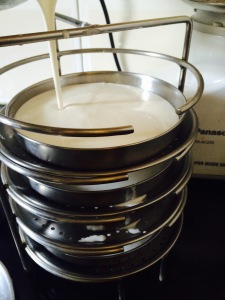
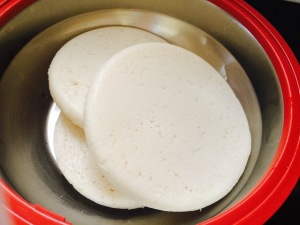
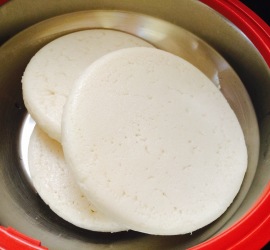
  • Grease small shallow steel plates with oil. Pour two ladles of fermented batter. Steam in a idli vessel for 10 – 15 minutes.
  • Cool for 15 minutes and de-mould as when hot it’s sticky. Cut into triangles.
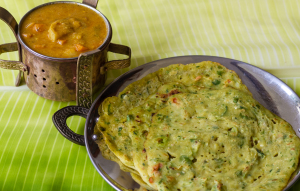
  • Serve warm with mutton / chicken curry or vegetable stew.

Upside down pineapple cake

Share Button

FullSizeRender (26)

FullSizeRender (25)

FullSizeRender (24)

Preparation time :  30 minutes
Cooking time      :  50- 55 minutes
Serves                :  10 members

Description

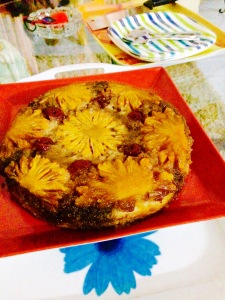
Pineapples always remind me of one thing that I learnt as a kid day dreaming during a boring class. The fruit itself is so interesting that I made sure to be like it to wear a crown, stand tall ( though I am short ) and be sweet inside meaning with in myself. My crazy little mind did wonder a lot but this one though stuck to me as I felt it to be a bit sense able. Me and my weird stories.. Coming to the cake. I made this cake when I had hubby dear’s cousin sister visit us. The cake was moist and tasted more like a pudding than a cake as the caramelize sugar that is let to drip down the cooked cake finally moisten’s the cake that just melts in your mouth. A very indulging novel tea time treat cake that’s worth every calorie which is rich in flavors and full of crunch, sweetness and a slight tang. The surprise element being there’s no artificial coloring or flavor’s added to the cake resulting in great results. This easily prepared well in advance cake makes for an impressive sweet finale. This flavorful power house dessert will instantly elevate almost any table from good to umm.. So get ready to turn your table’s from plain blah good to ummm… Ummmm.. Ummm…

Ingredients
Quantity
Butter1/4 cup
Brown sugar2/3 cup
Tinned pineapple slices9
Tinned cherriesfew
Flour / maida1 and a 1/3 cups
Sugar1 cup
Sunflower Oil1/3 cup
Baking powder1 and a 1/2 teaspoon
Salt1/2 teaspoon
Milk3/4 cup
Egg1 whole

Method

  • Heat a nine inch baking pan over low heat. Melt butter and add brown sugar evenly. Remove from heat.
  • Arrange tinned pineapple slices in a decorative way over brown sugar. Place tinned cherries in the center of each pineapple slice.
  • Preheat oven to 175 degree Celsius. Beat egg, milk and oil together with an electric egg beater. Add sugar and beat well to combine. Top with flour, salt and baking powder. Beat well for three minutes.
  • Pour the batter over the set pineapple slices. Bake for 50 to 55 minutes or until a toothpick inserted in the center comes out clean.
  • Remove from oven and immediately place a heatproof ( ceramic )serving plate up side down over cake pan, turn the plate letting it sit on the bottom and the cake pan over the top.
  • Leave the cake pan to cool completely, letting the brown sugar mix and drizzle over the cake.
  • Remove cake pan. Serve warm or at room temperature. Store the cake loosely covered until to be had next.

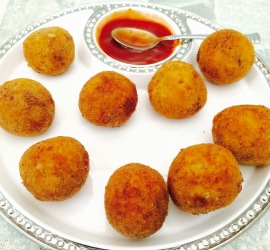
Italian cheesy rice balls

Share Button

FullSizeRender (17)

FullSizeRender (18)

FullSizeRender (19)

FullSizeRender (20)

FullSizeRender (21)

FullSizeRender (12)

FullSizeRender (11)

FullSizeRender (23)

Preparation time : 30 minutes
Cooking time : 3-4 minutes for deep frying each batch
Serves : 4 members

Description

Some how to me Italian food always relate’s to being romantic. No clue as to why I feel so but that’s what it is to me. May be the ease in which the way Italian food is made not being precise like we Indians cook with a little of this and a little of that and loads of love put into each dish. My trip to Italy was done when I just knew pizza and pasta being Italian dishes. Not aware of the versatility the Italian cuisine has I just missed out my chance to explore the real authentic taste of Italy. But I do make up for all the lost time by exploring all the interesting dishes that I get to know in all means. This recipe’s idea is from Italian Canadian born David rocca from one of his telly shows. I just love the way he uses simple, fresh, seasonal ingredients and cooks up a stir that helps any home chef to do the same any where. The authentic, easy to learn, classic Italian dishes that he shares are peasant cuisine which is at the heart of Italian cooking. I have added a few ingredients that are cupboard friendly to our Indian palate. I had my doubts about the rice crust breaking when deep fried but I was put to shame for sure. I made these rice balls when I had a cousin visit us with out notice and her favourite were these for sure with a “recipe please “following . The minute I told her these were made with left over rice, she was awe struck and looked at me like I was a genius. I had to tell her, it’s David rocca who is the genius and not me .

Ingredients
Quantity
Cooked rice2 cups
Rice flour1 teaspoon
Cornflour2 tablespoons
Red chilly flakesto taste
Egg1 + 1
Salt + pepper powderto taste
Grated Parmesan cheese1 cup
Mozzarella cheese3/4 cup cubes
Garlic crushed1 clove
Dried oregano1/2 teaspoon
Dried basil1/2 teaspoon
Bread crumbs2 cups
Oilto deep fry

Method

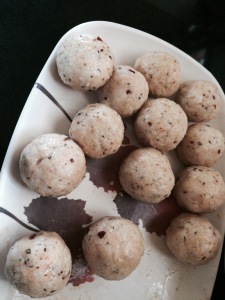
  • Mash boiled rice well with hands. Add salt, cornflour, red chilly flakes, garlic, one egg, dried basil, dried oregano and Parmesan cheese to the mashed rice. Mix well. Then add rice flour and mix well. set aside for twenty minutes.
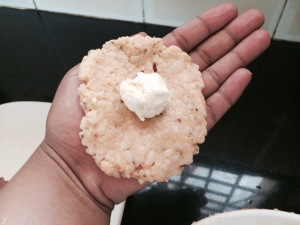
  • Make even lemon size ball’s of the rice mixture, flatten it out in your palm to get a round disc of your palm size with 1/4 inch thickness.
  • Place a goose burry size of mozzarella cheese cube in the centre. Bring the edges of the rice disc towards the middle and roll to a ball with no cracks making sure the mozzarella cube is sealed well.
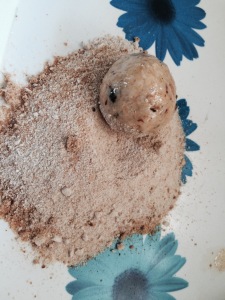
  • Beat one egg with salt and pepper to taste. Roll the filled rice ball over beaten egg. Remove and toss over bread crumbs making sure it’s coated all around well. Do the same to all the balls. Place in the fridge for 30 minutes.
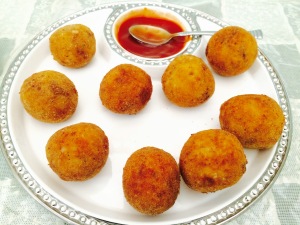
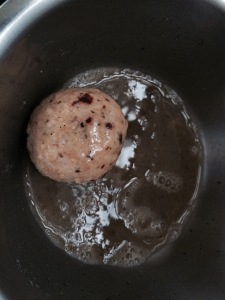
  • Heat oil to deep fry. Drop the rice balls in batches of four at a time and deep fry to crisp and golden in hot oil. Drain and serve hot with marinara Italian sauce or tomato sauce.


Cucumber Adai Dosa

Share Button

IMG_5916

FullSizeRender (10)

FullSizeRender (9)

Preparation time : 20 minutes
Cooking time      : 1 and a 1/2 to two minutes for each dosa
Serves                : 3 members

Description

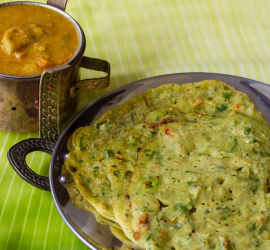
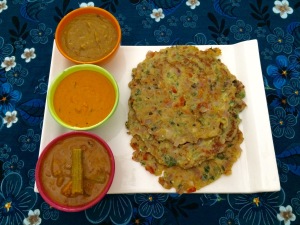
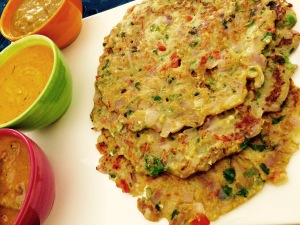
Cucumbers are used only for salads or just to munch for time pass at home. I have never ever cooked a dish with cucumbers so far. Came across a recipe that used cucumbers to make rotis. Grabbed the idea and tried this adai dosa version for the true blue South Indian I am. Not knowing what the texture of a cooked cucumber will result in, I eagerly waited for the first adai dosa to be cooked. The adai looked stunning with an eye popping splash of colors. The first tasting was done by my cook and myself together. Both of us had raised eyebrows and wide open eyes as it tasted divine, light and healthy with a crisp exterior, soft interior and the bite of cucumbers and onions were to die for. The perfect harmony of goodness and taste that’s mildly flavoured and quick to stir up. Made sure to high lighten the quick and healthy adai dosa by serving it with three chutneys. my cheats way just to impress my loved ones when in doubt about any new dish, serving it with many accomplishments. solving the mystery with in me of what to do if the dish will be a flop show. Sure this new avatar cucumber adai dosa will do full justice at all your home table’s as it did to mine.

Ingredients
Quantity
Cucumbers grated with skin 3 cups
Rice flour3 cups
Green chillies6 chopped
Ginger grated1 teaspoon
Garlic1 clove grated
Tomato1 chopped
Onion1 big chopped
Saltto taste
Soda -bi - carbonatea pinch
White Sesame seeds1/2 teaspoon
Turmeric powder1/2 teaspoon
Coriander leaves1/4 cup chopped
Spinach leaves1/4 cup chopped ( optional )
Oil4 tablespoons

Method

  • Squeeze out the excess water from the grated cucumbers and reserve the water.
  • Add all the other ingredients together with the reserved cucumber water and water to get a semi thick loose batter ( like dosa batter ). Taste and adjust seasoning.
  • Heat a gribble. Grease with little oil. Pour a big ladle full of batter and spread a little to get a round disc of 1/4 inch thickness.
  • Drizzle little oil over the edges and cook for a minute in medium flame.
  • Flip over and cook further for another 30 to 50 seconds.
  • Remove from heat and serve hot with choice of chutneys.

Jackfruit Mousse

Share Button

FullSizeRender (8)

FullSizeRender (7)

FullSizeRender (6)

Preparation time  : 35 minutes
Cooking time       : 12 minutes + setting time of six hours or overnight in the refrigerator
Serves                 : five members

Description

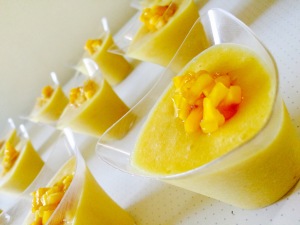
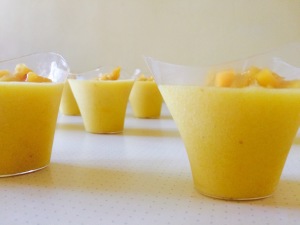
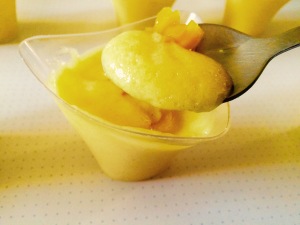
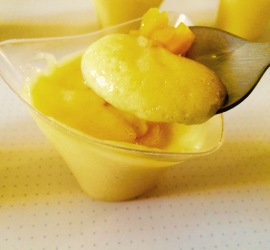
Jackfruit is one among my favourite fruits. Anything and everything made with this humble fruit is a sure delight to me. Every time home is over loaded with jackfruits during its season, I make sure to come up with a new dessert. My kids when growing up, spotting a jackfruit dessert in the fridge was cause to exult to them. I have no shame in admitting that I still have a soft spot for the bright sunny yellow, sweet, marvellous textured fruit. So this time it was a mousse made with jackfruits. Jackfruits with coconut milk combination is a no fail deal always. To be on the safer side just went ahead with the known devil killer combo. Did add a bit of custard powder for a smooth velvety effect to the mousse. This dessert was no – brainer to prepare. The final result was ultimate yummy dessert. Served it at a family gathering in the evening. We all did dig into family secrets as we ate our heart outs with these mousses. Well, when food is good, rest around the “gup – shup ” will be even better.

Ingredients
Quantity
Jackfruit1 cup chopped
Whipped cream1 packet ( blue bird brand - 50 grams packet )
Honey1 tablespoon
Powdered Sugarto taste
Jack fruit purée1 cup
Custard powder2 teaspoons
Thick coconut milk1 cup
Vanilla essencefew drops

Method

  • Mix custard powder with thick coconut milk. Bring to boil, stirring constantly to get a thick custard with no lumps. Remove from heat and cool completely.
  • Mix jack fruit puree, cooled custard, powdered sugar and vanilla essence together.
  • Whip the cream to packet instructions to stiff peaks. Fold the whipped cream with the custard mix.
  • Pour into pudding cups and place in the refrigerator to set for six hours or overnight.
  • Mix honey with Jack fruit bits. Garnish over the pudding and serve chilled.

Kerala Christian Fish Curry

Share Button

FullSizeRender (5)

FullSizeRender (4)

Preparation time  : 30 minutes
Cooking time       : 25 minutes
Serves                 : five members

Description

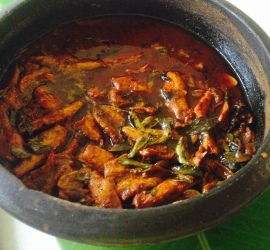
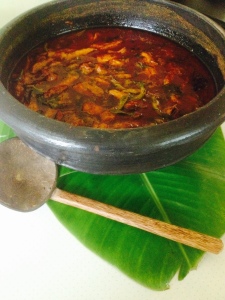
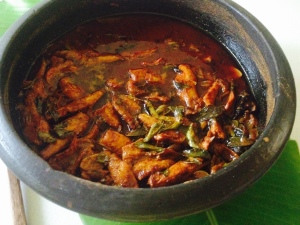
Every Friday night , was fish day at our boarding school. The entire mess would stink of fish and we kids would grumble and have dinner. One week it would be fish curry and the following week fish fry. Fish curry weeks were the worst. I remember on one such Friday, we entered the dining hall and I could see deep dark red colour curry over the lump of rice on all our plates. Or else it’s always a pale yellow – brown fish curry. That second, all our faces lit up with smiles before the prayer as the dining hall also didn’t have the fishy smell. As we started our dinner, it was fish curry but made in a different way and yum for sure. The entire dining hall was in a festive mood, rejoicing and enjoying the good fish curry. Out of a sudden we had our head mistress Mrs elsamma Thomas making rounds during dinner. As she neared our table, she asked us how the fish curry was? We all in a chorus shouted out saying its yum. She smiled and told us she had made the fish curry her self as she bought fish from Kerala after a two day holiday there. I was not smart enough to know what went into the curry she had made then but that one Friday’s fish curry till date does spark in my mind every now and then letting me crave for it always. This recipe was shared by a fellow foodie friend shuja Thomas on her blog. I just took note of it and gave a try. My, my, it was the same Friday night fish curry that our head mistress had made for us. My lost craving was put to an end with shuja’s recipe being bang on perfect. My first mouth full of rice and this fish curry sure took me to those cold night Friday dinners of our’s in school.

Ingredients
Quantity
Fish1/2 kg
Red chilly powder3 teaspoons
Coriander powder1 teaspoon
Turmeric powder1/2 teaspoon
Coconut oil4 tablespoons
Mustard seeds1/2 teaspoon
Garlic2 cloves chopped
Ginger1/2 inch piece chopped
Small onionsone hand chopped
Ginger and garlic paste1/2 teaspoon
Fenugreek powder1/4 teaspoon
Curry leavesfew
Gambooge / kudam puli 4 soak in one cup water with little salt
Saltto taste

Method

  • Heat a clay pot with coconut oil .Add Mustard seeds , once they crackle.
  • Top with chopped Ginger, garlic, small onions and curry leaves. Sauté to translucent.
  • Add the Ginger and garlic paste. Sauté to crisp.
  • Mix red chilly powder, coriander powder and turmeric powder with little water to get a paste consistency.
  • Add this over the crisp Ginger, garlic paste. Cook until oil floats on top.
  • Add soaked kudam puli, salt and two cups of water, bring to boil.
  • Drop cleaned fish pieces and sprinkle fenugreek powder.
  • Cover and cook in low flame for ten to fifteen minutes depending on the variety of fish used for the curry .
  • Swirl the clay pot in intervals of five minutes each when cooking after the fish is added.
  • Add a few more curry leaves and drizzle coconut oil all around the edges of the clay pot. Swirl and Simmer further for three to five minutes.
  • Remove from heat and serve after a few hours ( or best the next day ) as the curry tends to thicken when kept in a clay pot.
  • Adjust water consistency accordingly and serve with hot boiled rice.

Notes

  • Avoid small onions and coriander powder and make the same curry in case you want to keep the fish curry for a couple of days at room temperature.

Milk Powder Rasmalai

Share Button

FullSizeRender (14)

FullSizeRender (13)

FullSizeRender (12)

FullSizeRender (11)

FullSizeRender (10)

FullSizeRender (9)

FullSizeRender (8)

FullSizeRender (7)

Preparation time   :  30 minutes
Cooking time        :  20-25 minutes
Serves                  :  5 members

Description

The best rasmalais I have had are from Sri Krishna sweets in Coimbatore. There must be many more places that serve better rasmalais but as the truth of all our taste buds having the magnetic effect of liking food towards the regular nostalgic food habits we grow with that help’s to create magic with in us. I guess, that’s what is done to me as well with the Krishna sweets Rasmalai’s. After being married, every time I crave for rasmalais.. I just had to drool over thinking of it as it was not available any where. During my first pregnancy, I always felt like having rasmalais and was left to just gulp down a hell lot of saliva. Being in those days of no access to the internet, some how managed to get the recipe of rasmalai. Made it with great enthusiasm, praising and letting my cook at home know about its taste. placed the spoon over the rasmalai and pressed to take one bit and the rock hard rasmalai popped up and flew far away. My cook laughed out loud and I was left disappointed with me having to some how finish of the entire lot. Taste wise it was near perfect but failed in the light, fluffy texture part. That was my last try with Rasmalai’s. Just a few months back, came across a milk powder rasmalai recipe and gave it a try with my fingers crossed and mouth shut with my new cook this time. Followed the recipe religiously and my long lost quest to make perfect rasmalais was done with this cracker recipe. My girl ( the one responsible for my craving of rasmalais during my pregnancy) had a try and she was like, it’s the best rasmalais I have had till date. My Mission accomplished after a decade in satisfying the rasmalai craving caused due to her in me .

Ingredients

Ingredients
Quantity
Milk powder1 cup
Egg1
Baking powder1/2 teaspoon
Milk1 litter
Sugar3/4 cup
Saffrona pinch
Green cardamom powder1/2 teaspoon
Ghee1 tablespoon
Rose water1 teaspoon
Pistachiobits few to garnish
Rose petalsto garnish

Method

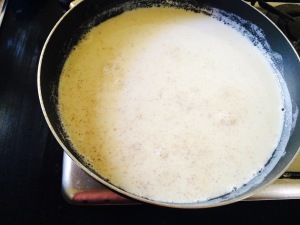
  • Boil milk with sugar and 1/4 teaspoon of cardamom powder over medium heat in a heavy bottomed pan.
  • Mix milk powder, baking powder, ghee and remaining cardamom powder together in a bowl. Mix gently, add a beaten egg little at a time to get a ball shape by kneading gently. ( you will not need the entire beaten egg. Add just enough to get a soft dough ). Do not knead too much.
  • Roll equal small lemon size balls out of the dough and flatten them lightly with no cracks. Make sure not to rough handle the balls.
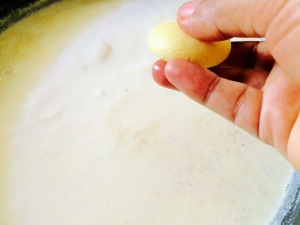
  • Drop the flattened balls one by one into the simmering milk. Cover and cook in medium heat until milk boils and the flattened balls increase in size.
  • Reduce the heat and simmer for five minutes until balls are light and soft. Remove from heat. Add rose water. Cool to room temperature.
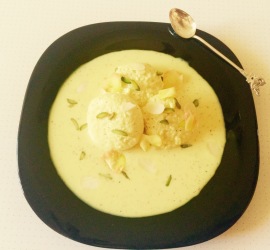
  • Place in the refrigerator to chill. Serve chilled, garnished with pistachio bits and rose petals.

Home made nachos served with Italian sauce and topping

Share Button

FullSizeRender (6)

IMG_6265

IMG_6267

IMG_6266

IMG_6273

Preparation time  :   30 minutes
Cooking time       :   30 minutes
Serves                 :   6 members

Description

It’s been a while since I tried out a fusion international dish. I could feel my dining table shout out to me saying, please we need a change. I grabbed the opportunity when my friend Sheela dropped in home to give me deepavali ( that’s how we South Indians say Diwali as ) sweets. A revelry won’t be complete with out edible gifts, would it ? This sure did add so much glamour to my other wise dull table. These nachos didn’t take much skill or any special equipment to pull off and with my clever touches and twists ( uff please .. No self praising ) to this Mexican divineness, it was a gorgeous creation. Though infinitely versatile, it’s all about getting the flavour pairing right. As myself and Sheela were in full swing with munching and gossiping, I heard the calling bell ring . Went and checked and to my surprise it was my neighbor kamala aunty ( we share the same native place ) who had come to drop deepavali sweets as well. Welcomed her and took her strait to the munching spread. We did enjoy our bit of togetherness with a good spread around. The same evening, we had another neighbor’s get together to attend for dinner. Myself and kamala aunty had a sly laugh as we both had food in our plates but nothing was lining our tummies. The joy and memories that food bring to my crazy self.

Ingredients for nachos

Ingredients
Quantity
Yellow cornmeal flour (makki ka atta)2 cups sifted
Flour / Maida1 cup
Baking powder1 teaspoon
Saltto taste
Oil2 tablespoon
Warm water2 cups or more
Oilto deep fry

Method for nachos

  • Mix the yellow cornflour, flour, baking powder, salt, oil and warm water together. knead to get a soft dough.
  • Roll into equal big lemon size balls. Spread out to thin rotis and cook over a hot griddle (tawa), on both sides. Remove and cool completely.
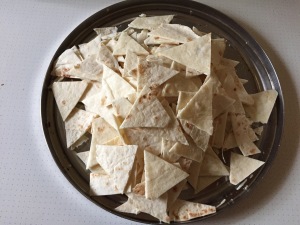
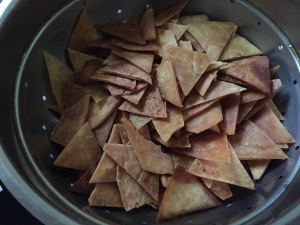
  • When cool, cut the rotis to triangle shape with the help of a sharp knife. Deep fry the rotis to a light golden brown and drain.
  • Keep stored in an air tight container until needed to be served.

Ingredients for Italian sauce

Ingredients
Quantity
Ripe tomatoes1/2 kg blended
Flour2 tablespoons
Olive oil2 tablespoons
Garlic2 cloves crushed
Stock cube1 ( I used maggi chicken stock cube )
Dried Basil1 teaspoon
Oregano1/4 teaspoon
Chilli powder1 teaspoon
Sugar1 teaspoon
Saltto taste

Method

  • Heat a non-stick saucepan with olive oil. Fry the garlic to light brown. Top with flour and sauté making sure no lumps are formed.
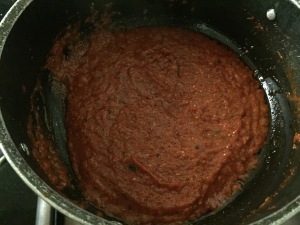
  • Pour the blended tomatoes. And mix well. Add salt to taste, maggi stock cube and 3 -4 cups of water and boil until raw smell goes and sauce thickens.
  • Season with basil, oregano, chilli powder and sugar. Taste and adjust seasoning. Remove from heat.

Other ingredients

Ingredients
Quantity
Onion1 chopped
Red , yellow and green capsicum's1/2 each copped
Cheesegrated to taste

How to assemble

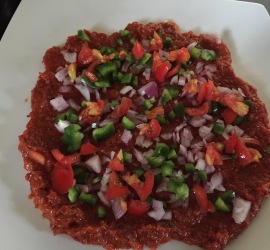
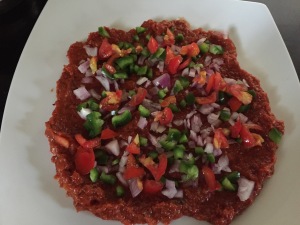
  • In a wide plate spread the Italian sauce. Pile up the fried nachos over.
  • Sprinkle chopped onions, three colored capsicum’s and grate cheese over.
  • Serve immediately.