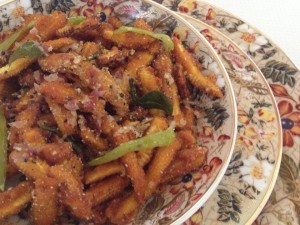
Cauliflower shezwan stir fry

Share Button

image (17)

Preparation Time : 20 minutes

Cooking Time : 10 minutes

Serving : 4members

Description

Cauliflower shezwan stir fry . No idea from where I learnt this dish or the source of the recipe but the inspiration was drawn from the Chinese restaurant Kowloon in Coimbatore . The shezwan fried rice and chicken shezwan stir fry served there is ultimate . My misconception and sense of gap in understanding Chinese food was cleared at large through this restaurant as i got to know that even Chinese food has regional food according to their own province through out china . This dish has a deep umami flavours of sweet , sour , salty and spicy together . The key is to achieve  a balance of all these tastes together stir fried on high heat so it adds a caramelised flavour .  This dish can very happily be eaten on its own , strait from the served bowl .( I end up doing this strait from the wok  always :-))  )

Ingredients

Ingredients
Quantity
Cauliflower florets 2 cups
Garlic 1/2 teaspoon chopped
Ginger 1/2 teaspoon chopped
Green chillies 1/2 teaspoon chopped
Capsicum1/4 cut into cubes
Spring onion with whites 1 teaspoon chopped + little to garnish ( I have used onion cubed as I didn't have spring onion whites in hand here )
Schezuan sauce3 tablespoons
Oil1 teaspoon + to deep fry
Saltto taste
Sugar1/4 teaspoon

Ingredients for batter

Ingredients
Quantity
Flour / maida1/2 cup
Corn flour1/4 cup
Oil 1 tablespoons
Salt to taste

Make a thick batter mixing all the above mentioned ingredients along with little water and set aside .

Method

  1. Dip the cauliflower florets in the batter and deep fry over a high flame until crisp .Drain and keep aside .
  2. Heat oil in a wok on high flame , add garlic , ginger , capsicum and green chillies and stir fry for a few seconds .
  3. Add the spring onion whites and sauté for a few second .Add the schezuan sauce and bring to boil .
  4. Add  fried cauliflower florets , salt and sugar mix well .Serve immediately garnished with spring onion greens.

Ingredients (for 3/4 cup sauce)

Ingredients
Quantity
Garlic (finely chopped)1/4 cup
Ginger (finely chopped)2 tablespoons
Sesame oil3-4 tablespoons
Dry red chilli10 to 12
Soya sauce1/2 teaspoons
Pepper powder1/4 teaspoons
Tomato ketchup1/2 teaspoons
Vinegar1/4 teaspoons
Saltto taste
Water1/4 cup

Method for the shezwan sauce

  1. Soak the red chillies  in water for an hour.
  2. Take out the seeds and grind it into a smooth paste. ( I prefer my sauce hot , so i omit removing the seeds ) Add a few teaspoon of water if necessary while grinding.
  3. In a pan heat  the oil and add the finely chopped ginger and garlic . Saute for few minutes till the garlic turns golden brown colour in a low flame . Add the ground red chilli  paste .
  4. Mix well and cook for 2 minutes till the oil oozes out. Add soya sauce ,pepper powder, tomato ketchup , vinegar and salt .
  5. Keep in mind that the sauces(soya and ketchup) contains salt.Add 1/4 cup of water to this and cook for few minutes till it reaches a saucy consistency.
  6. Add little extra water if you want, but do not add too much.Sauce is ready.

Notes

  1. The easier way to take out the seeds is in the dry red chillies for the sauce is to  take it out before soaking. this makes the job easy.
  2. The shezwan sauce can  be stored in a clean bottle for 10 days in the refrigerator and used in other dishes .
  3. This same recipe can be followed and done by swapping  paneer , mushrooms , baby corn , prawns , squid , chicken or boneless fish strips instead of cauliflower .

Imli chutney

Share Button

imlichutney

Preparation Time : soaking of tamarind over night + 15 minutes

Cooking Time : 1 hour

Serving : 20 members

Description

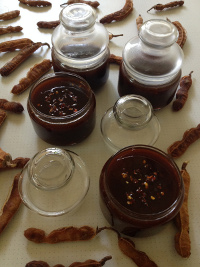
Imli chutney , a dark deep maroon  colored gooey mass of lip smacking accomplishment that helps to create a magic when served with anything and everything . As a kid , when at any chat counter or shop used to wonder what was in this sweet chutney as we call it . I always ask for more of sweet chutney :-)) . When I started cooking , I came up with a sweet chutney recipe with dates , tamarind , black salt , cumin and chilli powder which use to taste close to what is served at all the chat shops . I did religiously follow that recipe till a few months back until I came across this recipe which was shared by my fellow home chef mubeen Sulthana . The day she shared this recipe had a sack of tamarind from our farm at home . Immediately gave it a try adding a few more ingredients with my twist to the chutney but keeping it simple not over complicating it as well .  I ended up with 4 jars of imli chutney ( I wanted just 2 ) . No complaints as I saved 2 for myself and the other 2 were packed of to my daughters place . This imli chutney can be used with any chat items , samosas , dahi wada ( thayir wada ) and at times I use it as a dressing for salads as well with a trademark Indian twist . Tamarinds always bring me nostalgic childhood memories of me eating tamarind pieces dipped in salt . I would eat it non stop resulting with cuts  in the upper skull of my mouth above the tongue . Well now a days I do have imli sweets ( tamarinds coated with sugar crystals ) in my handbag to reach out for when the munchies strike or to chance upon serendipitously when you are rummaging for a pen :-)) .

Ingredients

Ingredients
Quantity
Tamarind 3 cups soaked in 5 cups of water over night
Vinegar1 teaspoon
Chilli powder2 tablespoons or to taste
Salt to taste
Black salt a pinch
Chat masala 1/4 teaspoon
Pepper powder1/4 teaspoon
Chilli flakes2 teaspoons
Crushed cumin seeds2 teaspoons
Jaggery 3 tablespoons or to taste

Method

  1. Soak tamarind overnight with water and cook for 45 minutes .
  2. Strain the cooked pulp 2 to 3 times very well that there is nothing left in the tamarind .After that discard whatever is left in the strainer.
  3. Cook the tamarind juice again and add vinegar, chilli powder, salt, pepper, chili flakes, crushed cumin , jaggery , black salt and chat masala .
  4. Cook for another 20 minutes or until it thickens on low heat And enjoy.

Rainbow pine wheel dosa

Share Button

image (13)

Preparation Time : 35 minutes

Cooking Time : 25 minutes

Serving : 4 members

Description

Rainbow pine wheel dosa . Heres a spin on the classic dosa , we all have been growing up eating . A dish I took note of from a telly cookery show about nine years before on a regional satellite channel  . Just love the innovation done with simple every day ingredients that we have around the house always . Absolutely additive yet ridiculously easy to make and will elicit a chorus of oohs and aahs for sure . Idlis , dosas and a white coloured chutney or a red coloured chutney alternatively was on the table  day and night every   ever passing day  at my in – laws place . My co – sister Farzana got married into the family only after 7 years of my coming . With crossed fingers wished and prayed that she should hate idlis , dosas and chutneys so that we all at home would be boomed with a change in the menu . But to my surprise … , she jumped with joy seeing idli and chutney for breakfast . Gosh I was like .. Finished my entire life will end eating these idlis , dosas and chutneys . A week passed and slowly she asked me if there will be a change in menu this following week …..I told her this is the standard never ending menu carved in the history of this house . She blinked as I did as a new bride  and we nicknamed these dishes as ” national dish “.  Dum me didn’t have the brains to re – imagine them as new , exciting versions of themselves  back then . Better late than never isn’t it folks ….. Now with this recipe , dosas will never be the same again .

Step -1

Ingredients for carrot chutney

Ingredients
Quantity
Carrots 1 cup chopped
Tomato 1 small chopped
Small onion5
Garlic flakes2
Tamarind a small pinch
Salt to taste
Coconut1/4 cup
Coriander leavesvery little
Dry red chillies 4 to 6
Gingely oil1 tablespoon
Asafoetidaa pinch

Method for carrot chutney

  1. Mix all the above mentioned ingredients in a microwave safe bowl .
  2. Mix well and microwave on high for 6 minutes . In between at an interval of 3 minutes toss once and microwave again .
  3. Cool completely and grind to a smooth paste . Add very little water if needed . The consistency of the chutney should be of a spreading consistency not too thin and watery or not too thick .
  4. Taste and adjust seasoning and set aside . Incase you don’t have a microwave just fry all the ingredients separately in gingely oil until the ingredients are 3/4 cooked .
  5. Remove cool and grind to get a chutney .

Step -2

Beet root chutney

Use the same ingredients as the above chantey but substitute beet roots instead of carrots and follow the above recipe to get beet root chutney .

Step -3

Ingredients for Coriander mint chutney

Ingredients
Quantity
Coconut 1/4 cup
Gingera tiny piece ( just a tit bit size )
Coriander leaves with stem1/4 cup
Mint leaves8
Green chillies4 to 6
Tamarinda pinch
Salt to taste
Curry leaves 2
Jaggery a tiny piece

Method for the coriander mint chutney 

  1. Grind all the above ingredients together to a smooth paste of semi thick spreading consistency by adding very little water .
  2. Taste and adjust seasoning and set aside .

Step -4

Other ingredients 

ingredients
Quantity
Dosa batter 3 cups
Oil or ghee2 tablespoons

Method

  1. Mix the dosa batter to the right consistency with water and salt to taste .
  2. Make  normal sized dosas  in a dosa tawa and set aside .
  3. The dosa should not be too thick or too thin but of medium size in thickness .
  4. The size of all the dosas should be of the same shape and size .

Step -5

How to proceed 

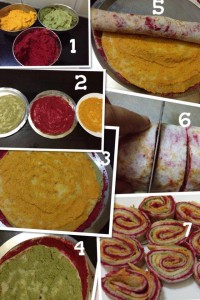
  1. Take 3 dosas . Spread 1 to 2 tablespoons of carrot chutney on one dosa . Spread 1-2 tablespoons of beet root chutney on the second dosa and spread 1-2 tablespoons of coriander mint chutney on the third dosa .
  2. Now place the beet root chutney spread dosa on the bottom , top with coriander mint chutney spread dosa over and finally place the carrot chutney spread dosa on the top .
  3. Now carefully hold all the 3 dosas together on one end and roll tightly towards the opposite end .
  4. Once rolled , cut into 1 inch thick bite size pieces and place the cut side facing upwards making sure the vibrant colours of the spiral dosa and chutneys are visually seen . Serve as it is or with tomato ketchup .

Note

  1. Use very little tamarind as all the three chutneys have tamarind added and when had together can tend to get very tart .
  2. Add very little water to make the chutneys as the dosa gets soggy when spread with runny chutneys .
  3. The size and shape of the dosas must be the same so that when cut not much of the pine wheel rainbow dosa is wasted .
  4. Make the chutneys and dosas ahead . Assemble and roll them together just before serving as the dosas tend to catch colour from the next dosa soon and tends to get soggy also .
  5. You could use a tooth pick and hold the bite size cut pine wheel rainbow dosas together and serve . Adds style and Children will love eating with a tooth pick on

Soya kofta curry

Share Button

image (12)

Preparation Time : 30 minutes

Cooking Time : 35 minutes

Serving : 6 members

Description

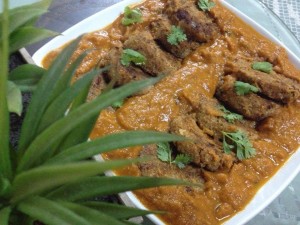
Soya kofta curry .  Soya beans and tofu are two ingredients that I hate the most but they are the healthiest . Why does healthy food always has to taste bland and not so good . Usually what I do with soya beans is soak it over night , boil it the next day morning and have it as it is ( tastes horrible ) or I mix it with some curd and have it for lunch . ( without chewing much , this way the curd helps to gulp in the soya beans .) all this happening with hubby dear beside me having a regular splendid meal and poor me :-(( . My life is a constant battle between my love for food and  not wanting to be fat . I had a lot of boiled soya beans left over after I had for lunch . Not wanting to waste them , came up with an idea of making a kofta gravy with these left overs but in a healthy way . Started and wanting to bake the koftas just didn’t want to use bread crumbs to coat them , so substituted with coarsely ground soya chunks and it worked perfect with a mildly crisp exterior and a yielding inside .  The gravy part is our regular tomato based one but I omitted the ground  onions as its costlier than gold now ( kidding ) . The first time soya beans tasted healthy , nutritious , delicious and got hubby dear to eat it as well along with me :-)) .

Ingredients for the Koftas

Ingredients
Quantity
Soy beans1 cup
large potato1
onion 1 chopped
green chillies2 chopped
Coriander leaveschopped few
Lime Juice1/2 a lime
Salt to taste
Soya chunks1/2 cup ( blitz them in a food processor to get a coarse powder )

Ingredients For Gravy

Ingredients
Quantity
Oil1/4 teaspoon
onion 1 chopped
ginger garlic paste 1 teaspoon each
cumin seeds 1 teaspoon
tomato paste 1 tablespoon
tomato puree1/2 cup ( just blitz 3 medium sized tomatoes in a food processor )
turmeric powder1/4 teaspoon
garam masala1/4 teaspoon
Red chilli powder to taste
Coriander leaves chopped few to garnish
bay leaf1
Salt to taste
Corn flour / soy flour1 teaspoon diluted in 2 teaspoons of water

Method for soy kofta

  1. Soak the soy beans overnight. Cook them in a pressure cooker. No problems if it gets mushy. We are going to do that anyways.steam the potato in the steamer (with the skin. It has nutrition too)
  2. Mix all the ingredients for the koftas together except the soya chunks . Mash them with your hands .
  3. Spread the coarsely blitzed soy chunks on a plate and coat the balls with them.
  4. Repeat with all the balls and place them in a lightly greased baking sheet. Bake for about 10-15 minutes in a preheated oven at 200 degree Celsius . ( this can be served as it is as a starter , side dish or as a nibble any time of the day )

Method for the gravy

  1. Heat a skillet  with 1/4 tsp oil And add the onions , bay leaf  and cumin with some salt. The salt will bring out the moisture and help the onions cook easily.
  2. Top with ginger garlic paste and fry until raw smell evaporates.  Add the tomato paste and the puree.
  3. Sauté until oil separates .
  4. Add the spice powders ( turmeric powder , red chilli powder and garam masala powder ) Along with  enough water to make sufficient gravy and once it comes to a boil, thicken it up with little soy flour or cornstarch and bring it to a simmer.taste and adjust , remove from heat and set aside .

How to proceed

  1. Remove the koftas from the Oven and pour half the gravy over each of the koftas until they are soaked in the gravy.
  2. Bake them for another 10 minutes and before serving pour out the remaining gravy.
  3. Garnish with chopped coriander leaves and Serve warm with phulkas , chapathis or rotis .

Idli upma

Share Button

image (10)

Preparation Time : 15 minutes

Cooking Time : 10 minutes

Serving: 2 members

Description 

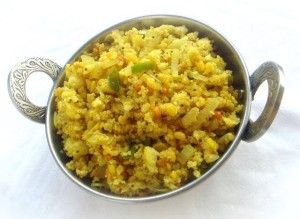
Idli upma . Upma is one dish I hate …. But I do crave a lot for the upma’s that were served to us in good shepherd public school (ooty )on Sunday mornings along with masala omelet . I used to fill the omelet with the upma inside , roll it and eat it like a katti roll . This idli upma recipe I learnt from one of my cooks at my in – laws place Which is a fast , clever , easy and time saving one pot dish . A genius quick fix with left over idlis at home . The high light of this recipe is the lime added which gives an oomph factor , Resulting deliciously tart . This dish did wonders when I had to pack lunch for my kids to school . It was my go – to quick fix when pressed for time . My daughter ANISHA is a die heart fan of this idli upma . She ends up asking for this idli upma very often which is a staple that’s adapted to suit the brew available .  upma

Ingredients

Ingredients
Quantity
Left over idli 6
Big onion1 chopped
small onion10 chopped
Green chilli1 chopped
Ginger 1/4 inch piece grated
Salt as needed
Cooking oil1 tablespoon
Mustard seeds 1 teaspoon
Urad dal1 teaspoon
Channa dal1 teaspoon
Dry Red chillies2 each torn into two
Curry leaves 1 strand
Asafoetida a pinch
Lime juice1/2 a lime
Turmeric powder1/4 teaspoon

Method

  1. Dip the idlis in salted water for 5-6 seconds . Remove and Crumble the idlies well and set aside.heat oil in a non – stick kadai .
  2. Add mustard seeds , urad dal , channa dal ,torn dry red chillies and curry leaves .
  3. Once the mustard seeds crackle top with hing , onions , grated ginger and green chillies .Once the onions turn translucent add turmeric powder and lime juice .
  4. Saute for 10 seconds and top with the crumbled idlis and toss well in a very low heat .
  5. Making sure the yellow colour Coates well all around the crumbled idlis and the flavours infuse together .
  6. Garnish with chopped coriander leaves and serve hot .

Note

  1. You can avoid the turmeric powder and lime juice following the same recipe to get a white color bland idli upma .
  2. You can add a sprinkle of idli podi ( powder ) to add more flavour to the idli upma .
  3. At times even the left over vegetable poriyals ( sabzis ) are also added to the idli upma . ( My favorite is potato fry to be added )

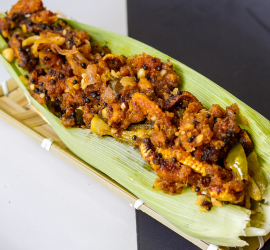
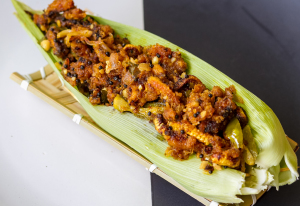
South Indian style baby corn stir fry

Share Button

IMG_5903

southbaby

Preparation Time : 30 minutes

Cooking Time : 30 minutes

Serving : 6 members

Description

South Indian style baby corn stir fry . This dish is adhitya bhels recipe from NDTV GOOD TIMES . I loved the innovative concept of how he used this vegetable in a typical South Indian style . The South Indian twist makes it more interesting . i have made a few changes from his recipe to match my comfort zone as I do always . As you start to chew this dish you feel a combination of new flavors burst in your mouth but as you tend to swallow it feels like its just like how mummy makes it . Any thing deep fried is irresistible to me ( actually any form of FOOD is irresistible to me now a days ) . Wonder why all that tastes good is a taboo for us to be consumed . The pain and mental stress we female non – stop foodies have to go through is un imaginable . 24 hours a day your mind is stuck with food being around you in the kitchen , on the table , in your mind , on your telly , in the laptop , in your social networks , in the food related groups on the net , in your dreams …. The list can just go on and on . Finally all you get to do is treat yourself with every thing through your eyes , smell through your nose , but nothing much should be done through your mouth . At times when you think come on once in a while its ok , go ahead and treat yourself … you do dive in and hog . just as you finish , you instantly feel your soul being pumped with guilt and your heart getting heavier . so the joy of soul full food is there in you only till you finish eating . I pity all my fellow folks who ever are going through this as I am . But ultimately , one cannot think well , love well , sleep well , if one has not dined well !!!!!

Ingredients

Ingredients
Quantity
Baby corn500 grams cut into thin long strips
Ginger garlic paste1/4 teaspoon each
Chilli powder1 tablespoon
Rice flour1/2 cup
Lemon1 /2 lime
Turmeric powder 1/4 teaspoon
Garam masala powder1/4 teaspoon
Corn flour1/2 cup
Coconut oil 2 teaspoons
Small onion 6 chopped
Ginger crushed1/4 teaspoon
Curd2 tablespoon
Oilto deep fry
Green chillies4 , slit into 4
Curry leavesfew
Coriander leaves1 teaspoon chopped ,
Roasted Peanuts1 tablespoon crushed

Method

  1. Marinate baby corn with lime juice , ginger garlic paste , turmeric powder, chilli powder, garam masala powder and salt to taste for 10 minutes .
  2. Add rice flour and corn flour and mix well , Adding little water to coat both the flours around the baby corn .
  3. Deep fry the baby corn to crisp .Drain and set aside . Heat coconut oil , add mustard seeds . Once they crackle add small onions , slit green chillies , grated ginger and curry leaves .
  4. Saute for a minute in low flame . Add the curd and fry till they curdle . Add the fried baby corn and saute for another two minutes .
  5. Garnish with coriander leaves and crushed roasted peanuts . Serve hot as a starter or a side dish .

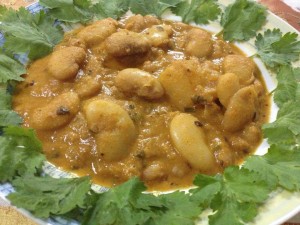
Kolhapuri vegetable masala

Share Button

kolhapuri

Preparation Time : 45 minutes

Cooking Time : 20 minutes

Serving : 4 to 5 members

Description

Kolhapuri vegetable masala . Any thing to be cooked in non – vegetarian is a cake walk for me but vegetarian cooking ??????? in recent , hubby prefers vegetarian food . I am put into the pressure of vegetarianism ( cooking and eating ). I know very few vegetarian graves and mostly based with onion and tomato gravy ( Can’t think of managing without these versatile staple veggies { oops tomato is a fruit } ) . This dish is made with kolhapuri masala which is made with dried coconut . Has an entirely different taste . kolhapuri masala recipe was from the net but I have made my quite essential twists and turns to jazz up the dish to suit our pallet at home . The boiled peanuts used gives the dish a dash of romance . Out of the Blue , I managed to create a delicate , alchemical infusion of flavors and textures in a vegetarian gravy . Hurray ….:-)))))

Ingredients for kolhapuri masala

Note : Can be stored in the freezer for few days

Ingredients
Quantity
Dry coconut1/4 cup , ( copra , coparai thenga )
Dry red chillies8 or to taste
Turmeric powder1/4 teaspoon
garlic5 cloves
ginger1 inch piece
poppy seeds(khus-khus)1 tablespoon
sesame seeds1 tablespoon
onions1 cup chopped
tomatoes 1 1/2 cup chopped , ( I just blitzed the tomatoes in a blender to a coarse pulp )
salt to taste
Oil3 tablespoons

Method for kolhapuri masala

  1. Combine all the ingredients given above except for onions, tomatoes, salt and oil .
  2. Grind to a smooth paste using little water. Heat oil and saute onions till brown add tomatoes saute till oil separates.
  3. Add the above paste and salt, saute till oil comes above cool and store.

Ingredients for vegetarian kolhapuri 

Ingredients
Quantity
White board beans 1 cup fresh or dried ( I used dried ones that were soaked over night and boiled )
Peanuts1/2 cup boiled
Potatoes 1 cup cubed and boiled
kolhapuri gravyaccording to taste ( above made gravy )
garam masala powder1/4 teaspoon
Oil2 tablespoons
Coriander leavesto garnish
Saltto taste

Method for Gravy

  1. Heat oil in kadhai or a non stick pan add the kolhapuri gravy masala , garam masala , salt and little water adjusting the consistency of the gravy.
  2. Mix well . Cover with a lid and bring to boil . Add the boiled white board beans , peanuts and potatoes . Mix well .
  3. Simmer the gravy for five minutes letting all the flavours infuse into each other till oil separates .
  4. Check the consistency of the gravy . Taste and adjust . garnish with chopped coriander leaves.
  5. Serve hot with chapathis , pooris , naan or kulchas.


Paneer tikka

Share Button

ptik

Preparation Time : 15 minutes + marination time

Cooking Time : 8 -10 minutes

Serving : 4 members

Description

Paneer Tikka. This recipe post was sent to me by Hamidha Shabeer for the competition. She did not sent in a description so today’s post is just the recipe alone.

Main Ingredients 

Ingredients
Quantity
Paneer cut into cubes400gms
Hung curds 1cup
Ginger paste1 teaspoon
Garlic paste1 teaspoon
chilli powder1/2 teaspoon
Tandoori chicken masala1 tablespoon
Turmeric powder1/4 teaspoon
Cornflour1 1/2 tablespoon
Oil1 teaspoon
Saltto taste

Ingredients for Grilling

Ingredients
Quantity
red pepper
1/2 cut into squares
yellow pepper/green pepper1/2 cut into squares
tomatoes de seeded and cut into squares
2 firm ripe
onion cut to get square flakes1 big
oil for basting1 tablespoon

For garnish

Lemon wedges,chat masala.

Accompaniments

Green chutney.

Method

  1. Beat hung curds. (put curds in a cloth and let it hang till the water drains out)
  2. Add all the spices and ingredients except paneer to it and mix into a smooth paste.
  3. Marinate the paneer cubes in the mixture and put it in the refrigerator till serving time.
  4. Heat an electric grill.
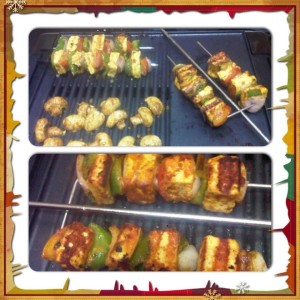
  5. Arrange peppers,tomatoes,paneer,onion slices in skewers as shown in the picture.
  6. Place it on the grill and cook till they are golden by basting oil in between.
  7. Serve sprinkled with chat masala and squeeze of lemon juice with green chutney.

Aubergine roll

Share Button

ar

Preparation Time : 10 minutes

Cooking Time : 10 minutes

Serving : 6 members

Description

Aubergine rolls. An easy to make starter with a few ingredients, aesthetically presented. The tang of tomatoes gives more zing to the rolls which is executed well and transformed into little wonders. When making these i tried rolling with bits of olives but felt it would be salty and avoided doing so with the rest. I made these for lunch to be sent over to a friends (priyas) place. I forgot to keep the olive filled rolls aside. The lunch was packed and sent over to priyas place. She called to thank me for the lunch and compliment me about the food. She liked everything but mentioned saying that the aubergine rolls were extremely salty. Only then did i realize that i packed the olive rolled aubergine rolls to her place. Well a flaw in me and my culinary experiment.

Ingredients

Ingredients
Quantity
Aubergine (big violet ones )2 sliced horizontally into thin slices
Mayonnaise 2 tablespoon
Saltto taste
Sugar1/4 teaspoon
Dried herbs ( oregano , rose Mary , thyme )
a pinch of each
Chilli flakes to taste
Basilica sauce 4 tablespoons ( I used barilla brand , available in all department stores , you can substitute with hot and sweet tomato sauce )
Olive oil2 tablespoons

Method

  1. Sprinkle salt over the thinly sliced aubergines and set aside for 5 minutes . This helps to remove the moister content in the aubergines and helps to take in some salt also .
  2. Pat the aubergines with a cloth and dry them . Heat 1/4 teaspoon of olive oil at a time and fry the aubergine thin slices, 1 minute on each side till it gets cooked through and gets soft and pile able . Set aside to cool .
  3. Mix all the other ingredients together . Taste and adjust . Apply the sauce mixture over the one aubergine slice .
  4. Place another aubergine slice over to sandwich them together . Then roll tightly and pin it with tooth pick .
  5. Do the same with all the aubergine slices and the sauce mixture . Serve hot or at room temperature .

Rajma galouti kebabs

Share Button

rajma

Preparation Time : Overnight soaking of rajma and 30 minutes

Cooking Time : 30 minutes

Serving : 6 members

Description

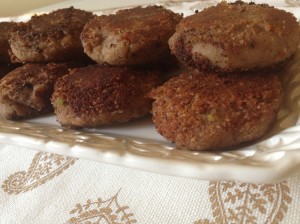
After breakfast was over at home , was all ready to start work for lunch . I get a call from my hubby dear saying we have guests at home for lunch . I had planed for a vegetarian lunch but that’s not a good enough menu for the carnivorous cousins of mine who were the guests for lunch . So changed the menu to the regular ravuthar guest menu with a mutton biriyani , chicken 65 , boiled egg , dalcha , onion raitha and a payasam . Having a big bowl full of left over red kidney beans boiled from the breakfast table . I wanted to use it up for lunch but something that goes well with my typical Muslim menu as well . Broke my head but nothing seemed to work . Finally googled and came across a rajma galouti kebab recipe in Sanjeev kapoor’s web site . Fell in love with the recipe as soon as I read it . Made slight changes as a few ingredients demanded were not available in my pantry . So added other ingredients instead and went ahead . The rajma gauloti kebabs were melt in the mouth that married along with the other dishes served at the lunch feast . These galouti kebabs were sent over to my elder mother – in – laws place as she is a vegetarian by choice and it travelled all the way to Coimbatore along with my cousin sister Aneez who had dropped in home in the evening to invite me for her daughters wedding . My left over rajma from the breakfast table served a treat to so many people at so many places.

Ingredients

Ingredients
Quantity
Red kidney beans (rajma)
2 cups
cashew-nuts 15
Poppy seeds (khuskhus/posto)1 1/2 tablespoons
Fennel seeds (shahi jeera)1 1/2 teaspoon
Cumin seeds
1 1/2 teaspoon
Green cardamoms1
Cloves2
Cinnamon2 inch stick
Saffron (kesar)a pinch
Pure ghee2 tablespoons + to shallow fry
Ginger chopped1 inch piece
Garlic chopped10 cloves
Green chillies 6 to 10 (finely chopped)
Warm milk1 tablespoon
Mawa (khoya) grated4 tablespoons
White pepper powder1 teaspoon
Salt to taste
Lemon juice1 tablespoon

Method

  1. Soak rajma in five cups of water preferably overnight. Boil in sufficient quantity of water until soft. Drain and set aside.
  2. Dry roast cashew nuts , khus khus , fennel seeds , cumin seeds , cardamoms, cloves and cinnamon. Cool and grind to a fine powder with out water .
  3. Soak saffron in warm milk . Heat two tablespoons of ghee in a pan, add ginger and garlic and sauté for a few seconds.
  4. Add green chillies and sauté for one minute. Add rajma and cook for three to four minutes. Add cashew nut powder stir-fry for four to five minutes.
  5. Add khoya, white pepper powder and salt, stir-fry for four to five minutes. Remove from heat. Cool and mash rajma to a smooth paste. (In case rajma paste is not firm, then cook paste further with addition of ghee till firm.) add soaked saffron.
  6. Adjust salt. Add lemon juice and mix thoroughly. Divide mixture into equal balls and press them lightly.
  7. Heat pure ghee in a frying pan and shallow fry tikkis until lightly coloured on both sides. Serve hot .

Notes

  1. While frying the galouti kebabs have the flame on medium heat always as you want a light golden brown colour and a crisp outer cover .
  2. Do not turn the galouti kebabs more than twice as the kebabs are very delicate and tends to break fast .
  3. Fry on one side for a minute or more then turn and leave to fry again for a minute over medium heat . Remove .
  4. Quite a tricky task but easy by following the above tips to shallow fry .