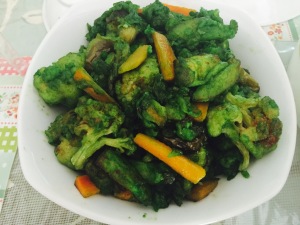
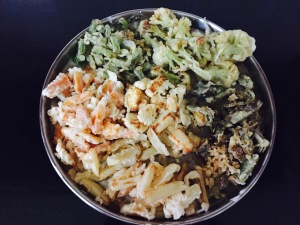
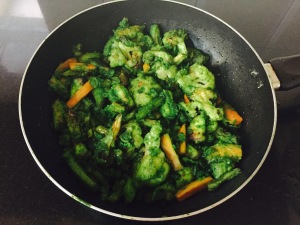
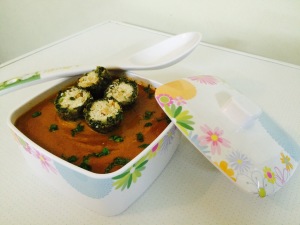
Herby green vegetable stir fry

Share Button

image1 (1)

FullSizeRender (10)

IMG_6051

IMG_6052

FullSizeRender (9)

FullSizeRender (8)

FullSizeRender (7)

FullSizeRender (6)

Preparation time  : 15 minutes
Cooking time       : 8- 10 minutes
Serves                 : 5 members

Description

Any dish I eat, the first thing is to feel the taste of it. Then my mind goes into what ingredients are used and how it is made to what technique of cooking is used. In case I find the guess interesting, I store it in my mind and use it later when I want to. This is one similar stored dish guess from a restaurant in my home town . Having to entertain with new vegetarian dishes is always stone breaking task for me. This came in handy when I had to pack a picnic lunch for a few vegetarian friends. I wasn’t sure about how this cook something new dish would be rated. To my surprise, this dish was a stunner, as it bought with it a melange of herby flavors. I was complimented so many times repeatedly following with a recipe please. As it is a hard feat to come up with vegetarian dishes for me, their compliments and recipe please sure made me think if this is possible. Food has its own way of charming me as always.. Guess that’s why I am madly, deeply in love with it no matter what..

Ingredients
Quantity
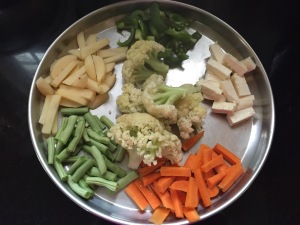
Carrot1 big cut into finger size strips
Beans8 cut each cut into two to get finger long pieces
Potatoes2 cut into finger size pieces
Capsicum1 big cut into finger long pieces
Cauliflower1 cup flower lets
Panner200 grams cut into finger size pieces ( I used one packet of store bought panner )

Ingredients for the batter

Ingredients
Quantity
Cornflour1 cup
Flour / maida1 cup
Saltto taste
White pepperto taste
Wateras needed to get semi think loose batter

Ingredients for the green sauce

Ingredients
Quantity
Mint leaves1/2 cup
Coriander leaves with stem1/2 cup
Green chillies4 to 6
Fresh basil / thulasi leaves6
Onion stem1/4 cup
Green food coloura pinch or more
Lemon juice1/2 a lime
Saltto taste

Other ingredients

Ingredients
Quantity
Oilto deep fry + 1 teaspoon to stir fry

Method

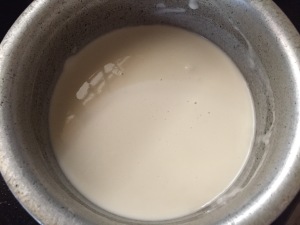
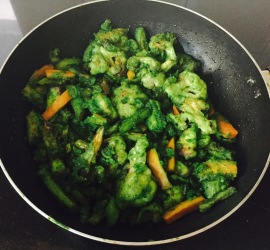
  • Mix all the ingredients together mentioned under the batter category to get a semi thick loose batter with no lumps.
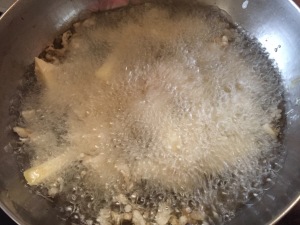
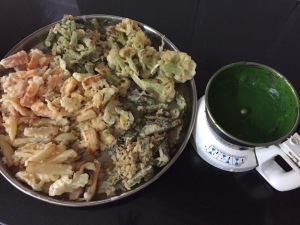
  • Heat oil to deep fry. Dip each cut vegetable and panner separately in to the batter and deep fry to golden and crisp. Drain and keep aside.
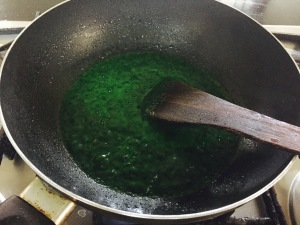
  • Grind all the ingredients mentioned under the green sauce together. Taste and adjust seasoning.
  • Heat a wide kadai / wok with oil to stir fry. Add the ground green sauce. Sauté until oil separates.
  • Top with the fried vegetable’s and panner. Toss well making sure all the sauce coats around the vegetable’s and panner well in Low flame.
  • Taste and adjust seasoning. Serve immediately as a side dish. Best served with pulao, biriyani, fried rice, chapathis and any type of rotis .

Notes

  • Best to do the last fourth step just a few minutes before serving as the vegetable’s tend to get soggy if done before.

Samai vegetable kolukattai

Share Button

image1

FullSizeRender (24)

FullSizeRender (23)

IMG_9655

IMG_9656

IMG_9657

IMG_9658

IMG_9661

IMG_9664

IMG_9665

FullSizeRender (22)

Preparation time :  20 minutes + over night soaking of millet’s
Cooking time      :  15-20 minutes
Serves                :  6 members

Description

I had no knowledge about millet’s and its benefits until recent when I went to a naturopathy hospital for a body detox where they used just millet’s for all meals. This sure was an awakening up grade to me. Took note of all the recipes from there and tried it out at home with results being great but a sure fail on the table with long faces. So all those recipes seem to be on rest in the hand written cook book as it is. But I was not ready to give up and what do I do with all the millets in my pantry. So every alternative day is a recipe trial day with millets keeping in mind it has to taste good and must be of an reinterpretation of any Indian main course that’s usually had for breakfast. This versatile kolukattai also is one such recipe that developed just like that in my mind. These novel tea time kolukattai’ are loaded with the Goodness of vegetables, dal and millet. It is a hard feat to come up with great vegetarian dishes for me. Here I some how cracked it, guess it was sheer fluke.. What ever let’s all celebrate the joy of healthy cooking by making this dish at all our homes.

Ingredients
Quantity
Little millet / samai arisi2 cups
Moong dal6 tablespoons
Whole pepper corns 2 teaspoons
Cumin seeds2 teaspoons
saltto taste
water3 cups
onion1 chopped
carrot1 chopped
beans4 chopped
cabbage1/4 cup chopped
green peas1/4 cup
Oil1 tea spoon
mustard seeds1/4 tea spoon
urad dal1/4 tea spoon
curry leavesfew
Grated coconut1 table spoon

Method for kolukattai

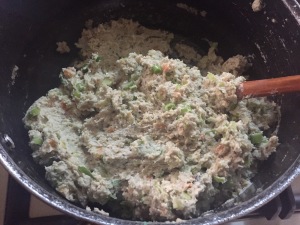
  • Wash and soak little millet in water overnight. Drain and grind to a coarse paste adding little water the next morning.
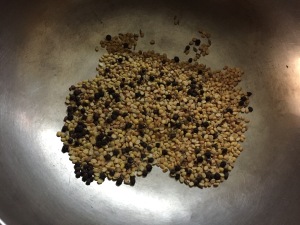
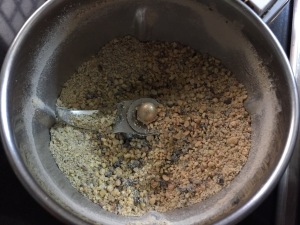
  • Dry roast moong dal to light golden in colour. Remove, cool completely and grind to a coarse powder with black pepper corns and cumin seeds.
  • Heat a non stick kadai with oil, add the mustard seeds, urad dal and curry leaves. Once they splutter top with the powdered moong dal mix and sauté for a minute.
  • Add chopped vegetables and onion. Sauté with salt to taste till half cooked with a sprinkle of water.
  • Add the coconut and mix well. Pour the soaked ground little millet mixture with water and keep stirring till it gets to thick dough consistency in medium heat for about 10-15 minutes.
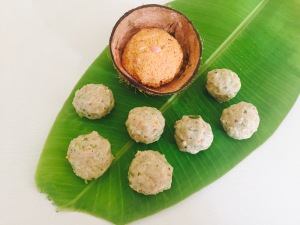
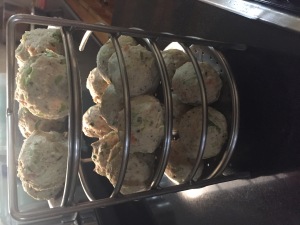
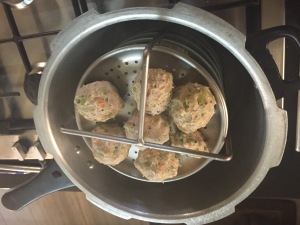
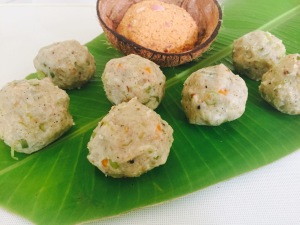
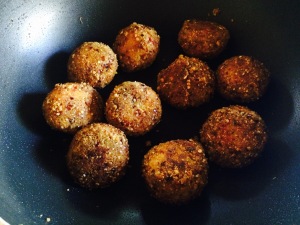
  • Take out and roll into lime size balls and steam in a greased base for 8 to 10 minutes, like for idle or ediappam. Serve hot with chutney.

Chutney ingredients

Ingredients
Quantity
Coconut grated3/4 cup
Fried dried red chillies4
Tamarindgoose burry size ball
Saltto taste
Water very little
Small onions1/2 hand

Method for chutney

  • Grind all ingredients together except for small onions to a coarse paste adding very little water.
  • Add the small onions and grind just to crush them coarsely. Mix well. Taste and adjust seasoning. Remove and serve with kolukattai.

Narthang Kaaei Rasam

Share Button

FullSizeRender (21)

FullSizeRender (1)

FullSizeRender (20)

FullSizeRender (19)

FullSizeRender (18)

FullSizeRender (17)

FullSizeRender (16)

FullSizeRender (15)

Preparation time :  20 minutes
Cooking time      :  10-15 minutes
Serves                :  5 members

Description

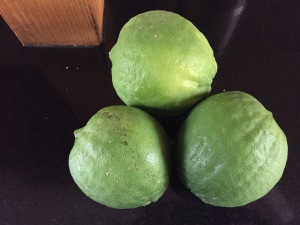
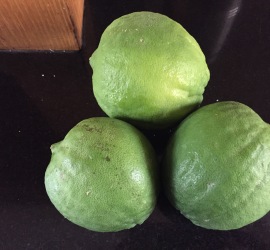
Living the old school way of managing an edible garden at home that teaches you patience and great watchfulness. The joy you get when it gives back through those edible jewels which is when you realize it’s worth all the sweat under the sun, watering done to it and so on and so forth. Blessed me, did get three citron’s from my back yard. Usually it’s always pickled. But this time having a lot of pickle at home opted to do some thing else. So planned to make rasam with them which is a regular on the table for lunch every day. My true blue South Indian hubby dear always has rasam for his second helping alone. But with this rasam it continued for a third helping, omitting the last helping of rice with curd and finishing off with a cup of the rasam to drink as well. My mind did go to the days of me planting the citron first to it growing , then blooming with flowers to give these citron’s. What a long journey it has been and to see it satisfying all of us through our tummies was pure bliss. The earth has so much to provide our needs, let us humans not destroy it with our greed. Take care of it and it will give back in ample as always.

Ingredients
Quantity
Thoovar dal1/4 cup
Tomato1 big chopped
Turmeric powder1/4 teaspoon
Saltto taste
Citron juice2 tablespoons
Asafoetida1/4 teaspoon
Coriander leavesfew chopped

Ingredients for rasam powder

Ingredients
Quantity
Coriander seeds3 teaspoon
Thoovar dal1 teaspoon
Black whole pepper corns1 teaspoon
Cumin seeds1/2 teaspoon
Red dry chillies4

Ingredients to temper

Ingredients
Quantity
Oil1/4 teaspoon
Mustard seeds1/4 teaspoon
Curry leavesfew

Method

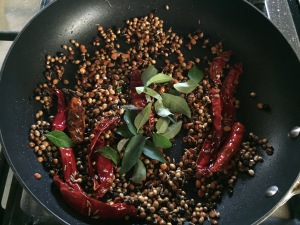
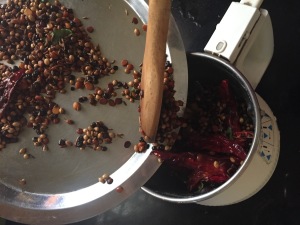
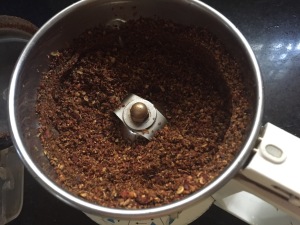
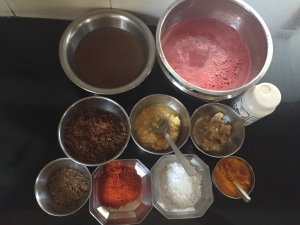
  • Powder all the ingredients mentioned below the rasam powder ingredients together to a fine powder with out frying.
  • Cook Thoovar dal with turmeric powder adding 3 cups of water.
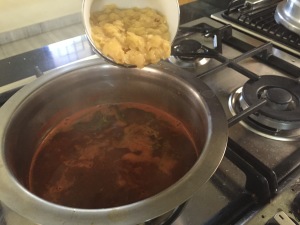
  • Boil chopped tomatoes with 1 cup water. Add salt, asafoetida and cooked Thoovar dal. Mix well and bring to boil.
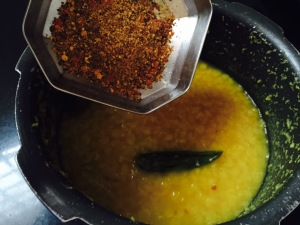
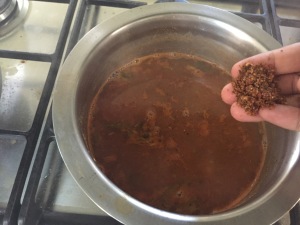
  • Add the rasam powder and boil further for five minutes.
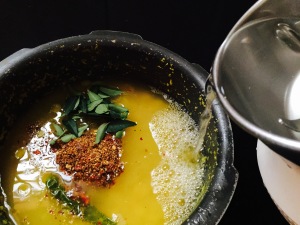
  • Heat oil, crackle mustard seeds and curry leaves. Pour over the rasam.
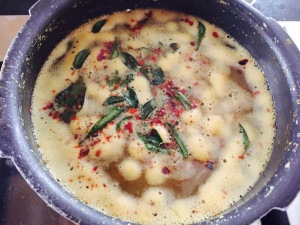
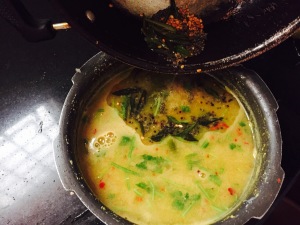
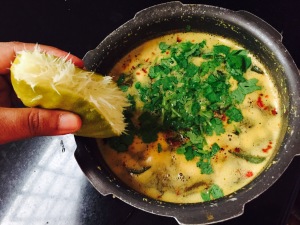
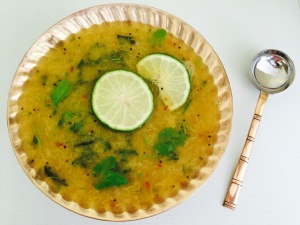
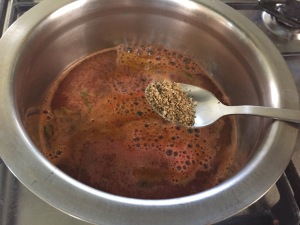
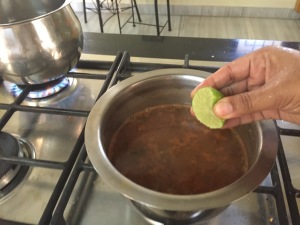
  • Garnish with chopped coriander leaves. Add the citron juice. Mix well, taste and adjust seasoning. Serve with rice.


Kuthiraivali paniyaram

Share Button

FullSizeRender (28)

IMG_9085

IMG_9087

IMG_9088

IMG_9091

IMG_9094

IMG_9121

FullSizeRender (23)

FullSizeRender (22)

Preparation time  : 10 minutes + 3 hours soaking time
Cooking time       :  2 minutes for each batch
Serves                 :  4-6 members

Description

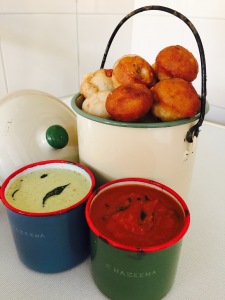
Cooking with millet’s is so in now a days. Like fashion being a circle and takes its turn over and over again. Food also follows the same as all these recipes with millet’s are age old recipes that our ancestors made in daily basis. It’s just that it became a forgotten story in between and now it’s started to pop up in the hit list of recipes. I am trying my best to serve healthy Indian food for breakfast at home with trial and error as always. This was a sure hit and I just loved the way the paniyaram’s puffed up. As alway’s I clicked pictures and sent it over to friends saying today’s breakfast trial. One good friend suggested saying try taking pictures with chattinad vessels. The light bulb moment sparked in me, as I remembered my mom giving me a lot of mangu vessels ( no idea what it’s known as in English ) when I was married of, that are kept safely in the loaf at home. My mom’s best friend Alamu Akka is from karaikudi. I remember my mom being blown away with her friends eldest daughters wedding in karaikudi as they have a custom of exhibiting all that they give the bride from the smallest to biggest thing possible. My Crazy breed mom did the same for my wedding too where I felt embarrassed a lot as this was so new to us and I personally felt it was way too much showing off. Well that’s my personal opinion, no offence to any one. She in fact had an old man come home for nearly four months every day to write my name in each vessel itched by hand using an iron nail sort of thing. Even in these picture’s my name is visible in the chutney containers. But thank god she did give me these vessels as they are put to use in the right way for me to show case the food I make.. Oops again back to square one of showing off in a different way …. I guess every thing is like fashion it runs in a circular motion.

Ingredients
Quantity
Barnyard millet / kuthiraivali arisi1 cup
Raw rice / pacha arisi1/4 cup
Urad dal1/4 cup
Fenugreek seeds1/8 teaspoon
Onion1 big chopped
Curry leavesfew chopped
Coriander leavesfew chopped
Green chillies1 chopped
Grated ginger1/4 teaspoon
Saltto taste
Soda - bi - carbonate1/8 teaspoon
Oil1/8 teaspoon for each paniyaram

Method

  • Soak barnyard millet, raw rice, urad dal and fenugreek seeds in water for three hours.
  • Drain and grind to a smooth paste adding very little water.
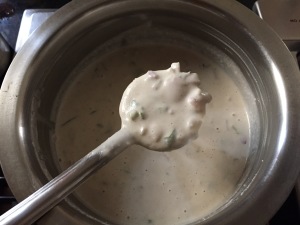
  • Add salt, onion, green chillies, coriander leaves, curry leaves, grated ginger, soda – bi – carbonate to the batter and mix well.The batter must be of dosa batter consistency.
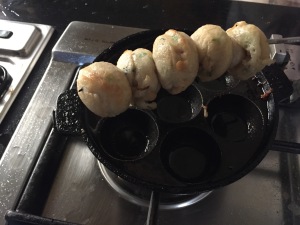
  • Heat an appe pan / kuli paniyaram pan with 1/2 teaspoons oil in each dent. Pour a small ladle of mixed batter into each dent.
  • Cook until you see bubbles on the top and the bottom gets a bit crisp.
  • Turn over the paniyaram ‘s and cook further for a minute or so until cooked through in medium heat . Remove from heat and serve hot with chutney of choice.

Notes

  • Serve these paniyaram’s immediately as they tend to get hard once cold.

Watermelon Rasam

Share Button

IMG_9078

IMG_8931

IMG_8933

IMG_8935

IMG_8937

IMG_8939

IMG_8941

IMG_8944

IMG_8946

IMG_8947

IMG_8954

IMG_8957

IMG_8962

FullSizeRender (18)

IMG_9079

IMG_9080

Preparation time  :  30 minutes
Cooking time       :  25 minutes
Serves                 :  6-8 members

Recipe source : http://puliyogaretravels.com

Description

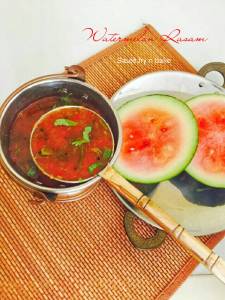
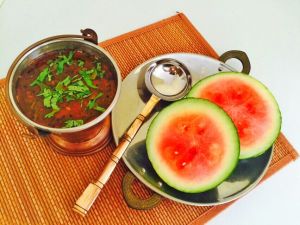
As usual, my messenger inbox had a message randomly from some one asking me about the food culture and foodie joints at my home town. As I always answer to foodie querries I did do justice by letting the concerned person know about the little I knew. Then I get an invitation asking if I can cook and show a recipe for their television show. The invitation sure did excite me but luck didn’t favour me as I was busy leaving my home town for a long family holiday abroad. Made sure I could help the crew and concerned person as much as I could with contacts and other details they wanted. Yet again another invitation in a few months time from the previous offer. I didn’t want to miss this opportunity this time . Grabbed it with full enthusiasm and got to meet that random messaged fellow ( well at that point of time he was addressed so in my mind ) in person. We did three shoots together and I got to know the random messaged person better. Well it’s none other than Rakesh Raghunathan, the host of sutralam suvaikalam television show in news 7 Tamil channel who has a blog in the name of http://puliyogaretravels.com/ where he shares his foodie travel experience and recipes too. Him being a true blue foodie as myself, we share a lot of similarities in wanting to explore and know all about food, culture, history and its existence. I was so inspired about his posts of the margazhi month canteens in the sabas of chennai. I made sure to visit the Saba canteen with him and got to relish authentic Brahmin sweets with good filter coffee. The canteen that we went was mount batten mani Iyer’s canteen. The following week in the television, Rakesh had showed mount batten mani Iyer himself cook and show two recipes. Both the recipes were out of the box category recipes that I had added them to my next try list. My next try list was put aside with a wedding in the family and was fading away slowly. I get a request from Rakesh asking me if I can try out a recipe for him?? Cooking and me… I can’t say no to that. So accepted it and to my surprise it was my next try listed watermelon rasam recipe that mount batten mani Iyer had made. Started making it along with my regular cooking at home and the rasam was done only after I finished my entire every day home cooking. My cook, requested me never to make this elaborated rasam recipe again. But the results were mind blowing with the right amount of heat, tang and sweetness all in one. Well, as the saying goes no pain no gain, this recipe sure proves it right.

Ingredients
Quantity
Tamarind juice1 cup (from a tiny ball of tamarind)
Turmeric powder1/4 teaspoon
Red chilly powder1/2 teaspoon
Asafoetida1/4 teaspoon
Saltto taste (preferably rock salt)
Jaggery1/2 teaspoon
Watermelon juice3 cups (strained without seeds)
Rasam powder 1coarse powder of whole pepper & Cumin seeds (2:1 ratio)
Ghee2 tbsp
Cooked toor dhal1 cup (this should be extremely watery and should have no trace of dhal)
Coriander leaveschopped few
Rasam powder 2teaspoons for garnish (recipe below)

Note on rasam powders 1 & 2

There are 2 powders that need to be used to make this rasam. Rasam powder 1 should be added while making the rasam and Rasam garnish powder to be added after the rasam is made.

Ingredients to make rasam powder 2

(this powder to be made preferably before making the rasam for freshness and added flavour)

Ingredients
Quantity
Ghee1 teaspoon
Asafoetida1/4 teaspoon
Toor Dhal1 and a 1/2 tablespoons
Channa Dhal1 and a 1/2 tablespoons
Pepper1 and a 1/2 tablespoons
Coriander seeds3 tablespoons
Whole dry red chilly10 (can increase if you want more spice)
Cumin seeds1 teaspoon
Curry leavesfew

Rasam powder 2 (recipe)

  • Heat ghee in a wok, add toor dhal, channa dhal and fry till golden brown and add pepper corns.
  • Once they pepper corn splutters, add coriander seeds and fry to golden brown .
  • Add dry red chillies and fry till the red chillies inflate and are fried.
  • Add curry leaves and once you hear them crackle add some cumin seeds and immediately turn off the flame.
  • Cool this mixture completely and grind to a coarse powder.

Method for the rasam

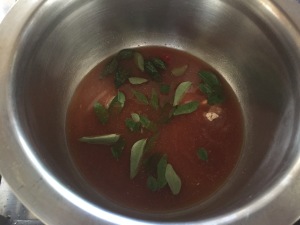
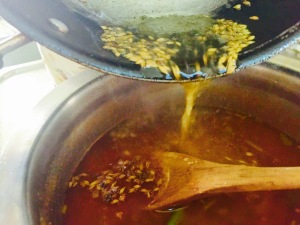
  • Pour tamarind juice into a wok and add turmeric powde, red chilly powder, asafoetida, salt, curry leaves and jaggery and bring to a boil.
  • Add a little water to the boiling mixture if you think it is a little too thick. Let it boil till the raw smell of the tamarind fades and top with chopped coriander leaves.
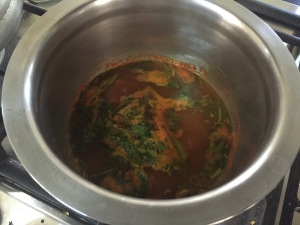
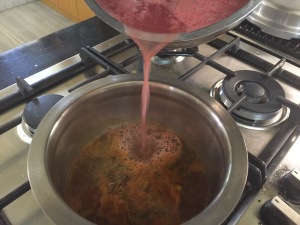
  • Now add the rasam powder 1 .Allow to boil and add the watermelon juice.
  • Add some pepper powder and let it boil. The colour is a lovely deep red colour.
  • Add the cooked dhal water and let it boil just a little bit.
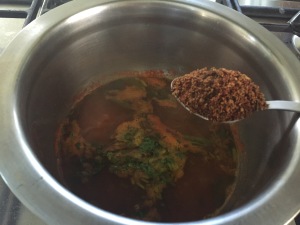
  • Add the rasam powder 2 that is used to garnish and immediately turn off the flame.
  • Heat ghee in a separate wok, temper mustard seeds, cumin seeds and pour over rasam.
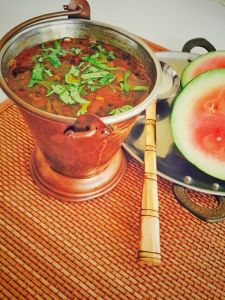
  • Add a squeeze of half a lemon. Mix well. Check seasoning and enjoy the rasam with hot boiled rice.

Note : The tempering and squeezing of lemon is done after turning off the stove always.


Cucumber Adai Dosa

Share Button

IMG_5916

FullSizeRender (10)

FullSizeRender (9)

Preparation time : 20 minutes
Cooking time      : 1 and a 1/2 to two minutes for each dosa
Serves                : 3 members

Description

Cucumbers are used only for salads or just to munch for time pass at home. I have never ever cooked a dish with cucumbers so far. Came across a recipe that used cucumbers to make rotis. Grabbed the idea and tried this adai dosa version for the true blue South Indian I am. Not knowing what the texture of a cooked cucumber will result in, I eagerly waited for the first adai dosa to be cooked. The adai looked stunning with an eye popping splash of colors. The first tasting was done by my cook and myself together. Both of us had raised eyebrows and wide open eyes as it tasted divine, light and healthy with a crisp exterior, soft interior and the bite of cucumbers and onions were to die for. The perfect harmony of goodness and taste that’s mildly flavoured and quick to stir up. Made sure to high lighten the quick and healthy adai dosa by serving it with three chutneys. my cheats way just to impress my loved ones when in doubt about any new dish, serving it with many accomplishments. solving the mystery with in me of what to do if the dish will be a flop show. Sure this new avatar cucumber adai dosa will do full justice at all your home table’s as it did to mine.

Ingredients
Quantity
Cucumbers grated with skin 3 cups
Rice flour3 cups
Green chillies6 chopped
Ginger grated1 teaspoon
Garlic1 clove grated
Tomato1 chopped
Onion1 big chopped
Saltto taste
Soda -bi - carbonatea pinch
White Sesame seeds1/2 teaspoon
Turmeric powder1/2 teaspoon
Coriander leaves1/4 cup chopped
Spinach leaves1/4 cup chopped ( optional )
Oil4 tablespoons

Method

  • Squeeze out the excess water from the grated cucumbers and reserve the water.
  • Add all the other ingredients together with the reserved cucumber water and water to get a semi thick loose batter ( like dosa batter ). Taste and adjust seasoning.
  • Heat a gribble. Grease with little oil. Pour a big ladle full of batter and spread a little to get a round disc of 1/4 inch thickness.
  • Drizzle little oil over the edges and cook for a minute in medium flame.
  • Flip over and cook further for another 30 to 50 seconds.
  • Remove from heat and serve hot with choice of chutneys.

Spinach panner balls in butter gravy

Share Button

FullSizeRender (5)

IMG_7631

FullSizeRender (4)

IMG_7633

IMG_7635

IMG_7634

FullSizeRender (3)

FullSizeRender (2)

FullSizeRender (1)

Preparation time  :  30 minutes
Cooking time       :  35 minutes
Serves                 :  5 members

Description

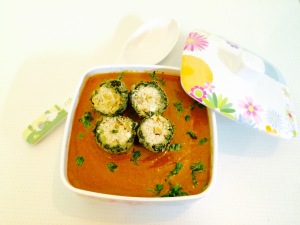
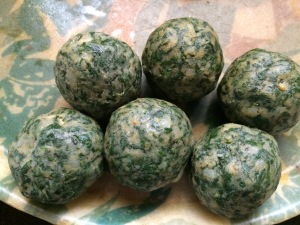
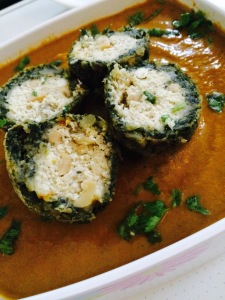
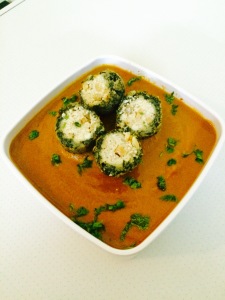
The carnivores me is trying my best to add more of vegetarian dishes into my regular menu as there is a big complaint that my posts are over dominated with non – vegetarian dishes. To break this, I have been into trying a lot of vegetarian dishes as I am clueless with the flavors and combinations that work wonders with vegetarianism. This recipe is a try from one of my stained recipe books but have no clue as to whose recipe it is. My instinct’s tell me it might be rupal bandarie’s. Whose ever it is, it sure is for keeps. I had my doubts about the outer cover of spinach not binding together but I was put to shame this time. I have done my bit of trimming and changes to the original recipe from my recipe book. The final visual look with the contrasting colors of green, white and red sure imparts vibrancy to the dish making you want to crab the dish. Deep contrasting flavours with simple but effective combination of ingredients that is sure to feed and please a crowd. The beauty of this recipe is in its multitude of textures, soft and firm, crisp and juicy. I got so addicted to this dish, I actually ended up eating it three days in a row. Shameless me :-)).

Ingredients for the spinach balls

Ingredients
Quantity
Boiled Spinach300 grams chopped
Gram flour3/4 cup
Garlic3 chopped
Green chillies2 chopped
Cumin1/2 teaspoon
Saltto taste
Oil1 tablespoon

Ingredients for the filling

Ingredients
Quantity
Grated panner30 grams
Red chilli flakes1 teaspoon
Saltto taste
Fennel seed powder1 /2 teaspoon
Cashew nuts6 powdered
Poppy seeds1/2 teaspoon

Other ingredients

Ingredients
Quantity
Cornflour1 cup
Oilto deep fry

Method for spinach balls

  • Heat oil in a pan. Crackle the cumin seeds. Top with garlic and green chillies. Sauté to golden.
  • Add the gram flour and stir for 3 minutes. Top with the boiled spinach with out water. Season with salt to taste.
  • Mix well and cook until the spinach starts leaving the sides. Remove from heat and cool completely.
  • Mix all the ingredients together for the panner filling.
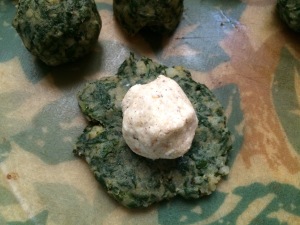
  • Take a lemon size ball of spinach mix. Flatten it. Place a small ball of panner in the centre of the flattened spinach and bring the edges of the spinach towards the centre covering the panner ball. Roll to a ball gently with no cracks. Do the same to get more balls.
  • Roll each ball over cornflour. Heat oil to deep fry. Drop the balls in batches of four at a time and deep fry to golden. Drain and set aside.

Ingredients for the gravy

Ingredients
Quantity
Onion3 big sliced
Tomato 6 big chopped
Cinnamon2
Clove2
Cardamom3
Ginger garlic paste1 teaspoon
Butter5 table spoon
Oil1 table spoon
Sugar1 teaspoon
Saltto taste
Cashew nuts10
Chilli powder1 table spoon
Coriander powder1 1/2 table spoon
Turmeric powder1/4 tea spoon
Fresh cream1/4 cup
Kasuri methi leaves1/2 teaspoon crushed
Coriander leavesfew chopped

Method for gravy

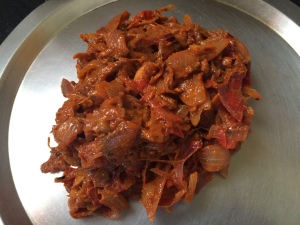
  • Heat oil with 4 table spoons butter. Add cinnamon, clove, cardamom and cashew nuts. Fry to light brown. Add onion and fry to transculent. Top with ginger garlic paste and fry till crisp. Add the tomato, chilli powder and coriander powder. Mix well and fry till the tomatoes let out some juices out.
  • Cool the gravy and blend to a smooth paste. Strain. Add 1 tablespoon butter, sugar, salt to taste, cream, kasuri methi to the strained gravy and simmer till all the flavours infuse together. Taste and adjust seasoning.
  • Drop the spinach dumplings and cook in low heat for three minutes. Serve hot by cutting the dumplings into equal halves and placing them over the gravy.
  • Garnish with cream , butter, chopped coriander and grated panner. Serve hot with roti’s or pulao’s.

Mushroom 65

Share Button

IMG_4935

IMG_4936

Preparation time  : 20 minutes + 3 hours marination time
Cooking time       :  5 minutes
Serves                 :  4 members

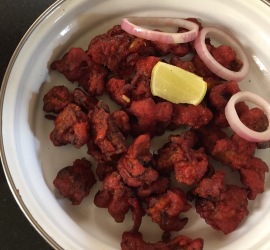
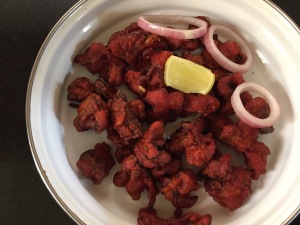
Description

From the first time I got to see mushrooms in colourful story books from our school library to wild mushrooms grown between the grass lands of the Nilgiris. This special fungus did make me ponder to think about its taste, texture and smell. Those days back in 1980’s it was not available in India like now a days. I remember, when on a weekend outing with my parents we dined at the fern hill palace hotel. As always, I was looking for out of the box dishes from the menu card and there it was in block letters ” MUSHROOM OMELETTE “. I didn’t want to miss the opportunity of tasting mushrooms and placed an order. My dad, made sure to warn me ahead saying.. You are to eat the omelette even if you don’t like it looking at mom and my little brother, winking and making fun of me. My long awaited mushroom omelette arrived, excited, anxious me took my first bite of the omelette from my fork. As I started to chew, I felt a meaty textured, chewy bits mushrooms wrapped over eggs and melted cheese. I did like the taste and flavours of the mushrooms. The ambience of the Swiss chalet fern hill palace with its wooden carved bargeboards, cast iron gates and manicured garden with fir and pine tree’s sure did add in more glamour to the mushroom omelette which made me feel like a princess dining. My dad was curiously looking at me, checking out if I am going to waste the omelette. I told all of them it tastes really good and shared a bite with them too. My long quest of wondering about mushrooms came to an end with giving me a cherished memory itched with in me for ever. Coming to this dish, it’s just a vegetarian version done by substituting mushrooms instead of chicken following the chicken-65 recipe. Food always has its own way of surprising us.. I hope this humble recipe also does the same to each one of you.

Ingredients
Quantity
Button mushrooms1 packet cleaned whole
Ginger garlic paste1/4 teaspoon each
Chilli powder1 tablespoon
Turmeric powder1/4 teaspoon
Curd1/4 cup
Cinnamon1 inch piece
Cloves2
Cardamom1
Pepper powder1/4 teaspoon
Cumin powder1/4 teaspoon
Lime juice1/2 lime
Vinegar1/4 teaspoon
Saltto taste
Orange Red food coloura pinch
Cornflour1 tablespoon
Maida1 tablespoon
Egg1 ( optional)
Oilto deep fry

To garnish

Ingredients
Quantity
Onion1 sliced to rounds
Lemon wedgesFew

Method

  • Grind all the ingredients together except for the mushrooms to a smooth paste.
  • Marinate cleaned mushrooms in the masala paste for 3 or more hours.
  • Heat oil to deep fry in a heavy bottomed pan. Fry mushrooms in batches for 5 minutes.
  • First 1 minute on high heat and then on medium heat for 4 minutes. This way you get a crisp out side and a soft, moist cooked mushrooms inside.
  • Once the mushrooms are fried, drain. Garnish with sliced onions and lemon wedges over the mushroom 65 and serve hot .

Katta metta podi kuli paniyaram’s

Share Button

image1
 
image2
 
image3
 
Preparation time : 30 minutes
Cooking time : 20 minutes
Serves : 4 members
 
Description
I am getting into a habit of serving only home made goodies for any one who drops in for a brunch at home. Good for me as I am learning the art of coming up with new dishes with cupboard friendly ingredients from my pantry with in a limited period of time (it surely does feel like the master chef mystery box challenge) but a very bad news for my cook and help at home. As the minute I start looking into my refrigerator for veggies, fruits, leftovers and a quite panicked walk in my store-room… They get to know that’s it our peace is shattered for the next one hour or more. Initially they would just gaze at me thinking what is this mad lady up to.. Now a days they are so used to it that as I am working on a dish, my cook asks me should I prep to coat the snack or are you going to steam it… My help comes up with how should I chop these veggies for the next dish.. We make a great team and slowly even they have started to enjoy as I do. The best part, they know no dish is supposed to go out of the kitchen with out a picture being taken. Even at times when we are running late to entertain our guests… They both so sweetly switch on all the lights in the kitchen gearing up for a photo shoot and ask “amma, light poothuma.. Ellai off panna va” which means is the light enough or do we have to switch it off. Oops coming to the dish… This dish was also born as such with a time frame to entertain my friend Sheela and her two little kids coming over for tea. Her son just went head over heels with these paniyaram’s and in fact Sheela did ask me to send over the same dish on his birthday a few days back, just to surprise him. I did and I am sure this will be itched with in him for ever to be cherished, shared and forwarded with his friends, cousins, his children and his grand children too..
 
Ingredients for coriander mint chutney

Ingredients
Quantity
Coconut 1/4 cup
Ginger a tiny piece ( just a tit bit size)
Coriander leaves with stem 1/4 cup
Mint leaves 8 leaves
Green chillies 4 to 6
Tamarind a pinch
Salt to taste
Curry leaves2
Jaggery a tiny piece

Method for the coriander mint chutney
Grind all the above ingredients together to a smooth paste of semi thick spreading consistency by adding very little water. Taste and adjust seasoning and set aside.

 
Sweet chutney

Ingredients
Quantity
dates8
jaggery1 table spoon
black salt1/4 tea spoon
tamarind pulp2 table spoons
saltto taste
chilli powder1 tea spoon
cumin powder1/2 tea spoon
Method
1. Boil all the ingredients together with little water for 8 minutes.

2.Cool and blend to a smooth paste. Keep aside.

Ingredients for kuli panniyaram 

Ingredients
Quantity
idli batter2 cups
small onions1/2 hand chopped
green chillies1 chopped finely
ginger1/4 inch piece grated
curry leavesfew chopped
coriander leavesfew chopped
soda - bi - carbonatea pinch
cumin seeds1/4 teaspoon
saltto taste
waterlittle
oil4 tablespoons

Method

  • Mix all the above ingredients together except for oil, to get a semi loose consistency batter. Set aside for 10 minutes.
  • Heat a non-stick kuli pariyaram griddle with 1/4 teaspoon oil in each dent on the griddle
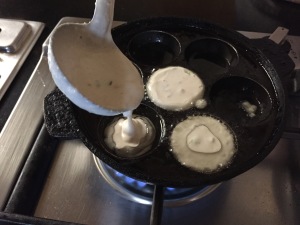
  • When oil is hot, pour 1 1/2 tablespoons full of batter mixture into each dent and cook for 30 seconds.
  • You will find bubbles on top of the batter in each dent, then turn the kuli pariyarams over with a help of a spoon or a kuli pariyaram stick
  • Cook again for a minute on medium heat till cooked through. Remove and keep aside.

Other ingredients

Ingredients
Quantity
Oil 1 tablespoons
Idli powder / gun powder 1 to 1 1/4 cups

How to proceed

  • Heat oil in a non-stick pan. Add the coriander mint chutney and the sweet chutney. Mix well and bring to boil and cook until thick and saucy. Taste and adjust seasoning
  • Add the kuli panniyarams and toss well by moving the pan making sure all the chutney is being soaked by the kuli paniyaram’s evenly all over.
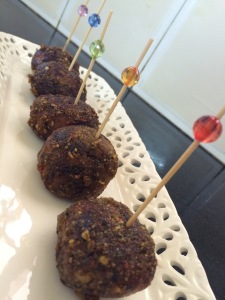
  • Once no chutney is remaining, sprinkle the idli powder all over and toss well. Lower the flame and roast the kuli paniyaram’s for 5-6 minutes tossing every now and then, making sure to get a crisp golden outer crust with out burning them. Poke tooth picks into each crisp kuli paniyaram’s and serve as a finger food in style.

Notes

  • At times I make the same by substituting with our regular tomato chutney and white coconut chutney. Following the same method for a savory version.

Cheesy whole stuffed gobi with butter masala

Share Button

image1
 
image2
 
image3
 
image4
 
image5
 
image6
 
image7

Preparation time : 30 minutes
Cooking time : 1 hour 10 minutes
Serves : 6-8 members

Description
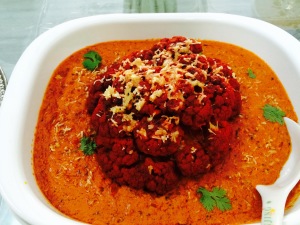
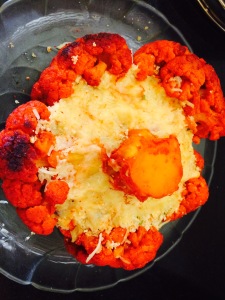
Having to entertain vegetarian guests is always a ride over a rocky road for me as I know very little vegetarian gravies or dishes. With the hype of me being addressed as a great cook and entertainer through food (no self praising please..), I have to push myself to keep up to the demands. This dish was made for a gang of friends that I got to connect through the new age world wide net getting to see each other for the very first time with most of them being vegetarian’s. I always wanted to do a whole cauliflower dish. This time I wanted it to be a whole tandoori cauliflower. Prepped and did so but last minute, I was short of any veggie or panner to be added to a butter gravy. The whole grilled cauliflower was sitting right next to the gravy in the kitchen counter. My brain sparked with an idea and I just placed the whole cauliflower tandoor over the gravy and there was the dish that happened with in a fraction of a second in my mind. This dish was vanished with five star rating from all. I had to pat myself for this genius idea (self praising again… Please stop it) so my two individual dishes got attracted to each other, fell in love and got married finally…giving way for all of us to relish their sweet little love story too.

Cheesy stuffed Whole gobi tandoori with butter masala

Step -1 

Ingredients for the cauliflower tandoori

Ingredients
Quantity
Whole Cauliflower1 medium size
Chaat masala powder 1/2 teaspoon
Cream 1 teaspoon
Garlic paste 1/2 teaspoon
Ginger paste 1/2 teaspoon
Lemon juice 2 teaspoon
Red chilli powder 1 teaspoon or to taste
Salt to taste
Cumin powder 1 teaspoon
Garam masala powder 1/2 teaspoon
Oil 1/ 4 teaspoon
Hung curd 1/2 cup
Red food color little ( optional)

Method for the cauliflower

  • Clean the whole cauliflower by removing the side stalks, leaves and the stem to a level that the cauliflower remains whole and when place on a plate stands straight with out tilting over to the sides.
  • Drop the whole cleaned cauliflower into a bowl of boiling water (not over the flame) with salt. Let it remain for ten minutes, helping worms and other impurities come out. Remove and wash well. Cool completely and wipe with a cloth to remove excess water and dampness.
  • Grind all the ingredients mentioned above except for the cauliflower to a smooth paste. Check seasoning. Apply and rub all over the whole cauliflower and marinade for four hours in the refrigerator.
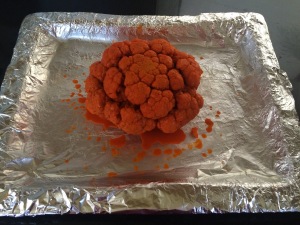
  • Pre heat oven to 180 degree Celsius for ten minutes. Place the marinated cauliflower over a baking tray lined with foil paper that’s greased with oil. Bake for 30-40 minutes until a nice crisp crust is formed. Remove and set aside.

Step -2 

Ingredients for stuffing

Ingredients
Quantity
Panner 250 grams crumbled
Cashew nuts 2 tablespoons chopped
Raisins 1 tablespoon
Poppy seeds (khus - khus) 2 tablespoons
Grated cheese 2 tablespoons
Green chillies 2 chopped
Salt to taste
Mozzarella + Parmesan cheese grated 1/2 cup

Method

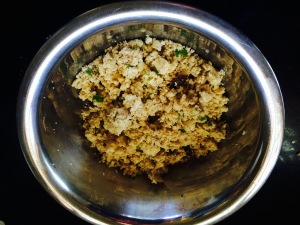
  • Mix all the above ingredients together. Taste and adjust seasoning.
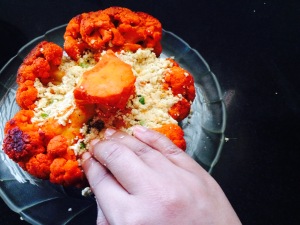
  • Turn the roasted whole cauliflower up side down. Stuff it with the planner filling tightly in between the stalks of stem. Top with half the grated mozzarella and Parmesan cheese. Grill for 5 to 8 minutes in a pre heated oven or microwave for 1 minute in the microwave to melt.
  • Remove and cool completely. Sprinkle the remaining mozzarella and Parmesan cheese over the top of the cauliflower and grill again for 5-8 minutes or microwave for a minute until the cheese melts. Keep aside.

Step -3

Ingredients for the butter gravy

Ingredients
Quantity
cashew nut 50 grams
melon seeds 50 grams
(Soak together in warm water for 30 minutes and make fine paste.)
Finely chopped onions 1/2 kg
Oil 1/ 4 cup
Ginger garlic paste 2 tablespoons
Tomato paste 1/4 kg ( blanch the tomato ,remove the skin and mark it into paste. )
cardamom 3
cloves3
cinnamon 1/2 inch stick
Chilli powder 1 tablespoon
Coriander powder 1 tablespoon
Cumin powder 1 teaspoon
Turmeric powder 1/4 teaspoon
Tomato sauce 2 teaspoon
Butter 2 tablespoons or less
Cream 1/4 cup
Dry fenugreek or kasuri methi 1 teaspoon
Garam masala powder 1/4 teaspoon
Cardamon powder 1/4 teaspoon
Red colour 1/4 teaspoon

Method
In a non stick pan add oil, cardamom, cloves & cinnamon. sauté for a minute. add chopped onions, sauté till golden brown.
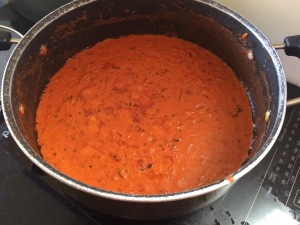
Add ginger garlic paste, sauté till the raw smell goes then add tomato paste, cook in slow flame and keep stirring to avoid burning, (this step is very important). Add cashew & melon paste, chili powder, coriander powder, turmeric powder, cumin powder, cardamom powder and tomato sauce. Mix well and sauté until oil floats on top. Add water to get the desired gravy consistency and boil with butter. Sprinkle dry fenugreek, red colour and garam masala powder. cook for another two minutes. Taste and adjust seasoning. Remove from heat.

Step -4 

How to assemble and serve

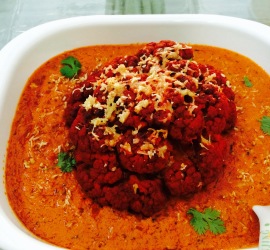
  • Pour the butter gravy on to a flare shallow large plate. Drizzle cream all over.
  • Place the cheesy stuffed grilled whole cauliflower in the center of the butter gravy.
  • Garnish with coriander greens and serve hot with rotis or pulao’s.