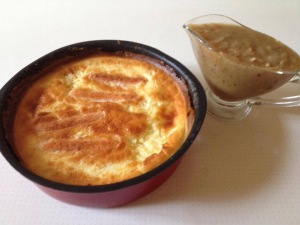
Toad in the hole with onion gravy

Share Button

image (23)

Preparation Time : 30 minutes

Cooking Time : 1 hour

Serving : 4 members

Description

Toad in the hole . Sounds like a short story title in a story book , isn’t it ? But it’s the name of this dish .  This recipes is from the magazine “recipes “, my brother had sent me as a surprise a few months bake . Not knowing what to cook for breakfast when my daughter and son – in – law were here . Was going through this magazine and came across this recipe . Sounded wired , easy and nice . Gave it a try and was quite bland and light . I would prefer adding some dried herds and chilli flakes to suit our Indian pallet . Very English thought . Now the word “English” just takes me to all the compliments I get now a days for my write ups ( more than my recipes at times :-)) ) I myself didn’t know I had this writing skill in me until I started my page . But I still feel my English teachers mrs .padmini menon and mr . Victor selvin  are to take full credit for my write ups . Mrs . Padmini taught me until my 4 th standard . She was the one who taught me how to use a dictionary . We were asked to write down five new words from the dictionary every day with its meaning and frame a sentence using the word as home work . This helped me to gain knowledge in knowing new words . And mr . Victor selvin taught me from my 6 th standard on wards . His vocabulary and way of teaching and pronouncing words always excited me a lot . He never used to dictate , we were asked to copy the notes written by him on the black board With an awesome handwriting of his . I can never erase william Shakespeare’s julius ceasar  as the way he taught us its just rooted deep into me . I have had an education just up to the 9 th standard . All this is possible to me because I had good teachers who inspired me and a school ( good shepherd public school , ooty ) that churned the best out of me .

Ingredients for toad in the hole

Ingredients
Quantity
Flour 110 grams
Eggs 3
Milk150 ml
Water 150 ml
Oil1 tablespoon
Sausages8 to 10

Ingredients for onion gravy

Ingredients
Quantity
Butter 25 grams
Oil 1 tablespoon
Onions3 big sliced
Brown sugar 1 teaspoon
Flour 25 grams
Stock cubes 2 ( I used 2 maggi chicken stock cubes )
Water500 ml
Pepperto taste

Method for toad in the hole

  1. Preheat the oven to 180 degree Celsius . For the batter , sift flour into a bowl , make a well in the centre and gradually whisk in the eggs .
  2. Followed by milk and water .Continue whisking until you have a smooth batter . Set aside to stand . Put the oil in a large baking tin and roast the sausages .
  3. Bake in the oven for 10 minutes or until the oil is sizzling hot and the sausages are starting to brown .
  4. Remove the tin from the oven , pour the batter around the sausages and return to the oven for 30 -40 minutes or until the batter is puffed up and golden on top .

Method for the onion gravy

  1. Meanwhile , Melt butter and oil in a large heavy bottomed pan over medium heat .
  2. Add sliced onions and cook for 10 minutes , stirring occasionally .
  3. Add brown sugar , increase the heat and cook for a further 5-10 minutes until golden in colour .
  4. Remove from heat add flour and mix well . ( the amount of flour you use depends on how thick you want your gravy ) .
  5. Gradually add crushed stock cubes and water .Mix until the gravy is thick and smooth .
  6. Return the pan to the heat and bring slowly to boil , stirring all the time .
  7. Then simmer for 2 minutes . Add pepper and check salt . ( be careful with salt as the stock cubes contain  a lot of salt ) .
  8. Taste and adjust . Remove the toad in the hole from the oven and Serve hot along with the onion gravy  and some steamed veggies . 
  9. you can add dried herds and chilli flakes to add more flavour .

Vegetable moussaka

Share Button

image (22)

Preparation Time : 30 minutes

Cooking Time : 45 minutes

Serving: 8 members

Description

Moussaka . This dish is a traditional Greek dish that I got to know through a cook book I got initially when I started to cook . I have tried it just once though and after that didn’t attempt . Not that I didn’t like it , some how it just faded away . Well now it’s a staple at home . I always make the non veg version with a combination of egg plant and potatoes together . This time I came across a veggie version and was in cloud nine as my hubby’s veggie avatar was putting me in a fix to entertain him through his tummy . It tasted equally good as the non – veg version and a super addition to any dinner table . This dish brings together different flavours and textures in one hearty mix . In fact using soya chunks works well like lamb . This dish can be prepared a day ahead and baked when ever required . I did try my best to swap this high calorie fatty culprit dish to a healthy one and to break the myth of anything healthy is boring .

Ingredients

Ingredients
Quantity
Big violet Egg plants4 sliced into 1/2 inch thick rounds
Maidato coat
Oil 4 tablespoons
Soya granules500 grams , ( soak in warm water for 10 minutes , drain and use )
Onions4 chopped
Garlic cloves4 minced
Cinnamon2 teaspoon ground
All spice powder1/2 teaspoon , ( I used garam masala powder instead )
Crushed tomatoes4 cups
Tomato paste4 tablespoons
Sugar2 teaspoons
Chilli flakesto taste
Salt + pepperto taste
Oreganoto taste
Coriander leaves1/2 cup chopped
Bread crumbs100 grams
Parmesan cheese2 cups grated , ( I avoided the cheese completely )

Ingredients for the white sauce

Ingredients
Quantity
Butter1 cup ( I used oil instead )
Maida 1 cup
Warm Milk8 cups
Nutmeg powdera pinch

Method for egg plant

  1. Sprinkle salt over the sliced egg plants . Set aside for 1/2 an hour .
  2. Rinse the egg plant slices and pat dry .
  3. Dust them in maida and shallow fry till soft but not brown . Set aside .

Method for filling

  1. Heat oil in a non stick pan . Sauté the soya granules till brown .
  2. Add onions , garlic and fry for 5 minutes .
  3. Top with cinnamon powder , all spice powder , crushed tomatoes , tomato paste , sugar , salt , pepper and chilli flakes .
  4. Simmer for 15 minutes until liquid evaporates and gets to a dry and chunky tomato sauce .
  5. Garnish with oregano and coriander leaves and set aside .

Method for the white sauce

  1. Melt butter in a non stick heavy bottomed pan . Sprinkle maida , using a whisk gently stir the flour until it starts to bubble .
  2. Keep stirring , making sure no lumps are formed .
  3. Pour warm milk over little at a time incorporating to get a thick creamy white sauce with no lumps .
  4. Simmer to thicken until when a back of a spoon coated with sauce can run a clean line with your finger , its ready .
  5. Add nutmeg powder . Mix well , remove from heat and set aside .

To proceed

  1. Preheat an oven to 180 degree celsius . Grease a baking dish . Sprinkle the bottom with bread crumbs .
  2. Top with a single layer of fried egg plants . Add soya mixture on top of the egg plant layer . Sprinkle with grated cheese . Pour a layer of white sauce .
  3. Do the same until all the egg plants , soya mixture and white sauce is over making sure the final top layer is white sauce sprinkled with cheese and bread crumbs .
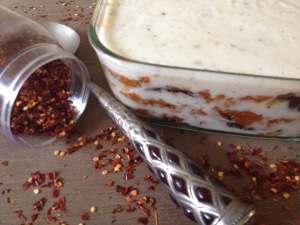
  4. Bake for 30 minutes until you get a melted golden crust .Allow to cool for 10 minutes . Slice and enjoy …non – veg version can be done by replacing soya granules with lamb , beef or chicken mince , following the same recipe .Can add 2 -4 beaten eggs to the cooled white sauce and use as the recipe demands .
  5. This helps the layers to stay separate and adds taste along with calories .
  6. Can use any vegetable of your choice instead of egg plants like potatoes and zukkenis .

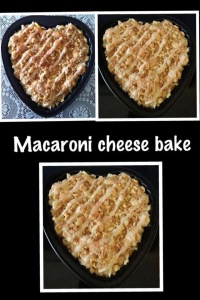
Marconi and cheese bake

Share Button

image (21)

Preparation Time : 20 minutes

Cooking Time : 40 minutes

Serving : 8 members

Description

Macaroni & cheese bake . A dish I first got to know about in neigella lawsons program on the telly . Wanted to try the recipe then and there but just didn’t happen . 2 days latter my hubby’s cousin brother Yousuf send over something for dinner . Opened the box and to my surprise it was mac n cheese . He also is a keen cook and foodie , often cant resist trying out a recipe as soon as it is discovered like me . he was also inspired by neigella lawsons program and made it for dinner . It was creamy and yum . After a few days while switching channels came across another mac n cheese recipe which was apt for our Indian pallet . The host was a Jamaican  and he added curry powder and green chillies . The recipe I am posting today is also his recipe as I found neigella lawsons recipe to be too bland for the Indian taste buds . The bland dish with a bit of chilli lift Breaks the monotony of the cheese . i can assure , once you make it ,they will be the talk of your meal for a long time .  My kids, son – in – law and even my fussy hubby likes mac n cheese . We all like it to explode with creamy and gooey cheese as soon as we bite into the crusty melted cheese exterior .The picture I am posting today was taken by my gal ANISHA and the mac n cheese was prepared by her too .

Ingredients

Ingredients
Quantity
macaroni400 grams
butter50 grams + to grease + to dot
plain flour ( maida ) 2 tablespoons
milk500 ml ( 2 cups )
grated cheese 2 cups ( I use Amul cheese cubes 1 cup grated and 6 Amul cheese slice )
Onion 1 big chopped
Mixed dried herbs rosemary , thyme , dill , oregano and basila pinch each
Chilli flakesto taste
Green chillies2 slit
Curry masala powder1 tablespoon ( coriander powder - 1/2 teaspoon + red chilli powder -1/4 teaspoon + cumin powder - a huge pinch + fennel powder - a huge pinch . Mix altogether to get curry masala powder )
Cooked shredded Chicken1/2 cup , ( optional )
Sweet corn and capsicum 1/4 cup each ( optional )
Salt to taste
Bread crumbs1 1/2 teaspoons

Method

  1. Cook the macaroni in a large pan of boiling water according to packet instructions (different brands may vary in size & cooking times)
    melt the butter in a medium non stick sauce pan and add chopped onion , slit green chillies , crushed garlic and fry to translucent . add the flour. Cook, stirring, for 1 minute over medium-low heat.
  2. Gradually add the milk, stirring until smooth. Stir gently until the mixture comes just to the boil, then reduce heat and simmer for 2 minutes.
  3. Remove from the heat, add the 1/2 the grated cheese and 4 cheese slices , stir until melted and smooth.top with a pinch of all the dried mixed herbs , chilli flakes , salt ( be care full with salt as cheese is already salty ) chicken , sweet corn and capsicum .
  4. Add the curry masala powder making sure the sauce colour remains cream in colour . Taste and adjust the sauce . The sauce should be in a semi thick gooey flowing consistency .
  5. Drain the cooked pasta . Pour cheese sauce over the pasta and stir until well coated.remove the slit green chillies . Grease a ceramic baking tray . pour the cheese sauce coated macaroni . top with remaining grated cheese .
  6. Sprinkle bread crumbs over . Cut the remaining cheese slice ‘s into thin strips . Place it in a criss cross pattern over the grated cheese . Dot the top with little butter all around .
  7. Bake in a pre heated oven at 180 degree celsius for 30 minutes . serve hot . I like my mac n cheese creamy so I always make sure it’s still gooey with a cheese melted crust .
  8. Just add more milk to get a gooey saucy mac n cheese .

Baklava

Share Button

image (11)

image (12)

bak3

bak4

bak3

baklast

Preparation Time : 4 hours

Cooking Time : 1 hour + 10 minutes for the syrup

Serving : 8 members

Description 

“Baklava ” I found this word so very difficult to memorise as it sounded wired and different to me the very first time . But the taste just didn’t let go of my soul as I was often rekindled with its crisp exterior with a satisfying texture , rich nutty middle and a sticky aromatic bright flavoured syrup that sure will unshackle your palate  . Till date I just can’t figure out what’s so inviting that makes me a die heart fan of this fatty culprit . I was introduced to this mighty sweet by my cousins Aashik and Fazeem who had bought a huge box full of baklava on a trip to the U.S . I remember , it was an assorted sweet box  and I just could not stop with two , wanting to taste all the assorted ones . Not knowing from where the dish originated or how they prepare it , used to just wait for the opportunity to have a few free baklavas always ( shameless me :-)) getting a real taste of a dish means travelling there , that’s where you will find the truest expression of its flavours , dining customs and whole way of thinking about food . To me it’s all done at home in front of my telly and that’s how while flipping channels came across a programme where they showed how baklava was made . Pains taking for sure , no wonder it tastes so good . Took note with out any precise measurements and that’s it . The lazy bug in me just didn’t let me want to try this dish out . My daughter Anisha also with utter excitement got a recipe from her collage library for baklava  , that was also saved but not put to use . Finally came across this recipe in the world wide net , saved it as usual . From then on any gourmet store  I went home shopping for ,the first thing in my to search list was phyllo pastry . This search went on for days to months to years from Coimbatore to Cochin to chennai to Mumbai to Pune and where ever possible . Did try my luck with my NRI relatives and friends but nothing worked . One fine day in chennai at AMMA NANA gourmet store ( with a confused state of mind , should I ask or not . As it’s always sorry mam ) Then I compromised  saying to myself , no harm in asking . Asked ” do you have phyllo pastry and the lady in the shop just pointed her fingers towards the first floor . Checked at the first floor and the man in counter just pulled a long blue coloured box  from the freezer and gave it to me with num reactions . I took it and jumped up ( seriously I did ) with a board smile and the num guy in counter controlling his laughter just smiled . I made sure to get another one as well . Stocked it in my freezer at home and felt proud as if I had accomplished the wish of owning a solitaire diamond was done . Waited for a real good celebration to try this recipe and made it following the recipe religiously to the core ( except for my cheat’s way of using the ready made phyllo pastry part ) for the first anniversary celebration of sauté, fry n bake . The results were more than perfect as even fussy hubby dear approved the baklava but I was dead nervous as I had Saaliha azim who has been living in Dubai through out her schooling and knows the real taste of this Middle eastern sweet treasure. I just pretended to be calm and composed when she was tasting until her verdict was out . She liked it and complimented saying it tastes really authentic . ( hope she meant it for real ) . Showed the pictures to my children and parents . My mom was flying high and extremely proud that her daughter has made baklava on her own that she kept telling tom , dick and Harry ( any one and every one ) about this , that embarrassed me a lot . I had no other option other than to make another batch to cater to my children and mom specially . Well only if you have eaten a baklava will you know why this middle eastern icon sweet has earned it’s spot in the global classics canon .

Ingredients for the dough

Ingredients
Quantity
All purpose flour1 1/3 cups
Salt1/8 teaspoon
Water1 tablespoon (more if needed)
Oil2 tablespoon
Apple cider vinegar1/2 teaspoon

Ingredients for the syrup

Ingredients
Quantity
Honey1/2 cup
water3/4 cup
Sugar3/4 cup
Cinnamon2 " Piece
Cloves5 to 6
Fresh orange peel2 " Piece

Ingredients for the filling

Ingredients
Quantity
Powdered cinnamon1 teaspoon
Allspice powder1/4 teaspoon
Coarsely powdered almonds1/3 cup
Coarsely powdered walnuts1/3 cup
Coarsely powdered pistachios1/3 cup
Granulated sugar1/4 cup
Ghee/ clarified butter (more if you need it)1/3 cup

Method

  1. Make the Phyllo dough. You can knead the dough by hand or using the food processor as I did.  Put the flour and salt in the processor bowl and pulse a couple of times to mix. Then combine the water, oil and apple cider vinegar ina small bowl and add to the flour.
  2. Knead until it comes together as a dough that’s sticks together initially and then becomes a smooth and elastic dough. Add a a tablespoon or so of water if your dough seems a little on the drier side.
  3. Shape the dough into a ball and place in a bowl coated with oil. Roll the dough till it is well coated with the oil and cover the bowl with plastic wrap. Let it rest for about 2 hours or longer. I ended letting my dough rest for about 6 hours before I started rolling it out!
  4. Now its time to start rolling out the dough as thin as you can. Divide the dough into 4 or 5 portions of equal size. Work with one portion at a time keeping the others covered so they don’t dry out.
  5. Place the dough on a well-floured surface and keep rolling out, dusting with flour whenever necessary, until you have rolled it out as thin as you can. Remember to also dust your palms and the rolling pin with flour.
  6. Lift the rolled out dough and stretch it on the backs of your hands as you would a pizza dough, just helps make it that much thinner. Otherwise just lift it up and carefully stretch it using your fingers without tearing it. Your dough should be thin enough to be almost transparent.
  7. Set aside the rolled out dough sheets on a well-floured surface. Repeat the process until your dough is used up. Flour well between each sheet so they do not stick to one another.
  8. You will not need to cover your dough with a wet cloth, as you do with boxed dough, it is moist enough that it will not try out. If you can make your Phyllo about the thickness of 2 sheets of copy paper and evenly rolled then that’s perfect.
  9. I divided my dough into 4 equal portions and then rolled each portion out into a square about 12” by 12”. Then I cut it into 4 equal squares. This gave me a total of 16 layers (each 6” by 6”) which I used as 4 layers of 4 sheets each for my Baklava.

Method

  1. You can make the syrup and the filling while the dough rests. To make the syrup, combine all the ingredients for the syrup in a medium sized pan/ pot and bring it to a boil, stirring until the sugar has dissolved.
  2. Turn the heat to medium and let the syrup boil for 10 minutes. Stir occasionally. Take it off the heat and strain out the solids. Keep the syrup aside until required. Do not chill but let is stay slightly warm.
  3. Now make the filling. Keep aside about 2 to 3 tbsp of the powdered pistachios and then mix together all the ingredients for the filling in a bowl, except the ghee/ clarified butter.

Method

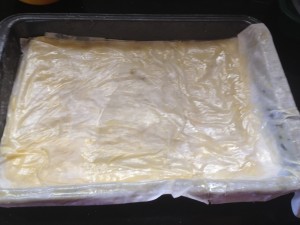
  1. Assemble the Baklava. Warm the ghee/ clarified butter slightly to make it easier to brush on. Brush the bottom and sides of your baking dish with ghee/ clarified butter. Place one sheet of Phyllo dough in the bottom of your baking dish.
  2. Brush it lightly (but well) with the ghee/ clarified butter. Place another sheet of Phyllo and brush with the ghee/ clarified butter again. Repeat this with three more Phyllo sheets and brush each layer with the ghee/ clarified butter.
  3. Spread one third the nut-spice mixture in a uniform layer. Then once again layer 4 sheets of Phyllo like before. Spread another one third portion of the nut-spice mixture.
  4. Once again layer another 4 sheets of Phyllo and then layer the remaining third of the nut-spice mixture. Top with 5 layers of Phyllo and finish off by brushing the top most layer of Phyllo well with the ghee/ clarified butter.
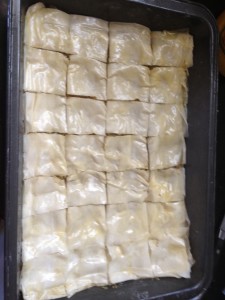
  5. You should have a 5-4-4-5 construction of Phyllo pastry layers (I used 4 sheets in every layer), though you can use as many layers as you want. Tuck the edges neatly suing a knife or spatula.
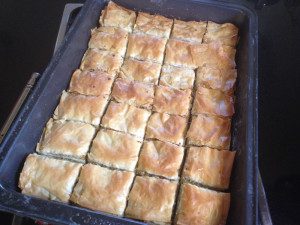
  6. Using a very sharp knife, cut the Baklava from the top through to the bottom, into desired shape and number of pieces. I cut mine into 16 squares.
  7. Now bake this at 180C (350F) for about 30 minutes and then take it out.Cut through the Baklava once again to make sure the cuts go all the way down to the bottom of your pan.
  8. Return the Baklava to the oven and bake for another 30 minutes or until the top is a beautiful golden brown.
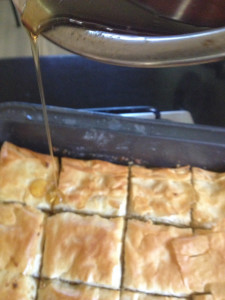
  9. Once the Baklava is done, take it out and gently pour the syrup evenly on the top of the hot Baklava making sure it goes through all the cuts.
  10. Pour as much as you can without letting the Baklava float in the syrup (I poured almost all the syrup I made, less about 2 to 3 tbsp of it). The syrup will soak into the Baklava during its overnight rest making it moist and juicy.

Method

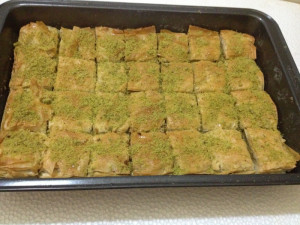
  1. Let the Baklava cool and then cover it. Let it sit at room temperature overnight. The Baklava will have soaked up the syrup. Store and serve at room temperature, after dusting the top of each piece with the reserved powdered pistachios.
  2. You can warm it very slightly before serving if you prefer.
  3. The Baklava will keep at room temperature for about a week in an airtight container. It can also be stored in the fridge but warm it up before serving or it will be very hard. Serve the Baklava with coffee as a snack or as dessert.
  4. This recipe makes 16 small pieces.

Tips

     1.Remove all your rings, bangles and bracelets or any jewelry that might snag the dough before you start working on it. The dough becomes very    fragile as you roll it out and you want it to tear as little as possible, preferably not at all.

     2. Check that you cut out your Phyllo to the exact measurement of your baking dish. A pizza cutter is less likely to tear the Phyllo than a knife while cutting it.
     3. Small tears in your Phyllo are ok, and your dough will roll out thinner and easier with practise. Just try to keep a couple of “unblemished/ not-torn” sheets for the top most layers for a good finish to your Baklava.
    4. Use a wooden dowel or a thin wooden rolling pin to roll out the dough. This makes rolling out much easier and you will be able to roll out the dough quite thin.


Dominos style filled garlic bread

Share Button

image(14)

Preparation Time : 1 hour 10 – 20 minutes

Cooking Time : 15 – 20 minutes

Serving : 6 – 8 members

Description

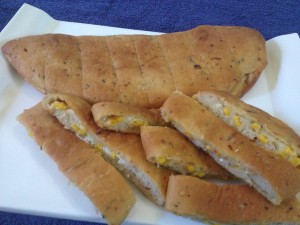
Domino’s style filled garlic bread . Bread is one thing that I grew up in boarding school eating fresh from the ovens of good shepherd public school in ooty . The smell of baking bread would just linger into the air and would disturb all of us with what ever we are doing at that moment . Any time hunger prank attacks we were allowed to go to the mess manager and get some thing to eat . We were served cookies , cakes , bananas or bread then . My class mate Ansu Mathews just loves bread in any form , I used to feel wired the way she used rave about bread as I was a typical South Indian who liked her idli’s and dosas back then . I did get in touch with her after nearly 24 years and didn’t forget to mention the bread story . Ansu was like hazi how on earth can you still remember all this stuff . Never in my widest dreams did I imagine that I would be baking breads as even the fresh breads baked at school during my childhood days didn’t motivate me much but I shook myself one day saying bread in one thing that has taken the world by Storm for ages and Ages as a moving culinary tradition . If I can’t master the art of this age old dish that exists in the world culture of family society then there’s no point in the love and passion I have over food and cooking . To me adding longer introductions to feature not just the recipe , which anyone can do , but the context of how a dish is prepared , who makes it and what it means to the maker in more important as that’s what food is all about .

Ingredients for dough

Ingredients
Quantity
All purpose flour2 cups
Warm milk¾ cup
Instant yeast1 teaspoon
Baking powderpinch
Sugar1/2 teaspoon
Salt1 teaspoon
Lightly beaten and divided in half1 egg
Melted butter1 tablespoon
Oil2 tablespoon
Milk powder1 tablespoon
Garlic powder1 tablespoon
Dried Italian herbs1 teaspoon
Minced garlic1 tablespoon
Chilli flakesto taste

Filling ingredients

ingredients
Quantity
Sweet corn kernels1 tin ( 400 grams )
Mozzarella cheese1 cup
Cheddar cheese grated1/4 cup
Chilli flakesto taste
Garlic minced 1 teaspoon

Method

  1. Sieve the flour, then add milk powder, baking powder, sugar, yeast and salt.  Then add the oil, butter and half the egg (reserve the other half for brushing the bread later) and mix together.
  2. Top with garlic powder , Italian herbs , chilli flakes and garlic minced . Now add the milk gradually whilst kneading.
  3. You might not need it all, so add it sparingly until your dough is nice and soft.  If more milk is needed to get a soft dough consistency, warm a litte more and use.  Knead for a good 8-10 minutes.
  4. The more you knead the softer the bread results will be.
  5. Touch a bit of oil with your fingertips and apply all over the ball of dough.
  6. Cover in a bowl and set aside for 40mins to an hour for it to double in size.

STEP 1

Divide the dough into 2 equal sections. Start rolling each one into a round  shape, about quarter inch or less thickness.place over greased and lined baking tray .

STEP 2

Brush with butter. Divide each filling ingredient into two equal portions ,Place one portion of filling ingredients  in the  centre of one circle . Do the same to the other circle as well .

STEP 3

Run a wet finger dipped in water all around the two circles . Fold the circles into a  moon shaped semi circle and press the edges together to seal the filling inside .

STEP 4

Cover with a light kitchen towel and allow the garlic bread to rest for about 30 minutes to allow them to expand again slightly.

STEP 5

  1. Make an straight line impression lightly with the help of a pizza cutter to get one inch thick sticks on both the semi circles .  Preheat the oven to 180 degree Celsius .
  2. Brush the remaining half egg over the bread and sprinkle sesame seeds( optional ) Bake for about 15 – 20 minutes or until the breads  are done and golden.

STEP 6

Remove and brush them with some butter, keep them covered with a kitchen towel to retain their softness until time for serving.

Note

The filling can be made with veggies , cheese , paneer , fish , prawn , chicken or anything to your taste.

  1. Store the garlic bread   in the refrigerator in an air tight container and steam – microwave before serving for a minute . Best served and had on the day made and can be stored for the next day not more than that .
  2. This is the best ever bread recipe I have come across and I follow it for any recipe that demands to bake bread … So peeps don’t forget to book mark the bread recipe .

Mauritian methi mutton

Share Button

image(11)
Preparation Time : 15 minutes

Cooking Time : 20 – 25 minutes

Serving : 4 -5 members

Description

Mauritian style methi mutton . This recipe is the from the book A TASTE OF MAURITIAN MUSLIM CUSINE by ZUBEITHA RANDERA . A cook book I received as a gift from my mother after her trip to Mauritius . All the recipes are home style recipes that are so easy to follow with easily available ingredients at home . The twist in this dish comes from the ground sesame seeds and poppy seeds paste added which just changes the regular methi dish to another level . The first time I learnt a methi chicken dish was from my aunt Nazeem ( mom’s sister ) . Every holiday my grand mother sabiya perima ( mom’s mother ) does a lot of cooking to entertain us . To give her some rest my aunt’s ( mom has 3 younger sisters and a brother who is younger to me !!! Wired but true :-)) ) and myself take turns to cook our respective hubby’s side star dishes for every one . That’s how I got to know about methi can be cooked with non – vegetarian . Quality time for us means cooking a meal together . While slicing onions , grinding masalas and washing the meat … We swap stories about our respective in – laws and gossip about near and distant relatives . While the kids would be busy playing dark room , ludo , snake and ladder or watching the telly munching on banana chips , murukku’s or what ever is there stored in the huge steel containers at the store room . After all food is glue that binds our family .

Ingredients

Ingredients
Quantity
Fresh Fenugreek leaves 1 1/2 cups ( leaves alone)
Mutton 1/2 kg
Tomatoes3 medium sized chopped
Oil 4 tablespoons
Salt to taste
Turmeric powder1/4 teaspoon
Red chilli powder1/2 teaspoon
Ginger garlic paste 1/2 teaspoon each
Cumin powder 1/2 teaspoon
Garam masala powder 1/4 teaspoon
Onion paste 3 tablespoons
Fried onions4 tablespoons
Curd 1/2 cup
White Sesame seeds2 tablespoons
Poppy seeds1 tablespoon
Water1 cup

Method

  1. Grind sesame seeds and poppy seeds together to a smooth paste and set aside .
  2. In a pressure cooker mix meat with all the ingredients except for the ground paste and pressure cook on low heat for twenty minutes or until the meat is cooked through  .
  3. Then add the ground masala  and  mix well .
  4. Being to boil .  Check and adjust seasoning .
  5. Serve hot as a side dish for roti , naan , chapathis , pulaos or white boiled rice

Note

The same recipe can be followed by using chicken also .


Italian meat balls with spaghetti

Share Button

image (24)

IMG_0281

IMG_0282

IMG_0283

IMG_0285

FullSizeRender (21)

image1 (1)

Preparation Time : 30 minutes

Cooking Time : 40 minutes

Serving : 5 members

Description

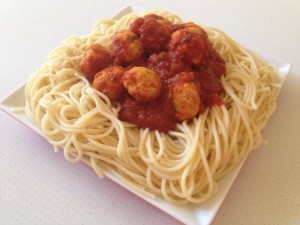
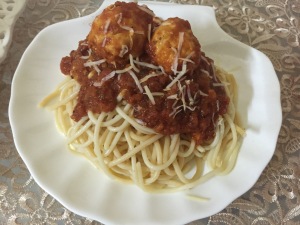
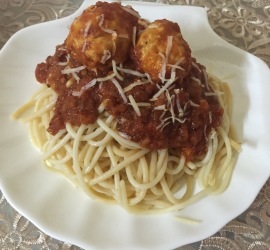
Italian beat balls with spaghetti . Having a packet of spaghetti in my pantry for quite some time . Every time I think of cooking it , I am like let the kids come . Finally one day I made the spaghetti with an Italian meat ball tomato sauce that is an international comfort classic .started of with a slight nervousness not knowing if my beat balls would turn out soft . I religiously followed the recipe for the meat balls but just substituted beef to chicken . Finally the dish resulted  in a wonderfully moist , soft and juicy tomato drunk meat balls . The meat balls turned into a ball of fame as Every one enjoyed it on the dining table and I made sure to pack the left over for my boy in Coimbatore . He had it for lunch , dinner and breakfast . Well , nothing perks us all up like home cooked mummy’s food :-))

Ingredients for meatballs

Ingredients
Quantity
Boneless chicken1/4 kg ground to a paste without water
fresh bread crumbs2 1/2 tablespoons ( blitz 2 slices of bread in a food processor )
Fresh parsley/ coriander leaves chopped 1 tablespoon
grated Parmesan cheese1 tablespoon
Chilli flakes to taste
ground black pepper1/4 teaspoon
Salt to taste
garlic powder/ paste1/4 teaspoon
egg beaten1

Ingredients for Sauce

Ingredients
Quantity
chopped onion3/4 cup
garlic minced 5 flakes
olive oil4 tablespoons
whole peeled tomatoes3/4 kg , ( blanch whole tomatoes in hot water and peel the skins ) , ( I blitzed the peeled tomatoes to a corse pulp )
salt to taste
sugar1 teaspoon
bay leaf1
tomato paste / tomato sauce 1 tablespoon
dried basil 3/4 teaspoon
ground black pepper1/2 teaspoon
Red chilli powder 1 teaspoon ( for the Indian pallet )

Method

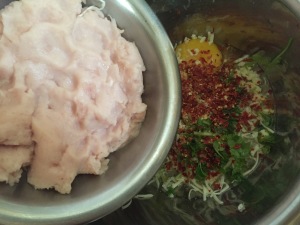
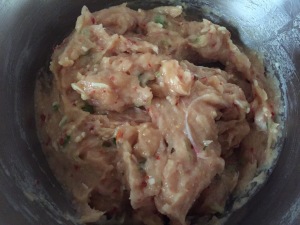
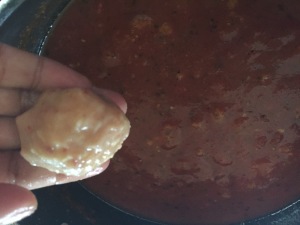
  1. In a large bowl, combine ground chicken , bread crumbs, parsley, Parmesan, 1/4 teaspoon black pepper, garlic powder / paste and beaten egg. Mix well and form into equal sized balls.
  2. Store, covered, in refrigerator until needed.
  3. In a large saucepan over medium heat, saute onion and garlic in olive oil until onion is translucent.
  4. Stir in tomatoes, salt, sugar and bay leaf. Cover, reduce heat to low, and simmer .
  5. Stir in tomato paste, basil, 1/2 teaspoon pepper . taste and adjust .
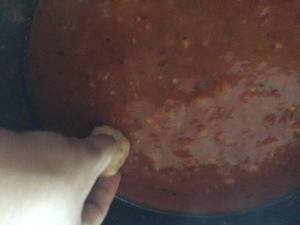
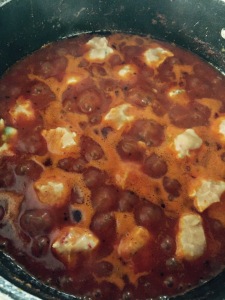
  6. add meatballs and simmer for 30 minutes or more until the meat balls are cooked through , soft and moist . Set aside

How to proceed 

  1. Boil spaghetti as per packet directions in boiling salted water .
  2. Drain and rinse in cold water .
  3. Add to the meat ball sauce and mix well , making sure that the sauce coats the spaghetti well .
  4. Serve hot .

Hunan chicken

Share Button

image (23)

Preparation Time : 20 minutes

Cooking Time : 15 minutes

Serving : 2 members

Description

Hunan chicken . A simple stir fry with deep fried crispy chicken stripes and a combination of  sauces which is spicy , sweet and tart . This dish is a perfect appetiser . I remember a Chinese street stall in v.o.c park in Coimbatore where my brother and myself used to often end up entertaining our taste buds . Till date , that has been the best Chinese food I have ever tasted . Hubby dear , does not fancy street food eating much . So my street food eating is done always in his absence . We Indians are so used to the fusion of indo – Chinese version that on my visit to china on a holiday . We were served an old fashioned dinning with a  delectable spread of classic authentic Chinese meal for lunch . I was so very excited about this. It was a grand feast with the table taken by storm  on a huge spread of authentic Chinese dishes .my excitement didn’t last long as the only thing served there that was liked by me was the sweet corn chicken soup and the fried rice . All the other dishes were a treat to my eyes with vibrant colours . This was an alert to me that I needed a definitive update in authentic Chinese food .

Ingredients

Ingredients
Quantity
boneless chicken stripes1/4 kg
light soy sauce 1 1/2 teaspoon + 2 tablespoons
egg1 beaten
cornstarch1 1/2 tablespoon
chicken stock (at room temperature)1/4 cup
white wine or sherry1 1/2 tablespoon ( I just omitted this ingredient )
garlic chopped1/2 teaspoon
ginger grated1/4 teaspoon
sesame oil 3 drops
sugar1/4 teaspoon
white pepper1/4 teaspoon
vinegara splash
Oil to deep fry + little to stir fry
onion stem chopped 4 ( use the white and green parts)
Crushed red chilli flakesto taste

Method

  1. Place chicken in bowl and add 1 1/2 teaspoons of soy sauce, egg and white pepper to taste. Knead as you would dough for about 5 minutes. Add 1 1/2 tablespoons of cornstarch and knead again. Set aside.
  2. In another small bowl , mix together chicken stock and 1 tablespoon of cornstarch.
  3. Add soy sauce, wine or sherry, garlic, ginger, oil, sugar, white pepper & vinegar.this is the sauce for the Hunan chicken . Set aside.
  4. Heat wok to a high heat. Pour 2-3 cups of oil into wok. Heat oil to deep fry . Fry chicken pieces in batches. Do not over crowd the wok or the temperature of the oil will drop.
  5. Cook chicken for about 3-5 minutes and then set on a rack. This will keep the chicken to remain crispy and excess oil to drip off. Repeat until all chicken is cooked.
  6. Remove all oil from the wok leaving 1 teaspoon of oil in the wok . Fry green onions and red chilli flakes for 30 seconds.
  7. Add crispy chicken and hunan sauce . Stir constantly until sauce is thickened and coats the chicken well .
  8. Serve hot garnished with chopped spring onion greens as a side or a starter.

Broccoli crapes with green spinach sauce

Share Button

broccoli

Preparation Time : 40 minutes

Cooking Time : 30 minutes

Serving : 6 members

Description

Broccoli crapes with green spinach sauce . The crapes , filling and the sauce are a regular at home but not had together as one dish . By putting these regular’s together with a knock out spin in the sauce by adding spinach puree to it . The dish was taken to another level with mouth watering heights . Some times a single ingredient change can feel like a total make over . I gave this dish a first try for hubby’s new vegetarian avatar recently . He approved the dish by eating 3/4 of what was made . He keeps telling every one that , he is a white rat in my cooking experiment laboratory . All my new tries are first tested and approved by him and then I decide the rest . I made this dish again when the kids were home and they loved it . Tweaking the tried and true is exciting too :-))

Ingredients for crapes

Ingredients
Quantity
Flour / maida1 cup
Water1 3/4 cup ( more or less to get a thin loose consistency batter )
Salt to taste

Method for crapes

  1. Mix all the above ingredients together except for barilla brand basilico pasta sauce or tomato sauce to get a thin flowing consistency batter .
  2. Pour into thin crapes on a non – stick pan and cook for 2 minutes covered . Remove and set aside . ( I used my appam non – stick kadai )

Ingredients for broccoli filling 

Ingredients
Quantity
Broccoli flower lets1 cup chopped
Onion1 big chopped
Green chillies to taste chopped
Cheese4 tablespoons grated + 3 tablespoons to garnish
Saltto taste
Garlic2 flakes crushed
Oil1 tablespoon

Method for broccoli filling 

  1. Put the broccoli flower lets into salted water . Remove from heat and set aside with lid closed for 5 minutes .
  2. Drain . Heat butter , fry onions and garlic for 1/2 a minute .
  3. Top with green chillies and drained broccoli flower lets . Sauté for 3-4 minutes . Season with salt . Taste and adjust .
  4. Cool and add 4 tablespoon grated cheese and mix well . Set aside .

Ingredients for spinach sauce 

Ingredients
Quantity
Boiled spinach puree2 cups
Milk2cups
Flour / maida2 tablespoons
Butter 2 tablespoons
Salt + pepper + chilli flakesto taste

Method for spinach sauce 

  1. Mix milk and spinach purée together and set aside .
  2. Heat butter in a non – stick pan , add flour and saute for 1/2 a minute in low flame , stirring continuously .
  3. Add milk and spinach puree mixture little by little and go on stirring until the sauce becomes thick making sure no lumps are formed .
  4. Season with salt , pepper and chilli flakes to taste . Set aside .

How to proceed

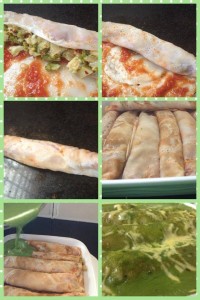
  1. Spread 1 1/2 teaspoons of barilla brand basilico pasta sauce or tomato sauce all over one side of the crape .
  2. Fill the crape with 1 tablespoon of broccoli mixture and roll the crapes tightly . Do the same to all the crapes and broccoli filling .
  3. Arrange the broccoli filled crapes on a greased baking dish and pour the spinach sauce over .
  4. Sprinkle 3 tablespoons cheese on top and bake in a preheated hot oven at 200 degree Celsius for 18 to 20 minutes . Serve hot .

Note

  1. In case you have extra sauce left over . Can serve it along with the crapes , so that any one wanting more sauce can have it .
  2. Can substitute broccoli with cauliflower or mixed vegetable filling . Non vegetarians can use any form of meat filling .
  3. Spinach can be substituted with 3 green / red or yellow capsicums for the sauce . Don’t boil the capsicums instead just blend them with milk to get a smooth runny paste .

Potato gnocchi with mushroom herby brown butter

Share Button

potato

Preparation Time : 40 minutes

Cooking Time : 30 minutes

Serving : 5 to 6 members

Description

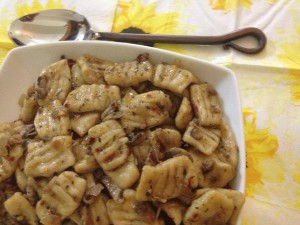
Potato gnocchi with mushroom herby burnt butter .An Italian origin dish served as an entree alternative to soup or pasta which is a sort of dumpling made with steamed potatoes , egg and flour . Served hot or warm .
Common accompaniments of gnocchi include melted butter (sometimes fried butter) with sage, pesto, and various sauces.
Like many Italian dishes, there is considerable variation in recipes and names across different regions of Italy . I am not sure which region this recipe is from . I did get to know about this wonder dish through the telly . From then , being wanting to give it a try . Finally one fine day started of very nervously , following the recipe that require a little effort but that makes it all the more worth while . Finished boiling the gnocchi and had to make a sauce now . I didn’t want to make the usual tomato or cheese based sauce that I make for pasta or any Italian dishes . Came across a recipe that used pumpkins and mushrooms with burnt butter and sage with gnocchi . Loved the idea and went ahead by omitting the pumpkin and substituting sage with mixed herbs . Though it looks and sounds less pretentious , works surprisingly well with all the elements coming together . I guess the butter did the magic here as every thing tastes better with a smear of melted butter . more butter used , more better in taste :-)) The gnocchi’s were soft and moist drunk with the fragrantly herby butter and stock . Every one in the table liked it except my boy , Afzar who missed his cheesy creamy sauce .

Ingredients for potato gnocchi

Ingredients
Quantity
potatoes (washed), peeled, quartered4 about 800 grams
Salt & ground white pepper to taste
egg lightly whisked1
plain flour2 cups ( 300 grams )
finely grated parmesan1/4 cup ( 20 grams )
Plain flour little to dust

Method for potato gnocchi

  1. Add enough water to a saucepan to reach a depth of 3 cm. Bring to the boil over high heat.
  2. Place potato in a metal steaming basket. Place steamer in saucepan (make sure base of steamer doesn’t touch the water). Steam, covered, for 15 minutes or until tender. (It’s best to steam rather than boil the potato.
  3. Boiling can saturate potato with water, which will increase the amount of flour required and result in a heavier gnocchi.) Transfer to a bowl and use a potato masher to mash until smooth.
  4. Season with salt and pepper.Add the egg and stir with a wooden spoon until combined. Add half the flour and parmesan and stir until combined. Add the remaining flour, in 2 more batches, until well combined and a firm dough forms. (If dough is too soft, add more flour.)
  5. Turn onto a lightly floured surface and knead until smooth. Line a baking tray with non-stick baking paper. Divide dough into 4 equal portions. Roll 1 portion into a 2 cm-diameter log about 30 cm long.
  6. Use a lightly floured knife to cut into 2cm pieces. Repeat with remaining dough portions.
  7. Lightly flour your hands and roll each piece of dough into a ball. Use your thumb to roll each ball over a floured fork. Place on tray.Bring a saucepan of salted water to the boil over medium heat.
  8. Add one-quarter of gnocchi (drop onto base of pan in a single layer, but don’t overcrowd as they can stick together) and cook for 3 minutes or until they rise to the surface.
  9. Use a slotted spoon to drain and transfer to a bowl. Cover with foil to keep warm. Repeat, in 3 more batches, with the remaining gnocchi.

Ingredients for Mushroom herby Brown Butter

Ingredients
Quantity
Butter4 tablespoons + 2 tablespoons extra
Mixed dried herbs - (basil , oregano , thyme , rose Mary , dill and sage) 2 pinches each
Maggi chicken stock1 cube
olive oil1 tablespoon
sliced mushrooms250 grams
Grated Parmesan cheese for serving

Method for Mushroom herby Brown Butter

  1. Melt 2 tablespoons butter with olive oil in large skillet then add mushrooms. Saute until tender and cooked down. Remove and set aside .
  2. Heat remaining butter in a large skillet over medium-low heat until melted. Add mixed dried herbs and continue cooking until butter turns a clear, dark amber, being careful not to burn.
  3. Add chicken stock cube to butter along with 1/4 cup warm water . Bring to boil . Add drained gnocchi to skillet with butter and stock, tossing to coat evenly.
  4. Add cooked mushroom slices, tossing to coat evenly.Season with salt ( be careful with salt as butter and the stock cube contains a lot of salt ) and pepper, and top with grated Parmesan cheese . Serve hot .

Notes

  1. These gnocchi’s stay moist and soft even the next day if kept in the fridge and heated in the microwave .
  2. The shape of my gnocchi’s are a bit different Than the regular shape as I didn’t get the original form of rolling with a fork right so just went ahead with what I felt comfortable with .
  3. Make sure not to over crowd the gnocchi’s while boiling them . Boil them in 3 – 4 batches .
  4. I used a little chilli flakes as well to spike up the herby butter sauce a bit . It’s optional and your choice to add or omit this ingredient .