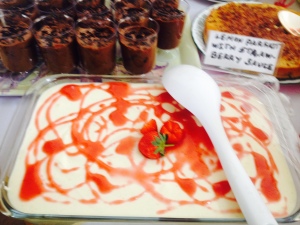
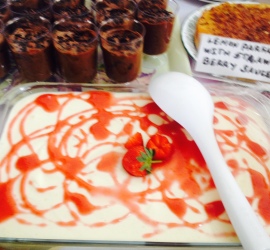
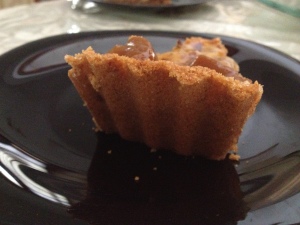
Lemon parfait with strawberry sauce

Share Button

FullSizeRender

Preparation time : 30 minutes
Cooking time      : 20 minutes + setting time over night in the refrigerator
Serves                : 8 members

Description

The spark of the bell to ring with in me to realise that food was my passion happened pretty late. Though through out my days in school as a kid or any time of my life till date, I have been the most happy when ever I get to play my simple or crazy tricks with food. As the saying goes… It’s always better late than never. Now coming to this dessert that was bought by Aanchal Chethan for the second anniversary celebration of sauté, fry n bake who is also a passionate foodie like me who has gradated from le corden bleu London. I was so very envious about her when I got to know she’s going to study there. How I wish, I could do some thing similar by just rewinding my cycle of life and adjust it accordingly. All of us at some point of time do think if only I could change things… Crazy breed’s we all are.. I just could not stop eating the tastefully crafted lemon parfait as the tanginess with the sweet just was epic and divine. I made sure to save the left overs for myself and managed to eat the French fatty culprit alone too. Deeply seductive dessert that is hard to stop with one serving. Umm a recipe from le cordon bleu , London does have its contemporary culinary canon and techniques required to master this dessert. I have been wanting to give it a try but some how, I have not gained the confidence yet to go ahead with it. I shall wait for the right moment to over come my fear for sure. Until then, I am eager to see all your trial and errors with this complete dessert.

Ingredients for lemon parfait

Ingredients
Quantity
Milk250 ml
Lemon juice150 ml ( add half the amount as Indian lemons are way too sour )
Egg yolks4
Castor sugar250 grams
Cornflour12 grams
Flour12 grams
Egg whites4
Lemon zest2 lemons

Method for lemon parfait

  • Boil milk and lemon juice separately. Combine and reboil. Add lemon zest.
  • Whisk egg yolks and 110 grams of sugar to pale. Add flour and cornflour.
  • Pour boiling milk and lemons juice onto the yolk mix, whisk vigorously.
  • Return mix to heat and boil, continue whisking vigorously until thick and boils a little from the centre.
  • Cook the remaining 120 grams sugar with water to 116 degrees. Whisk the egg whites and pour sugar syrup onto the egg whites to make an Italian meringue.
  • Gently combine the Italian meringue and lemon mix once cooled.
  • Spread mix in a shallow dish to set overnight in the refrigerator.

Ingredients for the strawberry sauce

Ingredients
Quantity
Sugar50 grams
Water20 ml
Strawberry purée200 ml
Lemon juice1/2 a lime ( omit this if using Indian strawberries )

Method for strawberry sauce

  • Cook sugar to 108 degrees.
  • Pour into the strawberry purée and combine. Boil adding lemon juice.
  • Pass through a sieve. Cool and chill.

To serve

  • Drizzle the strawberry sauce over the set lemon parfait and serve chilled.

Butter scotch peach praline

IMG_4726

IMG_4727

Preparation time : 10 minutes
Cooking time      : 10 minutes
Serves                : 8 members

Description

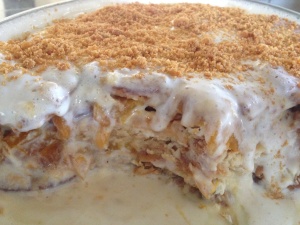
Getting to eat a new dessert is always exciting and if it tastes good it gets even the more better. But this happens only once in a blue moon to all of us. Like wise, I had this dessert at my aunt’s place at a dinner feast. I sure could not stop with one serving the first reason being the taste obviously and next reason being the dessert was ordered else where and served here. Now the challenge began with me tasting the dessert intensely to reconstruct it in my mind as how it was made. Myself and my gal were debating over this and we stuck to one method that felt right to our instincts. What next? Giving it a try to check how food smart I am. Made this dessert in the next feast at home. Tasted a mouth full before it was sent out to others. There was a tsunami of flavours and textures happening in that one mouth full of mine. In fact, the dessert was pitch perfect. Actually even better than what I had at my aunts place. Immediately called my gal and let her know about the results. Now, this is to my go to dessert recipe when ever pressed for time to entertain through food as its easy, yum and impressive. The pat on my back for being food smart was done by myself as no one else did. There’s no harm in self praising yourself when other’s forget to do it. Isn’t it?

Ingredients
Quantity
Marie biscuits 2 packets
Tinned peaches1 large tin
Cream500 ml

Ingredients for the butter scotch

Ingredients
Quantity
Sugar to taste
Vanilla essence2 drops
Sugar1 cup
Water1 teaspoon
Cashew nuts1/4 cup
Almonds 1/4 cup
Pistachios1/4 cup


Method 

  • Heat a large pan with one cup sugar and one teaspoon of water. Do not stir. Let the sugar dissolve and caramelise to a deep golden colour.
  • Add the nuts and mix well. Pour over a greased plate and cool completely to harden up. Crush the set caramel sugar and nuts to a coarse powder. (I blitz it the food processor of a second or two)
  • Mix cream, sugar and vanilla essence together. Mix well until sugar dissolves.
  • Drain the tinned peaches and chop them.
  • Take a large pudding bowl. Layer the bottom with two rows of biscuits.
  • Sprinkle chopped tinned peaches over. Pour enough cream mix over making sure it covers the biscuits and peaches.
  • Sprinkle crushed butter scotch over. Repeat the layers to the top of the pudding bowl making sure the top most layer is butter scotch nuts.
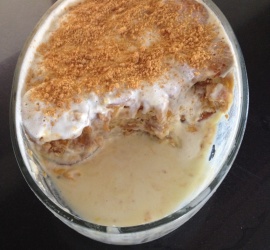
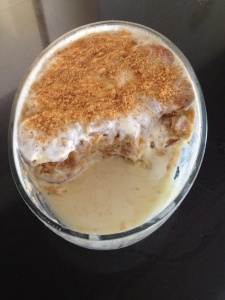
  • Place in the refrigerator for six hours or over night to set. Serve chilled.
chocolate cups

Share Button

image1
 
image2
 
image3
 
image5
 
image6
 
image7
 
image8
 
image9
 

Preparation time : 10 minutes + setting time about 15-20 minutes
Cooking time       : 1 minute
Serves                  : 6 -8 members


Description
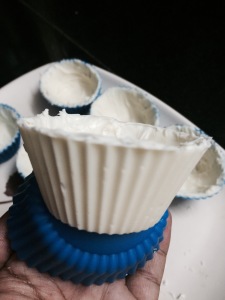
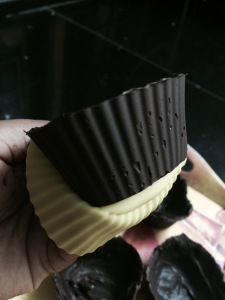
Getting to see all the foodie groups in face book with posts of these chocolate cups made. I had added this to my to do list. Finally made it when my parents and dads friend and his family dropped in for lunch. The recipe was so very easy with great results. I was not confident at all about pulling this of as my inner instincts kept telling me it’s not going to work out. The moment of truth was when I had to remove the silicon molds carefully out of the set chocolate cups. When done, I did do a dance jumping up in joy. Now chocolate has been added to my experimenting list for new and old recipes to be tried out.  From then till date, it’s been a recipe I rely on when pressed for time to do desserts. The best part being, you can fill the cups with any thing possible  letting you be more creative on every attempt. An apt recipe to be made with kids and beginners. The joy in eating the chocolate cups sure does bring a spark to elders, youngsters and kids with no difference at all.


Ingredients
Quantity
Morde dark chocolate compound chopped 1 cup
Morde white compound chocolate chopped 1 cup
Silicon molds few


Method
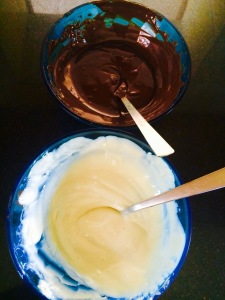
  • Place the chopped dark and white chocolate compounds in separate clean microwave safe bowls.
  • Microwave for one minute each one at a time. Remove and mix well to with a dry spoon to get a gooey mass of chocolate with no lumps.
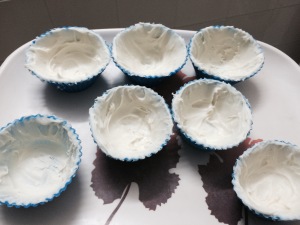
  • Pour one small ladle into silicone molds of choice. Turn and roll the chocolate all over by rotating the molds making sure the chocolate has coated all over well evenly.
  • Pour the excess out into the melted chocolate. Do the same until all the chocolate has been used up.
  • Place the silicon molds in the refrigerator for one hour to set.
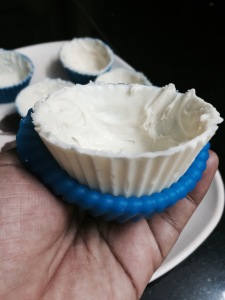
  • Repeat the same with white chocolate. Remove the set molds just before serving. Carefully peel the silicon molds to get chocolate cups.
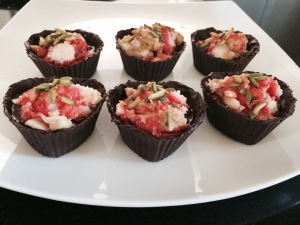
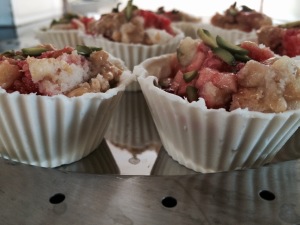
  • Fill the cups with any sweet treat of choice and surprise your loved ones with bliss.


Notes
  • Make sure there is no water in the chocolate, the vessels or spoon used. It’s very important as the chocolate does not set.
  • I have filled the cups with cake, mixed fruits, custard and nuts. Choice is yours with ice cream, any pudding etc..
  • You can de-mould the cups, fill and place in the refrigerator ahead. remove from refrigerator just before serving as these cups tend to melt due to humidity.
  • Get creative and make marble cups with a mix of both white and dark chocolate together.

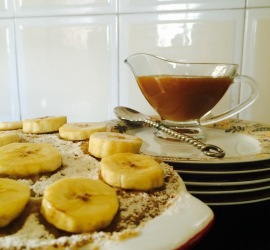
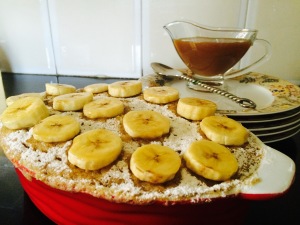
Microwave banana cake pudding with caramel sauce

Share Button

image1

Preparation time  : 10 -12 minutes

Cooking time        : 8- 10 minutes

Serves                  : 5-6 members

Description 

Having a few really well ripened bananas in hand with a friend of mine coming to visit me for a brunch on the same day . Made up my mind to make a quick fix dessert using the bananas , did seem like a gamble .  Googled and got an easy microwave banana cake pudding recipe . Started Prepping and later found out that all the bananas were not in a condition to be used but as I started .. Wanted to finish the dessert . So brought another set of fresh ripe bananas and went ahead . Made the dessert following it to the core resulting with the entire house filled with a lovely aroma of bananas and cinnamon . My friend Lalitha went bonkers with this cake pudding that she had two helpings and made sure to pack a few along with her as well . The following week posted the brunch table pictures in all the foodie groups that I am a part of with the recipe and to my surprise Lalitha had made the banana cake pudding herself and posted a picture of it . I just love the opportunity to share my little knowledge of cooking and food to one another . You need not burn a hole in your pocket by visiting restaurants, instead just add more variety to home cooking unshackling your palate . This knock out home made version dessert is assured for a sure bet to scoop out every last bit of the wicked cake pudding that you will want to make again and again .

Ingredients for the cake

Ingredients
Quantity
Butter100 grams + to grease
Sugar100 grams
Ground cinnamon powder2 teaspoons
Milk2 tablespoons
Ripe bananas3
Self raising flour100 grams
Eggs2
Icing sugarto serve

Method for cake

  1. Microwave butter in a greased microwave safe bowl on high for 2 minutes .
  2. Add 2 mashed bananas , sugar , self raising flour , cinnamon powder , eggs and milk to the butter and mix well .
  3. Slice the remaining banana and place over in a decorative way as you wish .
  4. Microwave on high for 5-8 minutes until cooked through and risen .
  5. Check after five minutes as each microwave differs for doneness .
  6. Remove and serve warm dusted with icing sugar and a good drizzle of caramel sauce .

Ingredients for caramel sauce

Ingredients
Quantity
Butter 1/4 cup
Cream 1/4 cup
Brown sugar 1 cup

Method for caramel sauce 

  1. In a microwave oven proof ramekin add the brown sugar, butter and cream .
  2. place in the microwave for 20-30 seconds.
  3. Remove and stir and repeat another two to three times depending on your microwave.
  4. You will end up with a dark caramel sauce.
  5. Drizzle over the banana cake pudding and enjoy .

Self raising flour ingredients

1 cup all-purpose flour       1/2 teaspoon salt            1 1/2 teaspoons baking powder

Method

Stir or sift together the flour, salt, and baking powder. self-rising flour is ready .


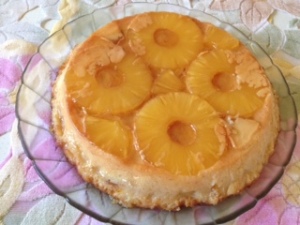
Pineapple caramel pudding

Share Button

IMG_1750

Preparation Time : 10 minutes

Cooking Time : 20 -25 minutes

Serving : 6-8 members

Description

Pineapples …. This rough , rugged , thorny fruit was always taken for granted by me . As , when a kid this one fruit was grown wildly on its own at my grand mothers back yard in Palghat . I still remember the numerous tears in my body caused by the leaves of this plant while playing around . The fruit was always there on the table for lunch or a brunch but never did it fancy me at any point . I preferred to eat the raw mangoes instead . Only after my married life did I realise the importance of this fruit as when ever needed … We had to buy it . Slowly started eating the fruit for the only reason of not wanting to waste it . The left overs were left to experiment with in the kitchen where initially what ever I made gave a sour taste . This pudding also was one such experiment where the entire pudding had to go into the bin . Latter got to know the flaw that raw pineapples used will give a sour taste later …so had to cook them a bit and then use in specific recipes .  Here I have used tinned pineapples that’s hassle free and we all like to add our own personal touch isn’t it ? Practically its fool proof and accommodating to most adjustments .  The best part of this classic dessert is its  delicate and has a slight wobble that defines its own signature flavour and distinct aroma .  With every error made .. that let way  to correct and learn more as well . The versatility is what makes it so special about this sinful indulgence .

Ingredient 

Ingredient
Quantity
Sugar5 tablespoons
Water 2 tablespoons
Tinned pineapple slices4 to 5
Butter2 tablespoons
Condensed milk1 tin
Room temperature Milk1 tin of the condensed milk tin
Eggs2
Vanilla essence1/4 teaspoon

Method

  1. Heat butter in a wide non stick pan . Add the pineapple slices and fry to a golden color on both sides . Remove and keep aside .
  2.  Mix sugar and water together and bring to boil and caramelize it to a dark golden color syrup .
  3.  Pour the golden sugar syrup into a pudding dish that can fit into your pressure cooker to be boiled .Arrange the pineapple slices over the caramelized sugar syrup in a decorative manner . Place aside for the caramel to set and harden .
  4.  Blend together – milk ,eggs, condensed milk and vanilla essence to a runny smooth mixture .
  5.  Gently pour over the set pineapple caramel . Cover the pudding dish with a lid or foil paper . Place inside the pressure cover over a water bath of around 3 cups on top of a small stand for the pudding vessel to sit firmly over .
  6.  Close the pressure cooker with its lid and pressure cook for three whistles . Once the whistle sound subsidies open the cooker , remove the pudding carefully and cool down completely.
  7. Place in the refrigerator to chill for six hours or over night . Run a wet knife all over the edges of the set pudding . Invert it over to a serving platter ,cut and serve in style .

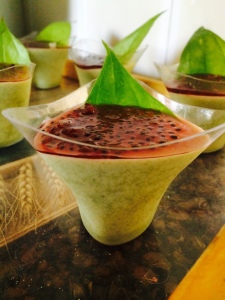
Paan mousse

Share Button

image1(2)

Preparation Time : 35 minutes + 2 hours to soak the basil seeds

Cooking Time : 30 seconds + setting time in the refrigerator.

Serving : 4-5 members

Description

Came across a new recipe of a welcome drink made with betel leaves and was awe struck with the totally innovative idea of using betel leaves in a new avatar . Me not wanting to repeat the same just borrowed the idea and tweaked it to a mousse instead . All the way tasting every bit of the mousse a million times as I felt the task to be very tricky as the betel leaf flavour has to be felt but not over powering at the same time . Finally got the spot on taste but the mousse looked so plain so had to add some colour to bring the pop out . Mixed soaked basil leaves , gulkand , rose milk syrup together and topped it . Wolla .. Looked appealing to the eyes as well now . Served it as a finale dessert after a fishy feast to hubby dears niece Zenofer and was waiting for her verdict . She did find it difficult to trace  the right flavour but liked it so much that , she had a second helping . I was confident about my boys liking because  as a kid he used to like paan so much that when asked what do you want to become when you grow up ? His answer was to own  a paan factory .crazy little minds . I was totally flattered with what the humble betel leaf that relates to our grand parents and weddings usually could be show cased in such a posh elite way . So it’s good to go wild with flavor combos once in a while breaking the myth of regularity.

Ingredients

Ingredients
Quantity
betel leaves/paan15 ground , gives approx ⅓ or ½ cup of puree.
Whipped cream4 cups
Condensed milk1 cup or more to taste
Gelatine2 tablespoons
Water4 tablespoons

Topping ingredients

ingredients
Quantity
basil seeds/sabza3 tablespoons, soaked in enough water for 2 hours .
rose milk syrup or rooh afza1/4 cup
gulkand 1/4 cup
2 to 3 tbsp of chopped dry fruitsfew ( I didn't use as I don't like nuts )
To decoratefew small betel leaves whole

Method

  1. soak gelatine in 4 tablespoons of water in a microwave safe small bowl for five minutes .
  2.  Rinse the betel leaves well in water. In a small blender, puree the betel leaves with little water.
  3.  whip the whipped cream to soft peaks .
  4.  microwave the soaked gelatine for 30 seconds to dissolve . Cool to room temperature.
  5.  mix puréed betel leaves , condensed milk together . Take around 1/4 cup of the whipped cream and mix it with the betel leaf +  condensed milk purée .
  6. Then pour over the remaining whipped cream and mix gently .Add the dissolved gelatine and mix well .pour into desired pudding bowl or glasses to 3/4 th full .
  7. Place a small betel leaf into each glass with the pointy end of the leaf facing up wards ( if using a big pudding bowl arrange the betel leaves all around the bowl ) .
  8. place in the refrigerator to set for one hour or more.mix together all the ingredients mentioned for topping except for nuts and dry fruits and place in the refrigerator to chill .
  9. just before serving , pour about 2-3 tablespoons of topping mix over each set paan mousse . Garnish with dry fruits and nuts . Serve chilled .

Deconstructed trifle pudding

Share Button

image2 (3)

image1 (4)

Preparation Time : 40 minutes

Cooking Time : 10 -12 minutes + setting time in the refrigerator.

Serving : 8-10 members

Description

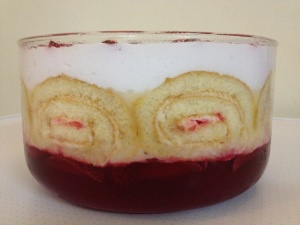
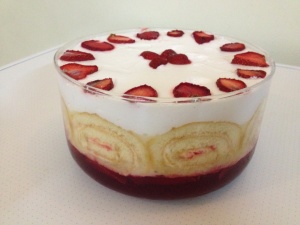
At times when you get to see jaw dropping good images of food in magazines and go head over heels thinking about the taste to the recipe or how was this put up together . I hope you all can relate to what I am meaning to say , yeah like wise … This was  one such dessert that I could not take my eyes away from BBC GOOD FOOD INDIA magazine on its front cover . Immediately went strait to the recipe in the magazine and it seemed to be so very simple but assembled in a genius innovative way that will make you a star chef even if it’s your first try . Made this dessert tweaking it a bit to my comfort level and available ingredients at home for a feast gathering where this was the finale dessert . Every one was awe struck with the first look of this dessert as i was . The first spoon in their mouth full and I knew by reading all their faces that their taste buds are being pampered generously .  My first mouth full and it hit me with nostalgic taste  of my moms trifle pudding that reminds me of my lazy summer vacations and days filled with delicious food .  This is just a posh version of the mighty usual trifle pudding that we have all been having for ages . Make your own twist to the recipe and fill your hearts with your own stories to feel the sense and comfort of sharing with family and friends creating memories that will come back to you every time you cook , see or eat it .

Ingredients

Ingredients
Quantity
Strawberry jelly270 grams
Strawberries400 grams , halved and hulled
Milk200 ml for custard
Ready made Swiss rolls180 grams sliced to one inch thick pieces ( any flavour , I used vanilla )
White chocolate100 grams chopped
Double cream200 ml for custard
Vanilla flavoured custard powder1/4 cup
Vanilla essence1 teaspoon + 1/4 teaspoon for whipped cream
Icing sugar6 tablespoons or to taste for whipped cream
Sugar100 grams for custard
Whipped cream90 ml

Method

  1. Make the jelly following the packet instructions . Leave until the liquid starts to thicken .
  2.  Place half the strawberries in the bottom of a wide , shallow pudding dish . Pour the jelly over and refrigerate to set according to packet instructions.
  3.  Heat 200 ml of milk and 200 ml double cream in a heavy bottomed pan . Mix custard powder with little water and dilute it with no lumps . Bring the milk and cream to boil , simmer the flame and add the diluted custard powder mixture . Keep stirring to get a thick gooey mass of custard that coats the back of a wooden spoon .
  4. Add vanilla essence and sugar . mix well . Remove from heat and add the chopped white chocolate . Mix well and cool .
  5.  Take the set jelly out of the refrigerator. Line the out side of the pudding dish with Swiss roll slices , making sure the slices are all facing the same way so it looks neat . Place a layer of Swiss roll on top of the set jelly . Pour the cooled custard into the middle and chill for another one hour or more to set .
  6.  Gently whip the whipped cream to stiff adding icing sugar and vanilla essence . Spoon the whipped cream over the set custard and decorate with the remaining strawberries .
  7. serve chilled .

Notes

  1. Can use any fruit of the season instead of strawberries or mixed fruits will also do .
  2. Can use any flavoured jelly . Get experimental using four different coloured and flavoured jelly to set to thin layers in the bottom for a rainbow trifle effect .

Coconutty jack fruit pudding

Share Button

image2

image3

Preparation Time : 20 minutes

Cooking Time : 30 -40 minutes + cooking and refrigeration timing

Serving : 6-8 members

Description

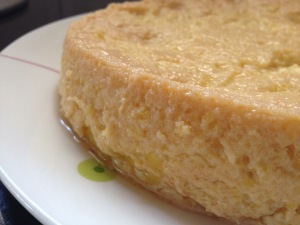
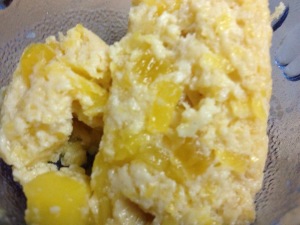
Jack fruit is my favourite fruit for many reasons from it’s sweet taste to it’s aroma to the nostalgia it carries along with my childhood days . Most of my summer vacations were spent at my maternal grand mothers place in Palghat as my mom was always  busy helping dad at work . Grand ma’s place was a massive huge house with so much space all around the house . We did have a back yard called the thodi with mango trees , coconut trees , plantain plants , tapioca , jack fruits etc .. Which was lush green through out the year . Even the walls had  all naturally grown green mesh in them . The kids were not allowed to go to the thodi alone as there were snakes there . The restriction did tempt us kids a lot to sneak in when ever possible and every time it was pure adventure from climbing trees ,to plucking fruits , to peeping over the last compound wall to see the pond in the other side ,to running away from snakes , to seeing live in helps romancing ( ssshush it’s a secret  till date :-)) . every time there was a ripe jack fruit from the thodi , it was like a festive season with two maids cleaning the ripe jack fruits with coconut oil greased hands separating  the ripe fruit segments from the seeds and thorny cover with all the kids around watching and gobbling  a few immediately . The air is filled with the mesmerising scent of ripe jack fruit that it takes you towards the happening place if away . My grand ma would make all authentic stuff with the jack fruit from payasam , puttu to kolakattai .  Umm , I doubt kids now a days will have such memories . Coming to the pudding . This was a first try with pure instincts of my nostalgic memories of my childhood days presented in a new posher avatar of those well researched authentic recipes of my grand ma’s magical treats . Served it to my hubby dears niece sabura and her dad when they were home to invite us for her sisters wedding . They liked it so much that they asked for a second helping and made sure to pack some as well . This sure made me more confident about my new posh version of jack fruit pudding letting a lot of gratitude to the good times life had to offer leaving way to good memories to cherish for ever and ever .

Ingredients

Ingredients
Quiantity
Condensed milk 1 tin
Thick coconut extract / milk1 tin of the condensed milk tin
Jack fruit purée1 tin of the condensed milk tin
Chopped jack fruit1 tin of the condensed milk tin
Eggs2
Vanilla essence few drops
Ghee / coconut oil to grease the pudding tray

Method

  1. Blend 2 eggs , condensed milk , thick coconut milk , jack fruit purée and vanilla essence together in a food processor . Add the chopped jack fruit bits into the blended mixture and mix well .
  2. Grease a pudding tray with ghee / coconut oil well . Pour the condensed milk + jack fruit mix into the greased tray . Heat water in a pressure cooker or rice cooker . Place a stand round ring and place the pudding tray above with a lid .
  3. Close the cooker lid and pressure cook for three whistles . If using rice cooker cook with a lid until it shows keep warm indication .
  4. Remove carefully and cool completely . Then place in the refrigerator over night . Run a wet knife all around the edges of the pudding tray .
  5. Place a plate that’s bigger than the pudding tray over and tilt the pupping tray to get the pudding on to the serving plate . Cut and serve .

Notes

  1.  Grind grated coconut of half of a big coconut with just 1/4 cup water to a smooth paste . Then strain to get thick coconut extract / milk .
  2. Blend cleaned jack fruit with little water to a smooth semi thick gooey paste to get jack fruit purée .
  3. make sure to close the pudding tray when steaming as the pudding tends to get water into it .
  4. In case you see a lot of water in your steamed pudding , do not panic . Leave it as it is . When you tilt the pudding to the serving plate just drain the excess water away .
  5.  I usually place 6-8 heavy stones on top of the pudding tray lid to avoid the water getting in . Sounds crazy but works always .
  6. This pudding can be served hot , warm or chilled .

Strawberry rose cream cheese pudding

Share Button

image 6

image 7

image 8

image 9

Preparation Time : 30 minutes

Cooking Time : 25 minutes + 3 hours or more of refrigeration or pudding to set

Serving : 4-6 members

Description

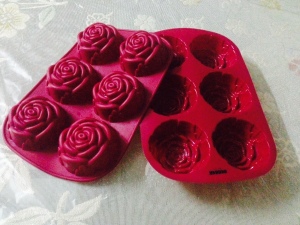
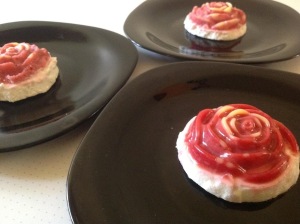
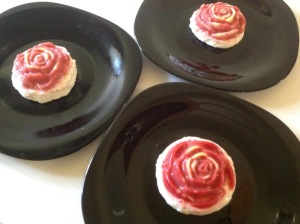
Any occasion to celebrate or guests at home to my kids coming home , the first to do on my list will be desserts . I make sure to serve two or more desserts always as I love to surprise and spoil people of choice . This is not intentional but happens so always when I start and finish with one dessert . I have left overs of some things like whipped cream , chocolate ganache etc .. That I make sure to use it in another form and create a dessert out of it . Like wise once when I made gulab jamun cheese cake , I was left with some cream cheese + whipped cream mix . If it was a lazy day , I should have just set it as it is and had it for my mid night craving enjoying my moment of adding more calories by sneaking to the refrigerator like nigella lawson dose . This time having two packets of strawberries in hand that I had kept aside to make another dessert came in handy along with a new silicon rose mould that I got . So just combined the left over cream cheese + whipped cream mix , strawberries and the rose mould to come up with this dessert . I myself was awe stuck with this Beauty that I created with perfect harmony and goodness of taste . ( I could not stop drooling over these ) Took a bite and temptation took over my sense . Taste wise the tanginess of the strawberries balanced with the cream cheese and sweetness giving way to indulge a symphony treat … Intense and irresistible . It was pure music in the tongue . I force fully had to self – impose a “BIG BAN ” on these for me :-(( as I ate so many servings that I had to health police myself .

Ingredients for the rose

Ingredients
Quantity
Fresh strawberries250 grams chopped
Sugar1/4 cup or to taste
Water5 to 8 tablespoons
Fresh cream 1/4 cup Vanilla essence
Gelatine 2 1/ 2 tablespoons soaked in 4 tablespoons of water

Method for rose 

  1. Boil strawberries with sugar and water to cook for ten minutes until the strawberries are cooked and mushy .
  2. Cool completely . Add vanilla essence and fresh cream to the cooled strawberries .
  3. Blitz it in a food processor to get a thick pulp .microwave the soaked gelatine for 30 seconds to dissolve .
  4. Bring it down to room temperature . Mix it with the strawberry mixture . Mix well and pour 1/4 way ( up to the rose petals are in the mould ) into greased rose silicon moulds .
  5. Place in the freezer to set for an hour or more .

Ingredients for base

Ingredients
Quantity
fresh cream250 gm whipped with 75 gm powdered sugar
Gelatine5 tablespoons soaked in 1/4 cup water
Cream cheese 1/2 cup
Strawberry essence 1 teaspoon

Method for cream cheese pudding

  1. Beat cream cheese with an electric egg beater to soften . Add whipped cream with sugar and mix well .
  2. Top with strawberry essence . Mix well and keep aside . Microwave the soaked gelatine for 30 seconds to dissolve .
  3. Cool it down to room temperature . Mix into the cream cheese mix .
  4. Pour over the set strawberry roses about to one inch thick . Place in the freezer to set for one hour or more .
  5. Once set place it in the refrigerator . Remove from refrigerator 10 minutes before needed to be served .
  6. Push the set strawberry rose cheese pudding out of the silicon mould over to a serving plate and serve chilled .

Baked peach cheesecake

Share Button

image (42)Uu366TjE0uuWSNx

image (43)


image (44)

Preparation Time : 15-20 minutes

Cooking Time : 35-40 minutes

Serving : 8-10 members

Description

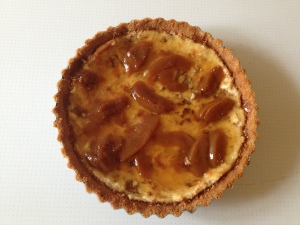
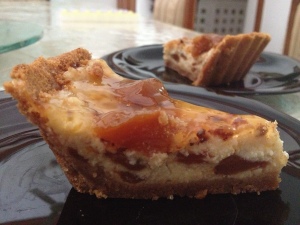
Dessert is always made at home only on festive days , special occasions , guests around or kids coming home . I always have two moods when it’s about desserts . One is to try out the most awaited interesting dessert recipes I have been waiting to try out or Russell up a dessert with ingredients that’s been in my pantry for a while to finish it off . The second mentioned has it’s risk factor of working either way good or bad .   This baked peach cheese cake was made to finish of the tinned peaches that I had in my pantry for quite some time when my kids were here on a holiday . Followed a recipe from the net and tweaked it to my convenience of ingredients at home . Baked , cooled and placed in the refrigerator to be served later . The next evening had my hubbies cousin sister wahida and his niece  Faiza visit us at home . I did serve this peach cheese cake along with a spread of nibbles . Not knowing how the dessert tastes with the trial I made to finish off stuff from my pantry , quietly was watching every one eat it . Faiza was the first one to say ” mami this so yum . What’s this ? ” feeling a bit of relief , made sure to serve her another piece of peach cheese cake . This dessert was over in a day and I did get my share to taste but still was not satisfied . Think the thought that the dessert was made to finish off a tin of peaches made me feel so . The following week , I get a call from wahida ( hubby dears cousin sister ) asking for the recipe of the peach cheese cake saying her daughter Faiza is craving for it ever since she ate it that day at your place and my other daughter Zeno is fed up listening to Faiza go gaga about the peach cheese cake and tempting her to the core . I am forced to make this peach cheese cake because of you and I hate it when I am pushed  to do things the main reason being my daughters compare me with you . I was like are you serious !!! You really want the recipe of that hassled up cheese cake in my mind . I had deleted the recipe thinking I am not going to make this cheese cake again . Now , I had to search for the recipe and send it over . What else could I do … I did so and made up my mind thinking not everything that tastes good to you is going to be liked by others or any thing that tastes bad to you is not going to be bad for others .  Dum me , at times I just loose my mind .. Well … I guess , I am being human actually :-)) .

Ingredients for the Crust

Ingredients
Quantity
Digestive biscuits12 crushed to a coarse powder
sugar1/4 cup
Melted butter4 tablespoons

Ingredients for Filling

Ingredients
Quantity
eggs2
cream cheese250 gms softened
sugar 1 Cup
vanilla essence 1/2 teaspoon
peach jam 1 cup+ 1/4 cup ( I used chopped tinned peach's instead for the filling )

Method

  1. Preheat oven to 350 degrees F / 180 degrees Celsius .In a medium size bowl, combine the digestive biscuit crumbs with the sugar and butter. Mix well and place in the bottom and sides of an 8-inch springform cake pan / tart pan .
  2. Make sure to press against the sides and bottom of the pan. Set the crust aside keeping it in the refrigerator .Prepare the filling by beating the eggs and cream cheese together.
  3. Add the sugar and vanilla and continue beating until well blended. Add 1/4 cup peach jam and mix until incorporated. Pour mixture into prepared biscuit crust and bake for 35 to 40 minutes.
  4. Remove from oven and let cool for 10 minutes.top with remaining 1 cup peach jam. Cool to room temperature and then refrigerate overnight. Serve chilled