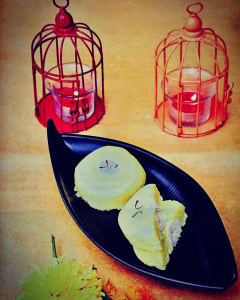
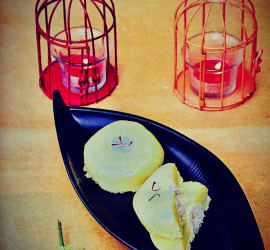
Fruit Sandesh

Share Button

whopper

Preparation time   : 30 minutes
Cooking time        : nil
Serves                  : 4 members

Description

Panner ( ricotta cheese ) is one ingredient that I got to know of very late as a kid. I remember eating palak panner in a restaurant for the first time when I was in the fourth standard in ooty. Not knowing what it is made of and tasted like nothing actually. I was in a confused state of mind then. From then on it was just another ingredient to me that is used in savoury dishes. The first time I got to see trala dalal use panner to make cheese cake.. my head did spin thinking yuk panner in a dessert. Wonder how it would taste. Finally I did end up following trala dalals vegetarian method of making a cheese cake with panner. My myth of panner is used just for making savoury things was thrown into the bins. Now I try to make a lot of deserts with panner and this is one such try that I did with tinned mixed fruits. This dessert should be had with in a day or two of making. With no cooking required, this is my go to recipe most of the time. I make the same with the fruits of the season for filling like stewed Apple’s or pineapples .
Try this dessert this Diwali season and entertain your loved ones with zing.

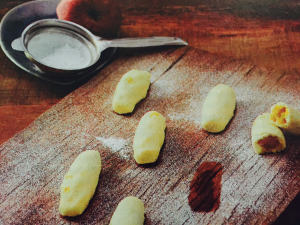
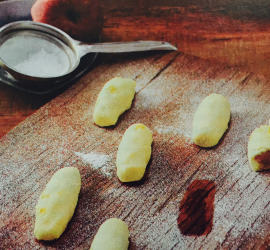
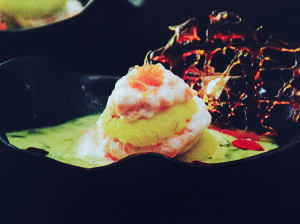
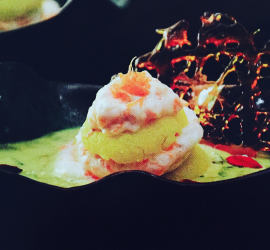
Fruit  Sandesh

Ingredients

Ingredients
Quantity
Panner ( ricotta cheese )200 grams
Powdered sugar5 tablespoons
Milk2 teaspoon ( optional , add only if the panner is too dry )
Rose essenceone drop

Ingredients for the fruit filling

Ingredients
Quantity
Tinned fruit1 tin drained
Saffrona pinch

Method

  • Mix drained mixed fruits with rose essence and saffron.  keep aside.
  • Crumble the panner and add the sugar powder. Mix well. If dry add milk it’s optional. Knead well together. Roll into lemon size balls.
  • Flatten each ball to Palm size . Place a teaspoon of mixed fruit in the centre. Bring the flattened panner edges towards the centre and close the fruits and roll to a log shape of finger size. Do the same to all the panner dough and fruits mix.
  • Place in the refrigerator until needed to be served. Sprinkle with powdered sugar and serve chilled.

Shahi boondi jar

Share Button

whopper

Preparation time  : 10 minutes
Cooking time        : 40 minutes
Serves                  : 8 members

Description

Any thing from desserts,salads, starters to main course served in a jar is so much in trend now a days. So why not try a jar dessert was the idea that popped up in mind. Having a lot of ladoos at home that were gifted by a cousin. I had to make use of them. What would pair well with a ladoo.. the mighty rabdi is the best said my inner instincts. Made a thick rabdi. Layered the two and this colourful jar dessert was born. The creaminess of the rabdi and the crispy moist crunch of the ladoo was a fantastic combination. I sent over a few to friends and relatives as I had five jars in hand. Saved just one for home. As I started to relish the dessert, I was like .. I should have saved two.. then it went back to.. thank god you have only one jar home. So less calories in take.. me and my monkey mind .. jumping from one jar to the other..

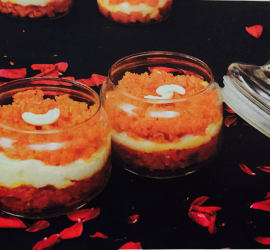
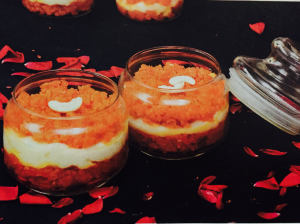
Shahi Boondi jar

Ingredients

Ingredients
Quantity
Mothi choor ladoo 6 broken down
Milk1 litter
Cardamom powder1 teaspoon
Sugar2 tablespoons
Cashew nuts , almonds and pistachiopeeled and chopped few to garnish

Method

  • Boil milk and reduce it to half its amount. Add cardamom powder and sugar. Boil further and reduce it to 1/4 of Its amount. Remove from heat and cool completely.
  • Take a clean glass jar of small size, fill the bottom to 1/4 th with the Mothi choor laddu evenly. Top with cooled milk rabdi to 1/4 inch equal to the Mothi choor laddu’ height.
  • Top again with Mothi choor laddu and another layer of rabdi. Make sure the top most layer is Mothi choor laddu.
  • Garnish with chopped nuts. Place in the refrigerator for six hours or more. Serve chilled.

Carrot rasamalai

Share Button

whopper

Preparation time : 10 minutes
Cooking time       : 5 minutes
Serves                 : 6 members

Description

Having to come up sweet recipes to be published in a leading Tamil monthly food magazine as Diwali special. I did not want to give the cliche sweets that are served at homes nor did I want to come up with cakes , cookies and things like that. So made up my mind to do deconstruct our desi sweets with a twist. This was one idea that I got from the world wide net which was done by a chef in Delhi ( sorry, I didn’t take note of the chef ). I simplified the recipe as much as I could as the origin recipe was too technically advanced that we home chefs find difficult to follow. Made the dish and my first bite into  the rasmalai sandwich… rabdi oozing out with the light whipped cream mixed with carrot’s grated was a match made in heaven. My mind went blank until I finished the entire lot. Then popped a question on why carrots alone pair so well with any Indian sweet. Well a million dolled question that I didn’t get an answer for till date. Carrot or no carrot I love my rasamali’s in any form. I always hide the last from others and gobble it up when alone. Crazy, Greedy breed me.

Carrot rasmalai

Ingredients

Ingredients
Quantity
Rasmalai6
Peeled , boiled and grated carrots2 tablespoons
Whipped cream2 tablespoons
Almonds , pistachio, rose petalsfew to garnish

Method

  • Squeeze the milk out of the resmalais. Cut each into equal halves horizontally.
  • Whip cream according to packet instructions to still peaks. Fold in the grated carrots with the cream.
  • Place one cut slice of resmalai. Top with one tablespoon of carrot whipped cream. Again place another piece of resmalai cut piece on top. Again top with carrot cream.
  • Do the same with all the cut resmalai pieces and whipped cream.
  • Place the sandwiched carrot resmalis in a shallow plate’s individually. Pour the resmalai milk over.
  • Garnish with chopped almonds, pistachio and rose petals. Place in the refrigerator and serve chilled.


Beetroot halwa white chocolate truffles

Share Button

unnamed

Preparation time   : 30 minutes
Cooking time         : 40 minutes + setting time in the refrigerator
Serves                   : 8 members

Description

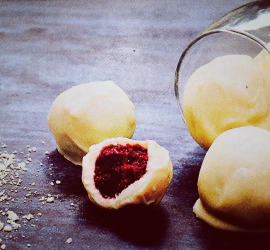
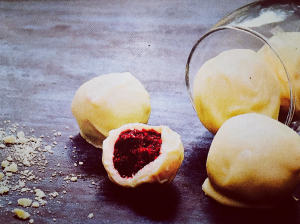
At home beetroot halwa is always made as an accomplishment for biriyani as a sweet. This is an authentic recipe from my in – laws  place. This time I had loads of beetroot halwa as left overs. Every one fed up seeing this on the table for every meal didn’t bother to see also. Me not wanting to waste the halwa, added a few more ingredients and rolled them to lemon size rounds. Was thinking of rolling them over chopped nuts but my pantry had no stock of nuts. Now what do I do. I stood in front of my refrigerator gazing at all the ingredients there. I saw a few bars of cooking chocolate. Yes I can coat it over chocolate but it will look odd as red with brown will not look eye appealing. Umm… my eyes go to the white chocolate and I am like bingo.. white chocolate coated beetroot halwa. Yum.. I had a tsunami happening in my mouth with so much saliva just thinking of the taste and look of it. Melted the white chocolate and coated the halwa balls. It was a flop as the balls broke down and the white chocolate got the colour of the beetroot mixed up. The results were not as I expected. Then I kept the balls in the freezer for some time to harden and then tried coating over  Melted white chocolate. Wolla, it worked perfect this time as I imaged it to be. Set it in the fridge and my first bite did true justice as I had imagined the dessert to be. Served as a snack while we were all watching the television. Hesitantly one was tasted and the rest vanished in seconds where I had to grab a few to save for myself.. so this the story of how the left over halwa got its old wine in a new bottle look giving birth to a new fusion dessert as well.

Beetroot halwa white chocolate truffles

Ingredients

Ingredients
Quantity
Beetroot1/4 kg peeled and grated
Milk1/4 litter
Sugar150 grams
Salta pinch
Milk Kova1 teaspoon
Ghee 40 grams
Water1/4 cup
Almond , cashew nuts and pistachio2 tablespoons peeled and chopped
White chocolate compound1 cup chopped

Method

  • Cook the grated beet roots with milk and water to done. Once cooked, boil until it gets dry with no moister in it.
  • Add sugar, ghee, milk Kova and salt. Mix well and boil until it dries up. Remove from heat and cool completely.
  • Add the chopped nuts to the beetroot halwa and mix well. Roll the halwa into small lemon size balls. Place in the freezer for two hours.
  • Melt the chopped white chocolate in the microwave for two minutes. Remove once in every 30 seconds and mix mix well with a dry spoon to get melted chocolate.
  • Dip the beet root halwa balls over the melted chocolate making sure it’s coated over all around well. Place over a tray lined with foil paper and place in the refrigerator until needed to be served.
  • Do the same to all the beetroot halwa balls. Serve when needed kept in the refrigerator.


Chocolate rasagulla

Share Button

unnamed

Preparation time  : 10 minutes
Cooking time       : 12 minutes
Serves                 : 6 members

Description

Who would say no to chocolate in any form… the word chocolate always relates to high end dishes and recipes like cakes and puddings to me. For a change I wanted to pair it with an authentic desi Indian dish. The Bengali rasagulla’s did pop up in my mind. First thought of infusing cocoa powder to the panner and soak it in sugar syrup. As I was gearing up.. I was like the sugar syrup always goes for a waste as no one actually has it much. Hey, why don’t you make a chocolate syrup instead so all get to lick their bowls. Changed my mind immediately and went further with this plan. All done. Looked at the fusion dessert, it was not eye popping. Looked like a mass of brown rounds with liquid. Tasted it and yummy yum.. I swear, I could not stop with one. It was so Very  addictive that I had my late night nigella lawson moments of sneaking to the refrigerator in the night ..

Chocolate rasagulla

Ingredients

Ingredients
Quantity
Condensed milk140 milli litter
Milk1 cup
Cocoa powder4 tablespoons
Vanilla essence 1 teaspoon
Rasagulla12
Almonds,cashew nuts and pistachiofew peeled and chopped to garnish
Rasagulla sugar syrupas required to dilute the chocolate syrup

Method

  • Squeeze out the sugar syrup out of the rasagullas and keep aside.
  • Mix milk, cocoa powder, condensed milk and sugar syrup from the rasagullas together. Strain and bring to boil until well combined and runny.
  • Add the squeezed rasagullas and cook for 3 minutes in medium heat.  Add the vanilla essence and mix well. Remove from heat and cool completely.
  • Place in the refrigerator for four hours. Serve chilled with a good garnish of the chopped nuts.

Notes

In case the chocolate syrup thickens dilute it by adding more rasagulla sugar syrup.


Paneer caramel pudding

Share Button

unnamed

Preparation time : 15 minutes
Cooking time      : 15 minutes
Serves                : 8 members

Description

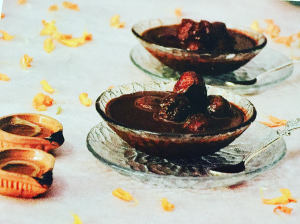
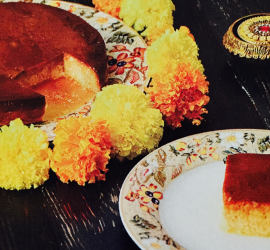
When ever pressed for time and I have to come up with a dessert to entertain guests at home. The mighty caramel pudding is first on my list as it’s easy to make and high in taste. But it’s a very cliche pudding too as the entire world makes it with so many versions of its own. So to break my monotonous cook off and to add a bit of zing to my table spread, I tried adding panner to the pudding . Went ahead with my gut instincts. I was wrong just with one thing of assuming the time to cook the pudding. Other than that I nailed it right. The slight bite that you get from the crumbled panner bits sure was the surprise element ending with raised eyebrows that day in the table.

Paneer caramel pudding

Ingredients for the pudding

Ingredients
Quantity
Milk1/2 litter
Eggs5
Sugar1 cup
Panner ( ricotta cheese )300 grams grated
Vanilla essence1 teaspoon
Cardamom powder1/4 teaspoon
Cinnamon powder1/4 teaspoon

Ingredients for the caramel

Ingredients
Quantity
Sugar2 teaspoon
Water1 teaspoon

 Method

  • Heat caramel ingredients together in a pudding mould that can be pressure cooked. Once the sugar melts and starts to brown to a golden colour, remove from heat and cool completely to set for ten minutes.
  • Blend eggs, sugar, milk, cardamom powder, cinnamon powder and vanilla essence together until sugar dissolves. Add the grated panner and blitz just for a second or two just to mix well. Make sure you do not grind it.
  • Pour this mix over the set caramel. Close with a kid or foil paper. Double boil in a pressure cooker with the weight on for ten minutes in high flame and in low heat for five minutes. Remove from heat and open the pressure cooker only once the whistle sound subsides.
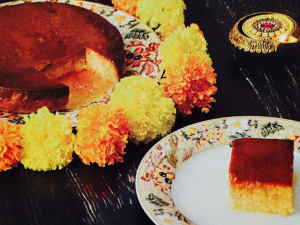
  • Remove and cool completely. Place in the refrigerator to chill for four hours. Run a sharp knife around the cooled pudding. Tilt over a flat pate. Cut into pieces and serve chilled.


Rabdi mousse delight

Share Button


unnamed

Preparation time   : 10 minutes
Cooking time        : 40 minutes
Serves                  : 8 members

Description

This fusion dessert is a share with no changes from my fellow foodie friend Mubeen sulthanas blog mubilicious. I think she had posted this around two years back. I did save it then but got to tick the cook off only now. When ever I try a new recipe, I add my twist to it but when it comes to desserts and cake I make sure to follow it precisely for best results. When get to a comfortable level with the dessert, that’s when I add my twist. But with this dessert, I did not want to spoil the taste of simple ingredients put together to taste divine. Like this dessert, the person who shared the recipe is also very sweet and beautiful. I did get to meet her just once when on a holiday in Dubai. Awaiting my next meet with her soon. Food plays such an interesting and important role in my life as the new people I get to know or become friends with are also food fanatics.. me and my crazy little world .

Rabdi mousse delight

Ingredients

Ingredients
Quantity
Milk2 cups
Cornflour1/2 teaspoon mixed with 1/4 teaspoon of water
Saffron2 pinches
Sugar3/4 cup + 3 tablespoons
Rose essencea drop
Whipped cream1 1/4 cup
Gelatine1 tablespoon
Rasagulla12
Yellow food coloura drop
Pistachio and almondspeeled and chopped few

Method

  • Boil milk with 1/4 cup sugar and  one pinch saffron. Add the diluted cornflour and keep stirring until the milk thickens. Add rose essence and remove from heat. Cool completely and keep aside.
  • Cut each rasagulla into equal 2 halves.
  • Soak gelatine with 4 tablespoons of water for five minutes. Microwave the soaked gelatine in a microwave safe bowl for 30 seconds until the gelatine is dissolved and gets to a watery stage.
  • Remove and cool down to room temperature.
  • Whip the whipping cream according to packet instructions to stiff peaks.
  • Add the cooled gelatine cooled rabdi milk mixture, 3 tablespoons sugar and yellow food colour together.
  • Place one piece of cut rasagulla into individual small pudding bowls. Top with whipped cream mix. Flatten the top evenly. Place in the refrigerator for four hours or more until the mousse delight sets.
  • Remove the set mousse delights from the pudding moulds. Garnish with chopped nuts and saffron and serve chilled.


Arabic nests

Share Button

FullSizeRender (1)

IMG_8989

IMG_8991

IMG_8993

IMG_8996

IMG_8997

IMG_9001

IMG_9002

IMG_9003

IMG_9004

IMG_9005

IMG_9007

Preparation time : 50 minutes
Cooking time      : 15 -20 minutes
Serves                : 6 members

Description

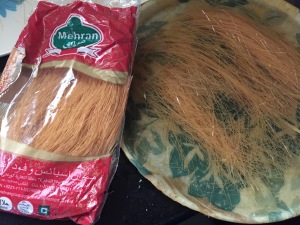
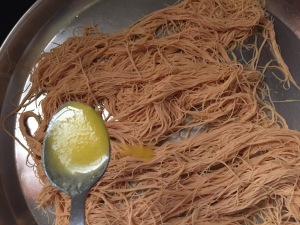
Having very thin fried vermicelli that I got from Dubai on a holiday which was lying in my pantry for a while. Made up my mind to put them to use but in an innovative stylish way. At the same time, my mind was busy thinking about the eid feast table menu. DUBAI – Arabia – thin vermicelli all this immediately took me back to the birds nest sort of dessert that I had in Dubai. Wanting to replicate the same.. I did my best with home friendly techniques that I thought would work. To my surprise it did and looked absolutely good too. Now, it came down to the tasting part, I took my first bite. The crispy vermicelli and the rose flavored filling inside was divine. But this tasted so very different from what I had in Dubai but in a good way. I was blown away with its beautiful balance of flavors, contrasting textures and contemporary presentation. Every one gave it the highest score in the dessert table letting way for it to be the dessert of the day. Happy happy me that my primped and prepped up new dessert for the festive season was a banging hit which evolved indulgence and refined taste.

Ingredients for the nest

Ingredients
Quantity
Thin vermicellione hand full
Waterenough to soak the vermicelli
Salta pinch
Ghee1 tablespoon
Muffin tray1 with 12 dents
Muffin cups12
Ghee or butterto grease

Ingredients for the filling

Ingredients
Quantity
Milk1 1/2 cups
Almond powder4 tablespoons
Cornflour2 tablespoons
Sugar4 tablespoons or to taste
Salta pinch
Rose essence2 drops
Almond + pistachiofew peeled and cut into strips

Method for nests

  • Soak the vermicelli in enough water and salt for 40 minutes making sure the vermicelli dose not break.
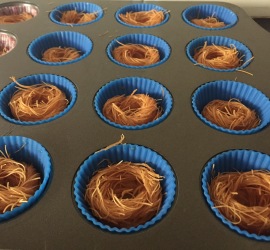
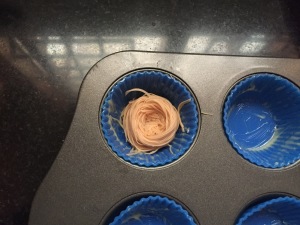
  • Drain the soaked vermicelli and add 1 tablespoon of ghee and mix well. Grease muffin cups with ghee or butter. Line them over a muffin tray.
  • Preheat the oven at 180 degrees Celsius for ten minutes.
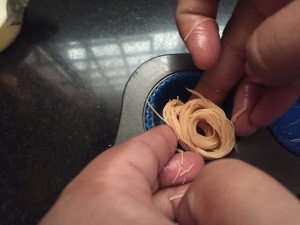
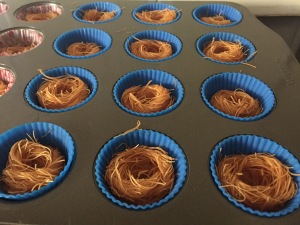
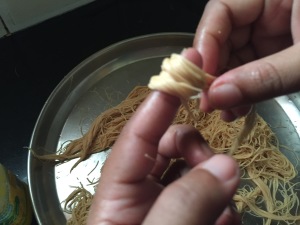
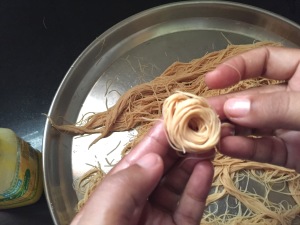
  • Take a little of the vermicelli and roll it around your finger to get a round shaped nest.
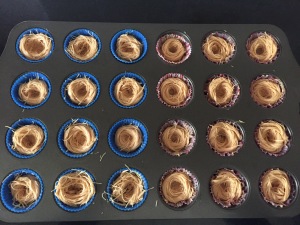
  • Place it over the greased muffin cup. Do the same to all the soaked vermicelli.
  • Place the muffin tray filled with the nests in the middle rack of the preheated oven and bake for 10 -12 minutes until crisp and golden.
  • Remove from the oven and cool completely.

Method for filling

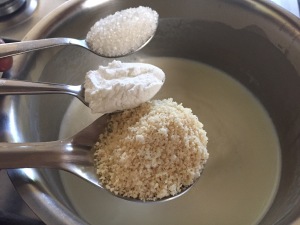
  • Heat milk to boiling point. Mix almond powder, cornflour, salt and sugar together.
  • Dilute it with a little water to pouring consistency. Lower the heat.
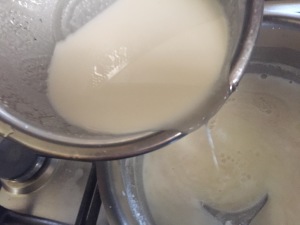
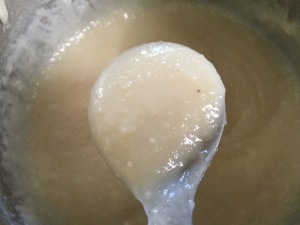
  • Add it to the boiling milk, stirring all the way until you get a thick gooey mass of mixture with no lumps.
  • Add rose essence. Mix well and remove from heat.

How to assemble

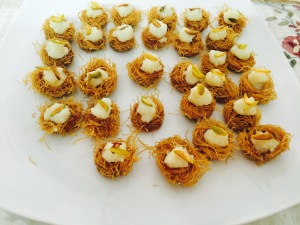
  • Place 1/2 a teaspoon of the cooled filling into each nest.
  • Garnish with almond and pistachio strips. Serve at room temperature.

Notes

  • Make sure not to break the vermicelli as it’s difficult to roll nests out of cut vermicelli.
  • In case the nests are not crispy. Deep fry in batches to crisp.
  • Drain into sugar syrup. Remove immediately, fill and serve.

Panner lemon curd pudding

Share Button


FullSizeRender (20)

FullSizeRender (19)

FullSizeRender (18)

FullSizeRender (17)


Preparation time : 30 minutes
Cooking time       : 20 minutes + setting in the refrigerator for 50 minutes.
Serves                 : 6-8 members

Description

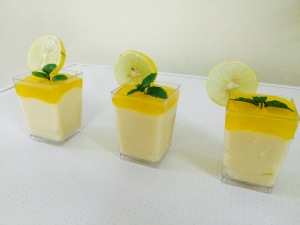
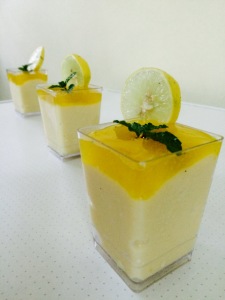
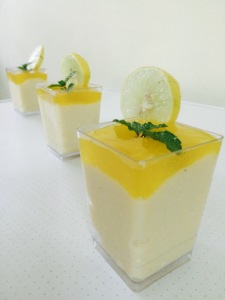
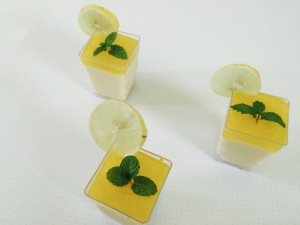
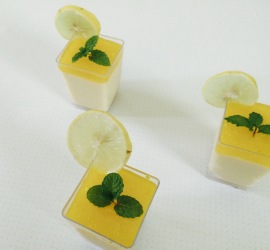
Other than lime juice, I never could relate to lime being used for a dessert or a sweet dish. But then as always breaking the stereo – type mind in me ends up with banging  results letting way for new inventions and more experiments to be added to my bucket list. This dessert also played a similar role as such. The tang of lemons with the sweetness breaking through and the sunshine yellow colour the lemons gave were to die for. Lemony, acidic and zesty. Perfect for a sunny afternoon with its fresh citrus notes. These can be made a day ahead and kept chilled until you need to serve them. If you ever flipped through pages of magazines and wanted to eat the photos, here’s your chance to try it out and surprise your loved ones.

Ingredients for the cream cheese layer

Ingredients
Quantity
Panner1 cup
Condensed milk1 cup
Sugar3 teaspoons
Vanilla essencefew drops
Gelatine1 teaspoons

Ingredients for the lemon curd

Ingredients
Quantity
Fresh lemon juice5 tablespoons
Grated lemon zest1 teaspoon
Sugar1/2 cup or more to taste
SaltA pinch
Butter5 tablespoons at room temperature
Cornflour1 heaped teaspoons
Yellow food colourA few punches ( optional but gives a good look to the pudding )

Method for cream cheese layer

  • Soak gelatine in 1/4 cup water to bloom for ten minutes. Then microwave for 30 seconds to dissolve. Cool to room temperature.
  • Beat Panner, condensed milk, sugar and vanilla essence together with the help of an egg beater to smooth. Add the dissolved gelatine and pour into individual pudding cups to 3/4 full. Place in the refrigerator to set for 40 minutes or more.

Method for lemon curd

  • Mix lemon juice, grated lemon zest, sugar, salt, food Colour and cornflour together with little water to get a loose consistency liquid.
  • Heat over medium flame until it thickens, stirring constantly. Remove from heat and cool completely. Add butter and keep stirring until all combines together and thick. Taste and adjust seasoning. Pour 3 tablespoons of lemon curd over each set cream cheese layer. Place in the refrigerator, until to be served.
  • Serve chill garnished with mint leaves and lemon slices.

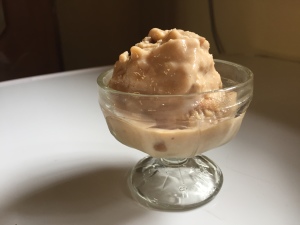
Chickoo ice cream

Share Button

FullSizeRender (6)

FullSizeRender (5)

FullSizeRender (4)

FullSizeRender (3)

FullSizeRender (2)

IMG_8420

Preparation time  : 20 minutes
Cooking time       : nil , 8 hours or over night to set
Serves                 : 10 members

Description

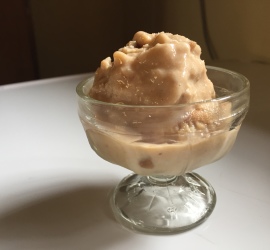
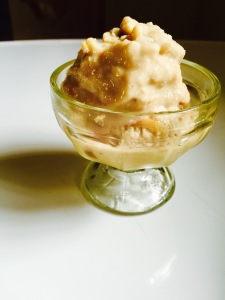
Nothing comes close to living the old school way of planting a tree, watering them, taking care of them and waiting for it to bear its fruits after years. Well I love doing this and make it a point to do so with the little space I have at the back yard at home. Every year the Chickoo tree bears fruits but I never care to relish on them wanting the birds and squirrels to have a feast instead. This year, I could not believe my eyes to see the tree over loaded with just fruits. As always my little joys are shared with friends and family. I did share a picture of the chickoo tree in face book. Friends started pouring in suggestions on what to do with the fruits. I settled for vidya vijay’s suggestion on chickoo ice cream as I have never ever tried making ice creams at home as to me it’s a stuff of childhood delight. I did follow sanjeev kapoor’s recipe which was so very easy to follow. I did make a twist of adding one cup chickoo purée. I treated my gym friends for the eid feast that I hosted. Believe me, the ice cream just vanished in seconds and was followed with we need more. The contrasting textures made it an absolute hit. All thank’s to vidhya for the idea and letting me try a new recipe as well. Now I know the trick of making yummy ice cream that’s hassle free which can be made in batches and frozen. They are easier to prep than you think. Umm.. Fresh and quick is always good isn’t it ??
Ingredients
Quantity
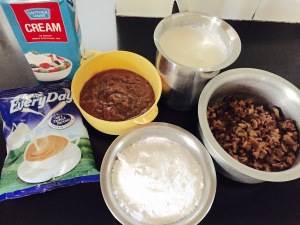
Chickoo purée1 cup
Chopped chickoo1 cup
Cream1 cup
Milk powder1 cup
Sugar1 cup powdered
Milk1 cup
Salta pinch

Method

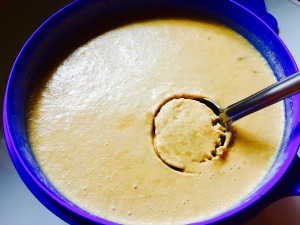
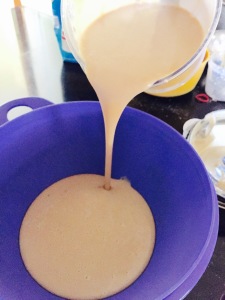
  • Mix all the ingredients together. Taste and adjust sweetness.
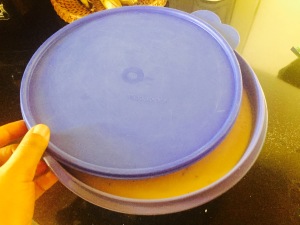
  • Pour into air tight container with a tight lid.
  • Place in the freezer for eight hours or over night to set.
  • Scoop out and serve chilled.