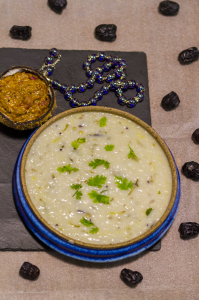
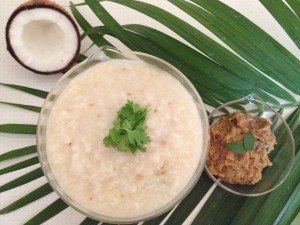
Venthaya koolu

Share Button

photo (11)

Preparation Time : soaking over night + 10 minutes

Cooking Time : 20 minutes

Serving : 4 members

Description

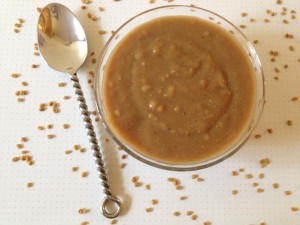
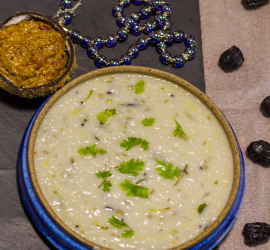
Venthaya koolu . Fenugreek Porridge. A tradition medicinal dish very own to tirunelveli . Only after i was married did i know there were medicinal dishes that Existed . As at moms place anything and everything about medicines are from the medical store except for the jeeraga kashayam given to us for gastric trouble. Here at my hubby’s place their food and menu revoles around health and medicinal facts for the body. This dish is had only for breakfast in an empty stomach to cool the body (as tirunelveli is hot place)and if you have blisters in your mouth or tummy so this dish is a cooling agent to the body.I make this dish atleast once a month.My kids don’t fancy this dish but i comple them and some how get it into their tummy. This dish requires a lot of stirring to be done , that’s a bonus to loose a few calories too.

Ingredients

Ingredients
Quantity
raw rice ( pachai arusi )1 cup
split black lentil ( urad dal with out skin )1 cup
fenugreek seeds1/4 cup
thick coconut milk1 cup
salta pinch
palm sugar ( karupetti )1/4 kg
water3 + 2 cups

Method

  1. Soak rice , black lentil and fenugreek seeds in water over night . Drain and grind in a food processor to a smooth paste , adding 3 cups of water to get a running consistency batter .
  2. Add a pinch of salt to the batter . Crush the palm sugar and boil it with 2 cups of water to get a syrup . Strain and set aside .
  3. In a heavy bottomed non stick kadai boil the ground loose batter , stirring continuously in medium heat for over 10 minutes till the rice mixture is cooked through and gets to a thick paste .
  4. Add the palm sugar syrup little by little stirring continuously and mix well . Then finally add the coconut milk as still stirring continuously .
  5. Simmer the flame and let all the flavours infuse together for a minute . The porridge should of thick flowing consistency .
  6. Remove from heat and serve hot or warm .

Pazlathappam

Share Button

photo (9)

Preparation Time : 30 minutes

Cooking Time : 20 minutes

Serving : 4 members

Description

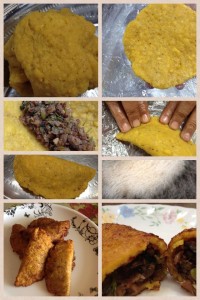
Palazthappam . An authentic ravuthar dish very own to the Palghat , Coimbatore region people . As we people are from Tamil Nadu , Kerala border Region . Our food , Language , habits , customs and every thing is a mix of both the states. This dish is very similar to the unnakai made in Kerala by the malabar region people. Only difference is the stuffing. We use minced meat stuffing or aval (poha) stuffing and they use dates , nuts and coconut. A few days before my moms cousin sister sabeena Shaikh (jabi Akka) messaged me the recipe with the picture of palazthappam. Only then did i get reminded about this dish. As i was in moms place asked her to make some.So picture and recipe courtesy my mom.(poor thing she was sick and made it just for me) a very tricky dish, even till date i end up making a mess at times.

Ingredients for Cover

Ingredients
Quantity
Kerala plantain 500 gm ( ripeness is very important , as too ripe ones will become watery and hard to shape . Not to ripe ones will be hard to shape and not sweet enough )
salt to taste
Coconut oil or vegetable oilto deep fry

Ingredients for Stuffing

Ingredients
Quantity
minced meat ( mutton only )1/4 kg
onions8 chopped finely
green chillies6 chopped finely
coriander leaves1/2 bunch chopped finely
ginger paste1/4 teaspoon
garam masala powder1/4 teaspoon
salt
to taste
coconut oil2 tablespoons

Method

  1. Steam the plantains and cook till they slit . Do not over cook . Cool and remove the black pith .
  2. Mash the plantains with out water in a mixer to get a tight dough . Set aside . Pressure cook the minced meat with salt to taste , ginger paste and garam masala powder till cooked .
  3. Boil the minced meat till all the moisture has evaporated and set aside . Heat 2 tablespoons of oil in a non stick kadai .
  4. Fry the onions to brown . Add green chillies , cooked minced meat , coriander leaves and salt to taste .
  5. Saute for 5 minutes to get a dry minced meat mixture .

How to Proceed

  1. Make lime sized balls with the plantain dough . Flatten each ball into round shaped circles . ( like poories , my mother used the poorie press keeping the plaintain ball inbetween two greased plastic sheets , this was so much easier than doing by hands ) place 1 1/2 tablespoons of minced meat mixture in the Center of flattened plantain circle .
  2. Close the circle from one side to get a semi circle shaped palazthappam . Fold and press the edges gently to close the palazthappams .
  3. Do the same with the remaining plaintain dough and stuffing mixture . Heat oil ( coconut oil adds more taste ) to deep fry .
  4. Drop the palazthappam s one at a time into hot oil and fry to golden brown colour and a bit crisp . Drain and serve as it is .
  5. Yummy sweet , sour , tangy , hot palazthappams are ready to be eaten .

Murungga poo poriyal

Share Button

photo (2)


Preparation Time : 20 minutes

Cooking Time : 15 minutes

Serving : 4 members

Description

Murungga poo poriyal . Drumstick flower poriyal. Can’t remember from where or whose recipe this is because haven’t had this dish in my moms place or my hubby’s place. But my instincts tell me it’s from Coimbatore. My hubby loves this dish but the problem is we get to prepare this dish only when the flowers bloom in a particular season when the season is on there is always a white carpet of drumstick flowers on the ground all around the tree. It’s a treat to the eyes.Very easy to prepare dish with very few ingredients.

Ingredients

Ingredients
Quantity
drumstick flowers4 cups
small onions1 hand full chopped
garlic1/2 hand chopped
green chillies2 to 3 chopped
saltto taste
eggs2 (seasoned with salt and pepper) beaten lightly
coconut oil2 tablespoons

Method

  1. Soak the drumstick flowers in salted water for 5 minutes . This helps small spider like white insects creep out of the flowers .
  2. Rinse the flowers in water three times , changing water every time . Drain and put it into a non stick pan .
  3. Top with chopped small onions , garlic , green chillies , salt to taste and little water .
  4. Cook till the flowers are cooked and the water has evaporated . ( I do till this part of the recipe in advance , and the rest that follows latter just before serving as you get to serve the dish hot ) make a well in between the cooked flowers .
  5. Pour the coconut oil in and heat the oil . Add the beaten eggs and scramble along with the flowers till the eggs coat the flowers well and the eggs are cooked .
  6. Serve hot for lunch along with rice as a side dish .

kumbliappam

Share Button

Photo: Kumbliappam . An authentic kerela sweet recipe that I first got  to know about through the face book page notes from a Mallu kitchen where a picture was posted with out a recipe . This authentic sweet did excite me a lot as it was the first time I got to see such a dish that I have never heard of before . Once on my visit to Cochin to bid bye to my brother Darvesh and family who were returning back to London after their 2 weeks holiday in India , my uncle jaffer chacha got a huge parcel from a local small tea stall  ( thattu kada / potti kadai ) full of kumbliappam made with ripe bananas .  All of us just gobbled it up in minutes . Even then none of us knew what the name of the dish was . I did take note of the recipe from not sure where in one of my hand written recipe book and did try it out at home when we had a huge jack fruit at home from our farm . Not having the vazhana leaves which is used authentically , I substituted the poo arasa maram Leaf ( don't know the english name , sorry ) instead which I got from my neighbours house . Made this  for breakfast when my daughter anisha was here . The clarity and perfection of the jackfruit speaking for itself in the dish was a dose of freshness .Fussy   Anisha didn't fancy it much , but it was devoured by the rest of us . I just could not control myself to stop eating it and forcefully had to parcel the rest to my in - laws place :-)) .  I made up my mind to post this recipe last night but not knowing the name of this dish , how is it possible to post . Well I had to re - check by logging into notes from a Mallu kitchen to get the name . Thanks to notes from a Mallu kitchen to have introduced  me to yet another authentic Kerala dish .  Although trends come and go , these sort of authentic treats never fail to impress and we all finally get back to our roots .

Preparation Time : 40 minutes

Cooking Time : 10 minutes

Serving : 6 members

Description

Kumbliappam . An authentic kerela sweet recipe that I first got to know about through the face book page notes from a Mallu kitchen where a picture was posted with out a recipe . This authentic sweet did excite me a lot as it was the first… time I got to see such a dish that I have never heard of before . Once on my visit to Cochin to bid bye to my brother Darvesh and family who were returning back to London after their 2 weeks holiday in India , my uncle jaffer chacha got a huge parcel from a local small tea stall ( thattu kada / potti kadai ) full of kumbliappam made with ripe bananas . All of us just gobbled it up in minutes . Even then none of us knew what the name of the dish was . I did take note of the recipe from not sure where in one of my hand written recipe book and did try it out at home when we had a huge jack fruit at home from our farm . Not having the vazhana leaves which is used authentically , I substituted the poo arasa maram Leaf ( don’t know the english name , sorry ) instead which I got from my neighbours house . Made this for breakfast when my daughter anisha was here . The clarity and perfection of the jackfruit speaking for itself in the dish was a dose of freshness .Fussy Anisha didn’t fancy it much , but it was devoured by the rest of us . I just could not control myself to stop eating it and forcefully had to parcel the rest to my in – laws place  ) . I made up my mind to post this recipe last night but not knowing the name of this dish , how is it possible to post . Well I had to re – check by logging into notes from a Mallu kitchen to get the name . Thanks to notes from a Mallu kitchen to have introduced me to yet another authentic Kerala dish . Although trends come and go , these sort of authentic treats never fail to impress and we all finally get back to our roots .

Ingredients

Ingredients
Quantity
Ripe Jackfruit Bulbs(chopped finely) 2cups
Jaggery(scraped)1 cup or to taste
Freshly grated coconut1cup
Rice flour (iddiappam rice flour )2cups
Cardamom powder1/2tsp
Vazhana Ela or Banana leavesas required


Method

  1. Melt jaggery in 1/2 cup of water.Remove the impurities.
  2. Make a smooth paste of jackfruit pieces without adding any water in a food processor .
  3. In a big bowl add jackfruit paste,jaggery syrup and coconut.Mix well with your hands.
  4. Add rice flour little by little and make a smooth dough.It should not be too thick or too loose.
  5. Now take the leaf(Vazhana leaf or banana leaf) and make cones with it and fill the dough inside.
  6. Bend the top of the leaves and press inside to cover the top or Use toothpicks to keep the leaves closed.
  7. Steam it around 30 minutes or till a tooth pick inserted comes out clean .


Notes

* You can prepare this appam with Chakka varatti /jackfruit jam as well ( available in all super markets , i recommend double horse brand ) add some rice flour and grated coconut to the chakka varatti and follow the above recipe .

If jackfruit is not available ,try this recipe with ripe bananas.*


Vegetable Rawa Kichadi

Share Button

Vegetable rawa kichadi

Preparation Time : 15 minutes

Cooking Time : 15 minutes

Serving : 2 to 3 members

Description

Uppuma is one breakfast dish no one at home likes . So any day planing to have a heavy lunch , breakfast at home is always Uppuma . Every one has it with a frown on their face . My hubby just has a look and leaves skipping breakfast . ( as I do and my maids too ) but when it’s vegetable kichadi every one loves it . We end up with an empty vessel always .

Ingredients

Ingredients
Quantity
Rava/Sooji/Semolina1 cup
Onion3/4 cup finely chopped
Ginger paste1/4 teaspoon
Garlic paste1/4 teaspoon
Green chillies2 slit
Vegetables3/4 cup ( mix of beans, carrot, peas and capsicum )
tomato1 small chopped
Turmeric powder1/4 teaspoon
Chilli powderto taste
Curd2 teaspoons
Lime juicea squeeze
Water3 cups
Mint leavesfew
Coriander leavesfew chopped
Ghee1 1/2 tablespoon
Cinnamon1 inch piece
Cloves2
Cardamom1

Method 

  1. Heat ghee in a pressure cooker adding cinnamon , clove and cardamom . Fry till fragvent .
  2. Top with onions and fry to brown . Add ginger garlic paste and fry to brown .top with mixed vegetables , green chillies , tomatoes , coriander leaves , mint leaves and salt to taste .
  3. Sauté for 5 minutes . Add curd , turmeric powder , chilli powder and stir well and cook for 3 minutes .
  4. Pour water and pressure cook for 1 whistle . Add a squeeze of lime and bring to boil . Taste and adjust .
  5. Add sooji little by little stirring continuously in reduced flame making sure no lumps are formed .
  6. When moisture is adsorbed and kichadi is cooked , remove from flame and serve hot .

Pazlam naiyil varuthathu

Share Button

Pazlam naiyil  varuthathu

Preparation Time : 10 minutes

Cooking Time : 5 minutes

Serving : 4 members

Description

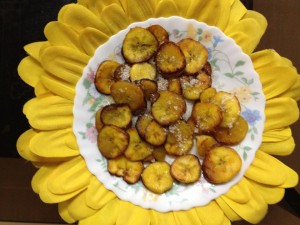
A simple snack made with just 3 ingredients . At home we have a huge pile of Kerala plantain hung in the middle of our store room and it is replaced when over . Kerala plantains are served on the table in some form or the other every day . I miss my Kerala plantains a lot as its very difficult to get them in tirunelveli , even if we do its not of good quality as back home . So when in moms place I make it a point to feed myself a lot with Kerala plantains and add a lot of calorie content too .

Ingredients

Ingredients
Quantity
Ripe Kerala plantain4 peeled and cut into 1/2 inch circles
Sugarto taste
Ghee or oil1 tablespoon for each batch

Method

  1. Heat an iron griddle or a dosa tawa .
  2. Pour ghee . once hot , place a batch of cut ripe Kerala plantains .
  3. Turn each piece after 40 seconds . Cook the other side as well for another 40 seconds .
  4. Once you get crisp edges and a soft inside of each plantain piece , remove to a serving plate and sprinkle sugar to taste over when hot , as it helps the sugar to melt a little which gives a lot more taste to this snack .
  5. Serve immediately

Nonbhu kanji

Share Button

IMG_4785-1

Nonbhu kanji

Preparation Time : 15 minutes

Cooking Time : 20 minutes

Serving : 4 members

Description

A staple dish we mainly use to break our fast during the month of Ramadan . This is my mother – in – laws recipe . Light flavoured Rice porridge , soothing to the tummy after a long days fast . It is usually served with a brinjal chuntny , samsa ( samosa , this is how they pronounce at my hubby’s place ) , cutlets , paruppu vadai or any deep fried snack . A soup bowl full is filling to the tummy .

Ingredients

Ingredients
Quantity
Broken basmati rice1 cup heaped
fenugreek seeds1/4 teaspoon
cumin seeds1/4 teaspoon
garlic flakes2
small onions6
green chillies2 slit
coriander leaves chopped1 teaspoon
mint leaves1/2 teaspoon
thick coconut milk1 cup
water6 cups
saltto taste
ghee1 table spoon
mustard seeds1/4 teaspoon
cinnamon1
clove1
cardamom1
curry leaves4
ginger garlic paste 1/4 teaspoon

Method

  1. Pressure cook , washed rice , small onions , garlic flakes , green chillies , mint leaves , coriander leaves , fenugreek seeds , cumin seeds along with the water for 4 to 5 whistles .
  2. Add salt to taste and coconut milk . Mix well adjust the consistency to a flowing thick porridge adding water if needed .
  3. Bring to boil . Heat ghee in a pan , crackle the mustard seeds , add the cinnamon , clove , cardamom , cut small onions 4 , curry leaves and ginger garlic paste .
  4. Fry to brown and crisp and pour over the kanji and mix well .
  5. Serve hot with brinjal chuntny .
Brinjal chuntny ingredients 

Ingredients
Quantity
Brinjals1/4 kg chopped (boiled with salt and water)
dry red chillies3 fried to crisp
tamarinda huge pinch
coconut1/4 cup
salt to taste
oil1 table spoon
mustard seeds1/4 teaspoon
urad dhal1/4 teaspoon
curry leavesfew
onion1 small chopped

Brinjal chuntny method 

  1. Blitze together coconut , tamarind , roasted red chillies and salt to taste to a coarse paste without adding water .
  2. Add the the boiled brinjal and blitze again till all combine together . Taste and adjust and set aside .
  3. Heat oil crackle mustard seeds , urad dal , curry leaves . Top with chopped onions and fry to translucent .
  4. Add the brinjal chuntny and mix well .
  5. Remove from heat and serve with kanji .

Murugga keerai poriyal

Share Button

Murugga keerai  poriyal

Preparation Time : 30 minutes

Cooking Time : 15 minutes

Serving : 4 members

Description

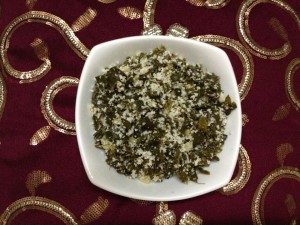
This is my grand mom balkees periyas recipe ( dads mom )very rarely did I get permission to stay with my cousins and grand Mom in Coimbatore at my uncles place ( dads last twin brothers ) as my grand mother used to live with them it was the place where all my aunts ( six of them , dads sisters ) and their children used to come often . Huge gang of people always in all age groups were there . I remember my 2 chachis , ( Mehar chachi and Shameem chachi ) sitting in a black bench sort of a sofa cleaning and cutting a lot of vegetables for lunch . Grandma used to cook . Once the vegetables are done it was served to the kids in small plates as a snack by 11.30 . I loved Murungga keerai that was served to me . After I started cooking wanted the recipe for this dish but my grand mom never let’s her recipes out , so had asked her to make it for me and quietly took note of how she prepared it .

Ingredients

Ingredients
Quantity
Drumstick leaves4 cups ( leaves alone )
coconut water of2 coconuts
small onions1 hand full sliced into rounds thinly
garlic1/2 hand full sliced into rounds thinly
green chillies2 chopped
coconut1/2 cup grated
coconut oil1 tablespoon

Method

  1. Seperate the leaves from the stem and wash , clean and drain . Set aside .
  2. In a kadai add small onions , garlic , green chillies and coconut water . Bring to boil .
  3. Top with the drumstick leaves and cover with a lid , stirring every 3 minutes once till all the coconut water is dried out and the leaves are cooked .
  4. Add little water if needed . Season with salt and add the grated coconut and coconut oil . Mix well .
  5. Simmer for 3 minutes till all the flavours infuse together .
  6. Serve hot or at room temperature with boiled rice as a side dish for lunch or with kanji .

Kayipola

Share Button

Kayipola

Preparation Time : 10 minutes

Cooking Time : 40 minutes

Serving : 6 members

Description

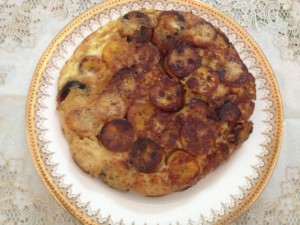
A malabar authentic sweet dish . My favourite cuisine is malabar cuisine . From my childhood days have heard a lot about malabar cuisine And did get to taste and eat a lot as well from my friend gazeena sulu kunahameds home .( packed from her home to boarding school after holidays ) but my quest to gain knowledge about the malabar cuisine happened very recently after I got into food blogging . I took note of so many recipes from my most liked food pages I follow from the net . This recipe is also one among them . I think this is from yummy , yummy to the tummy . Tried it out when my gal was here . It was yum . ( I finished 3/4 of the entire kayapola . )

Ingredients

Ingredients
Quantity
Kerala plantain ( nentharam pazlam )4 sliced
Milk1 cup
Oil or ghee to fry the bananas + 1 tablespoon
Sugar to taste
Egg 1
Cardamom2 crushed
Rose water1 teaspoon

Method 

  1. Shallow fry the sliced banana pieces in oil or ghee to brown and set aside . Beat milk , eggs , cardamom crushed , sugar and rose water together .
  2. Grease a non stick small pan with 1 tablespoon ghee . Layer the base with fried banana slices , pour half the amount aof the milk egg mixture .
  3. Cover and cook in very low flame for 15 minutes until egg mixture gets dried up . Make sure not to burn the bottom .
  4. Turn the side and pour the other half of the egg milk mixture and cook for another 15 minutes in low flame till egg mixture is dried up .
  5. Remove to a serving plate , cut and serve hot .

Stuffed Bun

Share Button

Stuffed bun

Preparation Time : 30 minutes

Cooking Time : 20 minutes

Serving : 8 members

Description

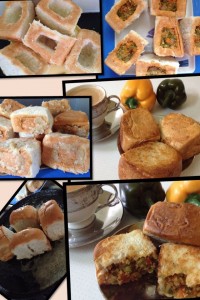
My friend fathima had come to Coimbatore for shopping once when I was there . She stayed in her sister – in – law Farzanas( farju , thats how she addresses her ) house . It was a 2 day trip . The entire day we used to shop together and hang around . It was great fun . On her way back to Salem she dropped into my place to bid me bye . She handed a box to me asking me to eat it . The box was warm . Opened to check what it was . Saw 3 pav bhajibuns toasted on all sides . I was like where is the veg gravy (bhaji ) for the pav ( buns ) . Called her to find out if she forgot to drop the gravy . She laughed her guts out telling me it’s stuffed bun made by Farju . Dum me , then I tasted it . God it was so very yummy . I tried it once I got Back home . Turned out well and every one liked it .the stuffed buns Which fathima had given had onion masala filling with 1/2 boiled egg inside . Here my filling is with chicken and vegetables .

Happy snaking on a wonderful Sunday.

Ingredients

Ingredients
Quantity
Pav bhaji buns8
egg1 beaten with salt and pepper to taste
ghee or oil4 teaspoons to toast the buns

For Filling 

Ingredients
Quantity
Boneless chicken 1 cup ( boiled with little turmeric powder
1/4 teaspoon ginger , garlic paste salt to taste along with little water and shredded )
mixed vegetables1 cup ( carrot, beans , capsicum , cabbage , green peas ) chopped
onion1/4 cup chopped
oil2 teaspoons
chilli flakesto taste
pepper powder and salt to taste
limea squeeze

Method
  1. Heat oil in a kadai . Add onions and vegetables and sauté for 5 to 8 minutes . Top with the cooked shredded chicken and mix well .
  2. Add salt , pepper and chilli flakes . Toss well and fry for 2 minutes . Finally squeeze lime , mixing well . Taste and adjust .
  3. Remove from heat and cool completely . Set aside .
  4. Make a square on the under part of the pav bun with a knife . Keep the square part aside .
  5. Remove the inside part of the bun with your fingers to get a hollow space in the bun to stuff the filling inside .
  6. Carefully stuff the hollow space of bun with the filling . Dip the square lid of the bun under part in the beaten egg and close the stuffed bun .
  7. Mix 1/2 teaspoon of removed bun crumbs with little beaten egg to get a paste . Use this paste to seal the square lid all around .
  8. Heat oil or ghee in a tawa and fry the stuffed bun on the sealed part first as to cover the stuffed part together . Fry in low flame on all sides to a golden colour . Serve hot with tomato sauce and masala tea .