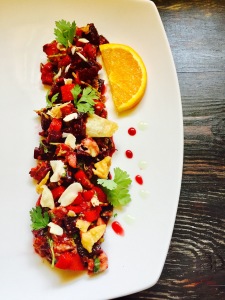
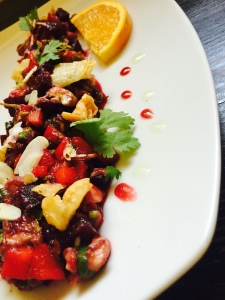
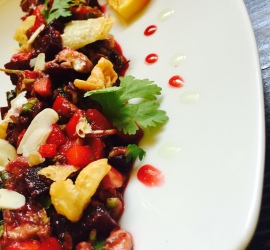
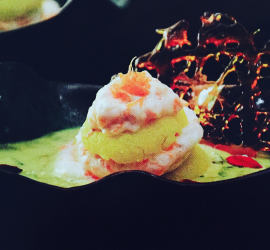
Beet’s and avocado salad with orange dressing

Share Button

img_0710

fullsizerender2

fullsizerender1

fullsizerender

img_0712

Preparation time : 20 minutes
Cooking time      : 5 minutes
Serves                : 4  members

Description

The minute you think of dieting, the first thing that pops up in your mind are salads. I always end up trying out new combinations of mixed vegetables and fruits to come up with a salad recipe for my dieting and have it as my lunch. This salad also was a similar try. The citrusy orange flavour with the tang helped to break the sweetness of the beetroots and carrots. The avocado gave a creaminess and the crisps with the almonds gave a good crunch. All in all a flavour bomb with all the possible texture’s in one bite.    Easy to make, tasty, filling and healthy.  Now isn’t this a recipe for keeps ? This is my go to recipe when ever I crave for a healthy option. Don’t miss out on trying it peeps.

Beet’s  and avocado salad with orange dressing

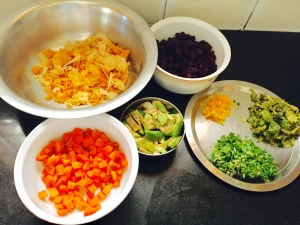
Ingredients for the salad

Ingredients
Quantity
Beetroot1 big peeled , chopped to cubes and boiled
Carrots 1 big peeled , chopped to cubes and boiled
Avocado1 ripe flesh chopped
Orange rind gratedof 1 orange
Mint leaves1/4 cup chopped
Coriander leaves1/4 cup chopped
Crisps 1 cup ( I used deep friend spring roll sheets , you can use potato chips too )

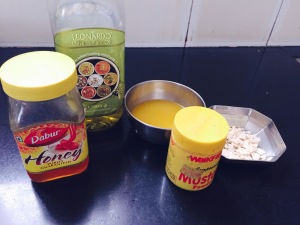
Ingredients for the dressing

Ingredients
Quantity
Olive oil1 tablespoon
Honey1 tablespoon
Orange juiceof 1 orange
English mustard1/4 teaspoon
Almonds8 peeled and chopped
Salt + pepper powderto taste

Method

  • Mix all the salad ingredients together except for the crisps. Place in the refrigerator.
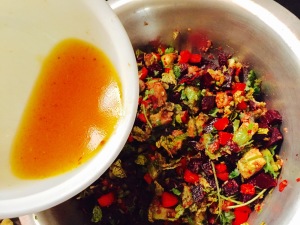
  • Just before needed to serve. Mix the dressing ingredients together. Taste and adjust seasoning. Pour over the mixed salad and toss well.
  • Garnish with the crisps and serve immediately.

Notes

  • Make sure you take the orange juice just when you want to mix it into the salad as it turns bitter if kept for a while.

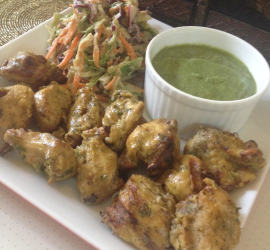
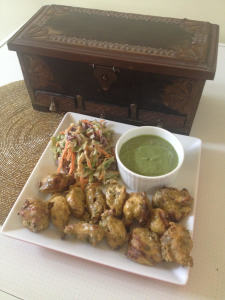
Murgh Kastoori kebab

Share Button

unnamed

unnamed1


Preparation time : 30 minutes + 1 hour marination
Cooking time       : 8- 10 minutes
Serves                 : 4 members

Description

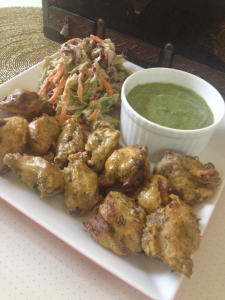
I have this habit of going through my recipe posts once in a while when I end up having nothing to do.. ( hey be frank.. It’s all self admiring of your work… Ok, ok.. Agreed) I take note that it’s been a while since I posed a chicken recipe. Went through my photo gallery for a good chicken recipe and found this murg kastoori kebab. I made it for a feast at home when my newly wedded daughter visited me. She loves the flavor of dried kasoori methi leaves. I made it a point to use them as the main flavor for this kebab. I know you all must be thinking about how can my vegetarian girl eat chicken. Well she does eat chicken alone once in a blue moon and I make full use of the opportunity given to come up with some flavors  she loves. I did full justice as she loved these kebab’s. I was a bit nervous about the yolk part being basted on top while grilling as it might result with an eggy smelling kebab. I didn’t mention about it either in the table and just waited eagerly. Yes, the results were fantastic. Now it’s added to my regular menu at home as well. Give it a try and sure you will end up adding it to your regulars at home like I did.

Murgh Kastoori kebab

Ingredients

Ingredients
Quantity
Chicken breast cubes15 pieces
Black cumin seeds2/3 teaspoon
Bread crumbs4 tablespoons
Butter4 tablespoons
Egg yolks3
Kasoori methi ( dried Kasuri Methis leaves )2 tablespoons
Ginger paste 1 teaspoon
Garlic paste1 teaspoon
Ginger grated1/4 teaspoon
Gram flour ( besan ) 2 teaspoons
Green cardamom powder1/2 teaspoon
Green coriander leaves4 teaspoon chopped
Lemon juice3 teaspoons
Oil 2 teaspoons
saffrona pinch
Saltto taste
White pepper powder1 teaspoon

Method

  • Marinate chicken breasts with ginger paste, garlic paste, kasoori methi, white pepper and salt to taste for one hour.
  • Heat butter and oil over a low flame. Add the gram flour and stir until golden brown. Remove from heat and divide this mixture into equal two parts.
  • Add one part of the gram flour mixture to the marinated chicken cubes along with bread crumbs, ginger grated and chopped coriander greens. Mix well to coat the chicken cubes.
  • Preheat oven to 150 degrees Celsius for ten minutes.
  • To the second half of the gram flour mixture add black cumin seeds, saffron and egg yolks. Whisk batter throughly.
  • Coat each marinated chicken cube into the gram flour batter and skewer them 1/2 inch apart from one another.
  • Roast the chicken in the oven for 8-10 minutes.
  • Remove chicken pieces from the skewers. Sprinkle cardamom powder and lemon juice. Serve hot with salad and mint chutney.


Palak poori

Share Button

img_1460

img_1445

img_1446

img_1447

img_1450

img_1454

fullsizerender-10

fullsizerender-9

img_1464

img_1461

Preparation time  : 30 minutes
Cooking time       : 1 minute – 40 seconds for  each poori deep fried
Serves                 : 3  members

Description

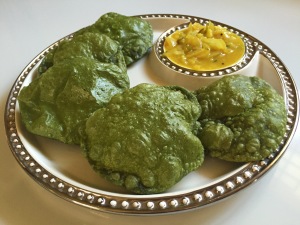
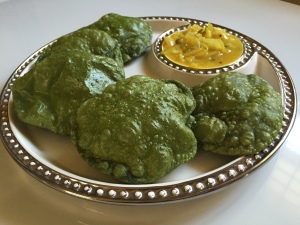
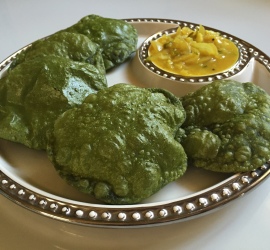
Nothing excites me more than an edible gift. I get two huge bunches of organic home grown spinach from one of my co – sisters. I did not want to use them the cliche regular way. So here is what I ended up doing with them. Yes, I made palak poories for breakfast. Trust me, I was flattered with the smiles at the breakfast table. The green eye popping colour sure did do its bit of magic. The best part being the taste of palak not felt at all. What a genius cheats way to make children eat their greens. Well, I don’t have such trouble at home as my three kids ( including hubby dear ) are fond of their greens and veggies. I shared these images with my co – sister, she was over whelmed and appreciated me a lot. What more do you need when people say you did pure justice to the organic jewel.
Palak poori

Ingredients

Ingredients
Quantity
Flour / Maida1 cup
Wheat flour1 cup
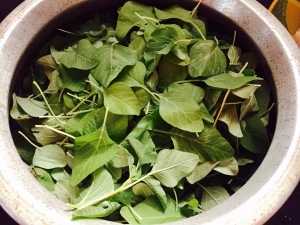
Spinach1 bunch cleaned
Saltto taste
Water1/2 cup
oil1 tablespoon + to deep fry

Method

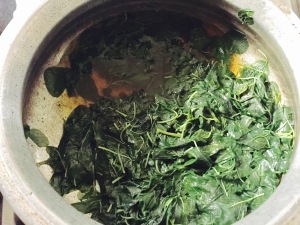
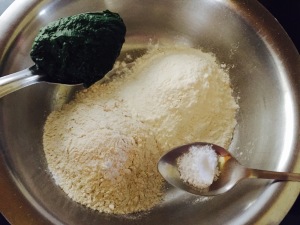
  • Boil the spinach with 1/4 cup water and salt to taste to done. Cool completely and blend to smooth purée.
  • Mix together flour, wheat flour and salt to taste. Add the spinach purée and mix well.
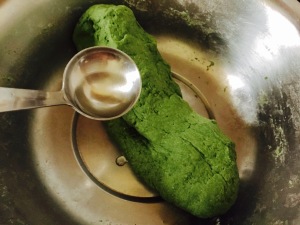
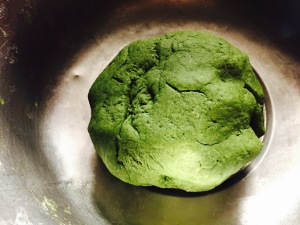
  • Top with one tablespoon of oil. Knead and sprinkle water if required to get a smooth elastic dough. Keep aside for ten minutes.
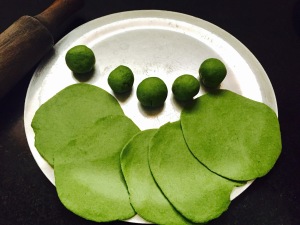
  • Heat oil to deep fry. Make small lemon size balls out of the smooth dough. Sprinkle flour on a work surface.
  • Flatten on lemon size ball and with the help of a rolling pin roll into Palm size discs of even thickness about 1/4 inch thick.
  • Do the same to all the dough balls.
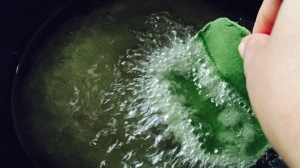
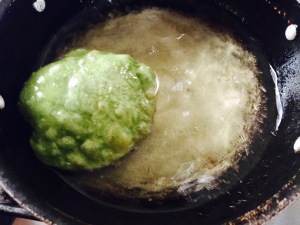
  • Deep fry the spinach poories in medium hot oil to puffed up and green colour. Drain and serve with curry of choice.


Plum breeze

Share Button

unnamed

Preparation time  : 10 minutes
Cooking time       :  nil
Serves                 : 2 members

Description

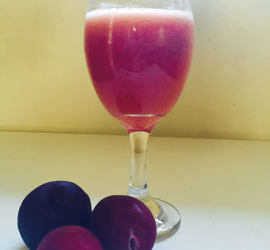
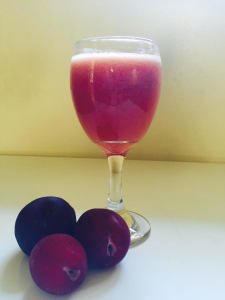
When you know a friend is dropping in home after a long time but you are pressed for time to do anything but treat her with a decent mock tail. All I do is run to my refrigerator and see what can be done. Like wise, once I get to see just a couple of plums and nothing else in my refrigerator. I just whipped it up with some sugar, salt and pepper. Went with my gut and made a mock tail.. mixed it . The colour was inviting but was not sure about the taste. I felt I should have peeled the plums and ground it but then if I did so I should have not got the colour and the sour kick to the mock tail. Tasted a bit, l loved its tasty fizz and  vibrant colour. My friend with her first sip went ooh… aah about the mock tail. She failed to find out the main ingredient of the mock tail which is when I realised I did make a wonderful invention. We did a cheers again and laughed over this crazy story of the mock tail ..

Plum breeze

Ingredients

Ingredients
Quantity
Ripe plums4
Sugarto taste
Salta pinch
Black pepper powdera pinch
Sparkling wateras needed ( I used 7 up )
Ice cubes 1 cup
Tall glass2

Method

  • Place two tall glasses in the freezer.
  • Remove the seeds from the plums. Blend it to a smooth purée by adding sugar, black pepper powder and salt.
  • Place in the refrigerator until needed to be served.
  • Just before serving, fill the tall glasses from the freezer with the plum purée to 1/4 th.
  • Top with ice cubes. Pour the sparking water over, mix and serve chilled.

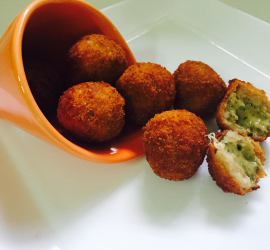
Herbed cheese Chicken Kiev’s

Share Button


unnamed

unnamed1

Preparation time :  50 minutes
Cooking time      :  3 minutes for each batch deep fried
Serves                :  6  members

Description

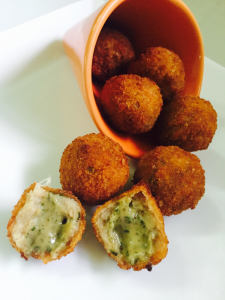
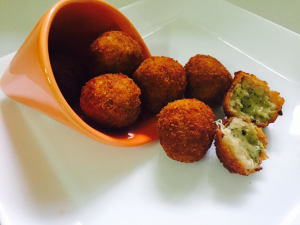
The cheeseir the better.. this is apt for me any day. I just go head over heels with any thing that’s served with cheese. Any restaurant or fast food joint I go to, when I am asked do you want to add extra cheese? I automatically say yes with out Shame. At times when I have my health freak daughter near me, the look that she gives me … I immediately turn away as I want to hide my face. Here is one recipe I tried when I was craving for oozing melted cheese. I added mixed herbs  to pop up the flavour to the dish. Served it as a starter and I could not believe my health freak veggie daughter herself was gobbling it up with out having a control over herself. A true sign of the dish winning over any one.
Serve the same to your loved once and see how insanely they eat it being their own selves.

Herbed cheese Chicken Kiev’s

INGREDIENTS for the cover

INGREDIENTS
Quantity
Boneless Chicken1/4 kg
Egg1
Ginger paste1/4 teaspoon
Saltto taste
White pepper powder to taste

For the herb Cheese

INGREDIENTS
QUANTITY
Mozzarella cheese1 cup
Parmesan cheese1/4 cup
Green chillies crushed4
Coriander chopped3 tablespoons
Mint leaves chopped3 tablespoons
Grated lemon zest1/4 teaspoon
Saltto taste

Ingredients for coating

Ingredients
Quantity
Egg1 beaten with salt and pepper to taste
Seasoned flour1 cup
breadcrumbs1 cup

Method

  • Grind the boneless chicken to a smooth paste with out adding water. Mix in all the other ingredients mentioned under the cover column together and keep aside for ten minutes.
  • Mix all the ingredients mentioned under the herb cheese together. Taste and adjust seasoning. Roll into small gooses burry sized balls and place in the freezer for ten minutes.
  • Take a small lemon size of ground chicken mix. Flatten it to your Palm size. Place the herbed cheese in the middle. Bring the edges of the ground chicken towards the centre and roll to a ball making sure the herbed cheese is covered with the ground chicken mix well all over. Do the sane with all the ground chicken and herbed cheese balls.
  • Roll these chicken balls over flour seasoned with salt and pepper powder, then dip into the beaten egg and finally roll over bread crumbs. Do the same to all the balls. Place in the refrigerator until needed to be served.
  • Heat oil to deep fry to medium high . Deep fry in batches to golden and crisp . Drain and serve hot with choice of dips.

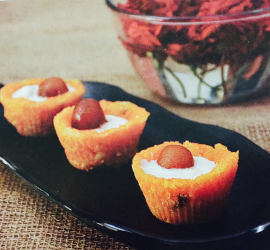
Edible carrot halwa cups served with ice cream and gulab jamoon

Share Button

whopper

Preparation time : 15 minutes
Cooking time       : 30 minutes + 4 hours setting time in the freezer
Serves                 : 8 members

Description

Combining three classic desserts together to be served as one is what is done here in style. I am sure most of the households in India celebrate festival’s with carrot halwa and gulab jamoon. Here I have made edible cups with the carrot halwa, topped it with a scoop of icecream and garnished it with a mini gulab jamoon. This match made in heaven divine combination is a never fail killer trio. As I was writing the recipe, I had my friends help me out. The entire gang was drooling and excited about it. They still have not got their share. I am yet to treat them. I was not very confident with making the edible cups with carrot halwa but believe me it’s easier to make than to be imagined as a hard task to master.I assure you any where served it will be a super hit. To more edgy recipes that can be done at home in restaurant style.. let’s do a hip hip hurray and celebrate the dessert.

Edible carrot halwa  cups served with ice cram and gulab jamoon

Ingredients

Ingredients
Quantity
Carrots 6 peeled and grated
Ghee1/2 cup
Sugar1 cup
Salta pinch
Fresh cream1 teaspoon
Milk Kova2 tablespoons
Cardamom powder1/4 teaspoon
Almonds, Cashew nuts and pistachiofew peeled and chopped
Milk1/4 litter
Vanilla essenceone drop
Mini Gulab jamoon10
Vanilla flavour ice cream 3 cups

Other things needed

  • muffin baking tin
  • Cling film

Method

  • Heat ghee, add the chopped nuts and fry to golden in colour. Add the grated carrots and milk.
  • Cook to done. Reduce the moisture by boiling further to get a dry consistency mixture.
  • Add sugar, cream, milk Kova and cardamom powder. Boil further for 10 to  15 minutes until moist but thick.
  • Remove from heat and cool completely.
  • Line each cup cake mould with cling film making sure it is around 1/2 centi meter above the muffin mould so it’s easy for you to lift and peel once the cups are set.
  • Grease each muffin dent with ghee on top of the cling film.
  • Drop two tablespoons of cooled carrot halwa into each muffin lined dent.
  • With your hands press in the bottom and all around in equal thickness to get a cup shape. Place this muffin tin in the freezer  for four hours or more to set.
  • Just before serving, remove the muffin tray from the freezer.
  • Peel the set cups out of the cling films. Place in a serving plate.
  • Top with a scoop of ice cream inside the carrot halwa cups. Place a mini gulab jamoon in the centre of the ice cream and serve immediately in style.


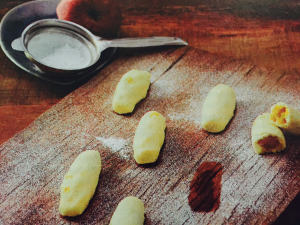
Fruit Sandesh

Share Button

whopper

Preparation time   : 30 minutes
Cooking time        : nil
Serves                  : 4 members

Description

Panner ( ricotta cheese ) is one ingredient that I got to know of very late as a kid. I remember eating palak panner in a restaurant for the first time when I was in the fourth standard in ooty. Not knowing what it is made of and tasted like nothing actually. I was in a confused state of mind then. From then on it was just another ingredient to me that is used in savoury dishes. The first time I got to see trala dalal use panner to make cheese cake.. my head did spin thinking yuk panner in a dessert. Wonder how it would taste. Finally I did end up following trala dalals vegetarian method of making a cheese cake with panner. My myth of panner is used just for making savoury things was thrown into the bins. Now I try to make a lot of deserts with panner and this is one such try that I did with tinned mixed fruits. This dessert should be had with in a day or two of making. With no cooking required, this is my go to recipe most of the time. I make the same with the fruits of the season for filling like stewed Apple’s or pineapples .
Try this dessert this Diwali season and entertain your loved ones with zing.

Fruit  Sandesh

Ingredients

Ingredients
Quantity
Panner ( ricotta cheese )200 grams
Powdered sugar5 tablespoons
Milk2 teaspoon ( optional , add only if the panner is too dry )
Rose essenceone drop

Ingredients for the fruit filling

Ingredients
Quantity
Tinned fruit1 tin drained
Saffrona pinch

Method

  • Mix drained mixed fruits with rose essence and saffron.  keep aside.
  • Crumble the panner and add the sugar powder. Mix well. If dry add milk it’s optional. Knead well together. Roll into lemon size balls.
  • Flatten each ball to Palm size . Place a teaspoon of mixed fruit in the centre. Bring the flattened panner edges towards the centre and close the fruits and roll to a log shape of finger size. Do the same to all the panner dough and fruits mix.
  • Place in the refrigerator until needed to be served. Sprinkle with powdered sugar and serve chilled.

Shahi boondi jar

Share Button

whopper

Preparation time  : 10 minutes
Cooking time        : 40 minutes
Serves                  : 8 members

Description

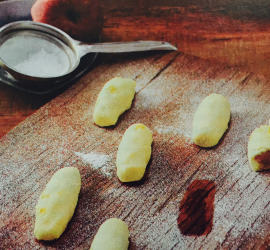
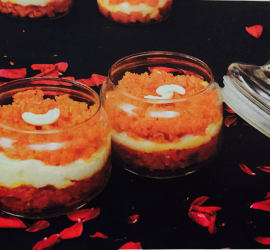
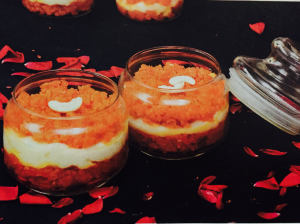
Any thing from desserts,salads, starters to main course served in a jar is so much in trend now a days. So why not try a jar dessert was the idea that popped up in mind. Having a lot of ladoos at home that were gifted by a cousin. I had to make use of them. What would pair well with a ladoo.. the mighty rabdi is the best said my inner instincts. Made a thick rabdi. Layered the two and this colourful jar dessert was born. The creaminess of the rabdi and the crispy moist crunch of the ladoo was a fantastic combination. I sent over a few to friends and relatives as I had five jars in hand. Saved just one for home. As I started to relish the dessert, I was like .. I should have saved two.. then it went back to.. thank god you have only one jar home. So less calories in take.. me and my monkey mind .. jumping from one jar to the other..

Shahi Boondi jar

Ingredients

Ingredients
Quantity
Mothi choor ladoo 6 broken down
Milk1 litter
Cardamom powder1 teaspoon
Sugar2 tablespoons
Cashew nuts , almonds and pistachiopeeled and chopped few to garnish

Method

  • Boil milk and reduce it to half its amount. Add cardamom powder and sugar. Boil further and reduce it to 1/4 of Its amount. Remove from heat and cool completely.
  • Take a clean glass jar of small size, fill the bottom to 1/4 th with the Mothi choor laddu evenly. Top with cooled milk rabdi to 1/4 inch equal to the Mothi choor laddu’ height.
  • Top again with Mothi choor laddu and another layer of rabdi. Make sure the top most layer is Mothi choor laddu.
  • Garnish with chopped nuts. Place in the refrigerator for six hours or more. Serve chilled.

Carrot rasamalai

Share Button

whopper

Preparation time : 10 minutes
Cooking time       : 5 minutes
Serves                 : 6 members

Description

Having to come up sweet recipes to be published in a leading Tamil monthly food magazine as Diwali special. I did not want to give the cliche sweets that are served at homes nor did I want to come up with cakes , cookies and things like that. So made up my mind to do deconstruct our desi sweets with a twist. This was one idea that I got from the world wide net which was done by a chef in Delhi ( sorry, I didn’t take note of the chef ). I simplified the recipe as much as I could as the origin recipe was too technically advanced that we home chefs find difficult to follow. Made the dish and my first bite into  the rasmalai sandwich… rabdi oozing out with the light whipped cream mixed with carrot’s grated was a match made in heaven. My mind went blank until I finished the entire lot. Then popped a question on why carrots alone pair so well with any Indian sweet. Well a million dolled question that I didn’t get an answer for till date. Carrot or no carrot I love my rasamali’s in any form. I always hide the last from others and gobble it up when alone. Crazy, Greedy breed me.

Carrot rasmalai

Ingredients

Ingredients
Quantity
Rasmalai6
Peeled , boiled and grated carrots2 tablespoons
Whipped cream2 tablespoons
Almonds , pistachio, rose petalsfew to garnish

Method

  • Squeeze the milk out of the resmalais. Cut each into equal halves horizontally.
  • Whip cream according to packet instructions to still peaks. Fold in the grated carrots with the cream.
  • Place one cut slice of resmalai. Top with one tablespoon of carrot whipped cream. Again place another piece of resmalai cut piece on top. Again top with carrot cream.
  • Do the same with all the cut resmalai pieces and whipped cream.
  • Place the sandwiched carrot resmalis in a shallow plate’s individually. Pour the resmalai milk over.
  • Garnish with chopped almonds, pistachio and rose petals. Place in the refrigerator and serve chilled.


Beetroot halwa white chocolate truffles

Share Button

unnamed

Preparation time   : 30 minutes
Cooking time         : 40 minutes + setting time in the refrigerator
Serves                   : 8 members

Description

At home beetroot halwa is always made as an accomplishment for biriyani as a sweet. This is an authentic recipe from my in – laws  place. This time I had loads of beetroot halwa as left overs. Every one fed up seeing this on the table for every meal didn’t bother to see also. Me not wanting to waste the halwa, added a few more ingredients and rolled them to lemon size rounds. Was thinking of rolling them over chopped nuts but my pantry had no stock of nuts. Now what do I do. I stood in front of my refrigerator gazing at all the ingredients there. I saw a few bars of cooking chocolate. Yes I can coat it over chocolate but it will look odd as red with brown will not look eye appealing. Umm… my eyes go to the white chocolate and I am like bingo.. white chocolate coated beetroot halwa. Yum.. I had a tsunami happening in my mouth with so much saliva just thinking of the taste and look of it. Melted the white chocolate and coated the halwa balls. It was a flop as the balls broke down and the white chocolate got the colour of the beetroot mixed up. The results were not as I expected. Then I kept the balls in the freezer for some time to harden and then tried coating over  Melted white chocolate. Wolla, it worked perfect this time as I imaged it to be. Set it in the fridge and my first bite did true justice as I had imagined the dessert to be. Served as a snack while we were all watching the television. Hesitantly one was tasted and the rest vanished in seconds where I had to grab a few to save for myself.. so this the story of how the left over halwa got its old wine in a new bottle look giving birth to a new fusion dessert as well.

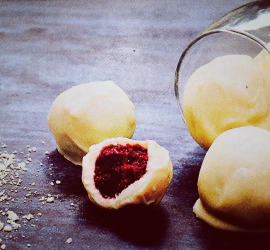
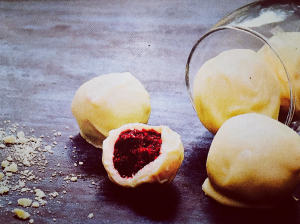
Beetroot halwa white chocolate truffles

Ingredients

Ingredients
Quantity
Beetroot1/4 kg peeled and grated
Milk1/4 litter
Sugar150 grams
Salta pinch
Milk Kova1 teaspoon
Ghee 40 grams
Water1/4 cup
Almond , cashew nuts and pistachio2 tablespoons peeled and chopped
White chocolate compound1 cup chopped

Method

  • Cook the grated beet roots with milk and water to done. Once cooked, boil until it gets dry with no moister in it.
  • Add sugar, ghee, milk Kova and salt. Mix well and boil until it dries up. Remove from heat and cool completely.
  • Add the chopped nuts to the beetroot halwa and mix well. Roll the halwa into small lemon size balls. Place in the freezer for two hours.
  • Melt the chopped white chocolate in the microwave for two minutes. Remove once in every 30 seconds and mix mix well with a dry spoon to get melted chocolate.
  • Dip the beet root halwa balls over the melted chocolate making sure it’s coated over all around well. Place over a tray lined with foil paper and place in the refrigerator until needed to be served.
  • Do the same to all the beetroot halwa balls. Serve when needed kept in the refrigerator.