Pachai avaraiyum kaimavum

Share Button

pak

Preparation Time : soaking over night and cleaning of hyacinth beans 20 minutes + 10 minutes

Cooking Time : 20 minutes

Serving : 6 members

Description

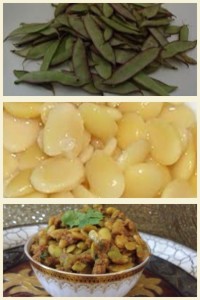
Pacchai avairaiyum kaimavum that’s how we call this dish at home . It is made of hyachinth beans and minced meat.This dish is a familiar classic among our family members.The hyacinth beans are available in the market only during a particular season once in a year. There are two types of hyacinth benas one pink coloured skin and green skinned. The one we get in India is the green skin one. The outer skin is removed to get small light yellow greenish beads inside. Then we soak the beans over night and peel the skin and then prepare the dish.A lot of work goes into the process of making this dish but worth the pain , I assure you that . Well good things comes to those who wait. This recipe is my grand mother balkees perimas.At home whenever i prep up to prepare a dish from moms place, my maid is like ayyoo because there is so much more extra work to do . My maid always complains about why are the dishes from your moms place so elaborate and pain taking .

Ingredients

Ingredients
Quantity
minced mutton1/4 kg
hyachinth beans ( pacchai avarai )1 kg (peeled , inside seeds soaked over night and remove outer skin by pressing gently between your thumb and index finger )
ginger garlic paste1 teaspoon
small onions1 hand full chopped
green chillies2 chopped
coriander leaves1 tablespoon chopped
turmeric powder1/4 teaspoon
coriander powder2 tablespoons
chilli powder1 teaspoon
saltto taste
coconut oil1 teaspoon + 2 tablespoons
cinnamon 1 + clove1 powdered together
Water3/4 cup

Method

  1. Mix minced mutton together with all the ingredients except for coconut oil 2 tablespoons and the hyachinth beans .
  2. Pressure cook the minced mutton mixture for two whistles till the minced mutton is 3/4 cooked .
  3. Now pour the minced mutton mix into a large non stick kadai adding the hyachinth beans together .
  4. Bring to boil and cook till the minced meat and the hyachinth beans are cooked through . Pour 2 tablespoons of coconut oil and mix well .
  5. Simmer for 5 minutes till oil floats on top and all the flavours infuse together . It should be of a semi thick gravy consistency .
  6. Serve hot with rice or chapathi as a side dish . We were served this dish only for lunch and the left over for dinner.

Mampazlam moru charu

Share Button

image1

FullSizeRender (3)

IMG_6171

IMG_6175

IMG_6176

IMG_6177

image2

IMG_6178

IMG_6179

IMG_6183

IMG_6185

Preparation Time : 15 minutes

Cooking Time : 10 minutes

Serving : 4 members

Description

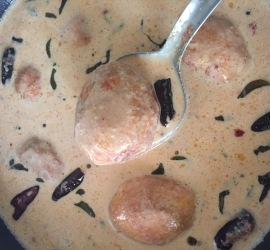
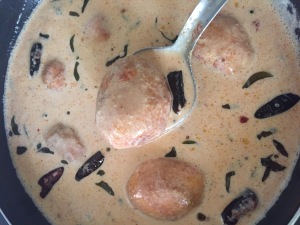
Mampazlam moru charu . A lightly spiced , sour and sweet curry made with ripe mangoes and thick butter milk .A dish very own to Palghat region but have never ever had or heard about it until I got the recipe from my friend fathima’s ( from salem ) mother – in – laws hand written recipe note book . I found the recipe really interesting as it served and brought a challenge to find new ways to use ripe mangoes . I had to wait a whole year to give a try to this recipe for the right mango season to arrive . The wait was worth while as the curry was a mass of velvety hot , sweet and sour all in one simple yet ingenious dish with the right touch of ripe mangoes in it . The burst of flavours they bring … Now it’s a regular at home on every years mango season and a family favourite too. I bet no one can stop with one helping for sure .

Ingredients

Ingredients
Quantity
Small country ripe mangoes
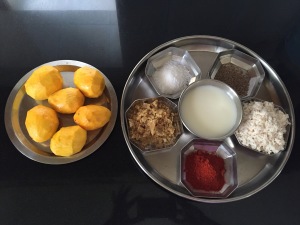
6 , peeled and whole with the seed
Red chilli powder 1 teaspoon or more to taste
Salt to taste

Method

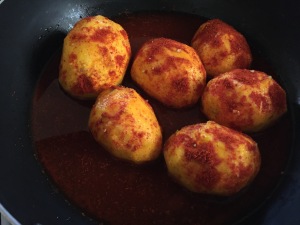
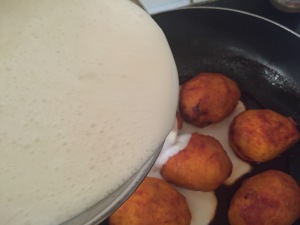
  1. Boil the peeled mangoes with red chilli power , salt and little water for 3 to 4 minutes .
  2. Make sure the mangoes are cooked but don’t get mussy at the same time . Set aside .

Ingredients to Grind

Ingredients
Quantity
Grated Coconut 1/2 a coconut
Cumin seeds1 teaspoon

Other Ingredients

Ingredients
Quantity
Jaggery 1 tablespoon
Thick butter milk 4 glasses
Saltto taste

Method to Grind

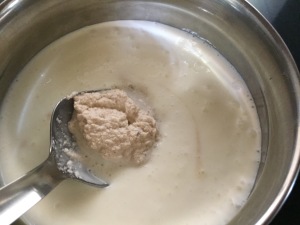
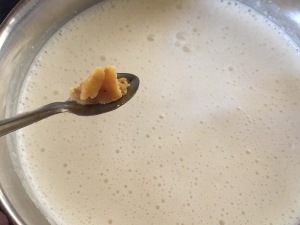
  1. Mix ground coconut + cumin seed paste to the butter milk . Add jaggery and salt to taste . Mix well , taste and adjust .
  2. Pour this mixture over the cooked mangoes . Place over medium heat . Once the edges start to foam , remove from heat And set aside .
  3. Takes about 3 to 4 minutes . Make sure not to boil the curry as the butter milk tends to curdle when boiled .

Ingredients for Tempering

Ingredients
Quantity
Coconut oil
1 tablespoon
Mustard seeds1/2 teaspoon
Dried red chillies2 torn
Curry leavesfew

Method for Tempering

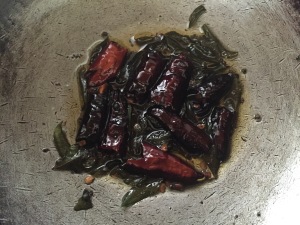
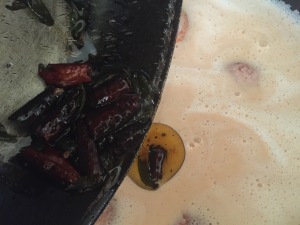
  1. Heat coconut oil , add mustard seeds . Once they splutter top with torn dry red chillies and curry leaves .
  2. Stir until the dry red chillies and curry leaves are crisp .
  3. Remove from heat , cool completely and pour over the mango curry .
  4. Mampazla moru charu is ready . Serve at room temperature with hot cooked white rice .

Baked peanut butter chicken strips

Share Button

photo

Preparation Time : 10 minutes + 5 hours for marination

Cooking Time : 30 minutes

Serving : 4 members

Description

I go head over heels about peanuts . No matter what form it is served in and peanut butter is my favourite . ( yea .. Anything fattening and high in calorie is liked by my taste buds which is desperate to kill me soon ) the first time i got to know about peanut butter was at the dinning table of my boarding school where my seniors would pass their bottle of peanut butter around to share with every one for our breakfast bread . I still remember, A chunk full of peanut butter fell down on to my bread and me not knowing what it was but could not show it out as well as all around were my seniors and above that what a shame it would be to admit to the fact with an elite English speaking crowd . I did spread the peanut butter with the help of my spoon all around my slice of bread seeing other do the same next to me . With out any one taking note of me , I immediately placed the spoon with little peanut butter sticking onto the spoon here and there in bits and tasted it . The moment my tongue felt the taste of the fatty culprit , I surrendered myself to the peanut butter and from then till date have not been able to get relived from it . I can easily pair peanut butter with any thing and every thing be it sweet or savoury . Then why leave the mighty chicken alone , so paired it up and gave a try to get this spot on dish . I omitted using oil as there is more than enough of peanut butter used to compensate . When served at home I ended up getting just a single piece and the left over crumbs .

Ingredients

Ingredients
Quantity
Bone less Chicken1/2 kg , cut into 1/2 inch thick strips
Garlic paste1/4 teaspoon
Lemon zest1/2 a lemon
Light Soya sauce4 tablespoons
Chilli powderto taste
Pepper powderto taste
Sugar1 / 2 teaspoon
Peanut butter8 tablespoons
Lime juice1/2 a lime
Water1/4 cup
Saltto taste

Method

  1. Mix garlic paste , soya sauce , lime juice , lemon zest , sugar , chilli powder , pepper , 4 tablespoons of peanut butter and salt together . Taste and adjust .
  2. Marinate chicken strips in the above sauce for 5 hours or over night in the refrigerator . Preheat oven to 180 degree Celsius .
  3. Place the marinated chicken strips 1/4 centimetre away from one another over foil paper in a baking tray and bake for 30 minutes .
  4. Mix the remaining peanut butter with the remaining marinate sauce and water .
  5. While baking the chicken strips keep brushing the sauce over the chicken strips in an interval of every 5 minutes once and turn over and bake after 15 minutes .
  6. Serve warm as it is .

Blueberry mousse

Share Button

photo (12)

Preparation Time : 15 minutes

Cooking Time : 10 minutes

Serving : 4 to 6 members

Description

Blue burry mousse . I really had a big confusion of not knowing the difference between a mousse and a soufflé . Only recently did I get to learn that mousse are cream based desserts that are set with the help of gelatine and soufflés are egg based and baked . As both mousse and soufflés are light , that’s where my confusion began . Now about this blue burry mousse . I took note of this recipe from the telly on Rachel Allen’s show but she had made it with blackberries and I have used canned blueberries instead as a quick , delicious and fool proof trick . ( the real reason being not getting frozen or fresh blue or any buries at my place ) I made this dessert when I had invited a vegetarian , north indian friend of mine home . She loved this mousse so much that she packed a few for her hubby and asked for the recipe as well :-)) . This master piece will chill your bones and hearts for sure .

Ingredients

Ingredients
Quantity
Blue berries1/2 kg ( I used Oregon brand blue berries In light syrup )
Waterenough to boil the berries about 1/4 cup
Sugarto taste
Gelatine4 tablespoons
Whipped cream3 cups

Method

  1. Add 5 tablespoons of water to the gelatine . Mix well and set aside to bloom .
  2. Boil the blue berries with water and sugar to taste until tender and soft for 10 minutes . Mash the cooked blue berries and strain through a sieve to get the extract alone .mix gelatine with the blue burry pulp and place over low heat , stirring for 5 minutes until the gelatine dissolves .
  3. Remove from heat and cool completely . ( I omitted the above step with blue berries as I used canned ready ones )
  4. Whip cream to stiff peaks . Fold in the blue burry , gelatine mix into the whipped cream and mix well .
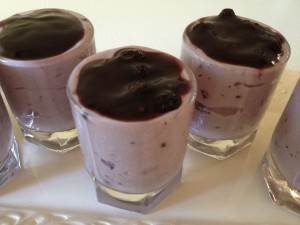
  5. Pour into transparent glasses or bowls and place in the refrigerator over night or for 3 hours .
  6. Serve chill topped with some blueberry coolie .

Notes

  1. I added sugar to taste to Oregon blueberry mix and mixed well until the sugar dissolved .
  2. Then added the bloomed gelatine but did not bring to boil . Mixed it with whipped cream . poured into individual short transparent glasses and left to set in the refrigerator .
  3. Topped with a teaspoon of Oregon. Blueberry coolie and served .

Venthaya koolu

Share Button

photo (11)

Preparation Time : soaking over night + 10 minutes

Cooking Time : 20 minutes

Serving : 4 members

Description

Venthaya koolu . Fenugreek Porridge. A tradition medicinal dish very own to tirunelveli . Only after i was married did i know there were medicinal dishes that Existed . As at moms place anything and everything about medicines are from the medical store except for the jeeraga kashayam given to us for gastric trouble. Here at my hubby’s place their food and menu revoles around health and medicinal facts for the body. This dish is had only for breakfast in an empty stomach to cool the body (as tirunelveli is hot place)and if you have blisters in your mouth or tummy so this dish is a cooling agent to the body.I make this dish atleast once a month.My kids don’t fancy this dish but i comple them and some how get it into their tummy. This dish requires a lot of stirring to be done , that’s a bonus to loose a few calories too.

Ingredients

Ingredients
Quantity
raw rice ( pachai arusi )1 cup
split black lentil ( urad dal with out skin )1 cup
fenugreek seeds1/4 cup
thick coconut milk1 cup
salta pinch
palm sugar ( karupetti )1/4 kg
water3 + 2 cups

Method

  1. Soak rice , black lentil and fenugreek seeds in water over night . Drain and grind in a food processor to a smooth paste , adding 3 cups of water to get a running consistency batter .
  2. Add a pinch of salt to the batter . Crush the palm sugar and boil it with 2 cups of water to get a syrup . Strain and set aside .
  3. In a heavy bottomed non stick kadai boil the ground loose batter , stirring continuously in medium heat for over 10 minutes till the rice mixture is cooked through and gets to a thick paste .
  4. Add the palm sugar syrup little by little stirring continuously and mix well . Then finally add the coconut milk as still stirring continuously .
  5. Simmer the flame and let all the flavours infuse together for a minute . The porridge should of thick flowing consistency .
  6. Remove from heat and serve hot or warm .

Aval pazlathappam

Share Button

photo (10)

Preparation Time : 30 minute

Cooking Time : 10 minutes

Serving : 4 members

Description

The vegetarian version was actually created by my mom for the sake of my vegetarian daughter. When we relish and enjoy and treat ourselves with Such dishes , having no choice she just has to gaze on us . So mom not wanting her grand daughter to just sit ideal made a vegetarian versions as well. (happens with all the dishes at home) have to mention how much our principal Mr. P.C Thomas , headmistress elsama and their children Liju and Julie Pradeesh used to enjoy my moms pallazthappams . Even recently Julie Pradeesh had mentioned about moms palazthappams.

Ingredients for Cover

Ingredients
Quantity
Kerala plantain500 gm ( ripeness is very important , as too ripe ones will become watery and hard to shape . Not to ripe ones will be hard to shape and not sweet enough )
saltto taste
Coconut oil or vegetable oilto deep fry

Method for Cover

  1. Steam the plantains and cook till they slit . Do not over cook . Cool and remove the black pith .
  2. Mash the plantains with out water in a mixer to get a tight dough . Set aside .

Ingredients for stuffing

Ingredients
Quantity
aval ( flattened rice , poha )2 cups
coconut grated1 cup
sugar to taste
salt a pinch
cardamom powder 1/4 teaspoon
cashewnuts1 teaspoon chopped
kismis ( dried grapes )1 teaspoon
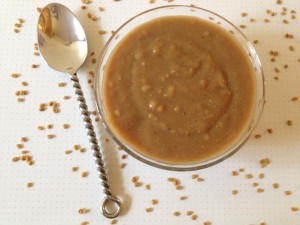
waterto rinse the aval ( flattened rice , poha )

Method for Filling

  1. Rinse the aval in water and squeeze out the water . Mix with all the other ingredients and set aside .

How to Proceed

  1. Make lime sized balls with the plantain dough . Flatten each ball into round shaped circles . ( like poories , my mother used the poorie press keeping the plaintain ball inbetween two greased plastic sheets , this was so much easier than doing by hands )
  2. Place 1 1/2 tablespoons of aval mixture in the Center of flattened plantain circle . Close the circle from one side to get a semi circle shaped palazthappam . Fold and press the edges gently to close the palazthappams .
  3. Do the same with the remaining plaintain dough and aval mixture . Heat oil ( coconut oil adds more taste ) to deep fry .
  4. Drop the palazthappams one at a time into hot oil and fry to golden brown colour and a bit crisp . Drain and serve as it is .
  5. Yummy sweet , sour , tangy palazthappams are ready to be eaten .

Pazlathappam

Share Button

photo (9)

Preparation Time : 30 minutes

Cooking Time : 20 minutes

Serving : 4 members

Description

Palazthappam . An authentic ravuthar dish very own to the Palghat , Coimbatore region people . As we people are from Tamil Nadu , Kerala border Region . Our food , Language , habits , customs and every thing is a mix of both the states. This dish is very similar to the unnakai made in Kerala by the malabar region people. Only difference is the stuffing. We use minced meat stuffing or aval (poha) stuffing and they use dates , nuts and coconut. A few days before my moms cousin sister sabeena Shaikh (jabi Akka) messaged me the recipe with the picture of palazthappam. Only then did i get reminded about this dish. As i was in moms place asked her to make some.So picture and recipe courtesy my mom.(poor thing she was sick and made it just for me) a very tricky dish, even till date i end up making a mess at times.

Ingredients for Cover

Ingredients
Quantity
Kerala plantain 500 gm ( ripeness is very important , as too ripe ones will become watery and hard to shape . Not to ripe ones will be hard to shape and not sweet enough )
salt to taste
Coconut oil or vegetable oilto deep fry

Ingredients for Stuffing

Ingredients
Quantity
minced meat ( mutton only )1/4 kg
onions8 chopped finely
green chillies6 chopped finely
coriander leaves1/2 bunch chopped finely
ginger paste1/4 teaspoon
garam masala powder1/4 teaspoon
salt
to taste
coconut oil2 tablespoons

Method

  1. Steam the plantains and cook till they slit . Do not over cook . Cool and remove the black pith .
  2. Mash the plantains with out water in a mixer to get a tight dough . Set aside . Pressure cook the minced meat with salt to taste , ginger paste and garam masala powder till cooked .
  3. Boil the minced meat till all the moisture has evaporated and set aside . Heat 2 tablespoons of oil in a non stick kadai .
  4. Fry the onions to brown . Add green chillies , cooked minced meat , coriander leaves and salt to taste .
  5. Saute for 5 minutes to get a dry minced meat mixture .

How to Proceed

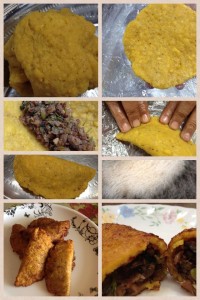
  1. Make lime sized balls with the plantain dough . Flatten each ball into round shaped circles . ( like poories , my mother used the poorie press keeping the plaintain ball inbetween two greased plastic sheets , this was so much easier than doing by hands ) place 1 1/2 tablespoons of minced meat mixture in the Center of flattened plantain circle .
  2. Close the circle from one side to get a semi circle shaped palazthappam . Fold and press the edges gently to close the palazthappams .
  3. Do the same with the remaining plaintain dough and stuffing mixture . Heat oil ( coconut oil adds more taste ) to deep fry .
  4. Drop the palazthappam s one at a time into hot oil and fry to golden brown colour and a bit crisp . Drain and serve as it is .
  5. Yummy sweet , sour , tangy , hot palazthappams are ready to be eaten .

5 Minute chocolate mug cake

Share Button

photo (8)

Preparation Time : 6 minutes

Cooking Time : 5 minutes

Serving : 2 members

Description

5 minute chocolate mug cake . Recipe and picture sent to me by Hamidha Shabeer . I have not yet tried this recipe but sure will be really good. Actually the day i tried the Nutella 2 minutes mug cake , Hamidha Shabeer tried this cake at her place. As i mentioned before great people think a like. Hamidha Shabeer and myself are far relatives. Every time i get to meet her in any gathering in the family, it’s like a smile first, a hi that follows and then a bye finally. That’s all . Only through my page have i got so close with her and realized that we both are so similar . thanks to my page for that and thank you Hamidha Shabeer (pappu) for the recipe, picture and the enormous encouragement from your side.

Ingredients

Ingredients
Quantity
flour4 tablespoons
sugar (white or brown)5 tablespoons
unsweetened cocoa powder2 tablespoons
baking powder3 teaspoon
egg1
milk1 tablespoon
butter (or any neutral oil)3 tablespoons
salt (if using unsalted butter)A pinch
vanilla extract (optional)2 drops

Method

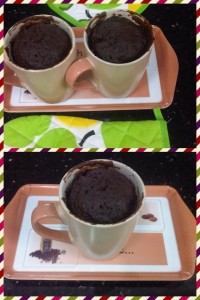
  1. Get your hands on two microwave safe coffee mugs that can hold about 250ml liquid (basically, nothing too small or the cake will spill over while cooking).
  2. Halve the quantity of flour, cocoa, baking powder, salt and sugar and add into each mug. Mix well with a fork.
  3. Then halve the quantity of milk, butter, and vanilla and add into each mug. Break egg into another small bowl, whisk with a fork and add half of it into each mug. Stir well until all the ingredients mix well. Make sure there is no flour stuck to the bottom of the mug.
  4. Add one mug at a time to the microwave and cook on medium heat for 2 mins. Every microwave acts differently and mine is a very basic one with just two knobs, one for heat level (low, medium, high) and one for time. I kept mine on medium and set each mug at 2 mins.
  5. The cake turned out perfect. If your microwave can show power levels, etc, keep it at medium and start at 2 mins. You can adjust it once you take a look at your cooked cake.

Paruppu Vadai

Share Button

photo (7)

Preparation Time : soaking time one hour + 15 minutes

Cooking Time : 2 to 3 minutes for one batch

Serving : 4 members

Description

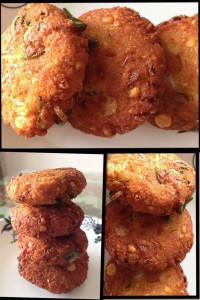
Paruppu vadai . Also known as masala vadai every where and aamai vadai only in tirunelveli . The paruppu vadai is a street food found all over Tamilnadu. The first time i got to eat this dish as a kid , I over ate it and at midnight vomited. (crazy me only then did i realize that you should not over eat any thing beyond a limit) I learnt this dish from my mother – in – law but she uses Bengal gram dal .Once my friend Meera Aboo Thamby suggested asking me to use peas dal instead of Bengal gram dal. The paruppu vadai tasted so good. Then once my maid (fathima) made paruppu vadai adding bits of carrots and coconuts. I liked that to, so my paruppu vadai recipe has taken twists and turns from the time I got to learn it.Finally the recipe that follows is the latest version of my paruppu vadai.

Ingredients

Ingredients
Quantity
peas dal ( Pattani paruppu or vadai paruppu as known in Tamil ) 2 cups
dry red chillies4 to 5
small onions1 hand chopped finely
green chillies2 chopped
curry leavesfew chopped
snauf1 teaspoon
saltto taste
ginger1/4 inch pieces grated
carrot1 medium sized cut into small bits
coconut2 tablespoons cut into bits
oilto deep fry

Method

  1. Soak peas dal in water for one hour . Drain and reserve 2 tablespoons of whole soaked peas dal aside .
  2. Add red dry chillies and snauf to the remaining soaked peas dal and grind to a coarse paste adding very little water .
  3. Add all the other ingredients except for the oil to deep fry . Mix well . Heat oil to deep fry in a kadai .
  4. Make lime size balls with the peas dal mixture and flatten them to get small round 1/4 inch thick Pattice .
  5. Drop one by one , 4 to 5 in one batch into hot oil and fry for 2 minutes on each side to get a deep golden brown crisp paruppu vadais .
  6. Drain and serve hot with chuntny , tomato sauce ,tea ….. At home it’s had as it is without any dips or chuntny s .
  7. Even before going to the dining table 3/4 of the paruppu vadais are over in the kitchen , as every one has a taste before on the table .

Fried Idly

Share Button

photo (6)

Preparation Time : 15 minutes

Cooking Time : 25 minutes

Serving : 6 members

Description

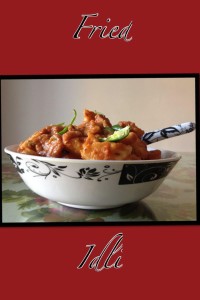
Fried Idli . A fusion dish (indo – chinese)that i learnt initially when i started to cook from my hubby’s aunt Bismi amma. She had invited us over for Breakfast when i was newly married. The first tought that came to my mind when i saw the dish was, it must be some chinese style chicken dish (I was like , how can you eat fried chicken for breakfast)even after they served and i tasted it also , i could not figure out what it was . Finally Bismi amma told me it was idlis. I was so surprised, that idlis could taste so good . I took note of the recipe then and there . From then on its a regular dish at home. Any left over idlis or hard idlis are surely changed into fried idlis.Who ever i have served this dish to have loved it and have never guessed that its made out of idlis.

Ingredients for Batter

Idlis – 10 , cut into 4 cubes

Ingredients
Quantity
Maida1 cup
cornflour1 cup
salt to taste
waterlittle

Ingredients for Sauce

Ingredients
Quantity
tomatoes5 big ground to a smooth paste
onions4 big fried in 1 teaspoon oil to brown in colour and ground to a smooth paste
ginger garlic paste1/2 teaspoon each
oilto deep fry + 2 tablespoons
onion1 chopped
cumin seeds 1 teaspoon
chilli powder1 1-4 teaspoon
saltto taste
ajinomotoa pinch ( optional )
tomato sauce1 cup
red food colora pinch ( optional , I didn't use in this dish on the picture )

Ingredients to Garnish

Ingredients
Quantity
green chillies2 cut into thin long strips
coriander leavesfew chopped

Method for Batter

  1. Mix all the ingredients together for the batter to get a semi loose consistency batter .
  2. Heat oil to deep fry in a wok . Dip the cubed idli pieces one at a time into the batter and drop into the hot oil .
  3. Fry to a light golden brown color and crisp . Drain and set aside .

Method for Sauce

  1. Heat 2 tablespoons of oil in a sauce pan . Add cumin seeds and chopped onion and fry to brown .
  2. Top with ginger garlic paste and fry to crisp . Add the ground tomato purée and fry till raw smell vanishes . Oil should float on top .
  3. Add the fried onion paste . Mix well and sauté for 2 minutes . Top with chilli powder , sugar , salt to taste , ajinomoto ( optional ) , red food colour ( optional ) and tomato sauce .
  4. Mix well adding 1/4 cup or more water to get a thick flowing consistency sauce .
  5. Boil the sauce for 2 to 4 minutes allowing all the flavours to infuse together in medium heat as the sauce tends to sputter all around . Taste and adjust .
  6. Mix the fried idlis just before serving with the re heated sauce . Garnish with green chillies and coriander leaves .
  7. Serve hot immediately .