Chicken Salna

Share Button

cs

Preparation Time : 15 minutes

Cooking Time : 20 minutes

Serving : 10 to 12 members

Description

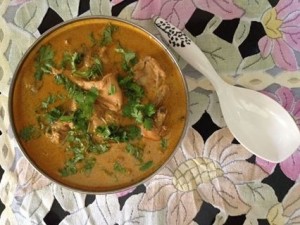
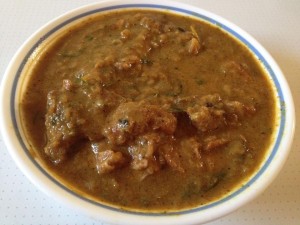
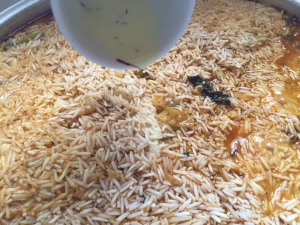
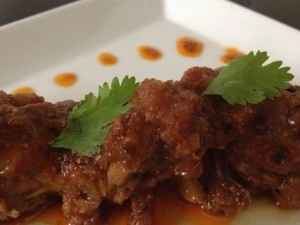
Chicken salna . This mighty dish is an authentic dish very own to the muslim ravuthar community who hail from tirunelveli. They have just this one recipe that they follow for both chicken and mutton. This Salna is a bit more watery than the usual curries, gravys and kormas served. They use this salna with white boiled rice , thenga choru (coconut rice)? Nei choru (ghee rice),parota,iddiappam, appam and everything possible actually. Remember the curry masala powder i mentioned and had posted the recipe before.That’s the main key ingredients for this dish. My hubby loves this dish so much when he was a kid , in my in-laws place they didn’t make parotas at home instead it was bought from a restaurant called hotel niyas.They would shread the parota (atleast 3 that’s the regular standard parcel)pour hell lot of Salna and soak the parotas,parcel it so when you open,it looks like a square box. It will be still moist with the Salna and pieces of meat inbetween. This is a typical Nellai style version of parota Salna. My hubby used to exchange meat pieces for more parotas with his sister vaseela as each one of them gets only one.

Ingredients

Ingredients
Quantity
mutton or chicken1 kg
onion2 sliced
small onion1 hand cut into 1/2
curry leaves1 strand
cinnamon 1 inch piece 2
cloves 4
cardamom 2
ginger garlic paste 1 tablespoon each
tomatoes 3 big chopped
green chillies 6 slit
coriander leaves 2 tablespoons chopped
salt to taste
poppy seeds 1/4 cup ground to a paste adding 1 teaspoon of fennel seeds
curry masala powder 6 tablespoons heaped ground to a smooth paste ( can just add the powder as it is but my mother - in - law grinds it and adds more taste )
coconut 1/2 grated and ground to a smooth paste
thick coconut milk 1/2 cup

Method

  1. Heat 100 ml of oil ( gingely oil or vegetable oil . Gingely oil is used traditionally ) in a pressure cooker .
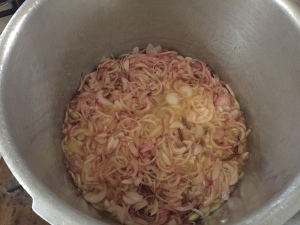
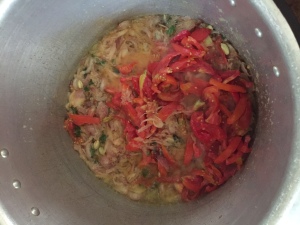
  2. Add cinnamon , cloves , cardamom , small onions and curry leaves . Once they splutter and onions are brown , top with ginger garlic paste and fry to crisp .
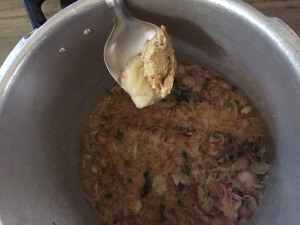
  3. Add meat , onions , tomatoes , green chillies , coriander leaves chopped and salt to taste . Sauté for 5 minutes till colour of the meat changes and lets out some juice .
  4. Add the poppy seed paste and sauté for another 5 minutes . Top with the masala powder paste and sauté for 3 minutes .
  5. Pour water just to enough to cover the meat in the pressure cooker . close with lid and pressure cook for 3 whistles or until meat is cooked . Add coconut paste and coconut milk .
  6. Bring to boil and simmer for 5 minutes until oil floats on top .
  7. Serve hot garnished with chopped coriander leaves .

Note

For curry masala powder click the link below :

Biscuit layered pudding

Share Button

IMG_5813

blp

Preparation Time : 15 minutes

Cooking Time : 5 to 6 minutes

Serving : 6 members

Description

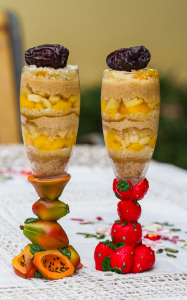
Biscuit layered pudding. This recipe was given to me by my aunt (moms last sister) Thasneem .I have taken note of the recipe in my first cook book of mine. A few days back my daughters co-sister Firdouse had called and given me a recipe saying that she had it in her cousin nadhas place. Took note of the recipe and found out that my aunts recipe and nadhas recipe were the same. I remember trying this dessert long back once but i didn’t like it then as the products available (like fresh cream etc) were not of good quality then. Made this when my son – in – law was here with a twist of layering the pudding in tall glasses. He loved it. Have to mention about these pretty glasses used here. They are very precious to me as it was gifted to me by my brother darvesh on his first trip to india after he started earning on his own. I use these glasses very rarely as they are so fragile and delicate.

Ingredients

Ingredients
Quantity
Marie biscuits or digestive biscuits 1 packet
eggs2
fresh cream 100 grams
butter 100 grams
nuts100 grams powdered
sugar syrup 100 grams ( I used the syrup from the tinned pineapples )
vanilla essence 1 teaspoon
sugar 20 grams
fruits or tinned pineapple 1 cup ( I used tinned pineapples )
dates1 cup pitted

Method for First Layer

  1. Melt 2 spoons of butter .
  2. Add one portion of powdered biscuit powder, sugar syrup and sugar to taste and mix well .
  3. Layer the base with this mix and top with powdered nuts mixed with sugar to taste . Place a layer of pineapples and dates .

Method for Second Layer

  1. Melt butter , add egg , vanilla essence , sugar to taste and one portion of the biscuit powder and mix well .
  2. Fill this mixture over the first layer , top with nuts powder and pineapples and dates . ( I cheated making ready custard and just mixing it with powdered biscuit instead )

Method for Third layer 

  1. Mix fresh cream , egg , vanilla essence , sugar to taste and third portion of powdered biscuit and mix well .
  2. Fill this mixture over the second layer . Top with nuts powder , pineapple and dates .
  3. Finally sprinkle the nuts powder on top .
  4. Place in the fridge for atleast 8 hours and serve chill.

Creamy quick pasta

Share Button

cqp

Preparation Time : 10 minutes

Cooking Time : 15 minutes

Serving : 5 members

Description

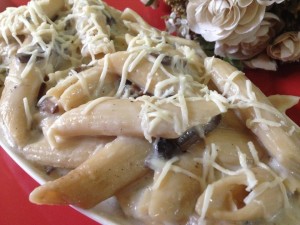
Creamy quick pasta . Quite a bland pasta mostly apt and loved by children. The creaminess helps them to just run it down to their tummy soon , as you all know most of the children chew a lot more than swallowing . My sister-in-law vaseelas daughter binusha fathima is like another daughter to me. She was born exactly on the 100th day after my daughter ANISHA was born.(did you all take note of their names ending rhymeing with a sha)every holiday she would be at my place with both my kids. She was (and is also) terribly a skinny gal. My job was to mainly make her gain weight before she leaves. So i used to feed her and make sure that she eats well. You feed her one mouth full (she’s got an unbelieveably small mouth )and she will take atleast 8 to 10 minutes to swallow.First 3 minutes she will have the food in her mouth on the right side, next 3 minutes after i push with my finger into the middle of her mouth it goes to the opposite side.Another 3 minutes in the Center of her mouth and finally into her tummy.I would finish telling her atleast 6 stories by the time she eats her meal. I seriously wished if only she had a zip in her tummy, would have been so easy just to put the food inside and zip her up. We all would tease her saying even on her wedding , i will have to feed her. Well now she is blessed with a beautiful baby gal Liyana Aashik and she will learn the art of feeding her soon.

Ingredients

Ingredients
Quantity
pasta 3 cups ( I have used cannelloni pasta here , you could use any pasta of your choice )
mushrooms1 cup sliced
onion 1 chopped
salt to taste
pepper to taste
milk1 cup
flour 2 tablespoons
oil1 tablespoon

Method

  1. Boil the pasta in hot boiling salted water it cooked through . Drain , rinse in cold water and set aside .
  2. Heat a non – stick heavy bottomed pan with oil . Add 1 crushed garlic ( optional ) , onion and mushroom and saute till the mushrooms release water first and then reduce the water released to get a dry consistency mixture and the mushrooms are cooked .
  3. Add flour , simmer the flame and mix well . Stirring continuously pour milk little by little and bring to boil till you get a semi thick creamy sauce . Season with salt and pepper .
  4. Taste and adjust adding the boiled pasta . Mix well making sure the sauce has coated well all around the pasta .
  5. Add a teaspoon of butter ( optional ) . Toss well . Serve hot with grated cheese on top .

Ghee rice / nei choru

Share Button

gr

Preparation Time : 20 minutes

Cooking Time : 15 to 20 minutes

Serving : 8 members

Description

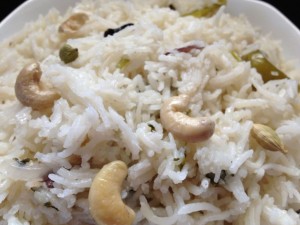
Ghee rice . Nei choru as we call it at home. Midly flavoured rice with whole spices and ghee which is the center piece at home other than biriyani whenever we have guests or a good occasion to celebrate. Nei choru is always served with mutton or chicken kurma , onion raitha (thayir chutney) dalcha (sambhar made with mutton bones and fat) and any dry or gravy dish made with mutton or a chicken and finally a Dessert which is a payasam for sure. This menu is a typical authentic ravuthar menu for a feast at home. Nei choru is served mainly for lunch but every household do eat the left over for dinner as well. At my in-laws place in case they have a lot of left over for the next day morning too. They mix the dalcha , korma and rice together adding little tamarind extract and salt to taste. Then they heat this mixture until heated well and serve pipeing hot. They call this as ithee vacha choru.

Ingredients

Ingredients
Quantity
basmati or jera sala rice 1 litter ( 5 1/4 cup , jera sala rice is used authenticly )
ghee 3/4 glass
coriander leaves few chopped
ginger garlic paste 2 tablespoons
cloves 4
cinnamon 4
cardamom 4
green chillies 3 slit
onions 2 sliced
curd3 tablespoons
sugar1/4 teaspoon
salt to taste
whole cashew nuts 2 tablespoons
rose essence 1 drop
water 1 3/4 litters

Method

  1. Wash and soak the rice in water .
  2. Heat ghee in a pressure cooker , add cinnamon , cloves , cardamom , sliced onion . Fry to translucent .
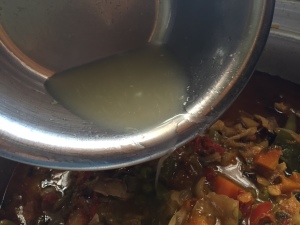
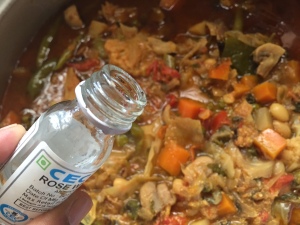
  3. Top with ginger garlic paste and fry to crisp . Pour the water along with curd , salt , sugar , coriander leaves , green chillies , cashew nuts , rose essence and bring to boil .
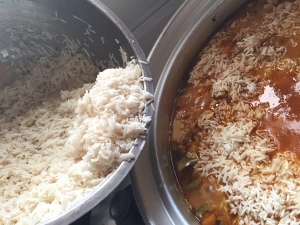
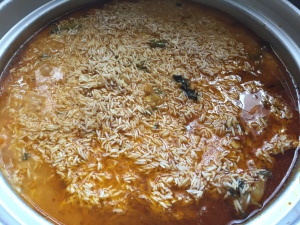
  4. Add washed rice and toss well and pressure cook for 1 whistle and simmer for 10 minutes .
  5. Switch of the flame and once the whistle settles down . Serve hot .

Carrot halwa

Share Button

ch

Preparation Time : 15 minutes

Cooking Time : 15 to 20 minutes

Serving : 5 to 6 members

Description

Carrot halwa . A North Indian full flavoured fabulous dish with distinct flavours. I have noted this recipe in my fiirst cook book but never tried out till recently as the recipe demands the use of unsweetened milk koda. In south indian cooking very rarely do we use milk kova in cooking except for the sweet itself. so the availability of unsweetened milk kova in the market was nil but now we get it everywhere. Milkymists brand has done justice in launching all milk products with good quality and high standards for food freaks like us. My moms cousin sister shareen (who is way younger to me but my aunt….)had requested for this recipe. I have more than 6 to 8 uncles and aunts who are younger to me. sounds crazy i know but it’s the fact. Well my metrnal uncle himself is 12 years younger to me. We did our schooling together in good shepherd public school in ooty.As i call him mama , he was addressed as mama by all my friends.

Ingredients

Ingredients
Quantity
carrot 1/2 kg peeled and grated
milk 1/2 litre
sugar 300 grams or more to taste ( I added more as i have a set of very sweet tooth )
unsweetened milk kova 125grams crumbled
ghee 75 grams
water1 glass
mixed nuts like cashew nuts , badam ( soaked in hot water and peeled )
pistachio chopped fine 2 tablespoons

Method

  1. Cook the grated carrot with milk and water in a non stick shallow pan .
  2. Boil until the milk and water has evaporated and the carrots are cooked and dry .
  3. Then add sugar , a pinch of salt , ghee and unsweetened milk kova .
  4. Stir till it gets to a halwa consistency .
  5. Garnish with chopped mixed nuts and serve hot , cold or at room temperature .

Home style mutton pepper fry

Share Button

hsmp

Preparation Time : 10 minutes

Cooking Time : 1/2 an hour

Serving : 5 members

Description

Home style mutton pepper fry . (naadan milagu Kari) an authentic dish that i have been eating from my childhood days. It’s so very easy and yummy to the tummy . You just have to pressure cook all the ingredients together and then season with coconut oil and curry leaves . The dish is ready. This is not just a mutton pepper fry but a dame good mutton pepper fry whenever i crave for home cooked comfort food , i have this mutton pepper fry with white boiled rice and hot rasam. Whoever i have served this dish to never say good bye instead they say i will be back soon.This recipe can be made with chicken also. The thick following gravy is a good accomplishment with chapathis , parota, appams, idli,dosa and everything possible.

Ingredients

Ingredients
Quanttiy
mutton or chicken 1/2 kg
ginger garlic paste 1 teaspoon each
small onions1 hand crushed
tomato1 chopped
coriander leaves 1 tablespoon chopped
turmeric powder 1/4 teaspoon
chilli powder1 teaspoon
coriander powder2 teaspoon
pepper powder1 1/2 tablespoon
cumin powder1 1/2 tablespoon
garam masala powder1/4 teaspoon
salt to taste
coconut oil 4 tablespoon
curry leaves few

Method

  1. In a pressure cooker mix all the ingredients together except for coconut oil and curry leaves along with 1 cup water .
  2. pressure cook for 3 whistles if mutton is used , 1 whistle if chicken is used .
  3. Heat coconut oil in a kadai and add curry leaves . Once they splutter pour the cooked meat into the coconut oil and bring to boil and reduce the gravy to a thick flowing consistency .
  4. Simmer for 5 minutes allowing all the flavours to infuse together and oil floats on top .
  5. Serve pipeing hot with anything and every thing .

Vegetable biriyani

Share Button

image1 (1)

IMG_3741

IMG_3742

IMG_3744

IMG_3745

IMG_3748

IMG_3749

IMG_3763

IMG_3764

IMG_3766

IMG_3767

IMG_3770

Preparation Time : 1/2 an hour

Cooking Time : 20 minutes

Serving : 4 to 5 members

Description

Vegetable Mughal dum biriyani . This is a wholesome warming dish that i have tried to showcase in a modern way. Usually dum biriyanis are made with firewood but now a days with the busy schedule and buzz of life it’s impossible. So i have followed the same procedure of the dum biriyani but on a stove top.(which is much more easy now a days)at times it’s best to be as practical as possible. I love the fried bread pieces that are in this biriyani. I usually serve myself making sure i have atleast 2 to 5 bread pieces on my plate. whatever said and done my choice is always the non – veg biriyani. Very rarely do i prepare this biriyani at home. Not that it does not tatse good but at home every one will have a huge question mark as why vegetarian biriyani ? Why not non – vegetarian biriyani ?

Ingredients

Ingredients
Quantity
Basmati rice2 cups ( cleaned and soaked in water for an hour )
onions3 big sliced
tomato2 big chopped
green chillies6 slit
coriander leaves 2 tablespoons chopped
mint leaves2 tablespoons
ghee1 cup ( can use 1/2 cup ghee and 1/2 cup oil )
cardamom3
cloves3
cinnamon1 inch piece 2
bay leaf1
ginger garlic paste 1 tablespoon each
mixed vegetables 1 1/2 cups ( carrots , cauliflower , green peas , potato , cabbage , beans , capsicum ) chopped into medium sized cubes
bread slices4 cut into squares and fried in ghee to brown
paneer1 cup cubied fried in ghee
saltto taste
turmeric powder1/4 teaspoon
chilli powder1 teaspoon
curd1 cup
coconut grated and cashewnuts2 tablespoons each ground to a smooth paste
rose water1 teaspoon
saffron - a pinch soaked in 1/4 cup milk
lime juice1/2 lime

Method

  1. Heat ghee in a pressure cooker . Add cinnamon , cloves , cardamom and bay leaf .
  2. Once they crackle add onions and fry to brown for about 5 to 8 minutes . Top with ginger garlic paste and fry to crisp .
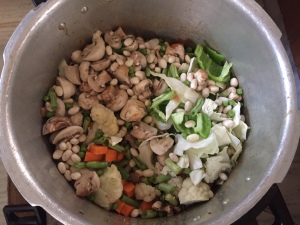
  3. Add mixed vegetables , tomato , green chillies , mint leaves , coriander leaves , curd , turmeric powder , chilli powder and salt .
  4. Mix well and sauté for 5 minutes till the tomatoes lets it juices out and gets to a gravy consistency . Add 5 cups of water and pressure cook for 1 whistle .
  5. Dilute the ground coconut cashew paste in little water and add to the vegetable gravy . Mix well adding lime juice and rose water .
  6. Taste and adjust . Mix in soaked basmati rice along with saffron , fried bread and paneer .mix well and pressure cook for 1 whistle and simmer for 10 minutes .
  7. Switch of the flame , once the whistle settles down remove and serve hot with onion raitha .

Sweet potato rice balls

Share Button

sprb

Preparation Time : 15 minutes

Cooking Time : 5 to 6 minutes

Serving : 8 members

Description

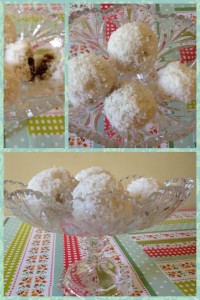
Sweet potato rice balls . This dish is my take on the malaysian dish onde onde.My co sister Farzanas grandmother is a Malaysian , once she got married and was into our family , every now and then we were introduced to all sorts of Malaysian dishes . But the problem was my co – sister didn’t know anything about the dishes except for its name and of course eating it.I recently got the recipe for this dish from the net.sounded so simple and easy. Got some fresh sweet potato from the market other day and gave this dish a try. I followed as the recipe demanded and rolled the balls.dropped the balls into boiling salted water and was waiting for the balls to float on top.Waited,waited and waited no balls seem to float.Dug into the water to see all my balls dissolved in the water. Read the recipe once again to see where i went wrong. Every thing i did seemed right. Went through again and found out i used normal rice flour instead of glutinous rice flour.Dum me . Well i have never seen or heard about glutinous rice flour . So with easily available ingredients in our market i have made these .

Ingredients

Ingredients
Quantity
sweet potato200 grams boiled , peeled and mashed
rice flour100 grams
palm sugar ( karupetti )100 grams
coconut grated100 grams ( white alone )
salta pinch

Method

  1. Mix salt and grated coconut in a bowl and set aside .
  2. Mix mashed sweet potato and rice flour together adding little salt . Knead to get a dough , if its too dry add little water bit by bit .
  3. If its too wet add a bit more rice flour . Make 12 equal size balls out of the dough . Flatten a ball and fill the Center with palm sugar small cubes . Roll them in your palms to form a smooth ball .
  4. Do the same with the remaining dough and palm sugar . Steam these balls on a stove top for 5 minutes using an idli steamer or microwave for 2 minutes using a microwave steamer with 2 tablespoons of water .
  5. ( I did it in a microwave as I already had messed up with a lot of vessels while boiling the balls in water . ) dip the balls in some palm sugar syrup and roll in grated coconut evenly . Serve hot or cold .

Chicken tomato gravy

Share Button

ctg

Preparation Time : 15 minutes

Cooking Time : Half an hour

Serving : 5 members

Description

Chicken tomato gravy . This is my mother -in – laws recipe. All gravies done by my mother – in – law are based on this style of gravy . My daughter ANISHA loves this gravy (only gravy , remember the vegetarian in her)any time you ask her what she wants the first thing will be chicken tomato gravy. During fasting (nonbhu , rosa) this dish is such a miracle that every alternative day i end up making this dish for our early morning eating.This dish is apt for any family style feast. Mainly a good side dish with ghee rice or boiled plain rice.Can be served with chapathis also to cretae perfection.Quite a hot dish, you sure will feel the slow burn singing the sides of your tongue.This dish brings me memories of my living in a joint family for 18 years of my married life. We were 11 family members with 7 servants along in one house. Food was always served in a way that celebrated the gathering of our entire family. The kitchen was on alert 24 hours a day because of the different age groups that demanded so.

Ingredients

Ingredients
Quantity
chicken 1/2 kg
onions3 big sliced
tomato2 big chopped
ginger garlic paste1 tsp each
coconut oil 5 tablespoons
cinnamon1
cloves 2
cardamom 2
cumin powder1 teaspoon
pepper powder1 teaspoon
chilli powder 2 teaspoons
salt to taste
curry leavesfew
coriander leaves 1 tablespoon chopped to garnish

Method

  1. Heat coconut oil in a pressure cooker . Add cinnamon , cloves and cardamom .
  2. Once they crackle add curry leaves and sliced onions and sauté to brown in colour .
  3. Add ginger garlic paste and fry to crisp . Top with chopped tomatoes and sauté till the tomatoes are cooked and oil floats on top .
  4. Add chilli powder , chicken and salt . Mix well and sauté till the colour of the chicken changes and lets out some juices .add 1 cup of water , mix well and pressure cook for 1 whistle .
  5. Top with cumin powder and pepper powder . Mix well and reduce the gravy if too watery to a thick flowing consistency gravy .taste and adjust .
  6. Simmer for 5 minutes till oil floats on top . Garnish with chopped coriander leaves . Serve hot .

Bruschetta

Share Button

bruschetta

Preparation Time : 10 minutes + 15 minutes marination time

Cooking Time : 8 to 10 minutes

Serving : 4 members

Description

Bruschetta . A very simple healthy fuss free recipe. I usually serve this with a vegetable soup for breakfast at home. The tang of tomatoes brings in more zink to the bruschetta . This is my version on the italian dish. I have just made two little changes by substituting some ingredients. Every thing around me revolves around food. Now a days at times i just forget where i am because i am kept busy with my own world of cooking , experimenting , working on recipes … But when it comes to great healthy eating options and relative recipes my mind goes blank. I usually focus mainly on show off recipes. (oops please, i am not one though) i read recently that the best way of eating healthy is to be 80 percent sensible and 20 percent indulgent. Well most of us have our eating habits the other way round.

Ingredients

Ingredients
Quantity
French bread 1 sliced horizontally to get oval shaped slices ( the thin long breads like your hands , you can use normal bread also but with thick slices )
tomato2 chopped
onion1 big chopped
garlic paste1/4 teaspoon
vinegar1 teaspoon
butter3 tablespoon ( at room temperature )
garlic5 flakes chopped
basil leaves few chopped ( I used thulasi leaves from my mother - in - laws backyard )
chilli flakes1/4 teaspoon
pepperto taste
salt to taste
olive oil1 tablespoon
cheesegrated to garnish

Method

  1. Preheat an oven at 180 degree celsius .
  2. Mix onions , tomatoes , chopped garlic , basil , olive oil , vinegar , chilli flakes , pepper and salt together and let it marinate for 10 to 15 minutes .
  3. Mix the ground garlic and butter together . Apply on the base of the sliced breads on one side .
  4. Top with the marinated mixture . Garnish with grated cheese .
  5. Bake the bruschetta slices for 8 to 10 minutes until you get a crisp crust base and the cheese melts on top .
  6. Garnish with more basil leaves chopped and serve hot , any time of the day .