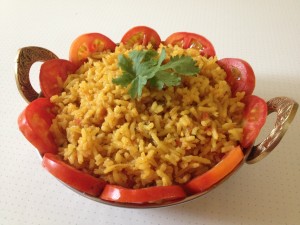
Cheesy potato canape

Share Button

cheesypotato

Preparation Time : 30 minutes

Cooking Time : 25 minutes

Serving : 5 – 6 members

Description

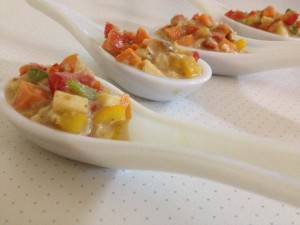
Cheesy potato canape . A Peruvian style cheese dip recipe that is served with tapioca finger chips . I came across this recipe in the telly on food safari program in fox traveller hosted by maeve o ‘ meara . One day was just flipping through a cook book and came across a recipe with the same cheesy dip used with potatoes and served as a canape by chef ritu Dalmia . Was wonder struck with her great idea of using this cheesy dip with potato rounds . Stored this idea in mind . In a few weeks time had my friend meera aboo thamby and her family come over for lunch at my place . Her hubby is a health freak and has a lot of salads , soups and proteins . Rice is a big no , no . ( you know about these NRI ‘S ….. Oops no offence to any one ) so I had to cater to her hubby’s needs as well . Planned to make four salads and the first one on my mind was the potato canape recipe that was stored in my mind . I followed ritu dalmias recipe and ended up resulting in a very runny sauce instead of a creamy one . Had to use more feta and salted biscuits than demanded in the recipe . Compared this recipe with the food safaris and found out that I had to use evaporated milk but ritu Dalmia had mentioned just milk and that to one cup . I guess that’s what made my sauce runny . So I have substituted milk with cream here . The entire world revolves around with borrowed , tweaked , followed and inspired recipes with their own twist.

Ingredients

Ingredients
Quantity
Oil1 tablespoon
Yellow bell pepper/ yellow capsicum1 chopped
Onion1 chopped
Garlic2 flakes
Green chilies2 chopped
Feta cheese100 grams
Cream2 tablespoon
Salted biscuits6 to 8 ,( I used Monaco biscuits )
Salt and pepperto taste
Potatoes4 boiled , peeled and sliced into 1/2 centimeter thick slices
Cappers1 tablespoon
Celery leavesfew

Method

  1. Heat oil in a frying pan . Saute yellow bell pepper , onion , garlic and green chillies until soft .
  2. Cool completely . Put this mixture in a blender along with feta cheese , cream , biscuits , salt and pepper .
  3. Blend to get a thick creamy sauce . Season the potato slices with very little salt .
  4. Lay the potatoes in a single layer on a flat platter and top them with the cheese sauce .
  5. Garnish with capers and celery leaves . Serve at room temperature .

Watermelon feta salad

Share Button

watermelonsaled

Preparation Time : 10 minutes

Cooking Time : nil

Serving : 4 members

Description

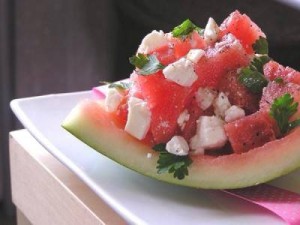
Watermelon feta salad . A Greek origin dish which I first got to know through nigella lawsons show on the telly . Fell in love with the idea of using the water melon in a salad . Following her recipe I just spiked it up a bit with our desi ingredients and wolla it was heavenly with the freshness of the ingredients , crunchiness of the cucumber , saltiness of the feta and enhanced lemony zing . This salad is a perfect iced appetizer . Water melon was one fruit as a kid that I just got to mournfully flip through pages and had to wonder how it would taste as it was no where to be found in Coimbatore and surrounding areas . The vibrant red with black seeds sparkling in between with the white lining along with the green skin was a fantasy to me . At last one holiday I finally got to taste water melon that was sourced from Bombay in my grand mothers( dads mom ) place in Coimbatore . As we were a huge gang of people there , each one of us got one piece each . Loved the taste and wateriness of the fruit but the taste didn’t register in my mind and was a for gotten episode . Finally water melon was sold a lot in Coimbatore and at school in Ooty , we were served a triangular piece each during lunch on summer days . Got married of to tirunelveli and not a sign of any fresh fruits available in the local market except for apples , oranges and bananas . My parents used to send over fruits of the season through lorry service over to in – laws place . Gone are those days , now Nellai has platform fruit stalls , fruit shops and huge department stores filled with imported fruits and veggies . Good things come to those who are patient . Right !!! We Nellai people are enjoying the exciting transformation for the lost time.

Ingredients

Ingredients
Quantity
watermelon cubes deseeded
250 grams
Cucumber cubes 50 grams
light soy sauce1 teaspoon
spring onions1 stalk
black olives6 to 7
feta cheese 50 grams
Black salta pinch
Coriander leaves (chopped)1 teaspoon
Mint leavesfew
tomato1 chopped
pumpkin seeds 2 teaspoons , ( or use any nuts of your choice )
chaat masala1/4 teaspoon
olive oil2 teaspoon
oregano leaves2 pinch
lemon zesta pincn
lemon juice1 teaspoon
sugar1 teaspoon

Method

  1. Peel and cut water melon into cubes or chunks if you like. Add the cucumber and Season with soy sauce and black salt.
  2. Slice the spring onions thin. Chop the olives. Crumble the feta cheese.Cut the tomato .
  3. Toast the pumpkin seeds, sprinkle the chaat masala with sugar. Prepare a dressing by whisking together the olive oil, oregano, lemon juice and zest in a mixing bowl .
  4. Add olives, the spring onions, tomato , feta, with the dressing. Season to taste.
  5. Place the cubed watermelon and cucumber on the plate with the dressing . garnish with coriander leaves and mint leaves .
  6. Place in the refrigerator until needed to be served and serve chill .

Millet rice balls with avocado aioli dressing

Share Button

mrbwaad

Preparation Time : 35 minutes

Cooking Time : 15 minutes

Serving : 4 to 6 members

Description

Millet rice balls with avocado aioli dressing . It’s been quite some time since I made salad at home . Last afternoon decided to skip my regular lunch . instead make a decent salad that should be healthy and fulfilling . I was in a mood to use ingredients from my refrigerator kind of thing , as it was fully loaded with vegetables ,fruits and herbs after my return from kodaikanal . Picked what ever I felt was right enough to be used and ripe along with some other ingredients . I remembered going through a recipe ( not sure where ) , where they had used quinoa balls in a salad . So I borrowed that idea and started of with millet rice balls . The first time I was experimenting with millet grains . Made a dressing with ripe avocado and mayonnaise . Tasted bland and buttery so just added a piece of sun dried tomato and its oil . Tasted and it just did pure Magic . I didn’t want to use regular salad vegetables so opted for the remaining avocado and spiked it with all the green herbs that I had . Proceeded and put the salad together . The salad was creamy , crunchy , tart , fragrantly herby with colour bursting all over . This haute make over with marvelous pairing of contrasting flavours are for keeps and sure to be a hit on any table . finally my quest of skipping lunch and having a salad alone was done in style .

Ingredients for the millet rice balls 

Ingredients
Quantity
Millet rice ( husk removed )120 gm
Brown bread4 slices
Red , yellow and green pepper1/4 each chopped
Olive oil2 tablespoons
Chilli flakes to taste
Dill1/4 teaspoon
Pine nuts1/4 cup
Lime juice 1/2 lime
feta cheese100 grams
Salt and pepperto taste

Ingredients for avocado aioli dressing

Ingredients
Quantity
Ripe Avocado 1/2
Mayonnaise4 tablespoon
Sun dried tomato1 piece with 1 teaspoon oil
Saltto taste

Salad ingredients

Ingredients
Quantity
Ripe Avocado1/2 cut to stripes
Leeks1 stem alone sliced few
Fresh whole basil leaves15
Mint leaves 8
Spring onion1 with greens chopped

Method for millet rice balls

  1. Pressure cook washed millet rice with 3 times more of water to the ratio of 1 share millet : 3 shares of water for 3 whistles and set aside to cool .
  2. Blitz the bread slices to a coarse powder . Heat oil and saute pine nuts and chopped coloured peppers to soft and nuts to lightly golden .
  3. Mix the cooked millet rice , pine-nuts pepper mixture , bread slice coarse powder , feta crumbled , lime juice , salt , pepper , chilli flakes and dill together .
  4. Mix well and shape into even size balls . Place on a greased microwave safe plate and microwave on high for 2 minutes . Remove and set aside

Method for avocado aioli dressing

  1. To make the avocado aioli for the salad , Blend the avocados with the mayonnaise , salt , sun dried tomato and oil to a smooth paste .
  2. Taste and adjust and set aside .

Method for salad 

  1. For salad , Mix avocado strips with leeks , fresh basil leaves and chopped spring onion .
  2. Toss half of the avocado aioli with the salad .

How to proceed and plate

  1. To serve , spread the salad on the base , top with millet rice balls and serve the remaining avocado aioli beside .
  2. Serve at room temperature .
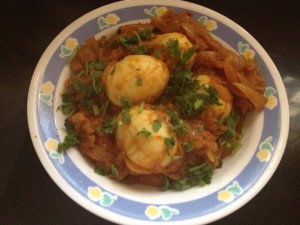
Thayir Vadai

Share Button

tv

Preparation Time : 1 1/2 hour soaking time + 30 minutes

Cooking Time : 5-6 minutes for each batch of vadais deep fried

Serving : 6 to 8 members

Description

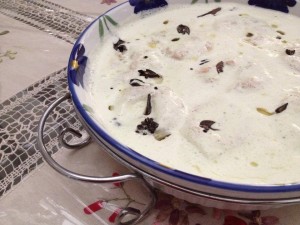
Thayir vadai . This is a typical South Indian style thayir vadai recipe . Initially when ever I made thayir vadais at home it never used to taste like the ones we get in hotels ( especially the ones we get in annapoorna hotel and Krishna sweets in Coimbatore . ) the curd used to always be a bit curdled like texture after some time . Once my hubby’s niece sabeena shared a secret about how to get the curd like in hotels . Gave it a try and it was pitch perfect . From then on I am religiously following this recipe . A few weeks back I was fortunate enough to attend a cooking work shop conducted by master chef 3 winner ripu dhaman handa . He was making a chat dish and suddenly he asked if any one knew what BALLA was ?? All of us in the class including the North Indians were like *#€¥!?#%*^>€$* ??? He showed us an ulunthu vadai and we all shouted out loud in a chorus VADAIS . In punjabi vadais are called BALLA . That was news to me as I thought ulunthu vadais are known as wada through out north India . In spite of the diversity in culture and language each indian state has the similarity in food with different names proves the unity we share as Indians .

Ingredients for ulunthu vadai

Ingredients
Quantity
Urad Dal / Ulunthu paruppu1 cup
Oilfor deep frying
Onions finely chopped
1/4 Cup
Ginger finely grated1 teaspoon
Curry leaves finely chopped
6-8
Green chillies finely chopped2
Saltto taste

Method for vadai

  1. Wash and soak urad dal for 1.5 hours. Strain the water. Grind urad dal to a smooth paste in a grinder by sprinkling water little by little.
  2. It took 15 minutes to grind 1 cup of urad dal. Use very very little water. Grind it till urad dal turns soft and fluffy.
  3. Add salt, finely chopped onions, ginger, curry leaves and green chillies to the dough and mix well.Heat oil in a Kadai to deep fry.
  4. Take a plastic cover or banana leaf. Moisten your hand with water. Take a lemon size dough and place it in the plastic cover. ( At times when i have guests at home , i use my doughnut cutter and make perfect same shaped and sized vadais )
  5. Flatten the dough and pierce a big hole in the centre of dough using your finger.Slide the dough carefully into oil.
  6. Fry till vada turns golden brown on both sides , takes about 2-3 minutes .
  7. Drain and Remove excess oil by placing the vadai in paper towels and set aside .

Ingredients for the curd mixture 

Ingredients
Quantity
Thick curd3 cups
Cashew nuts8
Coconut grated1/4 cup
Poppy seeds1 teaspoon
Green chilly 1
Saltto taste

Method for the curd mixture

  1. Grind coconut , green chilly , cashew nuts and poppy seeds together to a smooth paste .
  2. Blend this paste with the curd adding salt to taste . Taste and adjust and set aside .

How to proceed

  1. Soak the fried vadais in warm salted water for 5-8 seconds .
  2. Drain and drop them into the curd mixture And set aside .

Ingredients to temper

Ingredients
Quantity
Oil1 teaspoon
Mustard seeds1/2 teaspoon
Curry laces6

Method to temper

  1. Heat oil . Add mustard seeds . Once they crackle add the curry leaves .
  2. Remove from heat . Cool completely and pour over the soaking thayir vadais .

Ingredients to garnish

Ingredients
Quantity
Carrot grated1 small
Coriander leaves choppedfew
Kara boondhi1/4 cup

Method to garnish

  1. Garnish with chopped coriander leaves , grated carrots and kara boondhi .
  2. Serve at room temperature or chill and enjoy .


Pondicherry style chicken gravy

Share Button

pscg

Preparation Time : 20 minutes

Cooking Time : 20 to 25 minutes

Serving : 4 members

Description

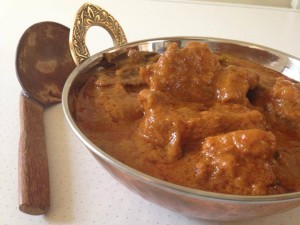
Pondicherry style chicken gravy . This dish very own to the sunshine union territory of Pondicherry  was brought by Bharathi rathi , for the recipe swap get together on the first anniversary of sauté , fry n bake but she had made it with mutton . Having so much of work to do for the anniversary celebration , this recipe was not written on the file of recipes I distributed that day , nor did i take a picture  and I didn’t get to taste it as well because it was cleanly wiped of before I could start my lunch . So I made it again with chicken , when I had my boy Afzar come home two days before eid ul azha . It was a very aromatic delicious gravy and liked the fact that there was no coconut or nuts used to thicken the gravy .this home style classic is a true union of taste and incomparable flavour  that shows the varied cuisine of our country .  I first got to meet Bharathi in the gym and it took nearly a
Week for us to start talking to each other . Once we started now there is no stopping as we talk for hours and hours in person and over the phone nearly every day and we are the best of buddies . When sauté , fry n bake was 299 likes , she asked one of her friends to give a like just for the sake of the little joy  that I get and is the best critic of sauté, fry n bake . Bharathi was the last person to come for the get together but she has to be excused as she had to come along with her  three month old baby boy . Her elder boy Shri  maan was like “why did you leave me and go to Hazeena aunties house ??” that evening after he was back from school . I pop up with utter joy every time I get to see Shri  maan with his huge round shy , blushing eyes :-)) .

Ingredients for step 1

Ingredients
Quantity
Small onionsone hand
Tomatoes 2 big chopped
Cumin seeds 1 teaspoon
Cinnamon1 inch piece
Cardamom1
Cloves2
Fennel seeds1 teaspoon
Ginger1 inch piece
Garlic6 flakes
Dry red chillies6
Oil1 1/2 tablespoons

Method for step 1

  1. Heat oil and fry each mentioned above ingredient until it gets roasted and let’s out its aroma separately .
  2. Cool completely and grind together.

Ingredients for step 2

Ingredients
Quantity
Chicken / mutton1/2 kg ,
Ginger paste1/4 teaspoon
Garlic paste1/4 teaspoon
Salt to taste

Method for step 2

  1. Mix all the above ingredients together and cook until the meat is cooked along with little water .

Ingredients for step 3

Ingredients
Quantity
Oil2 to 3 tablespoons
Fennel seeds1 teaspoon
Curry leaves1 string
Bay leaf1
Curry masala powder2 tablespoons or coriander powder

Method for step 3

  1. Heat oil in a non stick kadai . Add curry leaves , fennel seeds and bay leaf .
  2. Top with the curry masala powder and the ground masala paste . Fry until oil floats on top .
  3. Add the boiled meat with the water and mix well . Bring to boil . Simmer until oil separates and serve hot .

Note

  1. Can add potatoes and green peas with the meat and make a gravy for chapathis or any rotis .
  2. The water added can be adjusted according to the gravy consistency you want it to be , running or semi thick .
  3. Vegetarians can do the same by substituting potatoes , green peas or any other veggie of your choice .

Raw mango juice

Share Button

IMG_5900

rmj

Preparation Time : 10 minutes

Cooking Time : 10 minutes

Serving : 4 to 6 members

Description

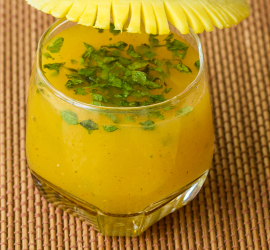
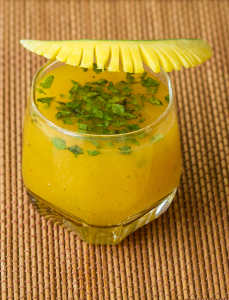
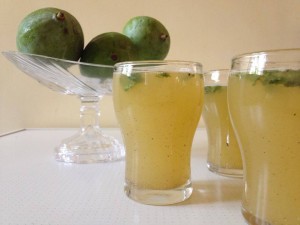
Aam panna, its brilliant coolness and thirst slaking qualities helps replenish all the energy lost in the sweltering heat. Refreshes you like no other drink. Happy summer folks…

Ingredients

Ingredients
Quantity
Raw Green Mango1 peeled and chopped
Dry roasted cumin seed powder1 teaspoon
Red chilli Powder1/2 teaspoon
chopped fresh Mint Leaves1 tablespoon
Salt1 teaspoon
Sugar7 teaspoons
Black salt a pinch
Ice cubes12
Ice water 2 cups

Method

  1. Pressure cook the peeled and chopped raw mango with 2 cups of water for one whistle . Cool completely .
  2. Grind into a smooth puree . Add cumin seed powder, red chili powder, sugar, black salt and salt and mix well . Add the finely chopped mint leaves and whisk again.
  3. To this mixture add chilled water and ice cubes and stir thoroughly. Taste and adjust . Your refreshing Aam panna drink is now ready.
  4. You may now serve the green mango juice .

Egg roast

Share Button

eggroast

Preparation Time : 20 minutes

Cooking Time : 15 -20 minutes

Serving : 4 members

Description

Egg roast . A dish that was and is always there on the dinning table spread on any occasion at home in my maternal grand mothers place . Grand pa ( periyatha ) has this habit of bringing home unexpected guests any time of the day .i still remember how much my grand ma would grumble but immediately head towards the kitchen to adjust and elaborate a better spread on the table . The first thing she does when in the kitchen would be , take eggs from the fridge and boil them and start chopping onions , resulting in an egg roast on the table . This would happen for any meal of the day . So this dish had no restriction of being on the table at all . At hubby’s place eggs are a big ” no , no ” as they consider it to be a high content fatty culprit . So for some time the mighty , nostalgic Egg roast had vanished from my menu . Last morning had my maternal uncle ( Shanu ) at my place for breakfast . My mind just rewinded bake and took me to the authentic spread of my grand mother . Wanting to rekindle those days in my uncle as he lives in Bangalore now and has no time to relax or to relish such authentic delicacies . Made a grand breakfast with a menu of our gods own country’s authentic dishes like puttu , kadala curry , iddiappam , naadan chicken curry , appam , stew and of course the mighty egg roast . These home style dishes that have lost their way did come as a revelation to my uncle and My mission was accomplished :-)) .

Ingredients

Ingredients
Quantity
Boiled Eggs4
Onions4 (medium, finely sliced )
Small Tomatoes3 blitzed to a puree
Garlic Ginger paste1/4 teaspoon each
Turmeric Powder 1/4 teaspoon
Red Chilli Powder1 teaspoon
Garam Masala 1/4 teaspoon
Green chillies4 slit
Coriander powder1 tablespoon
Cumin powder1/2 teaspoon
Fennel powder 1/2 teaspoon
Saltto taste
Coconut Oil2 tablespoons
Coriander leavesfew chopped

Method

  1. De – shell the boiled eggs . Make some slits over the eggs vertically and keep it aside .
  2. Heat coconut oil in a pan and shallow fry the boiled egg turning it frequently for couple of minutes until they start to turn a very light brown and set aside.In the same pan, saute the chopped onions till it turns to translucent .
  3. Add ginger and garlic paste , saute for a couple of minutes until the ginger garlic paste gets crisp . add green chilies and saute.
  4. Add turmeric powder , red chilli powder , coriander powder , cumin powder and fennel powder . saute till the raw smell is gone.
  5. Add blitzed tomato puree , salt to taste , and saute till oil separates from the pan.
  6. Add garam masala and mix in well. Top with the fried eggs and toss it well making sure not to stir the mixture too hard as the eggs might crumble .
  7. Cook it on a low heat for 4-5 minutes, stirring occasionally. Remove from the heat.garnish with chopped coriander leaves and serve as side dish with Anything and everything .

No oil healthy salad

Share Button

nooilsalad

Preparation Time : 20 minutes

Cooking Time : 20 minutes to boil soya beans

Serving : 4 members

Description

No oil healthy dressing salad . I am on a DIET …. Every time I say this , I cheat myself to the core . A foodie like me just can’t stick on to healthy food habits . Two days back my best buddy gazeena sulu kunahamed had posted a picture of herself and Sindhu Krishna ( my other best buddy , we are a trio of three hard to pull apart best friends from school ) this picture was a recent picture taken on Sindhu’s visit to sulu’s place . Both of them looked OMG glamorously gorgeous and THIN . I just shook myself up and made up my mind to shed off some weight which has resulted me to try my hands on healthy dishes that taste good too . Healthy + good taste are two words that are far apart from one another . So , I am on a wild goose chase in search for real healthy tasty food . Mindful eating is clearly the buzz word for now . But that doesn’t mean having to grudgingly pile on austere , flavor- less food on your plate . this salad was a lip smacking healthy , nutritious and a delicious one That has ‘ eat me now ‘ written all over it . I licked the entire bowl myself that was hearty and filling . The creaminess of the almonds along with a nutty punch and the sweetness of dates made for a lovely combination enhancing the simplicity of the dish . This salad is uncomplicated and is ready in less than twenty minutes . This dish did make me realize that making healthy choices that count to swap a few ingredient combination results in refreshing and nutritious way to tickle your taste buds .

Ingredients for dressing

Ingredients
Quantity
Almonds3
Pitted Dates3
White sesame seeds 1 teaspoon
Boiled soya beans 1 teaspoon ( I use 1 tablespoon soya milk instead at times )
Gingera very small tiny bit ( 1/2 of 1/4 teaspoon grated )
Garlic1 small flake
Saltto taste
Water just enough to grind ( when using milk avoid water )

Method for dressing

  1. Grind  all the ingredients together to a smooth paste and set aside .

Other Ingredients

Ingredients
Quantity
Carrot1 chopped
Red , green and yellow capsicum
1/4 of each chopped
Green Apple or red apple1/4 chopped
Tomato1/4 chopped
Chinese cabbage1 leaf chopped

Method

  1. Mix all the ingredients together . Add the ground dressing and toss well .Keep in the refrigerator and serve chill .

Savoury envelope appam

Share Button

savoury

Preparation Time : 40 minutes

Cooking Time : 10 minutes for filling and 5 minutes for each envelope appam

Serving : 8-10 members

Description

Savoury stuffed appam. The recipe for this dish was borrowed from my mothers cook book panorama home recipes of Kerala which was gifted to her by her friend. A treasure trove of home -style recipes. To me, recipes have always been more than instructions about how to make a great dish. Having this recipe in hand for quite sometime and being in my to try list as well, Every time something or the other just kept me away from the dish.My quest to make non-deep fried dishes for Iftar this year made me do this dish but with a little changes of using lesser oil than what the original recipe demanded. Once you have the pancakes and filling ready, you just have to assemble them together, shallow fry and cut and serve the pillow Drool worthy treat. Tadaa it’s ready.The layers and the crisp outer cover sure does tempt you a lot.It’s the same old thin pancakes and filling we make at home just like how our mothers would make but with a wicked clever, knock out spin of twist in assembling that gives this dish a oomph factor. This dish is a must try for all the home ministers.

Ingredients for pancakes / appam

Ingredients
Quantity
Flour / Maida1 1/2 cups
Milk1/2 cup
Eggs2
Saltv
Waterenough to get a loose batter

Method for pancakes / appam

  1. Mix maida , eggs , salt and milk together .
  2. Add water little by little according to the required amount to get a nice smooth thin batter . Keep aside .

Ingredients for filling

Ingredients
Quantity
Mutton / chicken keema250 gram
Green chillies4
Onions2 chopped
Ginger garlic paste 1 teaspoon each
Garam masala powder1/2 teaspoon
Coriander powder1 teaspoon
Turmeric powder1/4 teaspoon ,
Oil2 teaspoons
Coriander leaves1/2 bunch chopped

Method for filling

  1. Cook washed and cleaned keema with coriander powder , turmeric powder and salt to taste .
  2. Heat oil in a non – stick kadai . Fry the chopped onions to brown adding ginger garlic paste . Sauté to crisp .
  3. Top with green chillies , garam masala powder , cooked keema and chopped coriander leaves .
  4. Fry for two minutes or until dry and set aside .

Ingredients for Maida paste

Ingredients
Quantity
Flour / Maida1/2 cup
Salt to taste
Waterjust enough to make a thick paste of maida

Method for Maida paste

  1. Mix all the above mentioned ingredients together to get a thick consistency paste with out lumps . Set aside .

How to proceed

  1. Make pancakes with the loose batter of 3 sizes ( small , big and bigger ) in a non stick pan . ( i used 3 different sized non – stick pans for the 3 sized pancakes ) you get 3 pancakes in each size for the amount of batter mentioned in the recipe . Cook the pancakes on both the sides and set aside .
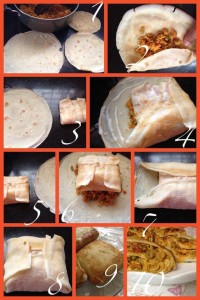
  2. Place the small pancake . Spread 1 1/2 tablespoon of filling in the Center in the shape of a square . Apply maida paste all around the filling till the edge of the pancakes . Fold the maida paste applied four sides in wards to form a small envelope .
  3. Take the big pancake . ( the middle sized pancake ) place 2 tablespoon of filling in the Center and spread evenly into a square shape leaving the edges of the pancake . Apply maida paste apart from the filled portion up to edges on all four sides . Place the 1st small envelope on top of the square filling and fold like the first envelop from all four sides inwards .
  4. Do the same with the 3rd ( bigger ) pancake . Each time placing the previous folded envelope on top of the square filling and folding the sides of the maida paste applied four sides in wards to get a bigger envelope .
  5. Heat a tawa with 1 tablespoon of oil and place the sealed side down and press to make it firm and crisp . Turn over and press the other side as well to get a golden colour crisp cover . With a help of a tong , carefully turn it over on all sides and fry to golden colour and crisp .
  6. Remove from tawa . Cut into four triangles and serve hot with tomato sauce . You get a crisp outer layer with soft inner layer of pancakes filled in between with the filling .

Notes

  1. Vegetarians can omit the eggs in the batter . Substitute with vegetable filling . Follow the same recipe and go ahead for the vegetarian version .
  2. I have added mixed vegetables ( carrots , beans , green peas , capsicum and cabbage ) along with the chicken keema for the filling . Just to add more vegetables in our diet as its ramadan and no other way than to cheat every one at home to get some veggies into their tummy .
  3. You could dot the pancakes with ghee while cooking on both sides .( I skipped using ghee , so my pancakes were oil free pancakes made in non – stick pans .)
  4. You could pan fry each envelope in oil for every envelope making sure each envelope has a good sealed sides and golden crisp cover . Start with small pancake and make sure each pancake gets bigger than the other , resulting in crisp golden layers outside as well as inside . ( I just pan fried the outer last layer alone wanting to avoid the extra oil content in the dish )
  5. I made just 3 different sizes of pancakes , resulting in 3 envelopes to be folded . Maximum you could do with 4 envelopes . ( I tried with 4 but it was too massive and huge )
  6. In total other than the oil used for the filling , I have just used 1 tablespoon of oil to fry each 3 layered envelopes . You could oil spray and fry and reduce the 1 tablespoon of oil that I used as well .


Tomato Biriyani

Share Button

tb

Preparation Time : 25 -30 minutes

Cooking Time : 30 minutes

Serving : 4 members

Description

Tomato biriyani , an authentic recipe that I learnt from my mother – in – law . My daughters favorite as it’s a vegetarian dish that helps her with a lesser job of picking and cleaning the rice before eating not giving her much trouble like the biriyani . I have made one change from my mother – in – laws recipe of using blanched , peeled and pureeed tomatoes instead of chopped tomatoes as she does . I had to make the change as the previous chopped tomatoes used ended up in a lot of tomato skin in the rice were the picking and cleaning of the rice had to be done before eating . Pains taking but the out come totally justifies the effort put in . Using the tomato puree helps in getting a better red color as well . At home this dish is called as thakkali saadham , meaning tomato rice in Tamil but I feel it’s more of a biriyani than just a saadham as we get to experience the magic of true Indian spices in an array of exotic and rare symphony of elegance . This tomato biriyani does taste very different from the traditional biriyani but in a good way that oozes with old world charm and sure to hit the right spot making sure your senses are soothed .

Ingredients

Ingredients
Quantity
Basmati rice2 cup
Tomatoes 1/4 kg Blanched , skin peeled and ground
Onions5 Sliced
Green chillies5 Slit
Cinnamon1 inch piece Powdered
Cloves2 Powdered
Ginger and garlic paste1 teaspoon each
Turmeric powder1/4 teaspoon
Red chilli powder1/2 teaspoon
Saltto taste
Coconut pasteone hand ground
Ghee4 tablespoons
Water4 cups
Coriander leaves2 tablespoons (chopped)

Method

  1. Cut a cross in the bottom of each whole tomato making sure the other end is intact together . Drop the tomatoes into hot water and set aside for 5 minutes .
  2. Remove from the hot water and cool , reserving the hot water that can be used to cook the rice . ( in case you are pressed for time drop the tomatoes into ice cold water ) peel the skin and blitz in a food processor to a purée .
  3. Wash and soak basmati rice in water .Heat ghee in a pressure cooker .
  4. Top with sliced onions and sauté for 5-6 minutes until onions are golden brown in colour . Add ginger and garlic paste diluted in little water and fry until raw smell has gone for about 4 minutes .
  5. Add green chillies and tomato purée . Keep stirring occasionally until oil floats on top. Add turmeric powder , red chilli powder , salt to taste , powdered cinnamon and cloves . Mix well adding water .
  6. Add coconut paste and mix well . Check seasoning and bring to boil . Drain the soaked basmati rice and add to the boiling water along with chopped coriander leaves .
  7. Mix once gently making sure not to break the soaked basmati rice . Cover with lid and pressure cook for 2 whistles in high heat .
  8. Wait for the whistle to subside , then open and serve hot with onion raitha , any spicy non – vegetarian or vegetarian gravy and paped .