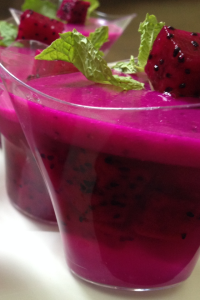
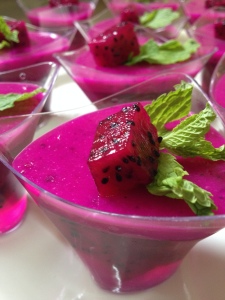
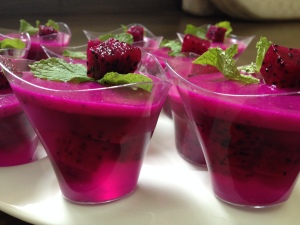
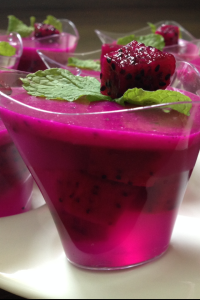
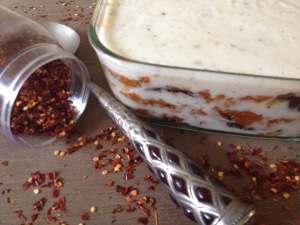
Dragon fruit pudding

Share Button

image (2)

image (41)


image (27)

image (3)

Preparation Time : 20 minutes

Cooking Time : 20 minutes + 3 hours setting time in the freezer

Serving : 6 – 8 members

Description

A dessert I came up with instantly to take over to a family gathering at my daughters place . My daughter kept reminding me about 2 dragon fruits in the refrigerator asking me to do something with it . The lazy bug in me when on a holiday just didn’t let me want to get into the kitchen . Finally with no other go had to do something with in four hours time as we were to start for the family get together on time . A pudding to set soon , the only cheats short cut option in mind was to use china grass / agar agar but dragon fruit alone would taste bland so pared it up tender coconut that was there at my daughters place . Started cutting the dragon fruit and with utter surprise found the dragon fruit to be a deep pink colour . My first time seeing a dragon fruit in this colour as usually we get only the white ones . Went ahead with my plan and the results were a vibrant coloured , awesome tasting pudding , Terribly simple to make and very impressive . Took  it for the family get together and it was the talk of the event leaving a mark in every ones memory . As usual I clicked pictures to post and share with all of you . My gal also clicked a few pictures saying she is going to post it on face book in a foodie group ( Kovai foodies ) where there was a food photography contest going on . The excitement of the out come of the pudding over took the news about the food photography contest at that point of time and a forgotten story there after . In a weeks time my gal calls me and conveys the message saying she won the second prize in the food photography contest . I was over whelmed and proud as a mother and the creator of the dessert . That one moment of a genius spark  that helped me invent this pudding took my gal places .

Ingredients

Ingredients
Quantity
Red dragon fruit 2 big peeled and cubed
White dragon fruit 2 big peeled and cubed
Tender coconut water5 cups
Tender coconut flesh3 tender coconuts ground to a smooth purée
Sugar to taste
China grass / agar agar 20 grams

Method

  1. Soak 10 grams of china grass / agar agar in 3 cups of tender coconut water for ten minutes . Place it over medium flame and keep stirring until the china grass dissolves . Takes about ten minutes . Add sugar to taste . Remove from heat , strain and cool for 4-5 minutes .
  2. Place 3 cubes of white dragon fruit and 3 cubes of pink colour dragon fruit into individual pudding cups 3/4 way . Pour the cooled tender coconut water mixture over making sure the dragon fruit cubes are immersed into the tender coconut water mixture .
  3.  Place in the freezer for 30 minutes to set . The first layer is done . For the second layer , soak the remaining 10 grams of china grass / agar agar in 2 cups of tender coconut for 10 minutes .
  4. Blitz the remaining red and white coloured ( I used only red coloured dragon fruits ) Dragon Fruits together making sure to keep the seeds whole but to get a coarse purée . Set aside .place the second batch of soaked  tender coconut water and china grass / agar agar over medium flame .
  5. Keep stirring occasionally to dissolve the china grass / agar agar for ten minutes . Add sugar to taste . Remove from heat . Cool for five minutes .
  6. Mix together the puréed dragon fruit pulp with the ground tender coconut purée .mix the above mixed purée to the cooled second batch of tender coconut  china grass / agar agar mixture gently making sure it’s not lumpy but smooth semi thick batter like . Check sweetness and add more sugar if needed .
  7. Pour over the set first layer of the pudding to one inch thick . Place in the freezer again to set for another 30 minutes .
  8. Remove from freezer and replace in the refrigerator until to be served .Serve chill garnished with two cubes of dragon fruit cubes and a spring of mint on top .

Vada pav

Share Button

image (1)

Preparation Time : 40 minutes

Cooking Time : 30 minutes

Serving : 6- 8 members

Description

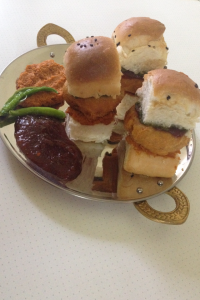
Vada pav , an authentic Mumbai street food that I have never heard or tasted until one day at a jewellery shop in Coimbatore ( Zaveri bros ) . I know jewellery shop having vada pav ??? Wait peeps , Sangeetha aunty ,  A very close  friend to my mom and an awesome jewellery designer with good aesthetics  served us each a vada pav from a near by chaat shop . The first bite just took away all my attention from the jewellery display in front of me to the taste of the dish and what must be the ingredients and method of cooking used .( as usual a typical “MY “mind ) with yet another new food item to be tried out , happy me just kept it in my to do lists . During fasting time finally gave the dish a try following Sanjeev kapoor’s recipe with an addition of two chutneys of my choice . Made a mistake by cutting the Pav’s into half instead of cutting then half intact . For a first try that’s not a flaw at all as the taste was more than perfect with sharpness , acidity and balance . Served it being very nervous ( fasting time all men turn more grumpy as their tummies are empty :-)) ) as hubby dear hates potatoes and bread . He ate the vada pav with no complains asking me to serve him more of the red chutney. Happy me as I I know some of the greatest Indian tastes in food are with the street food sellers of India . called my gal to convey this news and    She was like even I made vada pav today . Great minds think a like isn’t it !!! Like food is to be enjoyed and that cooking is primarily about making others happy .

 Ingredients For Vada

Ingredients
Quantity
Potatoes,boiled, peeled and mashed 6 large
Garlic8 to 10 cloves
Green chillies4
Turmeric powder1/4 teaspoon
Asafoetida a pinch
Lemon juice 1 tablespoon
coriander leaves,chopped 1/4 bunch
Salt to taste
Oil to deep fry

Ingredients For Batter

Ingredients
Quantity
Gram flour (besan)1 1/4 cup
Soda bicarbonate a pinch
Turmeric powder 1/4 teaspoon
Red chilli powder1/2 teaspoon
Saltto taste
Oil1 tablespoon

Ingredients For Red Chutney


Ingredients For Gereen Chutney

Ingredients
Quantity
bengal gram/Kadalai paruppu/Channa dhal1 cup
green chillies2
ginger grateda pinch
Salt to taste

Ingredients For Sweet Imli Chutney

Ingredients
Quantity
Tamarind 3 cups soaked in 5 cups of water over night
Vinegar1 teaspoon
Chilli powder2 tablespoons or to taste
Saltto taste
Black salta pinch
Chat masala 1/4 teaspoon
Pepper powder1/4 teaspoon
Chilli flakes2 teaspoons
Crushed cumin seeds2 teaspoons
Jaggery 3 tablespoons or to taste

Ingredients Other 

Ingredients
Quantity
Pav 6 to 8
Whole green chillies 5 deep fried to serve

Method

  1. For red chutney: grind together coconut, red chilli powder and garlic in a mixer. Heat oil in a non stick pan, add this mixture and sauté for a minute. Add the gram flour crumbs and mix well and remove from the heat. Season with salt. Set aside to cool.
  2. For the green chutney : grind all ingredients together for the green chutney together to a semi think paste adding very little water . Taste and adjust seasoning and set aside .
  3. For the sweet imli chutney :soak tamarind overnight with water and cook for 45 minutes . strain the cooked pulp 2 to 3 times very well that there is nothing left in the tamarind .
  4. After that discard whatever is left in the strainer.Cook the tamarind juice again and add vinegar, chilli powder, salt, pepper, chili flakes, crushed cumin , jaggery , black salt and chat masala .
  5. Cook for another 20 minutes or until it thickens on low heat And enjoy.Grind together green chillies and garlic to a paste. Mix the potatoes, garlic-green chilli paste, turmeric powder, asafoetida, lemon juice, coriander leaves and salt in a bowl.
  6. Divide into eight equal portions and roll them into lemon sized balls. Mix together gram flour, soda bicarbonate, turmeric powder, red chilli powder and salt in a bowl. Heat one-tablespoon oil and add it to the gram flour mixture.
  7. Add sufficient water and whisk to make a coating consistency batter. Heat sufficient oil in a kadai to deep fry .Dip the potato mixture balls in the batter and deep fry in hot oil till golden brown in colour.
  8. Drain on an absorbent paper.Slit the pavs horizontally without cutting through, spread the red chutney on the inner sides of the pav on one side and spread green chutney on the other side of pav .
  9. Stuff it with hot vadas. Serve hot with fried green chillies , sweet imli chutney and more red chutney .

Mutta charu

Share Button

image (25)

Preparation Time : 20 minutes

Cooking Time : 20 – 25 minutes

Serving : 4 members

Description

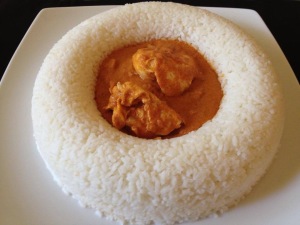
Mutta charu . Mutta means egg and charu is how we address curries at home . So this is an authentic egg curry that my grand ma ( dads mom , balkess perima ) used to make for us . From the first time I remember eating this curry I have loved it to the core . The poached eggs in the tamarind , coconut and red chilli curry base is to die for . I end up eating a lot of rice when ever this curry is made at home .  My grand ma used to high light this dish by making an omelet mix ( the usual onion, green chillies , coriander leaves , tomato , salt , pepper , turmeric powder mix ) and make round omelettes in a kuli pariyaram mould . Add the omelettes to the mutta charu just before  serving . These panniyara omelettes were reserved for the kids at home . This curry is always the first wanted dish in my wish list when at moms place . Hubby’s place this curry is never heard of before and no one Fancies it at home . So this curry is made only on all alone “ME ” days at home . Best served with white boiled white rice . Give this dish a try folks , happy cooking to all .

Ingredients

Ingredients
Quantity
eggs4
tamarind pulp1 1/2 cup
chilli powder 5 table spoons ( or according to taste as this curry is very hot )
coconut ground1/2
thick coconut milk 1 cup
green chillies4 slit
tomato 3 chopped
small onions 2 1/2 hands cut into 1/2
salt to taste
coconut oil5 table spoons
cumin seeds1/2 tea spoon
fenugreek seeds1/2 tea spoon
garlic flakes10

Method

  1. Mix tamarind pulp , ground coconut , coconut milk , chilli powder , green chillies , 3/4 of cut small onions and salt to taste together .
  2. Add 4 cups of water to the tamarind coconut paste mix .Taste and adjust and set aside .
  3. Heat oil , add fenugreek seeds , cumin seeds , little small onions and garlic flakes .Fry till the fenugreek crackles .Add the chopped tomatoes and fry till oil separates .
  4. Top with 1 tablespoon chilli powder and fry for 10 seconds as to get a good red colour to the curry .
  5. Pour the mixed tamarind ,coconut paste mixture over .Cover with a lid and cook till green chillies are cooked and colour changes .
  6. Lower the flame to medium and drop the eggs one at a time far apart from each other . let it cook for 5 minutes undisturbed , then turn over the dropped eggs and cook further for another 5 minutes undisturbed .
  7. Simmer for another 2 minutes till oil floats on top. Serve hot with boiled rice .

Chapathi noodles

Share Button

image (24)

Preparation Time : 15 minutes

Cooking Time : 10-12 minutes

Serving : 4 members

Description

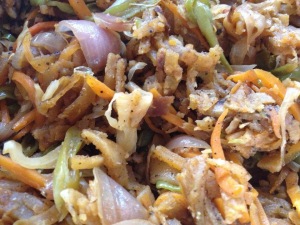
Chapathi noodles . A recipe I came up with when I had a lot of chapathis left over from the previous day dinner table . Usually I make kotthu parota or frankie’s but wanted to do some thing different and this just sparked in my mind With a bright effortless idea to suit every occasion at any level . Gave it a try and was pitch perfect . You can feed a crowd with this magical left over recipe . In fact my girl keeps asking me to make it when ever she is here . Sure this trick will work with fussy eating children as well and will work wonders as a packed lunch to school . Every time this dish is on the table , its brought me high praise and numerous accolades . ( no self praising please :-))) ) . Do give it a try folks , sure the praise and accolades will follow you too .

Ingredients

Ingredients
Quantity
Chapathis12 rolled tightly and cut into thin strips
Garlic1 flake crushed
carrots2 juliens , capsicum - 1 big juliens , cabbage - 100 gm shredded ,
beans 1/4 cup cut slanting long strips
spring onion few chopped onion-1 sliced
ajinomoto 3/4 teaspoon ( optional )
oil 4 tablespoon
light soya sauce 1 teaspoon
tomato sauce1 1/2 table spoon
sugar1 teaspoon
salt and white pepper to taste

Method

  1. Heat oil in a large wok . Add one garlic flake crushed , top with onion and all the vegetables except for onion stem .
  2. Stir on high flame for 3 minutes . Add ajinomoto , salt and sugar .
  3. Keep stiring till vegetables are 3/4 cooked still having a bit of crunch in them .
  4. Add all the sauces , white pepper and onion stem . Mix well . Taste and adjust .
  5. Add the chapathi strips and toss well on medium heat for 5 minutes .
  6. Once all the flavours have infused together and is dry remove from heat and serve hot with tomato ketchup .
  7. you can add one stock cube to the vegetables while sautéing but be careful with salt as the stock cubes are very salty .
  8. The stock cubes add a lot of flavour to the dish but its optional .

Toad in the hole with onion gravy

Share Button

image (23)

Preparation Time : 30 minutes

Cooking Time : 1 hour

Serving : 4 members

Description

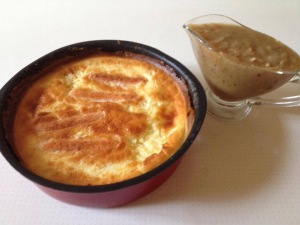
Toad in the hole . Sounds like a short story title in a story book , isn’t it ? But it’s the name of this dish .  This recipes is from the magazine “recipes “, my brother had sent me as a surprise a few months bake . Not knowing what to cook for breakfast when my daughter and son – in – law were here . Was going through this magazine and came across this recipe . Sounded wired , easy and nice . Gave it a try and was quite bland and light . I would prefer adding some dried herds and chilli flakes to suit our Indian pallet . Very English thought . Now the word “English” just takes me to all the compliments I get now a days for my write ups ( more than my recipes at times :-)) ) I myself didn’t know I had this writing skill in me until I started my page . But I still feel my English teachers mrs .padmini menon and mr . Victor selvin  are to take full credit for my write ups . Mrs . Padmini taught me until my 4 th standard . She was the one who taught me how to use a dictionary . We were asked to write down five new words from the dictionary every day with its meaning and frame a sentence using the word as home work . This helped me to gain knowledge in knowing new words . And mr . Victor selvin taught me from my 6 th standard on wards . His vocabulary and way of teaching and pronouncing words always excited me a lot . He never used to dictate , we were asked to copy the notes written by him on the black board With an awesome handwriting of his . I can never erase william Shakespeare’s julius ceasar  as the way he taught us its just rooted deep into me . I have had an education just up to the 9 th standard . All this is possible to me because I had good teachers who inspired me and a school ( good shepherd public school , ooty ) that churned the best out of me .

Ingredients for toad in the hole

Ingredients
Quantity
Flour 110 grams
Eggs 3
Milk150 ml
Water 150 ml
Oil1 tablespoon
Sausages8 to 10

Ingredients for onion gravy

Ingredients
Quantity
Butter 25 grams
Oil 1 tablespoon
Onions3 big sliced
Brown sugar 1 teaspoon
Flour 25 grams
Stock cubes 2 ( I used 2 maggi chicken stock cubes )
Water500 ml
Pepperto taste

Method for toad in the hole

  1. Preheat the oven to 180 degree Celsius . For the batter , sift flour into a bowl , make a well in the centre and gradually whisk in the eggs .
  2. Followed by milk and water .Continue whisking until you have a smooth batter . Set aside to stand . Put the oil in a large baking tin and roast the sausages .
  3. Bake in the oven for 10 minutes or until the oil is sizzling hot and the sausages are starting to brown .
  4. Remove the tin from the oven , pour the batter around the sausages and return to the oven for 30 -40 minutes or until the batter is puffed up and golden on top .

Method for the onion gravy

  1. Meanwhile , Melt butter and oil in a large heavy bottomed pan over medium heat .
  2. Add sliced onions and cook for 10 minutes , stirring occasionally .
  3. Add brown sugar , increase the heat and cook for a further 5-10 minutes until golden in colour .
  4. Remove from heat add flour and mix well . ( the amount of flour you use depends on how thick you want your gravy ) .
  5. Gradually add crushed stock cubes and water .Mix until the gravy is thick and smooth .
  6. Return the pan to the heat and bring slowly to boil , stirring all the time .
  7. Then simmer for 2 minutes . Add pepper and check salt . ( be careful with salt as the stock cubes contain  a lot of salt ) .
  8. Taste and adjust . Remove the toad in the hole from the oven and Serve hot along with the onion gravy  and some steamed veggies . 
  9. you can add dried herds and chilli flakes to add more flavour .

Vegetable moussaka

Share Button

image (22)

Preparation Time : 30 minutes

Cooking Time : 45 minutes

Serving: 8 members

Description

Moussaka . This dish is a traditional Greek dish that I got to know through a cook book I got initially when I started to cook . I have tried it just once though and after that didn’t attempt . Not that I didn’t like it , some how it just faded away . Well now it’s a staple at home . I always make the non veg version with a combination of egg plant and potatoes together . This time I came across a veggie version and was in cloud nine as my hubby’s veggie avatar was putting me in a fix to entertain him through his tummy . It tasted equally good as the non – veg version and a super addition to any dinner table . This dish brings together different flavours and textures in one hearty mix . In fact using soya chunks works well like lamb . This dish can be prepared a day ahead and baked when ever required . I did try my best to swap this high calorie fatty culprit dish to a healthy one and to break the myth of anything healthy is boring .

Ingredients

Ingredients
Quantity
Big violet Egg plants4 sliced into 1/2 inch thick rounds
Maidato coat
Oil 4 tablespoons
Soya granules500 grams , ( soak in warm water for 10 minutes , drain and use )
Onions4 chopped
Garlic cloves4 minced
Cinnamon2 teaspoon ground
All spice powder1/2 teaspoon , ( I used garam masala powder instead )
Crushed tomatoes4 cups
Tomato paste4 tablespoons
Sugar2 teaspoons
Chilli flakesto taste
Salt + pepperto taste
Oreganoto taste
Coriander leaves1/2 cup chopped
Bread crumbs100 grams
Parmesan cheese2 cups grated , ( I avoided the cheese completely )

Ingredients for the white sauce

Ingredients
Quantity
Butter1 cup ( I used oil instead )
Maida 1 cup
Warm Milk8 cups
Nutmeg powdera pinch

Method for egg plant

  1. Sprinkle salt over the sliced egg plants . Set aside for 1/2 an hour .
  2. Rinse the egg plant slices and pat dry .
  3. Dust them in maida and shallow fry till soft but not brown . Set aside .

Method for filling

  1. Heat oil in a non stick pan . Sauté the soya granules till brown .
  2. Add onions , garlic and fry for 5 minutes .
  3. Top with cinnamon powder , all spice powder , crushed tomatoes , tomato paste , sugar , salt , pepper and chilli flakes .
  4. Simmer for 15 minutes until liquid evaporates and gets to a dry and chunky tomato sauce .
  5. Garnish with oregano and coriander leaves and set aside .

Method for the white sauce

  1. Melt butter in a non stick heavy bottomed pan . Sprinkle maida , using a whisk gently stir the flour until it starts to bubble .
  2. Keep stirring , making sure no lumps are formed .
  3. Pour warm milk over little at a time incorporating to get a thick creamy white sauce with no lumps .
  4. Simmer to thicken until when a back of a spoon coated with sauce can run a clean line with your finger , its ready .
  5. Add nutmeg powder . Mix well , remove from heat and set aside .

To proceed

  1. Preheat an oven to 180 degree celsius . Grease a baking dish . Sprinkle the bottom with bread crumbs .
  2. Top with a single layer of fried egg plants . Add soya mixture on top of the egg plant layer . Sprinkle with grated cheese . Pour a layer of white sauce .
  3. Do the same until all the egg plants , soya mixture and white sauce is over making sure the final top layer is white sauce sprinkled with cheese and bread crumbs .
  4. Bake for 30 minutes until you get a melted golden crust .Allow to cool for 10 minutes . Slice and enjoy …non – veg version can be done by replacing soya granules with lamb , beef or chicken mince , following the same recipe .Can add 2 -4 beaten eggs to the cooled white sauce and use as the recipe demands .
  5. This helps the layers to stay separate and adds taste along with calories .
  6. Can use any vegetable of your choice instead of egg plants like potatoes and zukkenis .

Marconi and cheese bake

Share Button

image (21)

Preparation Time : 20 minutes

Cooking Time : 40 minutes

Serving : 8 members

Description

Macaroni & cheese bake . A dish I first got to know about in neigella lawsons program on the telly . Wanted to try the recipe then and there but just didn’t happen . 2 days latter my hubby’s cousin brother Yousuf send over something for dinner . Opened the box and to my surprise it was mac n cheese . He also is a keen cook and foodie , often cant resist trying out a recipe as soon as it is discovered like me . he was also inspired by neigella lawsons program and made it for dinner . It was creamy and yum . After a few days while switching channels came across another mac n cheese recipe which was apt for our Indian pallet . The host was a Jamaican  and he added curry powder and green chillies . The recipe I am posting today is also his recipe as I found neigella lawsons recipe to be too bland for the Indian taste buds . The bland dish with a bit of chilli lift Breaks the monotony of the cheese . i can assure , once you make it ,they will be the talk of your meal for a long time .  My kids, son – in – law and even my fussy hubby likes mac n cheese . We all like it to explode with creamy and gooey cheese as soon as we bite into the crusty melted cheese exterior .The picture I am posting today was taken by my gal ANISHA and the mac n cheese was prepared by her too .

Ingredients

Ingredients
Quantity
macaroni400 grams
butter50 grams + to grease + to dot
plain flour ( maida ) 2 tablespoons
milk500 ml ( 2 cups )
grated cheese 2 cups ( I use Amul cheese cubes 1 cup grated and 6 Amul cheese slice )
Onion 1 big chopped
Mixed dried herbs rosemary , thyme , dill , oregano and basila pinch each
Chilli flakesto taste
Green chillies2 slit
Curry masala powder1 tablespoon ( coriander powder - 1/2 teaspoon + red chilli powder -1/4 teaspoon + cumin powder - a huge pinch + fennel powder - a huge pinch . Mix altogether to get curry masala powder )
Cooked shredded Chicken1/2 cup , ( optional )
Sweet corn and capsicum 1/4 cup each ( optional )
Salt to taste
Bread crumbs1 1/2 teaspoons

Method

  1. Cook the macaroni in a large pan of boiling water according to packet instructions (different brands may vary in size & cooking times)
    melt the butter in a medium non stick sauce pan and add chopped onion , slit green chillies , crushed garlic and fry to translucent . add the flour. Cook, stirring, for 1 minute over medium-low heat.
  2. Gradually add the milk, stirring until smooth. Stir gently until the mixture comes just to the boil, then reduce heat and simmer for 2 minutes.
  3. Remove from the heat, add the 1/2 the grated cheese and 4 cheese slices , stir until melted and smooth.top with a pinch of all the dried mixed herbs , chilli flakes , salt ( be care full with salt as cheese is already salty ) chicken , sweet corn and capsicum .
  4. Add the curry masala powder making sure the sauce colour remains cream in colour . Taste and adjust the sauce . The sauce should be in a semi thick gooey flowing consistency .
  5. Drain the cooked pasta . Pour cheese sauce over the pasta and stir until well coated.remove the slit green chillies . Grease a ceramic baking tray . pour the cheese sauce coated macaroni . top with remaining grated cheese .
  6. Sprinkle bread crumbs over . Cut the remaining cheese slice ‘s into thin strips . Place it in a criss cross pattern over the grated cheese . Dot the top with little butter all around .
  7. Bake in a pre heated oven at 180 degree celsius for 30 minutes . serve hot . I like my mac n cheese creamy so I always make sure it’s still gooey with a cheese melted crust .
  8. Just add more milk to get a gooey saucy mac n cheese .

Jalar roti

Share Button


IMG_5809

image7

image1

image2

image3

image9

image4

image5

image8

Preparation Time : 20 minutes

Cooking Time : 1 minute for each jalar roti .

Serving : 8- 10 members

Description

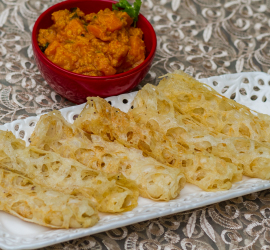
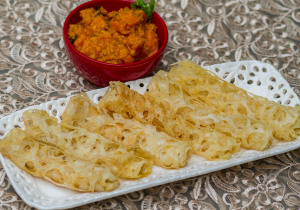
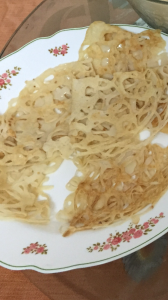
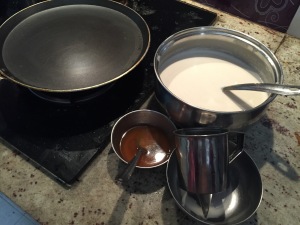
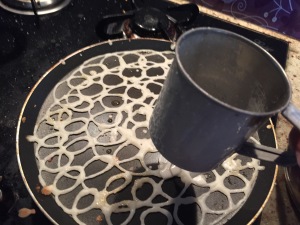
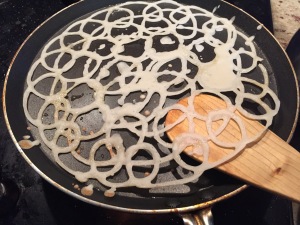
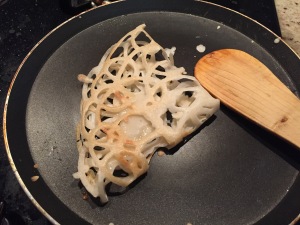
Jalar roti or roti jalar as known to the world but at home its known as jalar parota . This dish is an authentic dish very own to the Muslims of Malaysia . At mom’s place we don’t know head or tail about this dish . I got to know about this dish first when I was newly married at my in – laws place . The best part is this dish is not an authentic dish at my in – laws place also . They got to know about this dish from a place called NAGOOR ( a pilgrimage place ) near vellankanni in Tamil Nadu . The cone used to pour out the jalar roti is also available in NAGOOR or at Malaysia . This lacy crape poured out like a net pattern is eaten along with any non – veg curry or gravy . Made with easily available ingredients at home , its a fast , clever , easy time saving dish when you have sudden guests at home . This 5 ingredient wonder  is a favourite at home . Every time I make it , I feel the batter is a lot but finally it’s always not enough at the table . there are 2 more recipes that we make at home with the jalar parota being the main ingredient . I will be posting them soon . First we shall start with our mighty simple jalar parota .

 Ingredients

Ingredients
Quantity
Eggs2
Water650 ml
Thick Coconut milk100 ml
Saltto taste
Flour350 grams
Oil 100 ml

Method

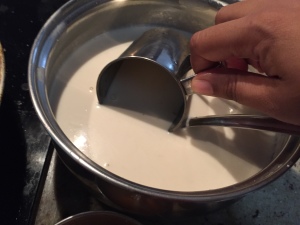
  1. Mix all the ingredients together except for oil making sure no lumps are formed . Heat a tawa greased with oil .
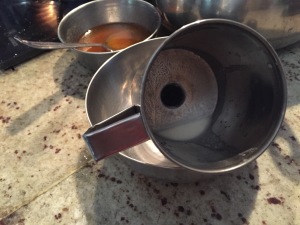
  2. Pour the batter using a jalar cup or a piping bag in a circular motion , making thin , lacy pancakes .
  3. Cook until set and crisp on one side . Fold into a triangle and serve hot with any non – vegetarian curry .
  4. I just mix flour with salt to taste and water , at times which works perfect as well .
  5. Health freaks can follow this method for the batter .

Surprise lasagna gravy

Share Button

image (19)

Preparation Time : 50 minutes

Cooking Time : 40 minutes

Serving : 8-10 members

Description

Surprise lasagne gravy . A recipe I came up with for a cooking competition held at my place Where we had to cook with fish , crab or prawn being the main ingredient . I was Participating in a competition nearly after decades . I think my last competition should have been in 1988 in school . Can’t tell you the excitement and nervousness that filled my soul from the time I started to prepare for the competition till the results were announced . First it started with breaking my head as to what dishes I should cook for the competition . I finalised with a cornflakes crusted fish fry , prawn pie , prawn Konkani style fry . but 2 dishes were deep fried and 1 baked . I wanted to serve a main course dish . How much ever I kindled my mind , I just could think of fish curry , chilli fish , fish gravy …. The regular usual things . The other 3 dishes I finalised are cooked regularly at home , was confident but  still wanted to come up with an innovative dish . I was making lasagne for dinner . As layering the lasagne having this competition in mind , my mind just went into what about a fish lasagne but again another baked dish . I just stuck to the concept of lasagne in my mind but wanted it with a surprise twist . Layers like lasagne , what do I use …. Cheese slice bingo … Oops but my prawn pie is a cheesy dish . Umm no way , pls something else ….. My mind and eyes wondered all around . Saw a cabbage in my kitchen counter . Use cabbage leaves instead of lasagne sheets … Wolla and fish mince  for filling . But a main course and not baked . So I decided to steam the layered cabbage and serve it along with a tomato tangy based gravy . Started my experiment and it worked pitch perfect the 3 rd time . The first time my cabbage and filling didn’t stick and came out as dry layers not as I wanted , corrected it by adding an egg to the filling . Second time I steamed the cabbage bundle it was hard , so I had to correct it by blanching it in salted water . Third , my tomato gravy lacked flavour so corrected it by adding bones to it to add more flavour . Four , the cabbage bundle didn’t have flavour of the gravy , so after blanching I poked it all around with a fork and then added it to the gravy . After all these corrections , tadaa , my surprise lasagne gravy was perfect . My hard work paid off and I won the competition . My surprise lasagne gravy and prawn pie were the high light of the competition . I have been wanting to post this recipe from the time I tried it . As the process and writing the recipe needs a lot of time , just kept postponing . So today is the day to reveal the secret of my surprise lasagne gravy .

Ingredients for blanching cabbage leaves

Ingredients
Quantity
Cabbage whole leafs10
Turmeric powder1/4 teaspoon
Saltto taste

Method to blanch cabbage leaves

  1. Take a large whole cabbage .
  2. Remove the cord of the cabbage from below carefully making sure you do not disturb the upper layers of the cabbage .
  3. Immerse the cabbage , cord removed side down in water mixed with turmeric powder and salt to taste .
  4. Let it boil for 8 to 10 minutes . Strain and reserve the water .
  5. Carefully take apart 10 leaves making sure you do not tear the leaves .
  6. Set aside .can use the left over cabbage for any other purpose in cooking

Ingredients for the filling

Ingredients
Quantity
Boneless Fish or Chicken mince 1/4 kg
Chilli powder1 teaspoon
Turmeric powder 1/4 teaspoon
Ginger garlic paste1/2 teaspoon each
Onion chopped1 big
Green chillies2 chopped
Coriander leaves chopped1 teaspoon
Garam masala powder1/4 teaspoon
Limea squeeze
Egg1
Salt to taste

Method for filling

  1. Marinate the fish or chicken mince with all the above ingredients together and set aside for 15 minutes .

How to proceed

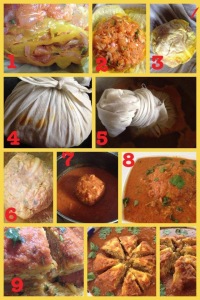
  1. Place four blanched cabbage leaves on top of a muslin cloth in the shape of a flower .
  2. Place one blanched cabbage leaf over the flower shape . Top with filling mixture .
  3. Pat the mixture making sure the blanched cabbage leaf is fully covered with the filling and is levelled .
  4. Repeat the same with three more blanched leaves and filling mixture .
  5. Now close the four flower shaped placed blanched cabbage leaves to form a covering to seal the layered stuffing . ( it will look like a normal cabbage ) .
  6. Now tie the muslin cloth together firmly to close the filled cabbage lasagne . Boil this tied cabbage bundle in the reserved turmeric salted water for 10 minutes .
  7. Remove and reserve the water . Cool completely . In tie the muslin cloth . Poke the cabbage lasagne with a fork all around and set aside .


Ingredients for the gravy

Ingredients
 
Fish or chicken bones few ( if using fish filling use fish bones , if using chicken mince for filling use chicken bones
Tomato 1/4 kg ground
Onion 1/4 kg sliced , sautéed in 1 teaspoon oil and ground to a paste
Ginger garlic paste1/4 teaspoon each
Onion 1 chopped
Cumin seeds 1 teaspoon
Oil4 tablespoon
Chilli powder1 teaspoon
Cumin powder1 /2 teaspoon
Coriander powder 1 teaspoon
Pepper powder 1/4 teaspoon
Garam masala powder 1/4 teaspoon
Saltto taste
Coriander leaves chopped 1 tablespoon

Method for the gravy

  1. Heat oil in a non stick kadai . Add cumin seeds and chopped onion . Fry to translucent . Add ginger garlic paste and fry to crisp .
  2. Top wit the fish / chicken bones and sauté for 3 minutes . Remove the bones and set aside . Add ground tomatoes and fry till oil separates .
  3. Top fried ground onion paste and fry for another 3 minutes in medium heat . Tie the fish / chicken bones in a muslin cloth and put it into the tomato onion gravy .
  4. Add chilli powder , cumin powder , coriander powder , pepper powder, salt  and garam masala powder . Mix well .
  5. Add 2 cups of reserved blanched water to get a thick saucy consistency gravy . Bring to boil in medium heat for 8 minutes until all the flavours infuse together and oil separates .
  6. Reduce the flame and immerse the blanched cabbage lasagne bundle carefully . Pour the gravy all over and simmer for 2 to 4 minutes letting some juices of the gravy to get into the cabbage lasagne .
  7. Remove from heat and set aside . Just before serving slice the cabbage lasagne into 8 or more slices . Remove the bone bundle from the gravy .
  8. Heat the gravy , pour over the sliced cabbage lasagne and serve hot garnished with chopped coriander leaves . Best served with chapathi’s , boiled rice , pulao , roti ….

Chicken cheese baked casserole

Share Button

image(29)

Preparation Time : 20 minutes

Cooking Time : 40 minutes

Serving : 6 – 8 members

Description

The habit of getting a recipe as soon as I like some thing that I have had any where from restaurants , road side food stalls to homes has resulted in giving me an opportunity in sharing this wonderful lip smacking  one pot dish . As a newly wedded bride my daughter Anisha and our family were invited to one of our relatives home for a grand feast . This chicken cheese baked casserole dish was also on display on the table . I served myself a very tiny piece   just to have a taste and the first mouth full just hit the right spot .. Bang on . Had some more guessing what  ingredients were there in the dish but it’s always better to know the right recipe rather than to assume and cook . So I asked abitha Akka ( the host ) for the recipe and saved it in my mind . Once home , saved the recipe from my mind to my hand written cook book and it was lost from my memory there after . Having an important guest at home for lunch wanted to come up with some thing different , as usual was going through my hand written recipe book and this recipe got my attention . Well this recipe has been put to sleep for a long while so it’s high time I gave it a try and went ahead by adding few veggies like broccoli and mushrooms . This dish was the most talked about stand out dish on the table that afternoon . My mission accomplished but I am yet to host a feast in return to abitha Akkas daughter anjum who’s married and has a kid as well .

Ingredients

Ingredients
Quantity
Chicken boneless1/4 kg boiled with salt and pepper and shredded ( reserve the left over water / stock )
Onion 5 sliced
Green chillies 3 chopped
Ginger garlic paste1/2 teaspoon
Tomato 2 blanched , skinned and chopped
Salt + pepperto taste
Capsicum1 chopped

Method

  1. Boil onions , green chillies , ginger garlic paste , salt ,  pepper and capsicum with left over water from boiled chicken .
  2. Add boiled shredded chicken and tomatoes .set aside to cool completely .

White sauce ingredients

Ingredients
Quantity
Butter 1 1/2 tablespoon
Maida3 tablespoons
Milk 2 cups
Mustard paste 1/4 teaspoon
Salt + pepper to taste

Method for white sauce

  1. Melt butter in a wide sauce pan . In low flame , add the flour to the melted butter little by little stirring continuously through out making sure no lumps are formed or gets burnt .
  2. Remove pan from heat , add milk and mix well vigorously making sure no lumps are formed .
  3. Once it’s mixed well , place over low heat and keep stirring to get a creamy , lump free white sauce .
  4. Add mustard paste , salt and pepper to taste .set aside and  Cool completely .

Ingredients to proceed

Ingredients
Quantity
Butter to grease
Eggs 3
Salt + pepper powder to taste
Red / yellow / green capsicum1 cut into rounds to decorate

Method

  1. Grease an oven proof casserole dish with butter . Preheat oven to 180 degree Celsius .
  2. Mix the cooled onion and chicken , tomato mixture along with white sauce . Mix well . Beat 3 eggs with salt + pepper to taste .
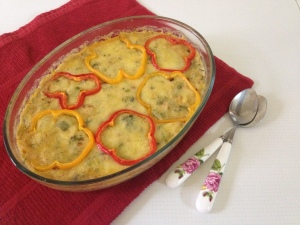
  3. Add to the chicken white sauce mixture and pour into the greased casserole dish . Add grated cheese over the top . Decorate with capsicum rings .
  4. Bake in the pre heated oven for 15 to 20 minutes or until the cheese on top melts to get a golden crust  and starts bubbling from bottom to top .
  5. Remove from oven cool a bit and serve warm or hot as it is .