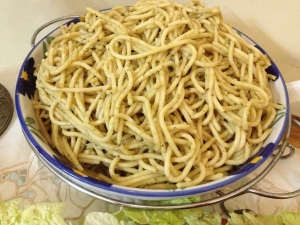
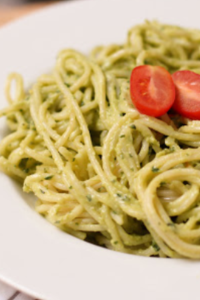
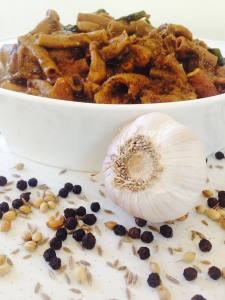
Home made pesto sauce tossed with spaghetti

Share Button

image

image1

image 2

Preparation Time : 20 minutes

Cooking Time : 25 minutes

Serving : 4 members

Description

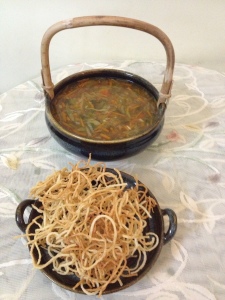
The new craze in me for Italian cuisine just makes me want to try every single Italian recipe I come across that interests me . When ever I get to see some thing in the shelves of gourmet stores that’s Italian I just grab it even if I don’t know what it is used for . Like wise I did the same with a bottle of pesto that was a pale green in colour , with the above floating with olive oil . Back home it was just in the store room shelf as it was in the shelves of the gourmet store . I happened to attend a cooking work shop of master chef India season 3 winner rippu dhaman handa in Coimbatore where he made a herby pesto from scratch . I was like ” OMG it’s dead easy and why did I have to get it from the shelves of a gourmet store for a whooping prise . ” later that bottle was used to make pesto bread pinwheels . Now , I make home made pesto and add it to salads , spread it over sandwich’s and katti rolls , serve it as a dip … I can go on and on . Wanting to impress and show off my new learnt Italian dishes made up my mind to serve an Italian spread for a family dinner at home . Spaghetti was one among the dishes I had in mind but wanted a change from the regular tomato – cheese based sauce I make usually . The bulb moment happened when I remembered Italian chef David rocca using pesto and tossing up a spaghetti . Went ahead with the same idea in mind but following my intuitions of the recipe . Tasted and it was spot on with a new welcoming colour that was herby and fragrant in taste . I did have a little left over which I tossed over equal amounts of cornflour + flour and deep fried to crisp and served it along a warm bowl of soup on a rainy cold night . These small inventions I come up with left overs putting as much love and effort into what I cook gives me a reason to smile when the deliciousness of the dish travels across the table .

 Ingredients

Ingredients
Quantity
spaghetti250 grams boiled in a pinch of salt and some olive oil ( reserve the boiled water )
olive oil 1 tablespoon
mint leaves few to garnish
cherry tomatoes 2
garlic1clove peeled

Ingredients For the Pesto Sauce

Ingredients
Quantity
basil2 cups ( at times I substitute with 1 cup mint + 1 cup coriander leaves or equal amounts of all the three )
Parmesan cheese1/2 cup grated
toasted walnuts or pine nuts1/2 cup ( I used pine nuts )
Saltto taste
garlic4 cloves
olive oil 3 tablespoons

Method For the Pesto Sauce

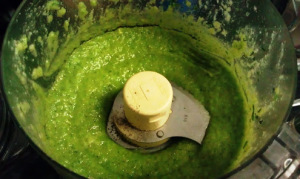
In a blender add all the ingredients and mix till a semi-fine paste is achieved.

For the Pasta

  1. In a pan heat the olive oil , add the garlic clove. Add the cherry tomatoes .
  2. Remove the whole garlic clove.Add the pesto sauce. Cook for 1 minute.
  3. Add the boiled spaghetti.Toss well , making sure the pesto sauce has coated the spaghetti all over .
  4. Add about 4 tablespoons of spaghetti boiled water to get the right consistency and moister .
  5. Garnish with a mint sprig and serve hot.


Gol gappa shots

Share Button

image (47)

Preparation Time : 30 minutes

Cooking Time : 5 minutes to deep fry the pain poorie’s . If using ready made pain poorie’s cooking time is nil .

Serving : 8-10 members

Description

Entertaining people through food with uniquely pleasurable dining experience  is my hobby . Though it sounds like a hope less hobby , I enjoy feeding people and to touch their hearts through my food . Now this hobby of mine has become an obstacle for me as every time I have to entertain through food the expectation is high . It’s like I have added more pressure on myself through my hobby guaranteeing to impress .  So I make sure to add new short cut , rare and unique menus and ideas to any grand feast at home . Like wise having to entertain my hubbies  newly wedded niece , I came up with this gol gappa shots idea to add a dash of glamour to the meal . I vaguely remember seeing this done in one of master chef India series long before. Having dried ready made pain poorie’s in hand that’s available in the local market here at my place .( such a genius product , just deep fry these and they pop  up to pani poorie’s , drain and store them in air tight containers until to be used ) i knew I had to execute this with a drink in a short glass and the pani puri to be filled with some thing . Just the day before I had tried out a salad dressing from celebrity chef vikki ratnanis cook book which tasted like a chat accomplishment  so thought of filling the pani poorie’s with that salad and serve a juice with it . Having fresh oranges in hand added some chat masala powder and black salt to go well with the salad stuffed pani poorie’s that had an Intense burst of salty , citrusy flavours. Served it to the guests at home as a starter and they were all head over heels with this new version of eye popping pani poori with a twist . I happened to meet my hubbies niece a few day before and she told me how her newly wedded hubby raved about the feast at our home to her in – laws which they listened with interest at first ( earning me loads of brownie points :-))  and when the same was repeated over and over again they did get irritated . I did share this recipe with my friend rabia Marliya who had a Diwali thyme cooking competition at her office in Trivandrum . She made ten dishes with which four recipes were from sauté , fry n bake . The most liked dish by the judges was this gol gappa shots . This mighty easy to make old fashioned classic dish has travelled places and gots it’s say every where in a stylish way .

Ingredients

Deep Fried crisp whole pain poorie’s – 8 to 10

Ingredients for the salad

Ingredients
Quantity
Red cabbage 1/4 cup shredded
Raw mango4 tablespoons peeled and grated
Carrots4 tablespoons peeled and grated
Cucumber 4 tablespoons grated with skin
Beetroot4 tablespoons peeled and grated

Ingredients for salad dressing

Ingredients
Quantity
Chat masala1 teaspoon
Tabasco sauce1/2 teaspoon
Amchoor powder ( dry raw mango powder ) 1/2 teaspoon
Olive oil 1 tablespoon
Vinegar1 tablespoon
Honey 1 tablespoon
Salt + pepperto taste


Method for salad

  1. Mix all the ingredients together for the salad dressing .
  2. Taste and adjust the dressing . Mix in all the veggies for the salad into the dressing .
  3. Toss well and place in the refrigerator until needed to be served


Ingredients for the orange juice

Ingredients
Quantity
Orange juicefrom 4 oranges
Water to dilute the juice
Sugar to taste
Chat masala powder1/4 teaspoon
Cumin powder1/4 teaspoon
Black salt1/8 teaspoon
Salta pinch

Method for orange juice

  1. Mix all the ingredients together until the sugar dissolves . Taste and adjust . Chill in the refrigerator until needed to be served .

Assembling

  1. Take one fully puffed up pain poori . Break it in the middle on one side to get a hole in the centre .
  2. Fill the dent with chilled salad . Do the same to all the pain poorie’s and salad . Pour orange juice 3/4 level into the short glasses .
  3. Place salad filled gol gappas over each glass and serve immediately .


Notes

1, Fill the pain poorie’s with salad just before serving or else the poorie’s get soggy .

2 , make the orange juice half an hour before serving . If made in advance before it tends to get a bitter taste into the juice .


Man-chow soup

Share Button

image (46)

Preparation Time : 15 minutes

Cooking Time : 30-35 minutes

Serving : 4 -5 members

Description

My every visit to Coimbatore in every two weeks once at least , my daughter Anisha makes sure to take me to mushrooming new eat outs there .like wise once , she ordered a take away from some chines restaurant for soup , starter to main course and sides . All ready to start our chines lunch , she served me man -chow soup that was a deep dark in colour with veggies , chicken and a thick slippery consistency . I hate thick soups , my vote goes to clear water like soups always . So as she served it to me I told no thank you but she forced me to give a try . She sprinkled few deep fried crisp noodles over and we both started our lunch with a slurp of soup . The first mouth full , I experienced all the possible textures , taste and flavours at one shoot . This soup did prove me wrong about thick soups and made me change my mind once for all . ( Uff , I at least had one think I didn’t like and now even that’s gone into the bin .. ) from that day I have been having the taste and aroma of the one bowl wonder soup haunting me every now and then . Made it on a cold rainy day for dinner as nothing offers comfort to an Cold day than a cauldron of soup bubbling away on the stove top , sharing the heat and aroma with you in the kitchen . Cold rainy days are the perfect time to enjoy a recipe to cosy up to a warm soothing bowl of hot soup and it vanished in seconds from the table

Ingredients

Ingredients
Quantity
garlic 2 tablespoons chopped
Ginger 1 inch piece chopped
mushroom 1/2 cup sliced
Oil 2 tablespoons
capsicum 1/4 cup juliens
carrots 1/4 cup juliens
Beans 1/4 cup juliens
chicken3/4 cup – minced
Stock or water 4 cups
light soya sauce 2 tea spoon
cornflour 1 teaspoon
salt and pepper salt and pepper
Vinegar1 teaspoon
ajinomoto1/4 teaspoon ( optional )

Method

  1. Heat oil add garlic , ginger and sauté till light brown .
  2. Add all the vegetables , chicken and stock or water . Cook till vegetables and chicken are cooked .
  3. Add soya sauce , vinegar , salt and pepper to taste ,ajinomoto and cornflour mixed with 2 tablespoon of water . Cook on low flame for 5 minutes stirring constantly .
  4. Serve hot .
  5. Vegetarians can omit chicken and can add celery and more leafy vegetable instead following the same recipe .

Ingredients for Fried Noodles

1 packet par boiled chinese eggnoodles  Drained and Dried on a kitchen towel

Ingredients
Quantity
cornflour 1/4 cup
maida 1/4 cup
Salt to taste
oil to deep fry

Method to fry noodles

  1. Mix cornflour , maida and salt to taste together .
  2. Sprinkle over the boiled noodles and toss well making sure no moister is left on the noodles .
  3. Heat oil to deep fry . Fry one cup noodles reducing the flame to medium to get crisp and golden colour noodles .
  4. Drain in absorbant paper and repeat with the rest of noodles . To serve , place the fried noodles on a plate beside a hot bowl of soup as each individual can have more or less of the deep fried noodles per taste .
  5. Usually the deep fried crisp noodles is crushed and sprinkled on top of the soup but I like more crisp noodles than just a sprinkle .

Baked peach cheesecake

Share Button

image (42)Uu366TjE0uuWSNx

image (43)


image (44)

Preparation Time : 15-20 minutes

Cooking Time : 35-40 minutes

Serving : 8-10 members

Description

Dessert is always made at home only on festive days , special occasions , guests around or kids coming home . I always have two moods when it’s about desserts . One is to try out the most awaited interesting dessert recipes I have been waiting to try out or Russell up a dessert with ingredients that’s been in my pantry for a while to finish it off . The second mentioned has it’s risk factor of working either way good or bad .   This baked peach cheese cake was made to finish of the tinned peaches that I had in my pantry for quite some time when my kids were here on a holiday . Followed a recipe from the net and tweaked it to my convenience of ingredients at home . Baked , cooled and placed in the refrigerator to be served later . The next evening had my hubbies cousin sister wahida and his niece  Faiza visit us at home . I did serve this peach cheese cake along with a spread of nibbles . Not knowing how the dessert tastes with the trial I made to finish off stuff from my pantry , quietly was watching every one eat it . Faiza was the first one to say ” mami this so yum . What’s this ? ” feeling a bit of relief , made sure to serve her another piece of peach cheese cake . This dessert was over in a day and I did get my share to taste but still was not satisfied . Think the thought that the dessert was made to finish off a tin of peaches made me feel so . The following week , I get a call from wahida ( hubby dears cousin sister ) asking for the recipe of the peach cheese cake saying her daughter Faiza is craving for it ever since she ate it that day at your place and my other daughter Zeno is fed up listening to Faiza go gaga about the peach cheese cake and tempting her to the core . I am forced to make this peach cheese cake because of you and I hate it when I am pushed  to do things the main reason being my daughters compare me with you . I was like are you serious !!! You really want the recipe of that hassled up cheese cake in my mind . I had deleted the recipe thinking I am not going to make this cheese cake again . Now , I had to search for the recipe and send it over . What else could I do … I did so and made up my mind thinking not everything that tastes good to you is going to be liked by others or any thing that tastes bad to you is not going to be bad for others .  Dum me , at times I just loose my mind .. Well … I guess , I am being human actually :-)) .

Ingredients for the Crust

Ingredients
Quantity
Digestive biscuits12 crushed to a coarse powder
sugar1/4 cup
Melted butter4 tablespoons

Ingredients for Filling

Ingredients
Quantity
eggs2
cream cheese250 gms softened
sugar 1 Cup
vanilla essence 1/2 teaspoon
peach jam 1 cup+ 1/4 cup ( I used chopped tinned peach's instead for the filling )

Method

  1. Preheat oven to 350 degrees F / 180 degrees Celsius .In a medium size bowl, combine the digestive biscuit crumbs with the sugar and butter. Mix well and place in the bottom and sides of an 8-inch springform cake pan / tart pan .
  2. Make sure to press against the sides and bottom of the pan. Set the crust aside keeping it in the refrigerator .Prepare the filling by beating the eggs and cream cheese together.
  3. Add the sugar and vanilla and continue beating until well blended. Add 1/4 cup peach jam and mix until incorporated. Pour mixture into prepared biscuit crust and bake for 35 to 40 minutes.
  4. Remove from oven and let cool for 10 minutes.top with remaining 1 cup peach jam. Cool to room temperature and then refrigerate overnight. Serve chilled

Sesame masala bread toast

Share Button

image (36)

image (37)

image (38)

image (39)

image (40)

image (41)

Preparation Time : 30 minutes

Cooking Time : 5-8 minutes

Serving : 2 members

Description

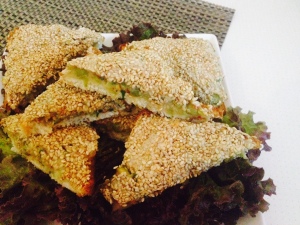
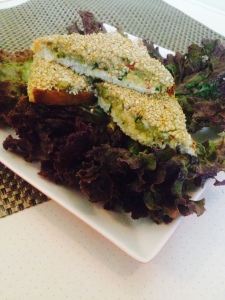
Some times when you come across unique recipes with ingredients that you use in your  kitchen nearly every day and go ” why on earth didn’t I think of this genius way to use these daily ingredients before ” . Well this is one such recipe that really shamed me off . I came across this  idea through my fellow home chef mubeen sulthanas recipe . Gave it a try and it didn’t work out for me as I burnt the toast while shallow frying them and that was the end of this unique easy toast . But it was there in my mind always popping up every now and then alerting me that you still have this dish pending with out perfecting it . Last week had so much left overs in the refrigerator that I had to come up with a new versatile way to get it down every ones tummies at home as left overs are always considered as old food and no one is ready to eat it when on the table . The mighty sesame masala toast did spark up in mind and pressed for time i just went with my inner gut amusing the recipe . This time I made sure to bake the toast instead of shallow frying them not wanting to commit another flaw again and to come with a healthier version .served it with a bowl of hot soup for a filling dinner .  The sesame in the toast added a crunchy bite bursting with flavours  and was devoured in no time . Happy me with ticking another dish from my must try and the left overs treating all at home in a well deserved , healthy , eye appealing  new way .

Ingredients

Ingredients
Quantity
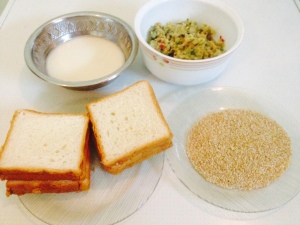
Bread slices3
Boiled Potatoes 50 grams
Carrots 15 grams ( 1 1/2 tablespoon) grated
Beans15 grams ( 1 1/2 tablespoons ) boiled and chopped
Boiled green peas 15 grams ( 1 1/2 tablespoons )
Onion1 chopped finely
Chat masala powder1 teaspoon
Cumin powder1/2 teaspoon
Coriander greens chopped few
Mint leaveschopped few
Black salt a pinch
Cornflour 1 tablespoon
Maida1 tablespoon
Sesame seeds1/2 cup
Oilto brush
Salt + pepper to taste

Method

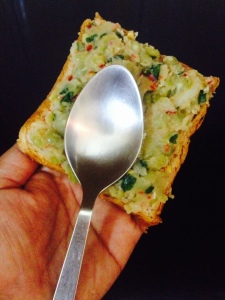
  1. Preheat oven to 180 degree Celsius .Mix boiled potatoes , beans , green peas , grated carrots , chopped coriander green , mint leaves and onions together .
  2. Top with salt , pepper , cumin powder , chat powder and black salt . Mix well together .
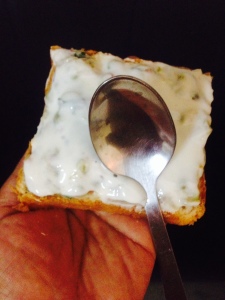
  3. Taste and adjust seasoning . Mix cornflour , maida , salt to taste and little water to get a thick paste of coating consistency and set aside .
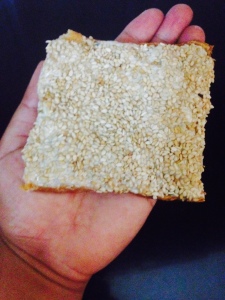
  4. Apply the potato mix over each bread slice . Spread the flour paste over and sprinkle the sesame seeds on top of the flour paste well .
  5. Press gently so that the sesame seeds stick to the bread slices . Do the same to all the bread slices .
  6. Place the bread slices over a foil lined baking tray . Brush oil over the top of each bread slices and bake for 5-8 minutes until crisp and light golden colour on top . ( check every 3 minutes once as each oven varies in cooking time . ) make sure not to burn the toasts .
  7. Remove and serve with any dip of your choice .

Notes

  1. can add any filling of choice ( non – veg also ) but a pasty filling not a dry one

Rasagulla makhani tomato gravy

Share Button

image (33)

image (34)

image (35)

Preparation Time : 35 minutes

Cooking Time :  45 minutes

Serving : 5- 6 members

Description

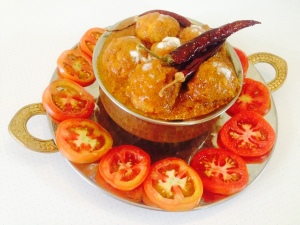
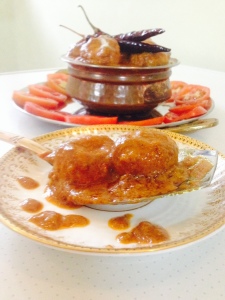
The present day phones serve us double to triple as a point of shoot camera , recording videos , saving notes ( mainly recipes for me ) sharing ones special moments .. I can go on and on . There’s no end to the possibilities with these handy new age mobile phones . It literarily  brings the entire world into your hands which is a boon to home makers like me to feel totally liberated in all means . I make maximum use through sauté, fry n bake by sharing my recipes , my thoughts related to the dish and taking pictures . All done with this wonder device that I own .( no computer here )I am loving it how you all pay your compliments , doubts and comments that comes along with a free advertising for sure :-)) . Like wise I have a very few talented home chefs that I compliment and never fail to try their recipes . One among them is mr . Jaspreeth nirula ji who’s North Indian gravies are the best I have tried out till date . The recipes he post’s are made  with every day ingredients in our kitchen and the best part being the way the recipe is described . I make sure to pen down each of his recipes in my hand written recipe note book . If  you follow the recipe religiously , the results are sure high praise where ever you serve it .  I made this dish like wise and it tasted awesome . Having a doubt about some measurement of an ingredient to be used , went through the entire recipe once again and found out that jaspreeth ji has made panner using rasagulla recipe method (  with out dipping into the sugar syrup ) and used for the gravy .i used left over rasagullas from my refrigerator that I had after Diwali for the gravy .  Only then did I realise that I made a big flaw in the dish but to me it tasted perfect . Served it for lunch and sure was followed with high praise as always with jaspreeth jis recipe . A blunder that turned into a wonder dish . Hubby dear made sure to pack some for his vegetarian aunt ( mrs . Mahmudha Rabbani ) . I did receive a call from her saying you need brains to think and create such a dish . Happy me as the blunder in my kitchen did serve to prove that I had a little brains , hahaha .. and finish of the rasagullas from my refrigerator in an innovative stylish way .

 Ingredients for Makhani gravy

Ingredients
Quantity
Butter 50 grams
Ginger , garlic and green chilly paste1 teaspoon
Tomato 4 puréed
Red chilli powder3 teaspoons
Cumin seed powder1 teaspoon
Salt to taste
Sugar2 teaspoon
Cashew paste 2 tablespoon
Fresh Cream 2 tablespoon

Method for makhani gravy

  1. Melt butter in a heavy bottomed pan . Add ginger , garlic and green chilly paste .
  2. Sauté to crisp . Add tomato purée and sauté until oil floats on top . Top with red chilli powder , cumin seed powder and salt . Sauté further for another 3 minutes until oil separates . Add sugar , cashew nut paste , 1/2 cup water and mix well .
  3. Bring to boil and cook for 5-6 minutes until oil separates . Taste and Adjust seasoning . Garnish with fresh cream and set aside .

Ingredients for onion tomato gravy

Ingredients
Quantity
Oil 3 tablespoons
Onion 3 chopped
Tomato3 chopped
Ginger garlic paste 1 teaspoon
Cumin seeds 1 teaspoon
Red chilli powder 2 teaspoon
Coriander powder 2 teaspoon
Turmeric powder1/2 teaspoon
Salt to taste

Method for onion tomato gravy

  1. Heat oil in a wide pan . Too with cumin seeds , once they splutter add onions and fry to a golden brown colour .
  2. Add ginger and garlic paste . Sauté to crisp . Top with red chilli powder , coriander powder , turmeric powder and salt along with little water so that the spice powders do not burn .
  3. Once the oil separates add the chopped tomatoes and mix well . Cook in medium heat letting the tomatoes to melt apart from it’s skin to become a mashy mass of gravy and oil floats on top .takes about 10-12 minutes . Remove from heat and set aside .

Ingredients for the main dish

Ingredients
Quantity
Rasagullas15 squeeze out the sugar syrup and set aside
Butter 50 grams
Dry whole red chillies3
Chopped ginger 1 teaspoon
Chopped garlic1 teaspoon
Chopped green chillies3
Coriander powder2 tablespoons full
Red chilli powder 2 teaspoons or to taste
Cumin seed powder3 teaspoon
Fennel seed powder1 teaspoon
Garam masala powder 1 teaspoon
Saltto taste
Fresh cream2 tablespoons
Makhani gravyonion tomato gravy

Method for the main dish

  1. Melt butter is heavy bottomed wide pan . Fry the whole dry red chillies to crisp , remove and set aside . Make sure not to burn the whole dry red chillies . Top with chopped ginger , garlic and green chilled . Stir for a minute .
  2. Add the makhani gravy and the onion , tomato gravy and mix well . Sauté for five minutes letting the flavours into one another in medium heat .
  3. Top with coriander powder , red chilli powder , fennel seed powder , cumin seed powder and mix well . Pour 1 to 2 cups of water and bring to boil for about five minutes .
  4. Squeeze out the sugar water from the rasagullas and add to the gravy and mix gently . Adjust consistency and seasoning to taste . Cook for another 10- 15 minutes in medium heat .
  5. Mix in the fresh cream , sprinkle with garam masala powder and serve hot garnished with fried whole red dry chilled .

Notes

In case you want to make rasagullas at home . Click the link below to follow the recipe


Gatta curry

Share Button

image (31)

image (32)

Preparation Time : 30 minutes

Cooking Time : 20-25 minutes

Serving : 4-6 members

Description

We were on an European holiday for 24 days in a package where we had a caravan behind us cooking and serving an Indian , vegetarian menu for lunch and dinner . ( I know , sounds quirky  but we Indians can never ever compromise when it comes to our daily food :-)) The best part being the chef was a South Indian from Bangalore who spoke fluent Tamil . I made maximum use from getting the menu changed to our liking to the spiciness and at times I myself would end up in the caravan making a cup of tea or just observing what the chef is up to today . Like wise we were served Gatta curry one day for lunch with rice and it was the first time I got to know about this deliciously warming Rajasthani  dish . I made sure to get the recipe from the chef and it was a forgotten story there after . The recipe was there with me for ages and was lost while I was shifting in to a new home .last month was going through a foodie magazine and found this recipe that brought a shot of sunshine in to me . Immediately made it for lunch , making up for all the lost years of not giving a try . I felt the curry was too thin and runny . So I added a teaspoon of chick pea flour to get a smooth saucy textured curry . It was a medley of simple every day ingredients that was packed with both heft and flavours coming together as an incredibly satisfying light Indian curry . The gutta curry sure did take me to the lovely natural landscaping of Austria where we had it for lunch . How wired Austria and Gatta curry too far apart but in my memories it comes  together itched as one .


Ingredients for the Gatta

Ingredients
Quantity
Gran flour ( basan )250 grams + 1 teaspoon diluted in 3 tablespoons of water
Oil 1/4 cup
Kasoori methi 1 teaspoon
Salt 1 teaspoon or to taste
Red chilli flakes1 teaspoon
Whole coriander seeds1 teaspoon crushed
Curd 1/4 cup beaten

Ingredients for the curry

Ingredients
Quantity
Ghee 4 tablespoons ( I used vegetable oil)
Asafoetida ( hing ) 1/2 teaspoon
Dry red chillies4
Cumin seeds 1 teaspoon
Curd 1 cup beaten
Red chilli powder1 tablespoon
Turmeric powder2 teaspoon
Salt to taste
Kasoori methi 1 tablespoon

Method for the gattas

  1. In a mixing bowl , add all the ingredients mentioned for gattas along with 2-3 tablespoons of water to get a stiff dough . Shape the dough into 4 long cylinders of approximately 3 cm in diameter .
  2. Boil water in a large sauce pan , immerse the cylindrical dough in the boiling water and let them cook for ten minutes .
  3. Check if the dough is cooked by inserting a wooden skewer in to it , if cooked it will come out clean or else cook further for another five minutes .
  4. Once cooked remove from boiling water . cut each cylinder into small pieces to one cm thick and set aside .

Method for curry

  1. Mix beaten curd with red chilli powder , turmeric powder and salt to taste .
  2. Heat a pan with ghee/ oil . Add asafoetida , whole dry red chillies and cumin seeds . Sauté for a minute .
  3. Top with beaten curd mixture and keep stirring until the gravy thickens in medium low heat as the curd should not curdle .
  4. Finally add kasoori methi and diluted gram flour and keep stirring for about ten minutes until the curry thickens to a semi thick flowing consistency .
  5. serve hot , warm or at room temperature with rotis , pulkas or rice.

Aattu kudal varatiyathu ( goat tripe / intestine )

Share Button

image (29)

image (30)

Preparation Time : 35 minutes

Cooking Time : 40-45 minutes

Serving : 3-4 members

Description

I still remember asking my mom to make towel curry today .Don’t get confused as this is how I used to address goat tripe ( goats intestine ) as a little one . I guess the rough texture on top that resembles a towel made me call it so . My brother and myself used to fight over as who has to be served first and crazy we over ate , resulting in indigestion followed with getting sick . From then on I have never ever wanted to relish or have goat tripes . ( not sure what’s happened with my brother though ) In the recent hubby dear has started demanding for goats tripe to be prepared at home . Me not knowing head or tail of this dish from cleaning to recipe , felt totally lost . To add up to this hubby dear wanted it just like my mom makes it . Luckily had some one at home who knew to clean them to perfection . (I checked them more than three times once they were cleaned . ) went ahead with moms recipe which was quite easy actually . The cleaning part is the pains taking job here . The taste was spot on just like mom makes it and I was happy too as I got to add another authentic dish into my every day menu at home . Local authentic home fare is slowly loosing their place in the kitchens as preparing them is a tedious  process but like me , I am sure each one of us relive our childhood every time we cook these sort of rustic dishes that never ever get out of style .

Ingredients

Ingredients
Quantity
Goat tripe / intestine1 full set washed and cleaned and chopped
Small onions1 hand full chopped
Garlic flakes10 big chopped
Saltto taste
Coconut oil 4 tablespoons
Curry leaves3 strands

Ingredients to grind

Ingredients
Quantity
Black pepper powder 6 tablespoon
Cumin seed powder 1 tablespoon
Coriander powder 3 tablespoons
Cinnamon 1 inch stick
Cloves2


Method

  1. Grind all the ingredients together mentioned under the to grind column to a smooth paste using little water .
  2. Mix the ground paste with the cleaned goat tripe / intestine , chopped small onions and chopped garlic and place it in the pressure cooker along with 3 cups of water .
  3. Pressure cook in medium flame for around 6-8 whistles or until the goat tripe / intestine is cooked through . Once cooked , season with salt and mix well .
  4. Bring to boil and reduce the consistency of the gravy to required gravy consistency .( I like it to be semi thick gravy just enough to coat the tripes . ) Heat coconut oil in a heavy bottomed pan , add curry leaves .
  5. Once they splutter pour over the cooked goat tripes . Take a ladle full of the goat tripes and add it to the pan that the coconut oil was used to temper the curry leaves and toss around making sure the tripes suck in all the flavours of the coconut oil into them .
  6. Add it to the rest of the tripes in the pressure cooker and mix well . Taste and adjust seasoning ( salt + pepper ) . Serve hot with any thing and every thing .

Vegetable hummus wrap

Share Button

image (23)

image (24)

image (25)

image (26)

image (27)

image (28)

Preparation Time : 30 minutes

Cooking Time : 35 – 40 minutes

Serving: 4-5 members

Description

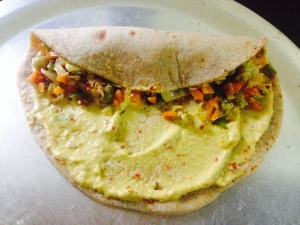
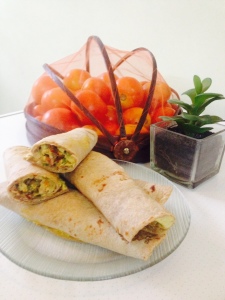
It’s raining chapathi’s in the recent for lunch and dinner at home under the request of hubby dear for month’s together now . I desperately needed a change but with the chapathi itself as it’s counter in another form . The easiest I could think of was a katti roll as old – school favourites make us glow with child like delight and the next problem being , it has to be healthy comfort food too . Had the veggie filling and chapathi’s in hand ready . To add more taste in a healthy way , decided to give the chapathis an egg white wash on one side . Went ahead and filled the veggies and rolled one katti roll . Tasted but the katti roll was a bit dry and hubby dear likes food that has a lot of moister in it rather than dry dishes . Now wanting a spread to be added to the katti roll … Healthy spread as well ??? Umm the only option in mind was hummus but it was already 12 .30 noon and making hummus in one hours time for lunch .. Not possible as soaking the chick peas and going ahead umm … is actually possible but my laziness just didn’t let me do so . Quickly added all the ingredients in a blender I do for hummus except for boiled chick peas and substituted with a cup of sautéed vegetables that I had for the filling with hung  curd for the creamy texture and went ahead . Tasted and adjusted the ingredients and seasoning to taste . Bingo I did get an awesome tasting humus that was profound in it’s simplicity but not the authentic way instead a quick fix one and got to realise that with a few tweaks and innovations these sort of casual classics can  be even more memorable . No time to taste once I assembled the katti roll together as it was lunch time already . Took pictures when hubby dear was shouting out for lunch and waited for the results on taste .He was like who send this over ? It’s send over from ” Mahu house ” was my reply . That’s our home name :-)) . He knocked my head with a grin having a bite , mouth full of the katti roll and widened his eyes indicating it’s delicious . He’s being asking me to do the same often  but it’s just not worked out yet not sure why ? So peeps at least all of you give a try and let me know the results as I have solved the mystery of what to make today at your homes for lunch box , breakfast , lunch or dinner as well :-))) .

Ingredients for the vegetable filling

Ingredients
Quantity
Carrot2 big chopped to tiny bits
Beans 10 chopped
Cabbage sliced thinly 1 cup
Green peas 1/2 cup
Capsicum 1 chopped
Onion 1 1/2 big chopped
Olive oil 2 teaspoon
Garlic 2 flakes crushed
Saltto taste
Red chilli flakes to taste

Method for vegetable filling

  1. Heat olive oil in a non – stick pan . Top with crushed garlic .
  2. Sauté to a light golden brown . Add all the chopped vegetables , green peas and onions .
  3. Sauté until 3/4 cooked with a slight crunch on them . Sprinkle red chilli flakes to taste .
  4. Mix well , set aside and cool completely .

Ingredients for vegetable hummus

Ingredients
Quantity
The above vegetable filling 3/4 cup
Olive oil 1 teaspoon
Garlic flakes3
Saltto taste ( be careful as the above sautéed vegetable filling has salt already )
Chilli flakes optional
Tahini paste 2 teaspoons or use 2 tablespoons of sesame seeds instead
Hung curd1/2 cup

Method for vegetable hummus

  1. Blend all the above mentioned ingredients together to get a smooth semi thick flowering consistently paste .
  2. Taste and adjust seasoning by adding more chilli flakes and salt if needed . Set aside .

Ingredients for assembling

Ingredients
Quantity
Soft Chapathis 4 to 6 ( click the link below in notes for the recipe )
Egg whites 2
Salt + pepper to taste
Oil 2 teaspoons

Method for assembling

  1. Beat egg whites with salt and pepper powder .
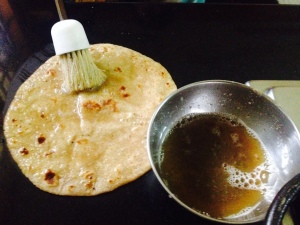
  2. Heat a non – stick griddle .apply little oil all over . Brush one side of a chapathi with the beaten egg white . Place over the hot griddle and cook . Remove . Do the same to all the chapathis . Place the egg white applied and cooked side facing you over the kitchen counter .
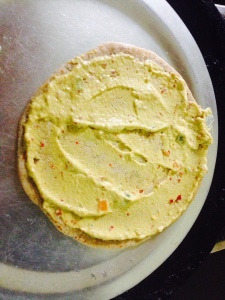
  3. Apply the vegetable hummus all over .
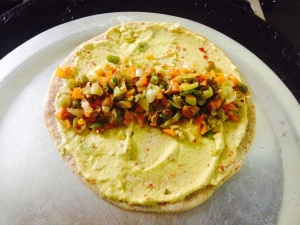
  4. Place 3 heaped table spoons of vegetable filling in the middle of the hummus applied chapathi and roll tightly . Do the same with all the chapathis , filling and vegetable humus .
  5. Cut each chapathi into equal two halves and serve warm as it is . There is no need of a dip or a salad as it taste good by itself .

Notes

To get soft chapathis , click the link below and follow the recipe


Baked sweet potato wedges

Share Button

image (22)

Preparation Time : 5 minutes + 15-20 minutes to marinate .

Cooking Time : 15-20 minutes

Serving : 3-5 members

Description

Sweet potato is one ingredient that I know to make just one dish out of it ,  oops no two actually . Well both being some what same  as I use the same ingredients just that one is in a round ball form and the other is in a porridge form . Both dominated with the flavours of coconut .having a lot of sweet potatoes at home and not wanting to repeat the same old recipes , I did come up with these baked sweet potato wedges version  . I made sure to add an Indian punch by adding our regular daily used cupboard friendly spices as well . Baked them and I had a platter full of sweet and spicy sweet potato wedges that were crisp on the out side and smooth on the inside . I served it as it is with out a dip and it was all vanished away in seconds . I have never been a fan of spicy and sweet combinations in a dish , but these sweet potato wedges did convert me . The magic simple vegetables can create is unbelievable . I know there are at least a million recipes for any wedges and I am happy to have added my version as well with an Indian twist to it .

Ingredients

Ingredients
Quantity
Olive Oil1 teaspoon for tossing
sweet potatoes, peeledsliced into 1/4-inch thick , long wedges
paprika/ red chilli powder3/4 teaspoon
Coriander powder1/2 teaspoon
Cumin seed powder1/4 teaspoon
saltto taste
black pepper powder 1/4 teaspoon
garlic powder / crushed garlic 1 teaspoon
Sugar1/2 teaspoon

Method

  1. Preheat oven to 180 degree Celsius .
  2. Line a sheet baking tray with parchment paper / foil paper . In a large bowl toss sweet potato wedges with oil and other ingredients .
  3. Set aside for 15-20 minutes . Spread sweet potatoes in single layer on prepared baking sheet, being sure not to overcrowd.
  4. Bake until sweet potatoes are tender and golden brown, turning occasionally for about 20 minutes. Let it cool for about 5 to 10 minutes before serving.