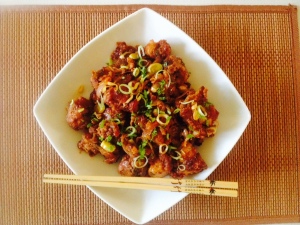
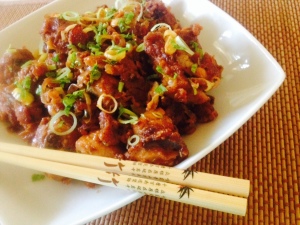
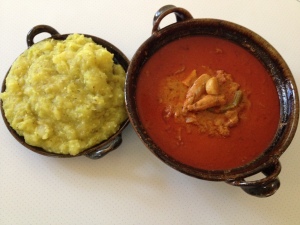
Green Apple mojito

Share Button

image1(1)

Preparation Time : 10- 12 minutes

Cooking Time : 12 -15 minutes for sugar syrup alone

Serving : 4 members

Description

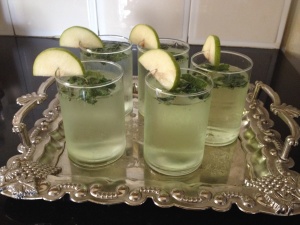
On a shopping sphere to Bangalore for my daughters first birthday celebrations nearly twenty four years back . We landed at kids kemp , the happening place then for all kids related things . Each one of us from kids to adults were awe struck and mesmerised with every bit in the store from the warm welcome , to the variety of dresses , to the dancing huge dolls ( my gal just clung onto me getting scared seeing them ) . We were served a welcome fizzy drink in a pale green colour garnished with mint leaves . The colour was so inviting that I took one drink for myself . The first sip , it tasted so different and yum. Back then , in India we had just thumps up and Torino option for fizzy drinks . I made sure to ask them what the drink was and got a reply with ” GREEN APPLE MOJITO ” . That was the first time I got to know there were apples in green colour too . That taste and colour with its refreshing soothing feel kept haunting me for years to follow . Finally when the buzz of fast food chains were launched in India got to taste mojitos again . This was just a trial recollecting the taste and look of the first green apple mojito I had at kids kemp . I did get the taste but the colour yet to be perfected . Served it at home on a summer day , lunch feast as a welcome drink getting their place in the sun with style that don’t get any easier to the stomach . Sure , did raise eye brows and proved to me you don’t have to send yourself to a chef school to up your game . So love it or hate it but definitely make sure to try it .

Ingredients

Ingredients
Quantity
Sugar syrupto taste
Sparkling water / sodaas needed
Green apple essencea drop
Green food coloura drop or lesser
Mint leavesto garnish
Green apple2
Lime juice1/2 a lime , just a squeeze
Ice cubesfew

Method

  1. Boil equal amount of sugar and water together until half reduced . Remove from flame and cool completely .
  2. Grind one green apple with little water to a smooth following consistency and strain . Add lime juice , green food colour and green apple essence to the strained green apple juice and mix well .
  3. In a glass , place Ice cubes 1/4 way . Pour the green apple juice about 4 -6 tablespoons in each glass . Top with sugar syrup . Mix , taste and adjust . Pour chilled sparkling water over . Garnish with a slice of green apple and a spring of mint .

Note

Apply lime juice and salt over the green apple slices to be garnished so they don’t turn dark in colour or just dip into the sugar syrup .


Brain fry

Share Button

image1 (3)

Preparation Time : 20 minutes

Cooking Time : 20 -25 minutes

Serving : 3-4 members

Description

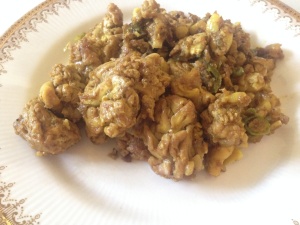
Every time this dish is being served on the table at home and when some one offers the other please have some brain fry and the reply immediately would be ” No thank you , I already have brains ” followed with a great laugh . Though a very cliche joke , it does bring a lot of smiles on the table . This recipe is an authentic recipe , traditionally made in every ravuthar ( Tamil Muslim ) household for special occasions . This culinary treasure was passed down from my grand mother balkees perima to my mother and from her to me  that has enabled me to stay in touch with our roots . The first visit to moms place after marriage with hubby dear and this dish was served to impress the new groom for sure . Back to in- laws place and he kept asking me what was that egg dish I had for lunch at your mom’s  place ? It was really yum and I have never had egg as soft as that till date . I kept asking mom about the egg dish and mom was like ” there was no egg based dish that day ” . Took a while for the moment of bliss to know that hubby dear  was mentioning about the brain fry all the way . When I told him it was not egg that you had , it was goats brain fry . He immediately replied saying ” I don’t eat goats brain ” Smiled and told him what ever you have been asking for is goats brain fry . From then , till date it’s one among the favourite dishes that is served at moms place to impress their only son – in – law to enchant him with its delicious simplicity and subtle use of spices .

Ingredients

Ingredients
Quantity
Goats brain4 cleaned whole
Small onion 3 hands full peeled and sliced to thin rounds
Garlic -1 1/2 hand full peeled and sliced to thin rounds
Green chillies4 chopped
Turmeric powder 1/2 teaspoon
Red chilli powder 1 teaspoon
Salt to taste
Water1/4 cup
Coconut oil 3 tablespoons
Coriander leaves2 tablespoons chopped

Method

  1. Mix together small onions , garlic , green chillies , coriander leaves salt , turmeric powder , red chilli powder ,
  2. one tablespoon coconut oil and water together in an non stock board vessel . Bring to boil and cook to 3/4 done . Add cleaned goats brain and cook for a minute .
  3. Gently toss the whole goats brain over with out breaking and cook the other side for another one minute . Reduce the water to almost dry but with a little moister left .
  4. Now drizzle the remaining coconut oil all around and roast the goats brain in medium flame for 5-6 minutes tossing over sides occasionally but making sure not to break them at the same time .
  5. Once oil floats and the brains have a crisp crust , It’s done . Serve hot .

Turnip Parata

Share Button

image1 (2)

image2 (2)

Preparation Time : one hour

Cooking Time : 20 minutes

Serving : 3-4 members

Description

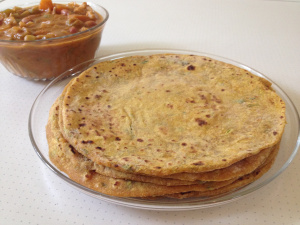
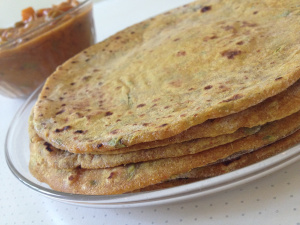
Turnips are one vegetable that I hate in what ever form they are cooked in . I still remember piling up the entire mass of turnip from my plate to a spoon and gulping it down with a mouth full of water with out chewing or getting to taste it as a kid at my boarding school . As it was compulsory to finish of what ever was served in the plate . If not , we had a teacher minding us on each table and to add to this we did have a duty teacher who comes checking our plates after every meal . My aversion towards turnips got more worse as I started cooking them mainly due to the acquired smell it has . So no turnips at all what so ever at home . Once on a holiday to moms place , she served me a Parata with curd for lunch and it tasted yum . I was surprised to know it was a Parata   Stuffed using turnips . Though turnips to me is not considered a taste by itself , it still was one of the most intense sensations I experienced . The touch of thick curd magically added depth to the turnip paratas leaving way to  a satisfying meal  . Got the recipe from mom and then on it was added as a regular at home . This sure was a revitalising wake up call to me after decades of aversion towards turnips .

Ingredients for dough

[table “690” could not be loaded /]

Ingredients for turnip stuffing

[table “691” could not be loaded /]

Method for Parata Dough

Place wheat flour, salt, curd and oil in a mixing bowl.Knead to a soft dough adding water.Cover with a wet cloth and set aside for 30 minutes.

Method for Turnip Stuffing

  1. Heat 1 tablespoon oil in a pan. Add cumin seeds.Once it start’s to crackle, add grated turnips.Sauté until moisture is gone.
  2. Now add red chilli powder , ginger, garlic , green chillies, turmeric powder, garam masala powder , dry mango powder and salt.
  3. Cook and stir for 4 to 5 minutes or until all the ingredients are mixed well and stuffing turns dry . cool completely.

How to proceed

  1. Make 6 round balls from the dough.Roll each ball in the shape of a round roti (about 5-inch diameter) to hold the stuffing.
  2. Put 2-3 tablespoon stuffing in the centre of roti and gather the edges towards the middle and roll gently with in your palms to a round ball.
  3. Do the same with all the dough and turnip stuffing . Roll each stuffed ball gently dusting flour to one inch thick rotis . Heat a tawa / griddle over medium heat.
  4. Put the stuffed rolled paratha on the hot griddle / Tawa . Cook for 2 minutes then flip the paratha and apply ghee or oil on the paratha.Cook further for another 2 minutes longer or until the paratha colour changes to light golden brown.
  5. Remove and serve hot with thick curd or any vegetable curry of choice .


Bread lasagna

Share Button

image1 (1)

image2

image3

image4 (1)

Preparation Time : 20 minutes

Cooking Time : 40 minutes

Serving : 8 members

Description

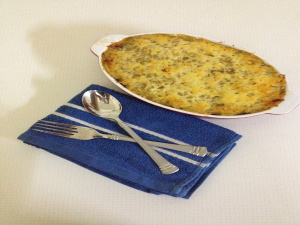
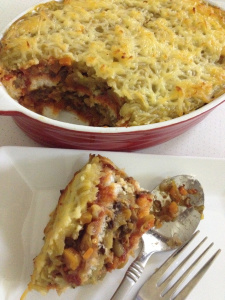
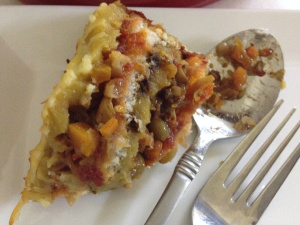
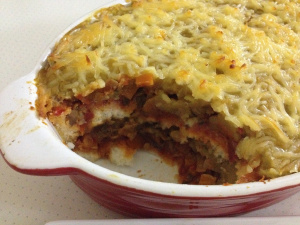
Having nearly half of the previous night vegetable soup and sautéed vegetable filling that was used for sandwiches . I was left to deal with re creating another dish with the Left over’s but with out a sign of its own previous version . The best that came to my mind at that moment being pressed for time as well was to come up with a one pot baked dish . Thought of mixing all together and just baking it with a dash of grated cheese . Some how felt it might taste the same as soup and sandwich . Revised in my mind about all the baked dishes I know and when lasagne came , the bulb moment happened . Went ahead but now the problem being my soup was too runny . Thickened it with cornflour and made a custard like sauce . Spiked the left over sandwich sautéed vegetable filling with some dried herbs . Layered them and baked it . In the dining table hubby dear was talking about hosting a feast for his friends with the best dishes I know as having his dinner . He was like , add this also to the menu as it tastes Devine . I wanted to burst out laughing but kept my cool and just nodded . Hubby dear made sure to send little to his friend Dr. Basker and his parents next door . Confused me with left overs sent around had no choice other than to keep quite as the secret of left overs will be out . Once hubby dear finished his dinner , my boy whispered to me saying ”  i know this is last nights vegetable soup and sandwich filling, but ma – you are a genius in fooling people through food . ” happy me for two reasons . One I got to execute left over in style and two my boy does have a good sense of things happening around with out being mocked .In total it was madness with left overs , letting me enjoy and experiment with my own twist . After all to me , cooking isn’t merely about fresh ingredients , knife skills or even skill full presentation . It is deeply philosophical and if there is no purpose or individuality to inspire with love then it isn’t cooking for sure .

Ingredients

Ingredients
Quantity
Bread 10 to 12 slices
Instant soup packet 1
Ready made Pizza sauce/ tomato sauce 1 cup
Vegetables( carrots , beans , cabbage , cauliflower , capsicum and green peas) - 3 cups chopped
Olive oil1tablespoon
Garlic flakes2 crushed
Dried herbs (oregano , thyme , basil ) - 1/4 teaspoon each
Chilli flakesto taste
Salt to taste
Butter1 tablespoon + to grease
Grated cheese 1/4 cup

Method

  1. Heat olive oil . Add crushed garlic , chopped vegetables dried herbs , chilli flakes and salt to taste . Sauté until the vegetables are 3/4 cooked and crunchy .
  2. Prepare soup according to packet instructions but add 1/2 the amount of water mentioned to get a thick custard like consistency , gooey sauce .
    Apply pizza or tomato sauce to the bread slices .
  3. Grease a casserole baking dish with butter all around and bottom well . Layer with bread slices , then the veggie filling , top with soup custard , garnish with Grated cheese .
  4. Do the same up to the top of the casserole dish . Grate cheese as the final top layer . Place butter bits all over the top and bake in a pre heated oven at 180 degree Celsius for 20 minutes until the cheese melts to a golden colour crust and bubbles .
  5. Remove from oven , cool a bit for 5 minutes and serve hot . Yummy yum .

Notes

  1. Can do the same with any left overs substituting bread with chapathis , rotis , naans . Any filling of choice ( left over non veg gravy , subji , poriyal )
  2. Instead of soup ( dal , white sauce , pasta sauce , left over curries ) Instead of cheese ( grated paneer , mashed potatoes

Chicken cigars

Share Button

image1

image2 (1)

image3 (1)

image4

image5

image6

image7

Preparation Time : 35- 40 minutes
Cooking Time : 10 minutes for filling + 1-2 minutes for each batch deep fried
Serving : 6-8 members

Description

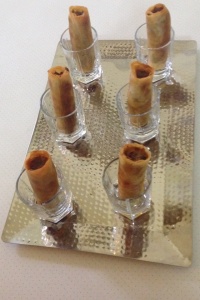
The first time I got to see these cigars ( vegetarian though ) made was in master chef India ( can’t remember the season ) at a team challenge in the palace of Rajasthan . This was the winning dish in the episode as well . Did store the idea in mind then but was forgotten like always . A few months back just before the holy month of Ramadan could start , I had a chat with my friend Anisa Arif and as usual the foodie in us took over and ended up discussing food . It was her that reminded me about these cigars again while our chat . Made sure to try it out immediately for all the lost time stored and forgotten from my mind . Anisa did ask me to apply flour paste all around the edges of the cover and just to roll up the cigars with the filling and deep fry . I was not confident with her version as felt the filling might just all come out once dropped into hot oil . So I went with my instincts being more safe by applying flour paste over both the sides of the rolled cigars . Wolla , it worked perfect and was a perfect snack to munch about with such ease that endeavoured to capture the soul of our regular local chicken samosa but in an innovative , tasty way . All thanks to the spice queen Anisa Arif for bringing back the long lost cigars in to experiment at my home kitchen and I hope it continues at all your kitchens too .
Ingredients for chicken filling

Ingredients
Quantity
Boneless chicken1/4 kg
Thin Coconut milk1/4 cup
Ginger garlic paste1/4 teaspoon each
Salt taste
Turmeric powder1/4 teaspoon
Onions 5 big chopped
Green chillies 4 chopped
Mixed vegetablescarrots , beans , cabbage , green peas chopped and boiled in water with salt - 1 cup
Mint leavesfew
Coriander leavesone hand chopped
Pepper powderto taste
Oil2 tablespoons

Method for chicken filling

  1. Pressure cook cleaned chicken , coconut milk , salt , turmeric powder and ginger garlic paste for one whistle .
  2. Bring to boil and Reduce the water . Cool completely and shred the chicken to treads ( I run it in the food processor for a second ) .
  3. Heat oil in a non stick board pan . Add onions and fry to translucent .
  4. Add green chilies , boiled chopped mixed vegetables , shredded chicken , mint leaves , coriander leaves , salt and pepper to taste .
  5. Mix well and lower the flame and keep stirring for 3 minutes letting all the flavours infuse together .
    Remove from heat , cool and set aside .

Ingredients for the cover

Ingredients
Quantity
Readymade spring roll or samosa sheets12 to 15
Flour / maida 1/4 cup
Water little
Salt to taste
Oil to deep fry

How to proceed

  1. If using spring roll sheets , cut one sheet into two equal rectangle strips .
  2. Mix flour / maida with salt to taste and little water to get a smooth paste like consistency .
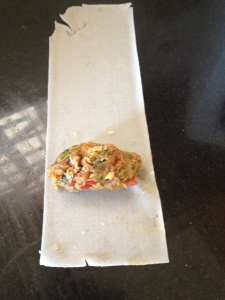
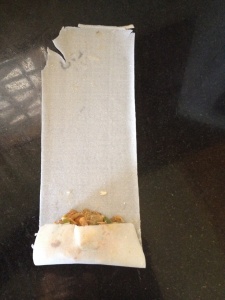
  3. Place about two tablespoons of filling over the rectangular sheet one inch away the top edge .
  4. Apply the flour paste all around the edges of the rectangular spring roll / samosa sheet .
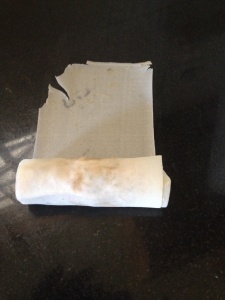
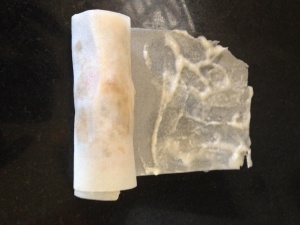
  5. Roll from the top end of the rectangular sheet tightly making sure the chicken filling is intact with out scattering away .
    Apply little flour paste on both the ends of the cigars .
  6. Do the same to all the sheets and filling . Heat oil to deep fry in medium heat .
  7. Drop the chicken cigars in batches and fry to golden brown in colour . Drain and serve hot with any dip of choice .

Notes

  1. Vegetarians can avoid the chicken and use potatoes instead along with the other vegetables following the same for the filling .
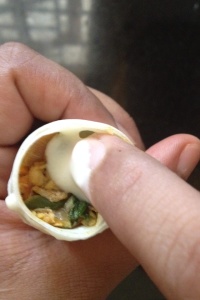
  2. I always press the filling by hand to get a log shape . Then place over the rectangular sheet and roll tightly . This way the filling stays intact .
  3. I usually follow this recipe up to the rolling of cigars and store in the freezer for 2 to 3 days . De freeze and deep fry when ever needed .

Masala prawn fried rice

Share Button

IMG_0951
Preparation Time : 30 minutes

Cooking Time : 35- 40 minutes

Serving : 8-10 members

Description

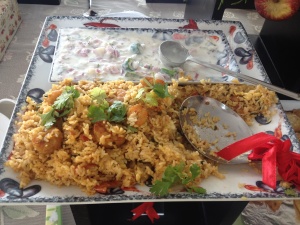
What do I start with , the dish or its creator ??? Well the creator of this dish has been kit n kin with me first so I shall start with her . The sense of nostalgia and the unforgettable of the sensuous and the breathtaking – Our Cousins . Who are our first best friends isn’t it ? Like wise to me my cousins Aneez and Rizwana were my first besties . We were a trio with best of secrets kept to ourselves and would attempt the most wired things together having other junior cousins feel so irritated about this ( shifa and cithara .. Am talking about you two here :-)) . Aneez was the first to get married among us . Rizwana and myself used to hang on to Aneez’s lips to hear all her new married stories not knowing one day even we will be soon following the same . Yeah , like wise Rizwana and myself did get married off . The only difficult thing being I was married away out of station when Aneez and Rizwana still remain in the same town like before . So they do hang out together a lot with out me , which bugs me for sure till date . Coming to the dish masala prawn fried rice .this dish was brought by Aneez for the second anniversary celebration recipe swap of sauté , fry n bake . Aneez was so excited and happy to be a part and kept calling me a million times with her doubts and quotes . I made sure to save some of this dish and it tasted even better that night seducing , irresistibly time and again . Aneez went back home with a prize and her entire family celebrated it with pride . She enjoyed every moment of this pride being num as her prize was for winning a game and not for the dish . What ever a moment of joy is to be cherished for ever isn’t it ? I am happy that I was responsible for this joy at her home . The little I could do for my best cousin sister .

Ingredients for gravy

Ingredients
Quantity
Prawn1 kg cleaned
Onion4 sliced
Tomato3 big chopped
Turmeric powder1/4 teaspoon
Red chilli powder 1 teaspoon or to taste
Ginger garlic paste1/2 teaspoon each
Light Soya sauce1 teaspoon
Tomato sauce 1 teaspoon
Salt to taste
Oil 3 tablespoons
Celery 1 tablespoon chopped
Spring onion 1 tablespoon chopped
Coriander leaves1 tablespoon chopped
Garam masala powder 1/4 teaspoon

Method for gravy

  1. Heat oil in a frying pan . Sauté onions to translucent . Top with ginger garlic paste and sauté to crisp .
  2. Add turmeric powder , red chilli powder , tomatoes and salt . Mix well and sauté until oil separates . Add soya sauce and tomato sauce .
  3. Mix well . Top with cleaned prawns and cook adding little water to tender . Check seasoning .
  4. Garnish with chopped celery , spring onion , coriander leaves and garam masala powder . Remove from flame and set aside .

Ingredients for rice

Ingredients
Quantity
Zeera sala ( zeraga samba ) rice 1 kg
Ghee3 tablespoons
Oil2 tablespoons
Cinnamon 1 inch piece
Cloves 4
Cardamom4
Onion 2 sliced
Garlic 6 flakes chopped
Mint leaves 1/2 hand
Coriander leaves1/2 hand chopped
Green chillies whole4 or more to taste
Water ratiorice 1 : water 1 1/2 .

Method

  1. Wash and soak rice . Heat ghee and oil together in a pressure cooker . Top with cinnamon , cloves and cardamom .
  2. Once they crackle add onions , green chillies and garlic . fry to translucent . Pour measured water with salt to taste , mint leaves and coriander leaves .
  3. Bring to boil . Add soaked and drained rice . Close and cook for one whistle . Then simmer for 5 minutes .
  4. Switch off flame and Let the whistle sound subside .open the cooker lid , mix gently and set aside .

Ingredients for egg

Ingredients
Quantity
Eggs4
Salt + pepper to taste
Oil 1 teaspoon

Method for eggs

Heat oil in a non stick kadai . Best eggs with salt + pepper powder . Pour into the hot kadai and scramble the eggs to cooked and soft .

How to proceed

Mix prawn gravy , cooked rice and scrambled egg together making sure all are mixed well . Masala prawn fried rice is ready . Serve hot .


Coconutty jack fruit pudding

Share Button

image2

image3

Preparation Time : 20 minutes

Cooking Time : 30 -40 minutes + cooking and refrigeration timing

Serving : 6-8 members

Description

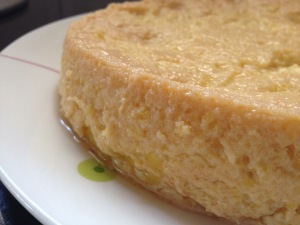
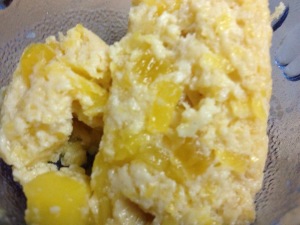
Jack fruit is my favourite fruit for many reasons from it’s sweet taste to it’s aroma to the nostalgia it carries along with my childhood days . Most of my summer vacations were spent at my maternal grand mothers place in Palghat as my mom was always  busy helping dad at work . Grand ma’s place was a massive huge house with so much space all around the house . We did have a back yard called the thodi with mango trees , coconut trees , plantain plants , tapioca , jack fruits etc .. Which was lush green through out the year . Even the walls had  all naturally grown green mesh in them . The kids were not allowed to go to the thodi alone as there were snakes there . The restriction did tempt us kids a lot to sneak in when ever possible and every time it was pure adventure from climbing trees ,to plucking fruits , to peeping over the last compound wall to see the pond in the other side ,to running away from snakes , to seeing live in helps romancing ( ssshush it’s a secret  till date :-)) . every time there was a ripe jack fruit from the thodi , it was like a festive season with two maids cleaning the ripe jack fruits with coconut oil greased hands separating  the ripe fruit segments from the seeds and thorny cover with all the kids around watching and gobbling  a few immediately . The air is filled with the mesmerising scent of ripe jack fruit that it takes you towards the happening place if away . My grand ma would make all authentic stuff with the jack fruit from payasam , puttu to kolakattai .  Umm , I doubt kids now a days will have such memories . Coming to the pudding . This was a first try with pure instincts of my nostalgic memories of my childhood days presented in a new posher avatar of those well researched authentic recipes of my grand ma’s magical treats . Served it to my hubby dears niece sabura and her dad when they were home to invite us for her sisters wedding . They liked it so much that they asked for a second helping and made sure to pack some as well . This sure made me more confident about my new posh version of jack fruit pudding letting a lot of gratitude to the good times life had to offer leaving way to good memories to cherish for ever and ever .

Ingredients

Ingredients
Quiantity
Condensed milk 1 tin
Thick coconut extract / milk1 tin of the condensed milk tin
Jack fruit purée1 tin of the condensed milk tin
Chopped jack fruit1 tin of the condensed milk tin
Eggs2
Vanilla essence few drops
Ghee / coconut oil to grease the pudding tray

Method

  1. Blend 2 eggs , condensed milk , thick coconut milk , jack fruit purée and vanilla essence together in a food processor . Add the chopped jack fruit bits into the blended mixture and mix well .
  2. Grease a pudding tray with ghee / coconut oil well . Pour the condensed milk + jack fruit mix into the greased tray . Heat water in a pressure cooker or rice cooker . Place a stand round ring and place the pudding tray above with a lid .
  3. Close the cooker lid and pressure cook for three whistles . If using rice cooker cook with a lid until it shows keep warm indication .
  4. Remove carefully and cool completely . Then place in the refrigerator over night . Run a wet knife all around the edges of the pudding tray .
  5. Place a plate that’s bigger than the pudding tray over and tilt the pupping tray to get the pudding on to the serving plate . Cut and serve .

Notes

  1.  Grind grated coconut of half of a big coconut with just 1/4 cup water to a smooth paste . Then strain to get thick coconut extract / milk .
  2. Blend cleaned jack fruit with little water to a smooth semi thick gooey paste to get jack fruit purée .
  3. make sure to close the pudding tray when steaming as the pudding tends to get water into it .
  4. In case you see a lot of water in your steamed pudding , do not panic . Leave it as it is . When you tilt the pudding to the serving plate just drain the excess water away .
  5.  I usually place 6-8 heavy stones on top of the pudding tray lid to avoid the water getting in . Sounds crazy but works always .
  6. This pudding can be served hot , warm or chilled .

Kunafah

Share Button


IMG_3401

image (4)

image (5)

image (6)

image (7)

Preparation Time : 20 minutes

Cooking Time : 50 -60 minutes

Serving : 8-10 people

Description

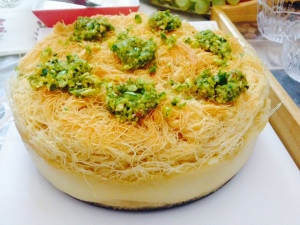
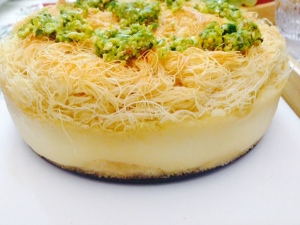
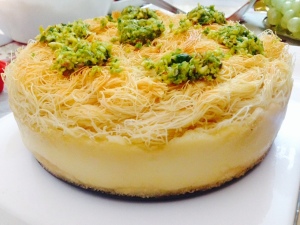
Kunafah . This word did sound like Greek to me the very first time I heard it through a relative of mine thasnim who had requested me for the recipe of Kunafah after a  holiday in Dubai . Not knowing if this was a sweet or savoury dish and from which part of the world it was made .. Left me clue less for sure . Thank god , we are blessed with google to clear our doubts what so ever . Immediately googled and found out it was a middle eastern sweet delicacy made with a special dough similar to vermicelli but soft , filled with creamy textured paste of any flavour of choice and baked . Then served with a good drizzle of flavoured sugar syrup . I did add this recipe to be must try list . Started my search through friends and relatives to get access to Kunafah dough from the Middle East . The search went on for months to years and finally my cousin brother mohideen got me two packets of Kunafah dough from Dubai . Went through so many recipes in the world wide net and stuck to the most simple and authentic one . Made good use to add more glamour to my eid al adha  feast table with the Kunafah for the first time . The first ever Kunafah that I have seen and tasted is the one I made and being clue less of the authentic taste and appearance felt lost with the out come . Served it and it was devoured in no time . Did send pictures to my friend sulu and she was all raving about how it looked perfect and she was surprised about the light yellow colour in the Kunafah . Satisfied me , but still had my doubts about the authentic taste and appearance in mind . Made good use clearing my doubt when on a holiday to Dubai recently  . I ate Kunafah where ever I saw it and the only difference from my Kunafah was the volume . Mine was like a cake and the authentic one was made in huge trays flat with colour added to the Kunafah dough . Taste wise it was pitch perfect . My cravings to taste the authentic Kunafah was accomplished but yet again I missed out buying Kunafah dough from Dubai that has left me to square one condition of searching a source to get the Kunafah dough :-((( .
 Ingredients for Sugar Syrup

Ingredients
Quantitiy
sugar2 1/2 cups
water1 1/4 cups
lemon juice 1 tablespoon
Rose water1 tablespoon
Rose essence 2 drops

Ingredients for Cream filling

Ingredients
Quantitiy
rice flour 1/2 cup
milk 4 cups
heavy cream 1/2 cup
sugar6 tablespoons

Ingredients for Pastry

Ingredients
Quantity
Kunafah pastry defrosted 1 pound
unsalted butter, melted1/2 pound

To Garnish

pistachios chopped- 2/3 cup

Method

  1. Syrup: In a small saucepan on high heat add water, sugar and lemon juice, bring to a boil then reduce to low, cook for 5 minutes. Cook until thick, like a syrup (if it becomes to thick add a small amount of water). Add rose water and rose essence , cool then chill.
  2.  Dilute the rice flour into the milk making sure there are no lumps . In a medium saucepan on high heat, add the diluted rice milk mix . whisk vigorously until there are no lumps to get a semi thick creamy batter . Add cream, mix well. Reduce heat to low and allow simmering 10 minutes, whisking through out every minute. Add sugar, set aside to cool .
  3.  In an extra large bowl, add Kunafah pastry, breaking all strings apart with hands. Add melted butter over pastry mixing well with hands, until covered. In an 11-12 inch pie pan, add half of Kunafah pastry, press down. Add cream filling, smoothing out then add other half of Kunafah pastry, press down. Bake in a pre-heated oven at 180 degree Celsius for 45 -50 minutes until the crust is crisp and light golden in colour .
  4. Take a sharp knife and run along pastry sides. Cover pan with plate and gently flip. Pour half of sugar syrup over pastry; reserve other half to serve at table. Garnish with pistachios.

Notes

  1. , in case you don’t have Kunafah dough pastry substitute with thin vermicelli instead .
  2. you can add orange food colour to the Kunafah dough . I omitted it .you can add banana , cream cheese , nuts or anything of choice for the filling .
  3. I preferred the simple filling as this was my first try . Will surely experiment with the rest soon .
  4. I prefer pouring the sugar syrup into the kunafe immediately once out of the oven when hot .
  5. Listening to the sizzle itself is so soothing .pour the reserved other half over the other tilted end just before serving .

Fusion honey chicken

Share Button

image (2)

image (3)

Preparation Time : 30 minutes + one hour marination

Cooking Time : 10 – 15 minutes

Serving : 4 members

Description

At times when you have nothing to do and you fiddle with your mobile going through your photo albums . Doing the same I was surprised to see a picture of this dish that I had tried decades ago and some how didn’t post it . Now had to search down the recipe . So dug up my drawer and   got a pile of recipes stapled together that was collected from our fellow   Sauté , fry n bake extended family members for the first anniversary celebration recipe swap get together . Going through all the recipes , I was surprised to know there were quite a few recipes that I have not posted yet ( Uff ,I am put to shame by this careless act of mine . It’s been more than a year now and how did I ever end up like this … That to with the first prize winning dish ) and this being the first prize winning dish that day brought by nazeera mohideen , Who is  a fellow food blogger .I just got to taste a tiny piece on the anniversary day and made this again when I had guests at home . This fusion is a lip smacking hit with an explosion of different flavours . A sure fire hit where ever served with every one .  The sweetness of the honey does sooth the edge’s of the burning tongue due to it’s hotness . This dish goes well with anything and everything breaking the usual stereotype -tailored to any preference . Gear up people to experience this dramatic culinary fusion at your home kitchens .

Ingredients

Ingredients
Quantity
Chicken1/2 kg or chicken lollipop 6 pieces ( I used chicken )
Ginger garlic paste 1 tablespoon
Chilli garlic sauce1 tablespoon
Soya sauce 1 teaspoon
Oregano1 teaspoon
Rosemary1 teaspoon
Curd1 tablespoon
Vinegar 1/2 teaspoon
White pepper powder 1 teaspoon + 1 teaspoon
Red chilli powder1 teaspoon
Egg 1 beaten
Corn flour 1 tablespoon
Maida / flour1 tablespoon
Salt to taste
Oil to deep fry + 1 tablespoon
Onion1 chopped
Garlic3 flakes crushed
Green chillies 2 chopped
Honey 2 tablespoons
Tomato ketchup 1/2 tablespoon
Spring onion + coriander leaveschopped to garnish ( I used celery leaves instead of spring onion )

Method

  1. Mix cleaned chicken , curd , oregano , rosemary , egg , cornflour , maida , red chilli powder , white pepper powder , soya sauce , chilli garlic sauce , ginger garlic paste and salt to taste together .
  2. Mix well and marinate for one hour in the refrigerator .Heat oil to deep fry .Once the oil is hot drop in the marinated chicken pieces and deep fry in batches to crisp .
  3. Drain and keep aside Heat one tablespoon of the chicken deep fried oil in another large non – stick pan .Add onions and garlic . Fry to golden brown . Top with tomato ketchup , honey , salt + white pepper powder to taste .
  4. Sauté for a minute  Add the deep fried chicken pieces along with a good sprinkle of warm water . Sauté and toss well in low flame letting all the flavours infuse into one another for five minutes . If using chicken lollipops ,wrap the lollipop wing edges with foil paper .
  5. Transfer to a serving plate . Garnish with chopped spring onions and coriander leaves ( I used leeks instead of spring onions as my pantry was out of stock .

Kappa

Share Button

image (1)

Preparation Time : 15 minutes

Cooking Time : 20-25 minutes

Serving : 5-6 members

Description

Growing up as a kid with mallu’s ( malayalis ) all around me from my best friends , teachers , class mates to every possible person around me being a Mallu some how or the other . My fascination towards gods own country mesmerised me for sure . Though a Tamil speaking native from Palghat in Kerala , I always loved to say that I was a Malyali ( not sure why , crazy me ) and the food habits also did tie my tongue down . Hearing all the mallu’s go gha gha about the kappa and fish curries that they have at home . I used to drool and imagine it as food of heaven. The first kappa and fish curry I ever tasted was at my teacher ( she taught my son too :-)) ) mrs Betty Francis home in arcaud . The kappa was kind of whole in pieces and I know that’s how it’s supposed to be as well but at home hubby dear likes soft gooey stuff so my version is always a bit mushy , fluffy , light and succulent than the original form . I can eat this either hot or cold at any time of the day with a satisfying plop on my plate . ( greedy , greedy , shameless me :-)) . Once in a while it’s nice to stick to old fashioned dining and open our bellies to a smorgasbord of food experience isn’t it ??
Ingredients

Ingredients
Quantity
Tapiocaa / Kappa1 Kg
Gridded coconut1 cup
Green chillies 5
Cumin seeds 1 teaspoon
Curry leaves1 spring
Sliced shallots / small onion4
Garlic 8 flakes
Turmeric powder 1/2 teaspoon
Water 1 Litter
Saltto taste

Method

  1. Clean and cut the tapioca into small pieces each of size around 1 1/2 inch and wash it thoroughly in water.
  2. Pressure cook the tapioca for 1 whistle time. Turn of the flame after its getting cooked, remove the water and keep it aside.
  3. Grind the coconut , green chillies, cumin seeds, curry leaves, shallots, garlic and turmeric powder lightly in a mixer to a coarse paste .
  4. Add the ground coarse paste into the cooker along with tapioca, add water, close the lid and cook it for 3-5 whistles (depending on the hardness of the tapioca)
  5. Lower the flame, and open the cooker after its cooled. Mix it thoroughly into a semisolid consistency .
  6. ( I mashed it a bit more than required as at home all love the dish this way ) Serve it hot with red hot fish curry .