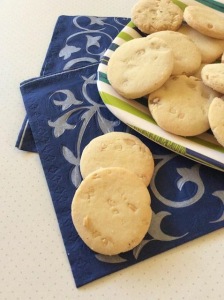
Eggless cashew nut cookies

Share Button

image1 (1)

image2(12)

Preparation Time     : 1 hour 20 minutes

Cooking Time          : 15 – 20 minutes

Serving                   : 6-8 members

Description

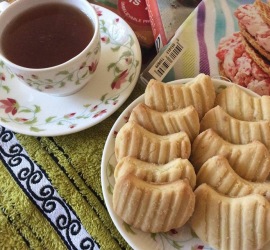
My first vivid memory of cookies around this very day several years ago, when I was in primary school…. Trays of cookies were distributed to all the students during mid tea break by eleven every morning. We called our every day cookies” DOG BISCUITS ” not sure why?? On hungry days I would grab two and eat them looking at the ooty lake and the pine trees around. Most of the days, I would ask the early birds who are returning from tea about what cookies? If the answer was dog biscuits, immediately a u- turn was taken heading back to the class  rooms. Once in a blue moon we were served Ginger cookies and it sure will be the talk of school. Now coming to this cookie. The first bite, you hear the cracking sound of the cookie, reaching the softness deliciously dissolving in your mouth. This took me straight back to the dog biscuits in school as this is what I have been experiencing for days and years together.  Only after I started baking did I get to know the art and what a bakers nightmare is until  perfected with practice. I ( it’s we – all my fellow school mates ) did take things for granted with all the spoon feeding done to us in boarding school. It was so easy for us to nick name a cookie as dog biscuit with out knowing how much heard work, practice and multiple techniques involves in making a cookie. Crazy breed me…. Getting to realize this  nearly after a decade. Umm, better late than never isn’t it ??

Ingredients

Ingredients
Quantity
Cashew nuts2 cups
Flour / maida1 1/4 cup
Salta pinch
Powdered sugar1 cup
Butter1/2 cup
Vanilla essence 1 teaspoon
Milk1/4 cup

Method

  1.  Chop half of the measured cashew nuts and powder the remaining by blitzing in a food processor with out water to a dry powder.
    mix powdered sugar, salt and butter with an electric egg beater in low speed.
  2. Do not over mix. add vanilla essence, flour and powdered cashew . Knead gently to form a dough. Cling wrap the dough and refrigerate for one hour in the refrigerator. preheat oven to 170 degrees Celsius.
  3. Roll small lime sized balls out of the dough and flatten. ( I rolled out the dough evenly and used my round cookie cutter to get even sized cookies ) Dip the flat side of the cookie into milk.
  4. Stick chopped cashew nuts on top. bake for 15-20 minutes to a light golden colour in the middle rack of the oven.
  5. Remove and cool completely as cookies tend to crumble when hot. store in air tight containers at room temperature and serve.

Bread cones

Share Button

image1(11)

image2(11)

image3(6)

image4(2)

image5

image6

image7

image8

Preparation Time    : 40 minutes

Cooking Time         : 3-4 minutes of using an oven , 1 1/2 minutes if using a microwave

Serving                  : 6 members

Description

Bread has always been something that I have relished and enjoying in some form or the other. From having bread slices being soaked in piping hot chicken stew for dinner at my grand parents place in Palghat to eating freshly baked bread two weeks a day with home made ( oops boarding school mess made ) jam, omelet or egg curry . The mighty bread is taken for granted here at my in – laws place not sure why ? The bread is just not accepted as a staple that can be enjoyed in any form. But my love for bread has just got more and bigger as I started to bake more. Words can’t be expressed to explain at seeing simple ingredients bonded together creating magic as bread and not to forget the aromatic scent  of baking bread that fills the entire house, road to the streets as well . I do try my best to cheat all at home to some how come up with new ways to impress them with bread based dishes. This bread cone idea was borrowed from a fellow foodie friend of mine . Made this stylish party starter for a high tea party at home and it was a super hit among the guests. As usual the others at home were like ” it’s bread “.  Well my fresh idea to cheat with a delicious treat of bread didn’t work this time too. No way am I ready to give up as dollops of love is put into each dish of mine. So some day I believe and hope that the love will prove its way to all the hearts at home.

Ingredients

Ingredients
Quantity
Sandwich bread slices6
Flour / maida 4 tablespoons
Saltto taste
Watervery little
Butter at room temperature4 to 6 tablespoons

Ingredients Filling

Ingredients
Quantity
Boneless chicken1/4 kg
Thin Coconut milk 1/4 cup
Ginger garlic paste1/4 teaspoon each
Saltto taste
Turmeric powder 1/4 teaspoon
Onions 5 big chopped
Green chillies4 chopped
Mixed vegetables carrots , beans , cabbage , green peas chopped and boiled in water with salt - 1 cup
Mint leavesfew
Coriander leavesone hand chopped
Pepper powderto taste
Oil2 tablespoons

Method for chicken filling

  1. Pressure cook cleaned chicken, coconut milk, salt, turmeric powder and ginger garlic paste for one whistle.
    Bring to boil and Reduce the water.
  2. Cool completely and shred the chicken to treads ( I run it in the food processor for a second ) .Heat oil in a non stick board pan.
  3. Add onions and fry to translucent.Add green chilies , boiled chopped mixed vegetables, shredded chicken, mint leaves, coriander leaves, salt and pepper to taste.
  4. Mix well and lower the flame and keep stirring for 3 minutes letting all the flavours infuse together.Remove from heat, cool and set aside.

How to proceed

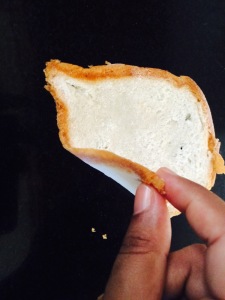
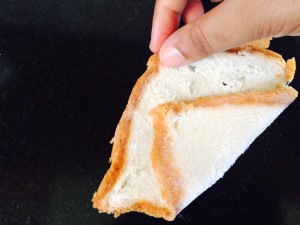
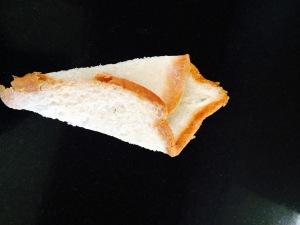
  1. Flatten sandwich bread slices with a rolling pin. Mix flour, salt and little water together to get a paste.
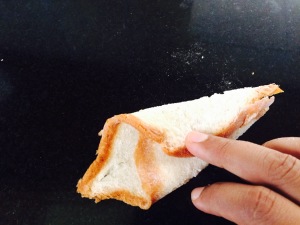
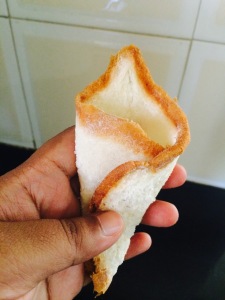
  2. Fold the flattened bread slices to a cone shape. Seal the edges with flour paste . Keep aside for ten minutes.
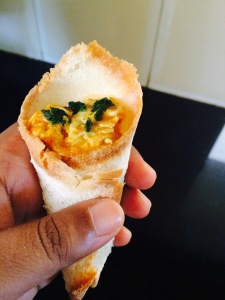
  3. Fill the cones with cooled chicken filling pressing with your finger or the back of spoon to reach the end of the bread cone.
  4. Top with grated cheese. Brush cones with butter all over.
  5. Preheat oven to 180 degree Celsius and bake for 3-4 minutes placing over a greased foil lined baking tray or can microwave for 1 to 1 1/2 minutes on high by placing the cones in between the round stripped microwave grill vertically. Serve hot.

Notes

  1. Any filling of choice can be used. I use left over noodles, mashed potatoes, anything to everything possible.
  2. Vegetarians can omit the chicken, use panner or soya chunks instead and follow the same recipe for a vegetarian version.
  3. Can top with a dot of tomato sauce, grated cheese , olive etc ..

Shezwan sauce

Share Button

image2

image1

Preparation Time  : 20 minutes

Cooking Time       : 15 -20 minutes

Serving                : more than ten times to be used in any form of cooking

Description

Only in the recent have I started to stock home made sauces in my refrigerator. I always felt buying the ready made store brought sauces were more handy and hassle free. Being human, my mind never sticks to one thought.  Like a monkey it just jumps in all directions driving me crazy for sure. So here, I am making home made sauces which is so not like me at all. I  always assumed making sauces had to be done with spending hours in the kitchen trying to perfect them. I was totally proven wrong as this sauce was not time consuming and tasted much better than the store brought expensive ready made version. Happy me with no complaints at all but it’s not the same with my cook and live in help at home. They keep saying,” amma, relax and enjoy yourself instead of fiddling with things here in the kitchen. Don’t you get bored with cooking and food. ” poor females, They still have not understood what cheer food and cooking brings into my silly soul.

Ingredients

Ingredients
Quantity
Red dry chillies15
Red bell peppers3
Tomatoes 4 big
Olive oil 1/2 cup
Garlic cloves12 chopped
Ginger1 inch grated
Celery 2 sticks chopped
Light soya sauce 1 tablespoon
Vinegar 1 tablespoon
Saltto taste
Brown sugar1 teaspoon

Method

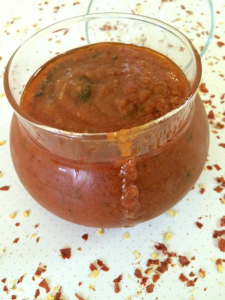
  1. Soak red dry chillies in hot water for ten minutes. Blanch the tomatoes and  peel the skin. Roast whole red bell peppers over medium flame. Place in a ziplock bag when hot for ten minutes. Peel the skin and remove the inner core of seeds and stem . Chop the red bell pepper flesh. Now grind soaked dry red chillies, blanched tomatoes and roasted red bell peppers together to a smooth paste adding very little wate.
  2. Heat olive oil , add chopped celery, garlic and ginger. Fry until a good aroma arises Making sure not to burn at the same time.
  3. Add the ground chilli, tomato, bell pepper paste and cook over medium heat until oil separates.
  4. Top with light soya sauce, vinegar, salt and brown sugar. Mix well.
  5. Taste and adjust seasoning. Remove from heat and cool completely. Store in an air tight glass container and use when required.

Notes

Keeps well in the fridge for one month.
Make sure to always use a dry spoon.


Neythili manga peera

Share Button

image1(10)

Preparation Time   : 20 minutes

Cooking Time        : 15 – 20 minutes

Serving                 : 4 members

Description

Fish and any thing sour together is a killer combination that gets me weak on my knees. I guess, being pampered and fed with the red hot fish curries with raw mangoes in it as a little one just soothed my tongue and soul for keeps. This dish is one such killer of a dish where I found it very difficult to stop eating it. The sourness of raw mangoes that marries with the fish and balance’s   with grated coconut and surprise’s you with a slight crunch from the crushed pepper corns are to die for. I did make this dish when on a holiday at moms place for a family lunch with all my aunts and grand ma. The meen manga peera was vanished in seconds off the table as the entire family is bonkers about sourness in any form. My aunt nazeem Akka did crack a joke saying this dish is so yum but the name peera is not so nice. Well, I have no clue as to why this authentic dish of Kerala is named so.. All that matters… is it tastes Devine… Isn’t it ???

Ingredients to marinade

Ingredients
Quantity
Red chilly powder1/2 teaspoon
Turmeric powder1/4 teaspoon
Saltto taste
Nethili fish ( anchovies )250 grams

Other ingredients<

ingredients
Quantity
Green mango1 big peeled and chopped
Grated coconut1 cup
Small onion 1/2 cup
Green chillies3
Ginger 1 inch piece
Garlic cloves5
Crushed pepper corns1/2 teaspoon
Turmeric powder1/2 teaspoon
Red chilly powder1/4 teaspoon
Salt to taste
Curry leavesfew
Mustard seeds1/2 teaspoon
Coconut oil2 tablespoons
Method

  1. Marinate fish with red chilly powder, turmeric powder and salt to taste .  blitz small onion , green chillies, ginger and garlic to a coarse paste with out adding water.
  2. Mix coconut , turmeric powder, red chilly powder together. heat coconut oil in a wide heavy bottomed pan.
  3. Add mustard seeds. Once they splutter add the curry leaves and coarsely ground masala .
  4. Sauté for two minutesadd raw mango chopped bits and sauté for five minutes over medium heat. Add grated coconut mix and mix well.
  5. Add fish, 1/4 cup water and salt to taste ( be careful with adding salt as we have marinated the fish with salt already ). Cook covered until fish is cooked and all the water dries out.
  6. sprinkle crushed pepper corns and serve hot.

Dal makhani

Share Button

image2(10)

image1(9)

Preparation Time   : 20 minutes + over night soaking of the whole black urad dal

Cooking Time        : 25 – 30 minutes

Serving                 : 6 members

Description

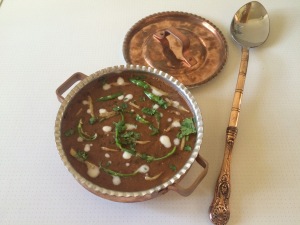
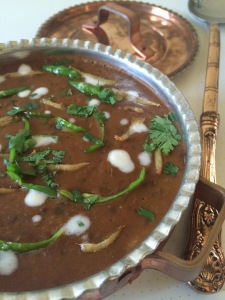
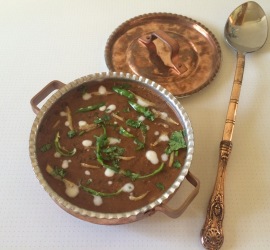
Being an enthusiastic foodie and an extremely very passionate person when it comes to food and cooking. I was shamed away a few years ago on a family gathering in chennai where three couples in our family ( including myself ) share the same date of marriage. We cousins around thirty of us planned to celebrate in style and headed to a grand buffet spread lunch in a restaurant. As usual, I was going through my taste trial with every dish on the buffet. Hubby dears cousin wahidha suggested saying that the dal makhani is yum. I head towards the Dal makhani and see a mass of dark blackish green gravy and think to myself” if it’s dal, it has to be yellow in colour , why on earth is this in a not so appealing colour.” still did go ahead with the tasting of dal makhani and found out that it’s made with whole black urad dal and that’s where the dish gets this dark colour too. Though have heard about dal makhani being a staple dish to Punjab, little did I expect it to be in this colour, taste or ingredients used. I felt so dum and shamed about myself as the well known dal makhani was unknown to me all these years of my existence. This is why I love food and cooking so much as you can never ever say I know everything.Each day food surprise’s you with a new invention, authentic dish, fusion dish and I can go on and on… The dal makhani sure did alert me to be more curious and to explore food seriously.

Ingredients

Ingredients
Quantity
Whole black urad dal1 cup
Butter 200 grams
Fresh cream3 tablespoons
Tomato 5 blanched , skin peeled and ground
garlic paste1 teaspoons
Red chilli powder1 teaspoon
Coriander powder1 teaspoon
Salt to taste
Garam masala powe1 teaspoon
Kasoori methi1 teaspoon
Kewarfew drops

Ingredients to tempe

Ingredients
Quantity
Ghee1 tablespoon
Ginger Julian's 1 tablespoon
Green chilly Julian's1

Garnish ingredients

ingredients
Quantity
Coriander greensfew chopped
Cream2 tablespoons

Method

  1. wash and soak the whole black urad dal in water over night. pressure cook the soaked whole black urad dal with soaked water and add more water if needed to boil for 4-5 whistles or until broken into half and very tender.
  2. Mash well to a creamy consistencyheat butter in a heavy bottomed wide pan. Add cumin seeds, once they crackle add garlic paste . Fry to crisp.
  3. Top with red chilly powder and ground tomatoes. Sauté until butter separates . add coriander powder and garam masalas powe. Mix well. Pour the mushy boiled black urad dal.
  4. Add salt to taste and water to the desired consistency and bring to boil for ten minutes. Sprinkle kasoori methi and add cream . Mix well and remove from heat.

Tempering

  1. Heat ghee, add Ginger and green chilly Julian’s and sauté for 30 seconds until a good aroma arise. Pour over the dal makhani.
  2. Sprinkle cream and chopped coriander greens and serve hot.

Madras mother base gravy

Share Button

image1(8)

Preparation Time   : 15 minutes

Cooking Time        : 20 minutes

Serving                 : 4 servings

Description

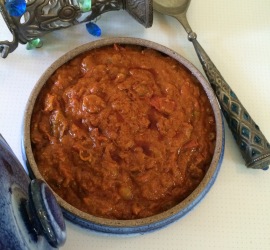
Just imagine….With just one gravy you could create around 7 to 8 different gravies.I know, this sounds like a miraculous thing to happen to all of us… The so called” home chefs”. The first thought on all our minds each morning is what to cook for breakfast, lunch, dinner or brunch ??? This is an universal mind breaking stress that we home chefs go through each day. I can feel all of you reading this go” YES, YES, YES”. Now, this gravy serves a solution to all of us with a magical boon. As it can be used to make 7-8 or more gravies with your imagination taking over. I came across this recipe through a foodie group in face book by mrs Radha nadarajan s and made note of it. Tried it out, made different gravies and chutneys with this mother base  gravy and every time I did… It resulted in eye brows raised by all at home. My gal immediately wanted a huge share to be packed for herself. Every time her stock of this chennai mother base gravy is over, she makes sure to replace them soon enough. Umm the pleasure of having mothers around :-)). I guess this masala base is also called mother base gravy as it lends ease and  warmth to us like all our mothers do..

Ingredients

Ingredients
Quantity
Tomatoes2 cups chopped
Small onions2 cups
Sambar powder2 tablespoons
Turmeric powder1 teaspoon
Asafetida1/2 teaspoon
Green chillie3 slit
Ground Coconut paste1/2 cup
Coriander powder2 teaspoons
Red chilly powder2 teaspoons
Fried gram / pottu kadalai 1/4 cup powdered
Oil 4 tablespoons
Salt to taste

Method

  1. Heat oil in a non- stick vessel. Add small onions,green chillies and sauté to a golden brown color.
  2. Add tomatoes and sauté until oil floats on top.
  3. Add all the other ingredients one after the other and mix well . Cook , covered for five minutes to get to a thick paste.
  4. Cool completely. The madras mother base gravy is ready.
  5. Divide into portions of your convenience and freeze in zip lock bags.
  6. Thaw before use and use as desired.

Ways to use the madras mother  base gravy

1.serve as it is as a side dish as it is.

2. vegetable masala koottu :
add boiled vegetables,channa or rajma to the madras mother base gravy . Add water to the desired consistency wanted .bring to boil and serve garnished with chopped coriander leaves with idli,dosa or chapathis.

3. hotel style sambar:

Blend the madras mother base gravy to a coarse paste. Add boiled dhal , tamarind pulp little , jaggery little , salt to taste . Mix well bring to boil.Taste and adjust seasoning.Heat oil,add mustard seeds , curry leaves . Once they crackle , add to the sambar . Mix well and Garnish with chopped coriander leaves . serve hot with idli and dosa .

4. tomato chuntney

Grind the chennai mother base gravy to a thick smooth paste . Heat oil , add mustard seeds , curry leaves , torn dry red chillies . Once they crackle , pour over the chuntney and serve .

5. tomato panner / egg bhurji

Heat oil , add 1/2 teaspoon of Ginger and garlic paste . Once crisp , top with 2 teaspoons of pav bajji masala powder . Pour the chennai mother base gravy with little water . Bring to boil , simmer until the raw smell vanishes . Grate panner over with chopped coriander leaves. Serve hot . ( I grate boiled eggs at times and on lazy days just serve with whole boiled eggs)

6. dum aloo

Blend the madras mother base gravy to a smooth paste . Grind cashew – 2 teaspoons, cumin powder- 1 teaspoon, cardamom-2 , fennel powder- 1 teaspoon , tomato -2 together to a smooth paste . Deep fry baby potatoes to crisp . Heat oil , add Ginger and garlic paste 1/2 teaspoon . add the ground chennai mother base gravy with the ground cashew paste and bring to boil with enough water for a gravy . Once the raw smell has vanished , add the deep fried baby potatoes with 1/4 cup cream , a few pinches of kasoori methi . Serve hot . ( I do the same with panner , chicken and egg omelet’s made in a panniyaram pan / appe pan )

7.pav bajji masala

Grind the chennai mother base gravy to a smooth paste.Grind mixed boiled veggies to a coarse paste.Heat butter add the madras mother base gravy with the ground veggies . Mix well , bring to boil.Remove,garnish with chopped onions , chopped coriander leaves and lemon wedges . serve with butter toasted buns,chapathis , idlis or Dosas .

8.grind the madras mother base gravy to a smooth paste.Mix with hung thing curd or mayonnaise with no lumps . Taste and adjust seasoning . Serve as a dip with chips , veggie sticks etc …

9.Let your imagination rule and create more wonders with this chennai mother base gravy.


Fennel and orange salad

Share Button

image1(7)

image2(8)

image3(5)

Preparation Time : 10 minutes

Cooking Time      : 3 minutes to blanch the almonds

Serving               : 3-4 members

Description

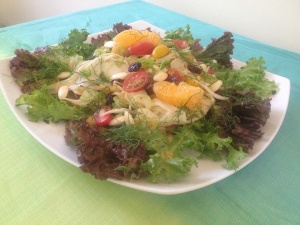
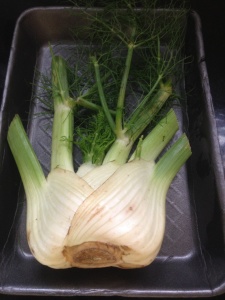
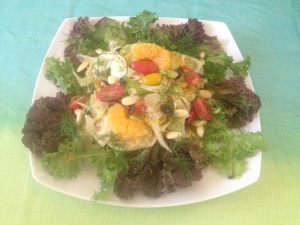
To me a happy good day would be to tour around a place filled with food or  food related ingredients. Like wise when ever possible i grab the opportunity for such an experience and make full use of it. on such a day in Coimbatore at a gourmet store, gazing around looking at the fresh exotic new variety veggies on the counter…. Suddenly I get to see fennel bulbs. Garbed two with utter joy as I have longed to experiment with these expensive price tagged beauties. Back home, not knowing head or tail about this mighty fennel bulb on how to clean, cut and cook with it. Googled for a recipe and the process of cleaning as well. Stuck with a simple recipe as complicating my first try might end up in a disaster. Went ahead and made this fresh, bright , crunchy salad. Made sure to have a taste first before it hit the table. My first mouth full of fennel was just with a mild menthol of fennel flavor balanced with the sweetness of the dried cranberries, fresh sourness  from the oranges and a good crunch from the almonds. All in all a good day led to a new experience with a lip smacking good healthy salad recipe for keeps and to share.

Ingredients

Ingredients
Quantity
Fennel1 large bulb trimmed and thinly sliced ( use two sliced cucumbers tossed in 2 tablespoons of fennel powder instead )
Oranges 2 peeled , deseeded and segments alone
Cherry tomatoes4 cut into half
Olive oil1 tablespoon
Vinegar1 tablespoon
Salt + pepper to taste
Sweetened dried cranberries 2 tablespoons ( can use dried grapes / kismis) 2 tablespoons
Blanched almonds skin peeled2 tablespoons
Lettuce6 to 8 leaves

Method 

  1. Place the sliced fennel and cherry tomatoes in a salad bowl.
  2. Slice oranges to divide flesh segments and add to the salad bowl.
  3. Drizzle olive oil, vinegar, salt and pepper over and toss well.
  4. Spike the salad with dried cranberries and almonds.
  5. Place in the refrigerator to chill until needed to be served. Spread over a bed of lettuce and Serve chilled.

Vanilla cookies

image1(6)

Preparation Time : 15 minutes

Cooking Time      : 15- 20 minutes

Serving                : 4 members

Description

Biscuits and cookies don’t fancy me much but it’s just the vies – ver -sa  with my boy.  I used to give both my kids just two biscuits at a time when they were little. My gal being a fussy eater would take them with no complaints but my smart fellow would roll on the ground , cry out loud and do a lot more drama just to get the entire packet of biscuits from me. Being the cliche mumma… I would end up giving him the entire packet as boys are always mummas sweet hearts right ?? My boy would have finished  the whole packet in a few minutes where my gal would have finished just half a biscuit of the two given to her. My boy would grab the remaining one and half biscuit as well from her. This was a regular scene at home back then. Now that my boy is back home with me for a long break after he’s finished his under graduation. I did bake a huge batch of vanilla cookies for him. He did relish a few and the rest were stored in an air tight container for later. The next day, having guests drop in for evening tea, I opened the cookie container and found it to be empty ??? I immediately knew this cleanly wiped out job was done none other than my darling smart fellow. With a motherly heart full of joy .. I did think … Some habits are born to stay for ever and ever.

Ingredients

Ingredients
Quantity
Flour / maida 2 cups
Butter 1/2 cup
Sugar1/2 cup
Baking powder1/2 teaspoon
Salt a pinch
Vanilla essence 8-10 drops

Method

1.Preheat oven to 180 degrees Celsius.
2.mix butter, sugar, flour, salt, baking powder and vanilla essence together.
3. Knead to a soft dough . Roll the dough to a one inch thick rectangle of even thickness all over.
4.Cut into desired shape with a cookie cutter . ( I used a moon shape cookie cutter and pressed with a fork on top to get the lined pattern )
5. place the cut cookies at a gap of one inch distance each over a greased butter paper / foil paper lined baking tray.
6.bake the cookies for 15-20 minutes until done.
7. Remove from the oven and cool over a wire rack. Serve after one hour so that the cookies get a bit crisp and crumbly.
8. store in an air tight container at room temperature. Keeps well for a week.

Notes

1. make sure all the ingredients are at room temperature.
2.Let your imagination rule and experiment with the Desing of the cookies .
3. I cut the cookies to rounds and stick jems color cookies , or cut to a flower shape with a cookie cutter and stick one jems in the middle and press with a fork to get the flower petals to look good .


Goan style chicken suke

Share Button

image2(6)

Preparation Time : 20 minutes + one hour marination time

Cooking Time      : 15 -20 minutes

Serving                : 6 -8 members

Description

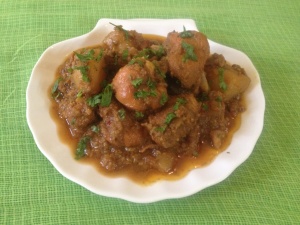
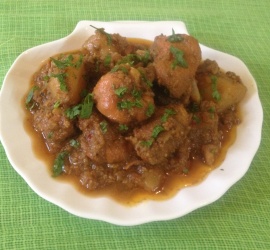
Goa is one place that always reminds me of happy care free days with good food, sun kissed beaches with laid back attitude people around. My first visit was as a little one with my parents and brother. All my brother and myself did was soak ourselves in the pool and beach alternatively.. Followed with eating meals and brunches non- stop .Till date it’s the best holiday for me. My next visit was a few years back, again with my parents and two kids. This time it was more of exploring the place, food and culture .Its kind of hard to impress my gal but she  fell in love with goa and ended up saying get me married to a guy here please. She still is crazy about vindaloo , xacuti and bibenca. ( all these are Goan dishes not guy’s names ) so for the love towards goa, every now and then I keep trying out Goan recipes to cosy  up. This recipe was taken note from the telly which was made with mutton. I have used chicken instead and no complaints at all as it was deliciously warming endowed with a lovely meaty texture. The aroma of fried ground spices with the chicken hits you at the right spot. This dish can be served any time of the day with anything and everything. I serve it as a side with rice,  chapathis, idli , dosa , rotis, bread …..

Ingredients

Ingredients
Quantity
Chicken / mutton1 kg
Potatoes-6 cubed
Bay leaf2
Coriander seeds 1 teaspoon
Cloves 2
Onions4 chopped + 2 sliced
Coconut grated 1 cup
Black pepper corns1/4 teaspoon
Cinnamon2 one inch pieces
Dry red chillies2 broken to 2
Oil 4 tablespoons + 4 tablespoons

Ingredients to marinate

Ingredients
Quantity
Turmeric powder 1 1/2 teaspoon
Red chilly powder4 teaspoons
Garam masala power 4 teaspoons
Lime juice1 lime

Ingredients to grind

Ingredients
Quantity
Garlic-10 flakes
Green chillies 6
Ginger2 inch piece

To garnish

Coriander leaves- chopped few to garnish

Method

  1. Grind the ingredients below the to grind ingredients list together to a smooth paste .Add with the marinating ingredients and mix well with the cleaned chicken pieces and cubed potatoes.
  2. Marinate for one hour .Heat oil in a heavy bottomed pan . Add pepper corns , coriander seeds , cloves , cinnamon, dry red chillies and sliced onions . Sauté for 2-4 minutes until s good aroma arises .
  3. Top with the grated coconut and fry until crunchy and gets to deep gold color. Remove from heat and cool completely. Grind to a coarse paste .Heat 4 tablespoons of oil in another pan .
  4. Top with the Bay leaves and chopped onions . Fry to pink in color. Add the marinated chicken and potatoes with half cup water . Bring to boil adding salt to taste .
  5. cook until the color of the chicken and potatoes change . Takes about 6-8 minutes . Add the ground coarse paste .
  6. Mix well and cook until the chicken and potatoes are cooked and oil separates .
  7. Garnish with chopped coriander leaves and serve hot .

Notes

The same recipe can be done with mutton as well


pineapple peel wine

Share Button

image3(4)

image2(5)

Preparation Time : 20 minutes + 21 days

Cooking Time      : nil

Serving               : 4 members

Description

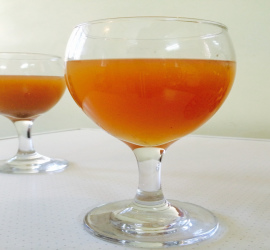
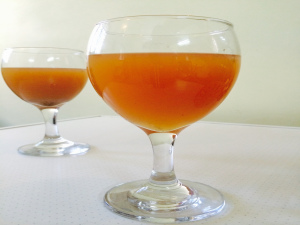
Wine has always mesmerised me as a kid wondering what it would taste like to the colour and smell of it. Studying in a Christian  boarding school, I used to attend the mass every Sunday as I was in the school choir. Seeing others have round corn chips dipped in to wine, made me wonder even more. I used to ask all my fellow Christian mates about the taste. Our head mistress mrs. Elsama Thomas would make wine at home and have seen her serve it to some staffs as well. All I knew was wine was made from grapes and has a deep redish thick purple colour. Later when my class mate Liju told me he had pineapple wine in Germany  on a holiday which was deep golden yellow in colour. I just fell for the way he described it to me. My crazy little mind just stored this for keeps.. Not sure why ? A few months Back I came across a recipe of home made pineapple wine in Nisahomy.com – cooking is easy. A blog that I have been following for quite some time. I jumped up with joy and gave a try to the recipe. Waited for nearly a month to see the results and as Liju had described to me it had a deep golden yellow colour . As we are not supposed to have wine for religious reasons , I packed the wine for my moms friend suganthi aunties family. As I was packing it, gave 1/4 glass to my live in help to taste and let me know about the wine . She happily drank it and said it had a fruity flavour and was sweet. As she was finishing the wine she told me she was feeling a bit dizzy. I laughed it off thinking a home made wine can’t get you toxic and that too .. one made by me . Poor thing she really did mean it as she dozed off to sleep in a few minutes and woke up late night by eleven . I still have my doubts if she played a prank over me for some extra rest :-)). The wine did reach suganthi aunty and their entire family enjoyed the wine. Aunty did let me know that it was quite toxic but the flavours and colour was addictive. Well the golden oldie drink did make a mark. From playing an integral part in religious rituals to being hailed as an elixir, wine has enjoyed its glory days from a thousand years before. But is it really as virtuous as its touted to be ?? Still keeps me questioned about ??

Ingredients

Ingredients
Quantity
Pineapple skin of 2 pineapples
Pineapple slices 2-4 chopped
Water 1 1/2 cup
Sugar1 3/4 cup
Beaten egg white 1
Dry Ginger / chukku-1 tablespoon crushed
Cloves6
Cinnamon 2 sticks
Yeast1/2 teaspoon

Method

  1. In a ceramic jar, put all the ingredients one after the other . Mix with a wooden spatula.
  2. close with the lid. Cover the lid with a piece of cloth and tie it tightly with a string.
  3. place the jar in a dark place for 10 days . The next 11 th day , strain the wine.
  4. pour into a clean sun dried bottles and place in a dark place for another 21 days to mature.
  5. In case you can’t wait, have it after five days of bottling.