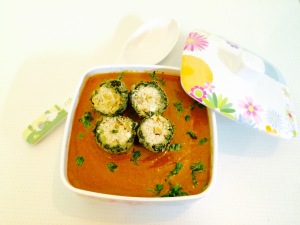
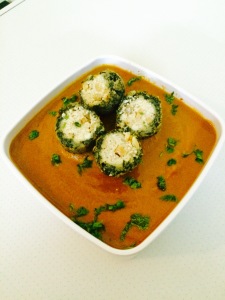
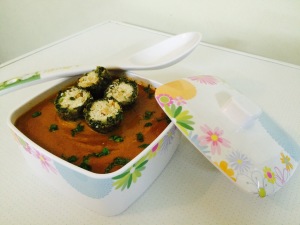
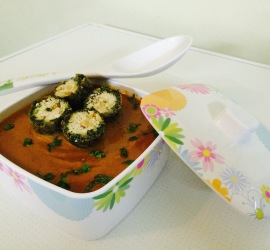
Spinach panner balls in butter gravy

Share Button

FullSizeRender (5)

IMG_7631

FullSizeRender (4)

IMG_7633

IMG_7635

IMG_7634

FullSizeRender (3)

FullSizeRender (2)

FullSizeRender (1)

Preparation time  :  30 minutes
Cooking time       :  35 minutes
Serves                 :  5 members

Description

The carnivores me is trying my best to add more of vegetarian dishes into my regular menu as there is a big complaint that my posts are over dominated with non – vegetarian dishes. To break this, I have been into trying a lot of vegetarian dishes as I am clueless with the flavors and combinations that work wonders with vegetarianism. This recipe is a try from one of my stained recipe books but have no clue as to whose recipe it is. My instinct’s tell me it might be rupal bandarie’s. Whose ever it is, it sure is for keeps. I had my doubts about the outer cover of spinach not binding together but I was put to shame this time. I have done my bit of trimming and changes to the original recipe from my recipe book. The final visual look with the contrasting colors of green, white and red sure imparts vibrancy to the dish making you want to crab the dish. Deep contrasting flavours with simple but effective combination of ingredients that is sure to feed and please a crowd. The beauty of this recipe is in its multitude of textures, soft and firm, crisp and juicy. I got so addicted to this dish, I actually ended up eating it three days in a row. Shameless me :-)).

Ingredients for the spinach balls

Ingredients
Quantity
Boiled Spinach300 grams chopped
Gram flour3/4 cup
Garlic3 chopped
Green chillies2 chopped
Cumin1/2 teaspoon
Saltto taste
Oil1 tablespoon

Ingredients for the filling

Ingredients
Quantity
Grated panner30 grams
Red chilli flakes1 teaspoon
Saltto taste
Fennel seed powder1 /2 teaspoon
Cashew nuts6 powdered
Poppy seeds1/2 teaspoon

Other ingredients

Ingredients
Quantity
Cornflour1 cup
Oilto deep fry

Method for spinach balls

  • Heat oil in a pan. Crackle the cumin seeds. Top with garlic and green chillies. Sauté to golden.
  • Add the gram flour and stir for 3 minutes. Top with the boiled spinach with out water. Season with salt to taste.
  • Mix well and cook until the spinach starts leaving the sides. Remove from heat and cool completely.
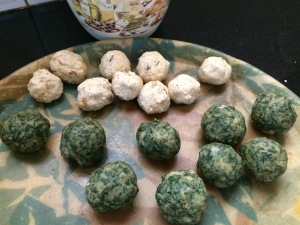
  • Mix all the ingredients together for the panner filling.
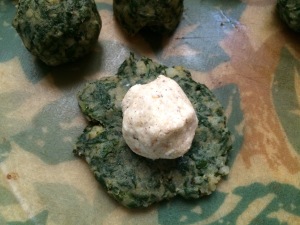
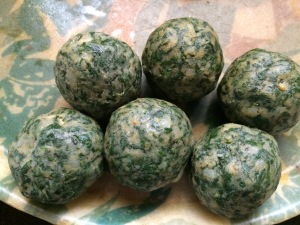
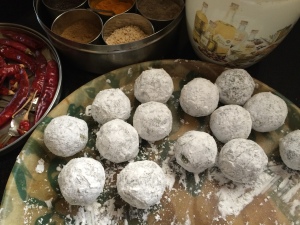
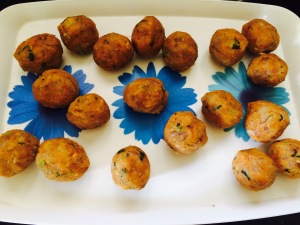
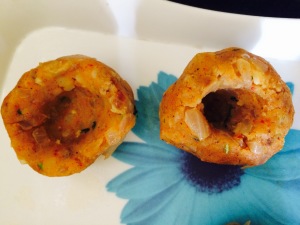
  • Take a lemon size ball of spinach mix. Flatten it. Place a small ball of panner in the centre of the flattened spinach and bring the edges of the spinach towards the centre covering the panner ball. Roll to a ball gently with no cracks. Do the same to get more balls.
  • Roll each ball over cornflour. Heat oil to deep fry. Drop the balls in batches of four at a time and deep fry to golden. Drain and set aside.

Ingredients for the gravy

Ingredients
Quantity
Onion3 big sliced
Tomato 6 big chopped
Cinnamon2
Clove2
Cardamom3
Ginger garlic paste1 teaspoon
Butter5 table spoon
Oil1 table spoon
Sugar1 teaspoon
Saltto taste
Cashew nuts10
Chilli powder1 table spoon
Coriander powder1 1/2 table spoon
Turmeric powder1/4 tea spoon
Fresh cream1/4 cup
Kasuri methi leaves1/2 teaspoon crushed
Coriander leavesfew chopped

Method for gravy

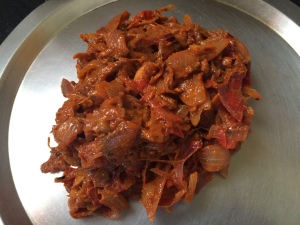
  • Heat oil with 4 table spoons butter. Add cinnamon, clove, cardamom and cashew nuts. Fry to light brown. Add onion and fry to transculent. Top with ginger garlic paste and fry till crisp. Add the tomato, chilli powder and coriander powder. Mix well and fry till the tomatoes let out some juices out.
  • Cool the gravy and blend to a smooth paste. Strain. Add 1 tablespoon butter, sugar, salt to taste, cream, kasuri methi to the strained gravy and simmer till all the flavours infuse together. Taste and adjust seasoning.
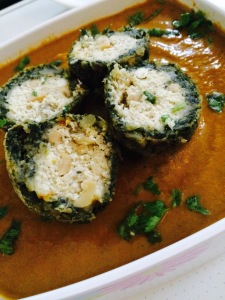
  • Drop the spinach dumplings and cook in low heat for three minutes. Serve hot by cutting the dumplings into equal halves and placing them over the gravy.
  • Garnish with cream , butter, chopped coriander and grated panner. Serve hot with roti’s or pulao’s.

Lemon parfait with strawberry sauce

Share Button

FullSizeRender

Preparation time : 30 minutes
Cooking time      : 20 minutes + setting time over night in the refrigerator
Serves                : 8 members

Description

The spark of the bell to ring with in me to realise that food was my passion happened pretty late. Though through out my days in school as a kid or any time of my life till date, I have been the most happy when ever I get to play my simple or crazy tricks with food. As the saying goes… It’s always better late than never. Now coming to this dessert that was bought by Aanchal Chethan for the second anniversary celebration of sauté, fry n bake who is also a passionate foodie like me who has gradated from le corden bleu London. I was so very envious about her when I got to know she’s going to study there. How I wish, I could do some thing similar by just rewinding my cycle of life and adjust it accordingly. All of us at some point of time do think if only I could change things… Crazy breed’s we all are.. I just could not stop eating the tastefully crafted lemon parfait as the tanginess with the sweet just was epic and divine. I made sure to save the left overs for myself and managed to eat the French fatty culprit alone too. Deeply seductive dessert that is hard to stop with one serving. Umm a recipe from le cordon bleu , London does have its contemporary culinary canon and techniques required to master this dessert. I have been wanting to give it a try but some how, I have not gained the confidence yet to go ahead with it. I shall wait for the right moment to over come my fear for sure. Until then, I am eager to see all your trial and errors with this complete dessert.

Ingredients for lemon parfait

Ingredients
Quantity
Milk250 ml
Lemon juice150 ml ( add half the amount as Indian lemons are way too sour )
Egg yolks4
Castor sugar250 grams
Cornflour12 grams
Flour12 grams
Egg whites4
Lemon zest2 lemons

Method for lemon parfait

  • Boil milk and lemon juice separately. Combine and reboil. Add lemon zest.
  • Whisk egg yolks and 110 grams of sugar to pale. Add flour and cornflour.
  • Pour boiling milk and lemons juice onto the yolk mix, whisk vigorously.
  • Return mix to heat and boil, continue whisking vigorously until thick and boils a little from the centre.
  • Cook the remaining 120 grams sugar with water to 116 degrees. Whisk the egg whites and pour sugar syrup onto the egg whites to make an Italian meringue.
  • Gently combine the Italian meringue and lemon mix once cooled.
  • Spread mix in a shallow dish to set overnight in the refrigerator.

Ingredients for the strawberry sauce

Ingredients
Quantity
Sugar50 grams
Water20 ml
Strawberry purée200 ml
Lemon juice1/2 a lime ( omit this if using Indian strawberries )

Method for strawberry sauce

  • Cook sugar to 108 degrees.
  • Pour into the strawberry purée and combine. Boil adding lemon juice.
  • Pass through a sieve. Cool and chill.

To serve

  • Drizzle the strawberry sauce over the set lemon parfait and serve chilled.

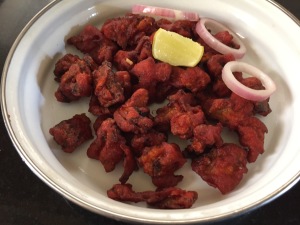
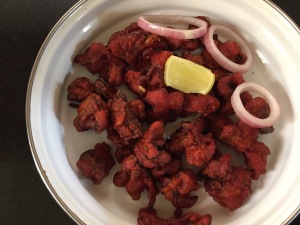
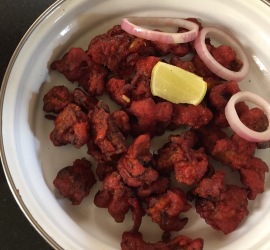
Mushroom 65

Share Button

IMG_4935

IMG_4936

Preparation time  : 20 minutes + 3 hours marination time
Cooking time       :  5 minutes
Serves                 :  4 members

Description

From the first time I got to see mushrooms in colourful story books from our school library to wild mushrooms grown between the grass lands of the Nilgiris. This special fungus did make me ponder to think about its taste, texture and smell. Those days back in 1980’s it was not available in India like now a days. I remember, when on a weekend outing with my parents we dined at the fern hill palace hotel. As always, I was looking for out of the box dishes from the menu card and there it was in block letters ” MUSHROOM OMELETTE “. I didn’t want to miss the opportunity of tasting mushrooms and placed an order. My dad, made sure to warn me ahead saying.. You are to eat the omelette even if you don’t like it looking at mom and my little brother, winking and making fun of me. My long awaited mushroom omelette arrived, excited, anxious me took my first bite of the omelette from my fork. As I started to chew, I felt a meaty textured, chewy bits mushrooms wrapped over eggs and melted cheese. I did like the taste and flavours of the mushrooms. The ambience of the Swiss chalet fern hill palace with its wooden carved bargeboards, cast iron gates and manicured garden with fir and pine tree’s sure did add in more glamour to the mushroom omelette which made me feel like a princess dining. My dad was curiously looking at me, checking out if I am going to waste the omelette. I told all of them it tastes really good and shared a bite with them too. My long quest of wondering about mushrooms came to an end with giving me a cherished memory itched with in me for ever. Coming to this dish, it’s just a vegetarian version done by substituting mushrooms instead of chicken following the chicken-65 recipe. Food always has its own way of surprising us.. I hope this humble recipe also does the same to each one of you.

Ingredients
Quantity
Button mushrooms1 packet cleaned whole
Ginger garlic paste1/4 teaspoon each
Chilli powder1 tablespoon
Turmeric powder1/4 teaspoon
Curd1/4 cup
Cinnamon1 inch piece
Cloves2
Cardamom1
Pepper powder1/4 teaspoon
Cumin powder1/4 teaspoon
Lime juice1/2 lime
Vinegar1/4 teaspoon
Saltto taste
Orange Red food coloura pinch
Cornflour1 tablespoon
Maida1 tablespoon
Egg1 ( optional)
Oilto deep fry

To garnish

Ingredients
Quantity
Onion1 sliced to rounds
Lemon wedgesFew

Method

  • Grind all the ingredients together except for the mushrooms to a smooth paste.
  • Marinate cleaned mushrooms in the masala paste for 3 or more hours.
  • Heat oil to deep fry in a heavy bottomed pan. Fry mushrooms in batches for 5 minutes.
  • First 1 minute on high heat and then on medium heat for 4 minutes. This way you get a crisp out side and a soft, moist cooked mushrooms inside.
  • Once the mushrooms are fried, drain. Garnish with sliced onions and lemon wedges over the mushroom 65 and serve hot .

Reshmi Seek Kebab

Share Button

image1 (3)

image2 (2)

Preparation time : 30 minutes
Cooking time      : 10 minutes
Serves                : 8 members

Description

The first thing I always order when in an Indian restaurant would be a tandoori platter. I am a die hard fan of any thing done in a tandoor. The char grilled flavour it lends to any thing from meat, vegetable to rotis is Devine. The aroma and smoke it generates.. Specially when in a foreign country…. My heart melts and I get goose bumps for sure. I really am not aware of why this love I have towards tandoori dishes but it sure lights me up. I am adventurous enough to experiment and try a lot with dishes using the tandoor. This kebab was a try I did when I had my daughter visit us on a short break. She wanting to eat a less oil meal. I was amazed at how the flavours complimented each other so well and it sure gave our blah lunch table a pop of refreshing flavours. Mixing the old and new usually crests some thing edgy that compels you to sit up and take notice. These kind of dishes that could be easily rustled up at home are always welcome any day to celebrate in style. So gear up and get ready to dazzle your loved ones with this stunning tandoor invention.

Ingredients
Quantity
Chicken mince1 kg
Butter to baste3 1/3 tablespoons
Cashew nut paste3 1/3 tablespoons
Panner grated3 1/3 tablespoon
Cumin powder2 teaspoons
Eggs whisked2
Garam masala powder1 teaspoon
Garlic paste4 teaspoons
Ginger paste4 teaspoons
Green chillies 3 teaspoons chopped finely
Green coriander leaves3 teaspoons chopped
Oil4 tablespoons
Onions3 1/3 tablespoons
Saltto taste
White pepper powder1 teaspoon
Yellow chilli powder1 teaspoon ( I didn't use as it was not in stock at home )

Method

  • Mix minced chicken, cumin powder, white pepper powder, yellow chilli powder, salt and oil. Keep aside for fifteen minutes.
  • Add the cashew paste, Ginger paste, garlic paste, onions, green chillies, coriander greens, garam masala powder, grated panner and eggs. Mix well.
  • Divide the mixture into eight equal parts and make balls.
  • Pass the skewer through the balls of mince, moisten your hands and spread the balls by pressing each along the length of the skewers until they are 8-10 cm long and about 4 cm apart.(I just rolled up the chicken balls to small logs as I didn’t have skewers)
  • Roast in a hot tandoor or oven at 175 degree Celsius for 8-10 minutes, basting with butter and roasting until lightly brown.
  • Serve with vinegar marinated onions as a starter.

Notes

  • The chicken mince mix might look too loose but it’s supposed to be so as only then we get a moist and succulent kebabs.
  • The chicken mince is quite hard to handle, be patient and roll them to logs with greased hands and grill them.

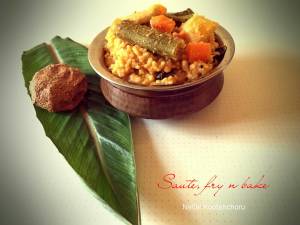
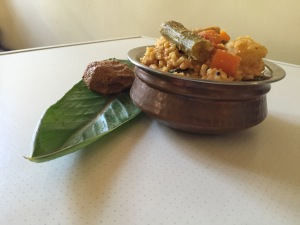
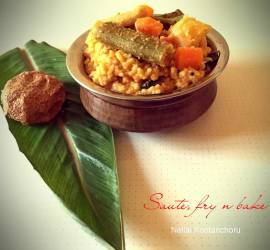
koothaan choru

Share Button


image19

image1 (1)

image2 (1)

image3 (1)

image5 (1)

image6 (1)

image7 (1)

image8 (1)

image9 (1)

image10

image11

image12

image13

image14

image15

image16

image17

Preparation time : 15 minutes
Cooking time      : 20-25 minutes
Serves                : 3-4 members

Description

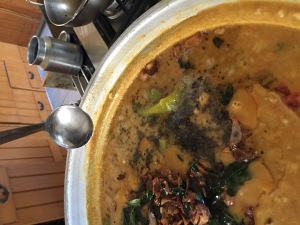
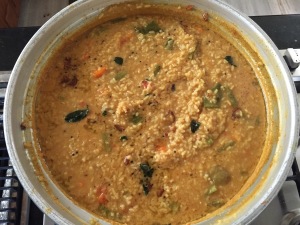
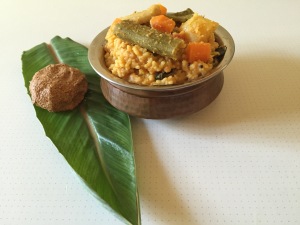
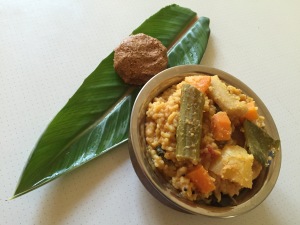
Being married to the other opposite end of Tamil Nadu from where I was bought up. Every thing from culture, language, practise,food to every bit was so very different for me. At that young age like all newly wedded brides, I used to just gaze at things around taking note of every word to move done by others. Trying my best to cope with to the local standards and demands. My bygone days of trial and error. Every day there was some thing new to learn and know about. I used keep my self entertained with Hubby dear’s cousin sisters. As always while catching up with them over the days up dates, one cousin told she had Koothaan choru for lunch . I didn’t know what it was, asked her what it is and she was clue less about how it’s made but just told me its yum. I made sure to ask my mother – in – law about the dish and she made it the following week. It was mushy mass of rice, dal and country vegetables cooked together. Goodness oozing in all means. This dish is an authentic dish very own to triunelveli ( that’s my home town). Mainly made by farmers wife’s who accompany their husbands to work in the fields. The dish by itself says it all as its one pot dish done with rice, dal and vegetables cooked together. That makes a deliciously satisfying packed lunch to keep you going all afternoon. So, let’s all get to be a bit loyal to our old school recipes by giving it a try and adding it to our regular’s at home.

Ingredients
Quantity
Rice ( boiled normal South Indian rice )1 cup
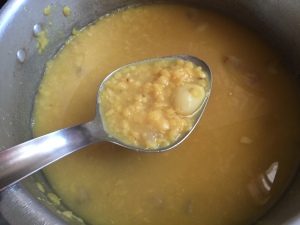
Cooked Thoovar dal1/2 cup
Water3 and a half cups
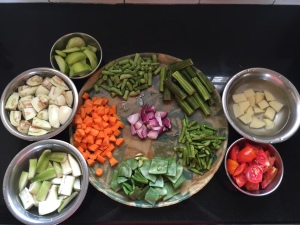
Country veggies chopped -(raw banana - 1, carrot -1 , beans -4, brinjal -2, raw mango -1/4, potato -1, drum stick -1 )
tomato1 chopped
Small onion1/4 hand chopped
green chillies2 slit
Asafetida1/8 teaspoon

Other ingredients

Ingredients
Quantity
Red chili powder1/4teaspoon or to taste
Turmeric powder1/8 teaspoon
Sambar powder1 teaspoon
Saltto taste
Tamarind pulp2 tablespoons
Drum stick tree leaves1/4 cup

Ingredients to grind to a paste

Ingredients
Quantity
Grated coconut1/4 cup
Cumin seeds1/8 teaspoon

Ingredients to temper

Ingredients
Quantity
Gingely oil 2 tablespoons
Mustard seeds1/8 teaspoon
Black gram dal1/8 teaspoon
Small onions4 chopped
Curry leavesfew
Vengaya vadagam2 to 3 crumbled ( optional but adds a lot of flavor )

Method

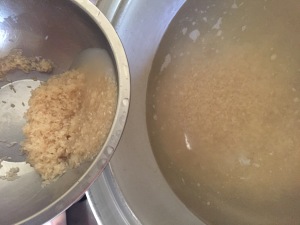
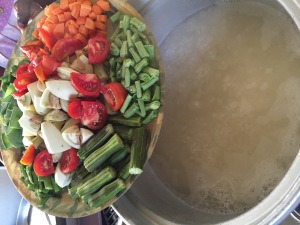
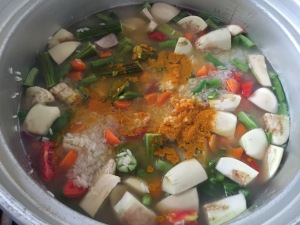
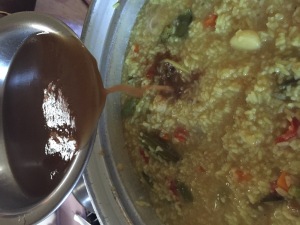
  • Boil rice and veggies with water, salt, turmeric powder and asafetida.
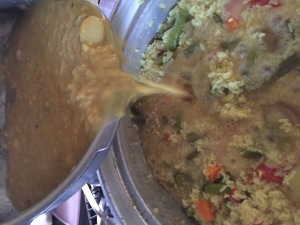
  • Once 3/4 cooked add cooked thoovar dal and ground coconut + cumin seeds paste.
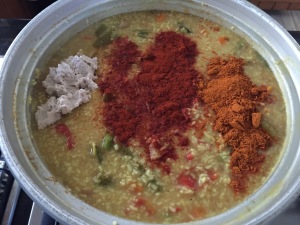
  • Mix well, adding tamarind pulp, chilly powder and sambar powder. Taste and adjust.
  • Bring to boil. Sprinkle with drum stick tree leaves and close the lid and cook on low flame for 10 to 15 minutes.
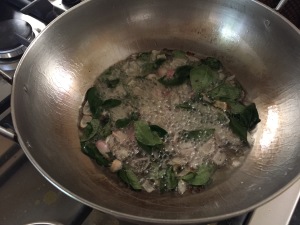
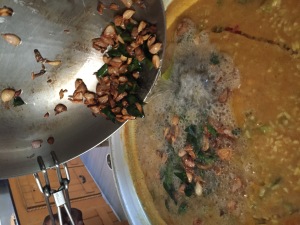
  • Heat oil. Temper with Mustard seeds, black gram dal, small onions, curry leaves and vengaya vadagam if you have. Pour over rice.
  • Mix well. Serve hot with appalam and ellu thovayal.

Notes

This rice has to be mushy and a bit loose . So add the given amount of water with out fail.


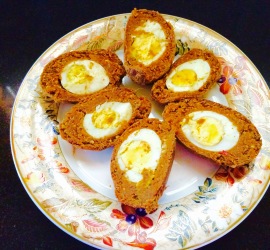
Mutta Kaima Urundai

Share Button

image9

image1

image2

image3

image4

image5

image6

image7

image8

Preparation time  :  30 minutes
Cooking time       :  20 minutes
Serves                 :  6 members

Description

There are times when your mind gets blank and does not work like it always does. Right now, I am in that state of blankness about this dish and what to recollect or write about it. A dish i got to know only recently after one of my cousin sister was married to a town in Tamil Nadu called eroad. Well, nothing out of the box but a tamilian reinterpretation done to the British scotch eggs and the North Indian nargisi koftas. We being a large family (hubby dear often address’s our family as a circus family) with 28 first cousins. All married with Tamil, Malayalam and Urdu speaking spouses. The latest addition, my last cousin brother’s NRI wife. So our food habits have also taken twists and turns as each addition to the family has its own influence through food and culture. I make sure to steal the authentic new recipes from every one for sure. Like wise this recipe was one such. I do make the same with quill eggs at time’s which is apt for single serving and adds a surprise element to the dish when bit in to see an egg inside letting temptation take over your senses. This dish is a perfect harmony of goodness and taste that I consider is best served during a festive season meal to create a memorable spread. So rock it with these sophisticated accompaniment In style all.

Ingredients
Quantity
Boiled eggs3
Mutton keema ( boneless mutton mince )150 grams
whole dry red chillies2
roasted gram/Pottu kadalai/varu kadalai1 tablespoon
cashewnuts4
fennel seeds1 tablespoon
grated coconut2 tablespoons
small onions/Shallots6
garlic flakes3
grated ginger2 teaspoon
cardamom1
cinnamon1/2 inch
clove1
curry leavesfew
Raw egg1
Saltto taste
Oilto deep

Method

  • Heat oil. Add cinnamon, cardamom, clove and curry leaves.Once they crackle add ginger and Saute.
  • Top with garlic,small onions and saute for a few seconds.
  • Add the green, red chillies, cashew and saute till the ingredients get roasted well.
  • Then add fennel seeds and saute until a good aroma arises. Add coconut,saute it.
  • Finally add roasted gram and give a slight roast.set aside and cool completely.
  • Heat little oil and saute the minced mutton for 5 – 8 minutes.
  • See to it that it gets half cooked and water gets dries up completely. Cool the minced mutton.
  • Grind all the roasted ingredients together except for minced mutton with out adding water. Then add mutton and salt.
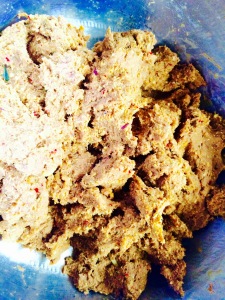
  • Grind to get a thick smooth dough like mass of mixture.
  • Add egg to the ground mixture and mix well. Taste and adjust seasoning.
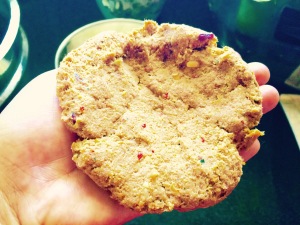
  • Make big lemon sized balls and flatten with no cracks.
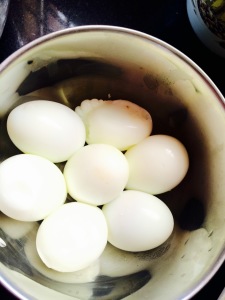
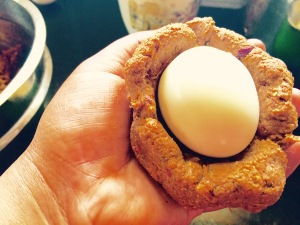
  • Place one boiled egg in the middle and slowly cover the boiled egg entirely with the minced meat mix with no cracks and holes.
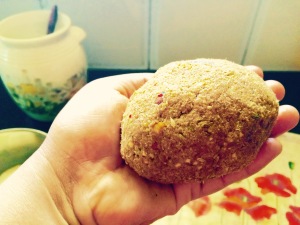
  • Do the same with all the boiled eggs and ground minced meat mix.
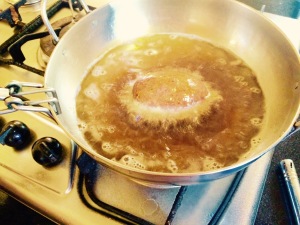
  • Heat oil to deep fry in medium flame. Deep fry the mutta kaima urundai to a dark golden brown colour and crisp.
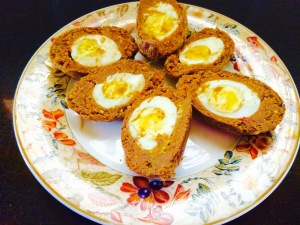
  • Drain, cut into equal half with the help of a sharp knife and serve hot as it is.

Notes

  • Make sure to use the exact quantity of ingredients mentioned or else the minced meat cover will not taste or turn out good.
  • While grinding the mixture don’t add water.Or else it will absorb more oil.
  • Heat oil in medium flame to deep fry. If fried in high flame the outer layer becomes dark soon but it will not get cooked inside.
  • you can follow the same to do chicken kola urundai.
  • Make sure there are no cracks before deep frying the mutta kaima urundai as they tend to suck in oil and look terrible.

Butter scotch cake

Share Button

image19

image1

image2 (1)

image3 (1)

image4 (1)

image5 (1)

image6

image7

image8

image9

image10

image11

image12

image13

image14

image15

image16

image18

image20

Preparation time  :  35 minutes
Cooking time       :  30 minutes + assembling and decorating 20-25 minutes
Serves                 :  10 members

Description

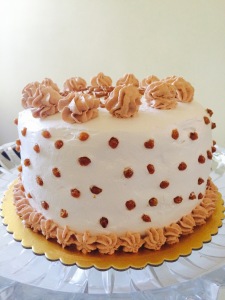
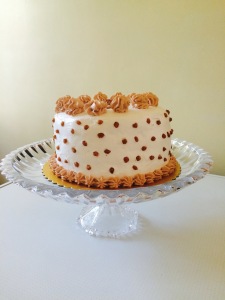
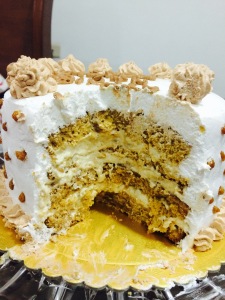
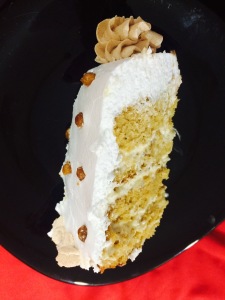
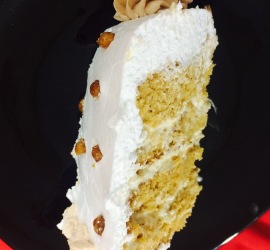
Birthday cake’s always bring in a splash of child like delight to all of us. I remember those by gone days of our local bakery birthday cakes with florescent coloured hard icing roses where the birthday celebrating person gets to choose their favourite rose first, with the rest of us just left to gaze. I always wanted those half bloomed roses but have never ever finished eating one. Then came the days of ordering 2 1/2 kg cake at boarding school and it always had to be a chocolate cake. The joy in cutting the cake to celebrate with friends and there after getting to manage the left over cakes was a big task. Umm.. Birthday’s are natures way of to telling us to eat more cake. After marriage birthdays were just another normal day until my beloved gal started to bake and decorate cakes. She made a lovely fondant cake with roses (yet again roses that took me back to those by gone days of hard icing roses) and after a long while we as a family were together to celebrate. seeing my gal bake and decorate cakes and helping her when ever I could made me want to give a try as well. I did with my baby steps of few cakes as a beginner but not to the extent of my gals perfection. Now it’s become a must at home to bake a cake for every ones birthday and when it is hubby dear’s birthday who was sick then.. It had to be the best as well to pep him up. Broke my head and came up with this butter scotch cake. Made it but could not taste it until it was cut. The cake was cut with just the two of us letting us know the reality of the future that’s ahead for our togetherness. Sick hubby dear loved the cake. I was blown away and could not stop with one big piece. Made sure to share the cake immediately with my in – laws, cousins and my friends not wanting to gulp in more calories. Took the remaining to my Zumba class and it was a celebration of cake eating that took all of us to the child like delight I mentioned before….. Well cakes are for life not just for birthdays.

Recipe source : taste of home .com

Ingredients for the cake

Ingredients
Quantity
Butter scotch chips2/3 cup ( I used caramelised nuts in sugar balls instead which taste like chikki )
Water1/4 cup
Butter1/2 cup
Sugar3/4 cup
Brown sugar3/4 cup
Eggs3
Flour2 and 1/4 cups
Baking soda3/4 teaspoon
Baking powder1/2 teaspoon
Salt1/2 teaspoon
Butter milk1 cup

Ingredients for filling

Ingredients
Quantity
Sugar1/2 cup
Corn flour1 tablespoon
Condensed milk1/2 cup
Water1/3 cup
Egg yolk1 lightly beaten
Butter scotch chips1/3 cup ( I used caramelised nuts in sugar which taste like chikki )
Butter2 tablespoons
Walnuts1 cup chopped
Coconut flakes1 cup ( I used fresh grated coconut )
Whipped cream3 to 4 cups or more depending on the decoration done

Method

  • Preheat the oven to 375 degree Fahrenheit. Line two 9 inch cake pans with butter paper and grease well.
  • Microwave the butter scotch chips and water for one minute. Mix in every interval of 20 seconds to smooth. Cool to room temperature.
  • With the help of an electric beater beat butter and sugar to fluffy. Add eggs one at a time beating well.
  • Mix flour, baking powder, baking soda and salt together.
  • Alternatively add flour mix, melted butter scotch mix and butter milk into the butter and beat well in three batches. Mix well to get a cake batter.
  • Pour into prepared pans. Bake at 375 degree Fahrenheit for 25 to 30 minutes to done in the preheated oven. Remove and cool completely.

Filling method

  • Mix sugar, corn flour and milk together. Bring to boil over medium heat.
  • Remove the mix from heat and add the beaten egg yolk mixing vigorously making sure it blends into the milk with out getting split or cooked.
  • Place over low flame and keeping stirring for two minutes.
  • Remove from heat and add the butter scotch nuts, butter, coconut and milk maid. Mix well and Cool completely.
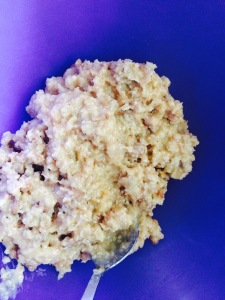
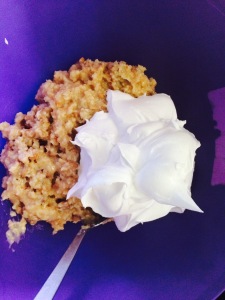
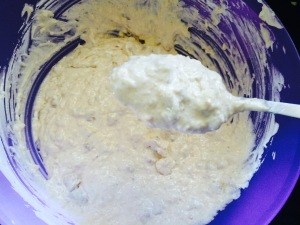
  • Add one cup of whipped cream to the cooled filling and keep aside in the refrigerator.

How to proceed

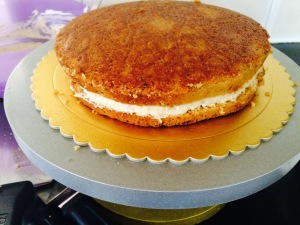
  • Cut both the cooled cakes horizontally into equal halves.
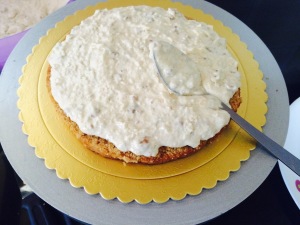
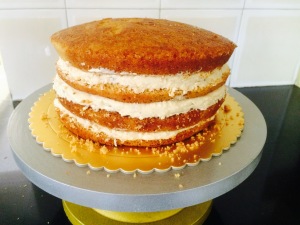
  • Sandwich them with the filling and stack then one over the other.
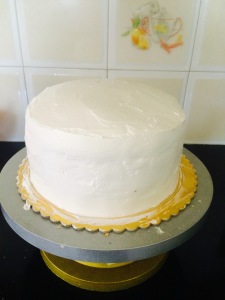
  • Frost the stacked cake with remaining whipped cream.
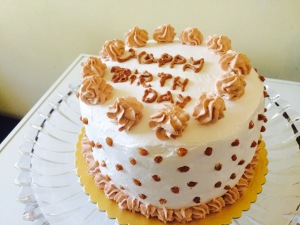
  • Decorate with butter scotch bits. Cake is ready.

Notes

Store the cake in the refrigerator if humid.


Butterfly Chicken

Share Button

image2

image4

image5

image3

Preparation time  :  20 minutes + 1 and a 1/2 hour marination time
Cooking time       :  8 -6 minutes for each batch deep fried
Serves                 :  5 members

Description

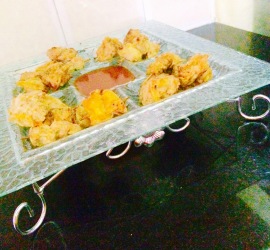
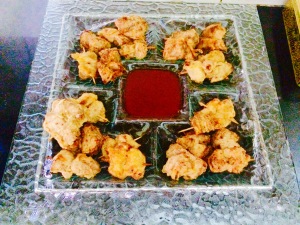
It’s always a pleasure to be with friends and good food around. Like wise, on a visit to my friend Lalitha’s home for a high tea party. She had made these butterfly chicken which was irresistibly Devine. A few weeks passed by and I came across the same dish in a foodie group shared by Naveen hafeez. Saved the innovative concept recipe and gave it a try to add more glamour to my eid spread. The butterfly chicken was moist inside with the goodness of the crisp potato cover sure raised eye brows in the table. My friend Lalitha had her butterfly chicken air fried where the chicken wasn’t as moist as the deep fried ones I made. This recipe is for sure keeps as this dish does not need a time or reason to be eaten. I tasted one piece of the crisp, chunky dish, followed it with another and another, and couldn’t stop ( shameless me ). This simple and basic dish works well as a finger food for parties. Every time I have a large party or have to set a buffet, I make it in mini sizes. So they just vanish in the mouth. For a sit down meal, I recommend making larger ones. Let’s just say you try this recipe once and you will be making many of these over and over again under special requests.

Recipe source : Naveen hafeez

Ingredients
Quantity
Potatoes2 sliced into thin rounds
Boneless chicken1/2 kg cubes
Egg1
Flour5 tablespoons
Salt + pepper + chilli flakesto taste
Soya sauce1 teaspoon
Red chilli sauce1 teaspoon
Baking powder1 teaspoon
Oilto deep fry

Method

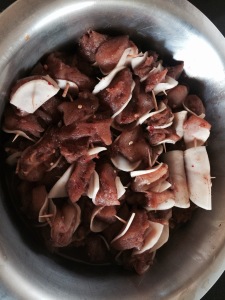
  • Mix cleaned chicken with baking powder and set aside for ten minutes.
  • Wash the chicken well and drain.
  • Marinate chicken with salt, pepper, red chilli sauce, soya sauce, egg and red chilli flakes for half an hour in the refrigerator.
  • Place one piece of marinated chicken over a potato slice. Fold the potato slice into half with the chicken between and skewer into a tooth pick.(can do one piece, two or three according to your wish as you want to serve).
  • Do the same to all the potato slices and chicken pieces. Place in the refrigerator .
  • Mix flour, salt and chilli flakes to taste with little water to get a loose watery batter.
  • Heat oil to deep fry. Dip each chicken skewer into the batter and drop into medium hot oil in batches.
  • Deep fry to golden and crisp. Drain and serve hot with dips of choice.

Paped Cups

Share Button

image1

image2

image3

image4

image5

image6

image7

image8

image9 (1)

image10

Preparation time : 10 -15 minutes
Cooking time      :  5-8 minutes
Serves                : 10 members

Description

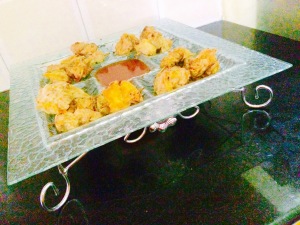
Pappadam, appalam, paped or with its any form.. I just love it. A meal had with a pappadam beside sure does help me gulp in a bit more. The pappadam was there on the table every lunch. Puffed up, crisp and light ( well it’s the Kerala pappadam’s ) as a kid. Me and my evoking foodie childhood memories. In fact, my dad was nick named pappadam samy. I really don’t know why? Must be because of the love he had towards it and I guess it was just passed down to me. I really get excited to know new recipes that are done with things I love and this one was sure for keeps. Who will not want to give a try to this fuss free, gratifying and popular with every one dish. As I started to make this dish, my cook keenly taking note of what I was up to, says ” amma, you turn into a child once you step into the kitchen and play around like a kid in the candy store with utter joy. Don’t you get tired “. I just smiled and the saying “A man who loves good food has a way of making it gravitate toward his kitchen.” Came into my mind. Coming to the dish,it is no more than an easy assembling job and is prepared in advance making it ideal for entertaining large groups when pressure is mounting and time and energy declining. These cups can be made 1- 2 days ahead and stored in air tight containers at room temperature. It’s best served as an appetiser or a snack at a party adding so much more glamour letting the guests oomph about us as self – taught culinary whizz’s.
Ingredients
Quantity
Masala pepper paped's10
Water2 Cups

Other things required

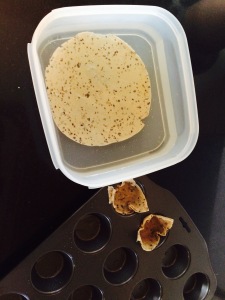
Small Muffin tray1
Sharp Kitchen scissor1

Method

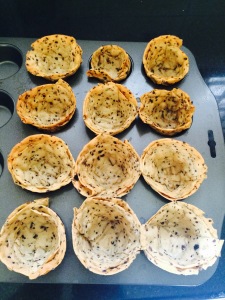
  • Preheat oven to 180 degree Celsius for ten minutes.
  • Pour water into a wide vessel with high sides. Grease the mini muffin tray with oil in to each dent generously.
  • Pour water into a wide, flat mouthed vessel with high sides. Place one masala pepper paped into the water for 30 -50 seconds to soften and get pile able.
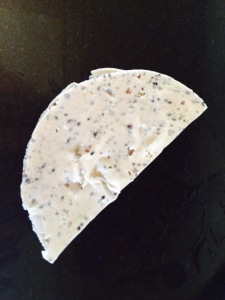
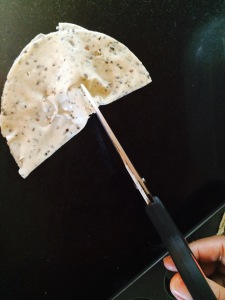
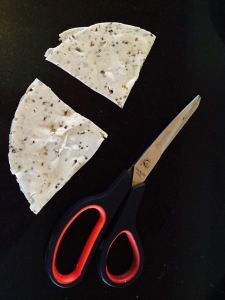
  • Remove the paped carefully and fold into a semi circle. Cut into equal triangles with the help of a sharp kitchen knife.
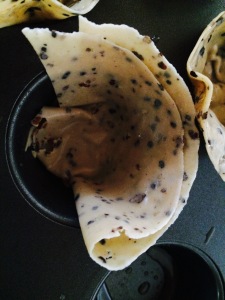
  • Place one paped triangle with the “V” shape placed into the bottom greased muffin tray dent half way and the rest coming up to the sides of the dent.
  • Take the other cut paped triangle and do the same as above over lapping the previously placed paped triangle to get a cup shape.
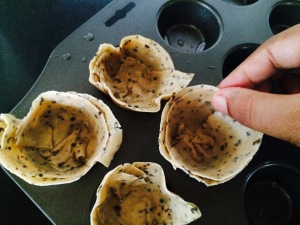
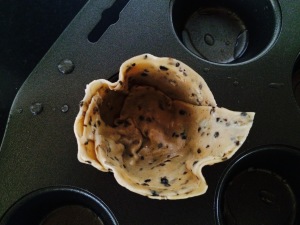
  • Press well making sure both the triangles stick together and has no gap to get a cup once baked.
  • Do the same to all the remaining papeds as above. Bake in the preheated oven for 5 to 8 minutes or until cooked and gets crisp with out getting burnt.
  • Remove the muffin tray from the oven. Cool a little so the paped cups get crisp ( if left for too long they tend to get soggy ).
  • Remove the cups and store in dry air tight containers until needed to be used.
  • Just before serving, fill with filling of choice and serve immediately in style.

Birds Nest

Share Button

image1

image2

image3

image4

image5

image6 (1)

image7

image8

image9

Preparation time :  20 minutes
Cooking time      :  35 minutes
Serves                :  5-6 members

Description

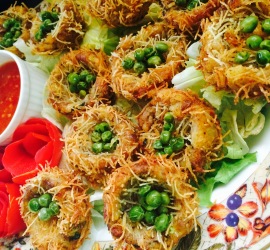
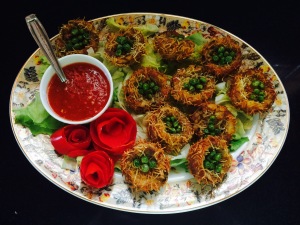
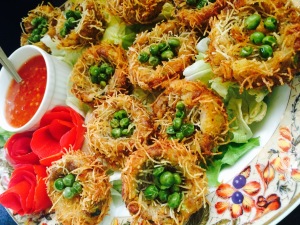
Deconstructing a dish…. I did get to hear this for the first time watching master chef Australia. Took me time to know what it means and how. Well it’s no high end mathematics but the regular cheats way we home chefs do to represent our regular dishes in a new avatar. This birds nest as well is just a deconstruction done to my regular cutlets when I had to host a special feast for guests at home. It’s always a joy to do dishes that are with in your comfort zone when pressed for time to entertain. Your entire system just works fine like a computer knowing what to do exactly even when blind folded. So this was the best option I had in mind to cheat the guests and all at home with this new thrillingly innovative reconstructed dish. I was blown away to watch it transform into some thing beautiful. Tasted it and was a pleasing mix of textures, Devine with the crispy vermicelli and a bite of the green peas. This dish sure has taught me that taste does matter but the visual look and presentation of any dish matters equally. As , if I had made these into cutlets I should have sure had left overs but with its new deconstructed look it was all let to graze, vanishing in seconds which made me smile with this sure fire crowd pleasure.

Ingredients
Quantity
Potato1/2 kg ( boiled , peeled and mashed )
Boneless chicken200 gm ( optional )
Turmeric powder1/4 tea spoon
Onion3 chopped
Garam masala powder 1/4 tea spoon
Green chillies4 crushed
Ginger garlic paste1/2 tea spoon
Red chilli flakes1 tea spoon
Coriander leaves2 table spoon chopped
Mint leaves 1 table spoon chopped
Pepper and saltto taste
Lime juice1/2 lime
Egg1 beaten with salt and pepper to taste
Fried vermicelli2 cups
Oil2 table spoons and to deep fry
Boiled green peas1 cup
Boiled sweet corn1/4 cup

Method

  • Boil chicken with turmeric powder, ginger garlic paste and salt to taste. Cook till dry n shred the chicken.
  • Heat 2 tablespoons of oil in a non stick kadai. Add onions and green chillies and fry to translucent. Add all the other ingredients one by one except for egg, vermicelli, lime and oil to shallow fry.
  • Sauté till all the flavours infuse together. Remove from flame add lime juice. Mix well taste and adjust seasoning and cool.
  • Make equal goose berry sized round balls of the potato – chicken mixture.
  • Insert your thumb into the center and just widen the sides to get a shallow dent like a nest .
  • Dil the nests into beaten egg. Then place over the vermicelli and make sure it sticks all around with out the nest shape being spoiled. Do the same to all the nests .
  • Heat oil to medium high and deep fry the birds nests in batches of 3-4 on both sides for 2 minutes on each side to a golden brown in colour gently.
  • Drain over absorbent paper. Fill the crisp nests with boiled green peas and sweet corn ( I was out of stock in my pantry and just had to go ahead with green peas alone ).
  • Serve hot with tomato ketchup .