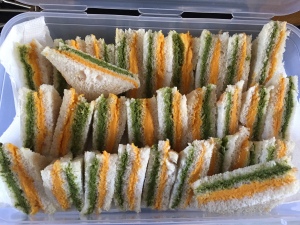
Instant Rasam powder

Share Button

unnamed8

unnamed7

unnamed6

unnamed5

unnamed4

unnamed3

unnamed2

unnamed1

unnamed

Preparation time : 20 minutes
Cooking time      : 18 minutes
Serves                : 8 members

Description

I have always wondered how do people make rasam with rasam powder’s that are stored in air tight jars as I was taught to make rasam in various way’s but always to grind a powder fresh just before making the mighty rasam. I know it’s no big deal but to us South Indians, our rasam means a hell lot. Hubby dears far relatives do visit us quite often, on one such visit one of his cousin mentioned about the rasam powder. I immediately asked her to make a batch for me. I made sure to take note of the ingredients and how it was made. That day the rasam also was made with the instant rasam powder. It tasted equally good as the fresh powdered rasam. My girl comes to kitchen and asks me, what’s being made. The entire house smells so good. (my true blue vegetarian girl, the aroma of the rasam tickled her nostrils ) seeing the rasam powder, she took the entire batch for herself. I made another batch again the next day. From then till date, my girl makes sure to ask for rasam powder on her every visit. I do it with pride as I have grown up seeing my grand mother pack so much food and edible goodies for her six married daughters homes after their every visit. It is hard work but the memories that will be itched with the food sent over will remain for ever and ever. As all my aunts even till date do talk about how my grand mother used to send them hands full after their every visit. We girls have so much pride in showing off about any thing and every thing connected to our parental roots. Cliche we .. Poor men .

Instant Rasam powder

Ingredients
Quantity
Ghee1 teaspoon
asafoetida1/4 teaspoon
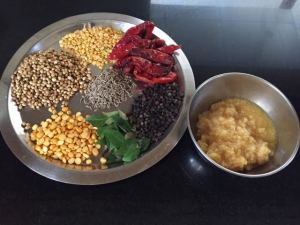
Toor Dhal1 and a 1/2 cups
Channa Dhal1 and a 1/2 cups
Pepper1/4 cups
Coriander seeds3 cups
Whole dry red chilly20 ( can increase if you want more spice)
Cumin seeds1/4 cup
Curry leaves1/2 cup

Method

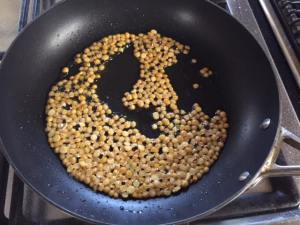
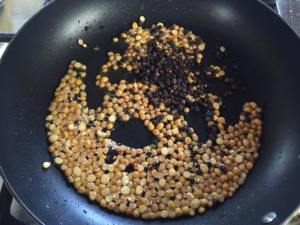
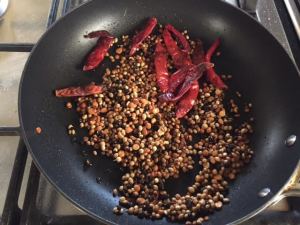
  • Heat ghee in a wok, add toor dhal, channa dhal and fry till golden brown and add pepper corns.
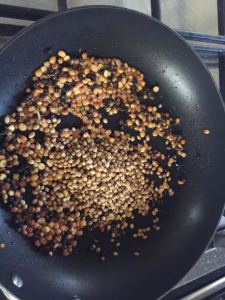
  • Once they pepper corn splutters, add coriander seeds and fry to  golden brown.
  • Add dry red chillies and fry till the red chillies inflate and are fried.
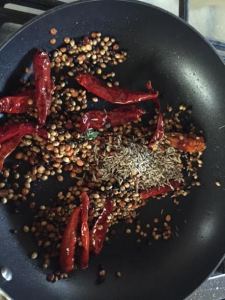
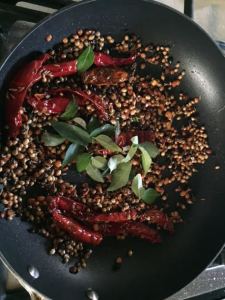
  • Add curry leaves and once you hear them crackle add some cumin seeds  and immediately turn off the flame.
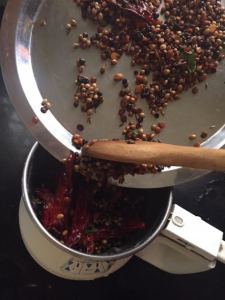
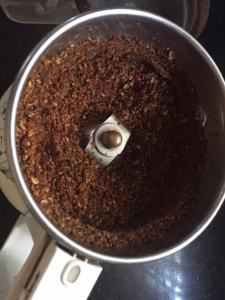
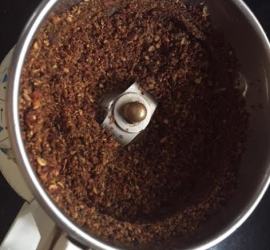
  • Cool this mixture completely and grind to a coarse powder. Store in air tight clean containers at room temperature.
  • Use as required when making rasam by adding a tablespoon when tempering the rasam.


Continue reading “Instant Rasam powder” »


Chocolate cup cakes with chocolate ganache frosting

Share Button

image1

img_8529

fullsizerender-8

img_8531

fullsizerender-7

img_8534

fullsizerender-6

fullsizerender-5

img_8558

img_1337

Preparation time  : 20 minutes
Cooking time       : 18 minutes
Serves                 : 8 members

Description

Cup cakes are always a fancy high end considered indulgent. Not sure why, but to me any thing that is high end or too English when it comes to food related stuff, I am a bit hesitant to give a try. ( not to eat but to cook ) so cakes are always the last thing to be ticked in my bucket list of trials and errors. It’s just the opposite with my daughter “Anisha ” who loves to bake and decorate cakes of any sort. I do help her out at times with her orders and that’s when she gets to boss over and shout at me for doing all crazy stuff.. Me being curious wanting to know all about it, ending in messing it up. My girl is a natural with piping and decorating cakes. See her do some thing, I try the same and it ends up looking dreadful. I guess, I don’t have the patience as she does. I always think I should practice more on this but my laziness makes me stay ideal instead. The thought creeps up only next when I try to decorate a cake. I have to confess, that this image of the cup cakes was borrowed from my girls work. Just by looking at them, I feel like gobbling them off the picture. I remember, how I licked the chocolate ganache and she gave me a weird look . Her turn to mother me I guess.. These crazy little food related stories are itched into me to create a better bond with my loved ones and food too. So peeps give a try to this cup cake recipe and create stories of your own and enjoy.

Ingredients
Quantity
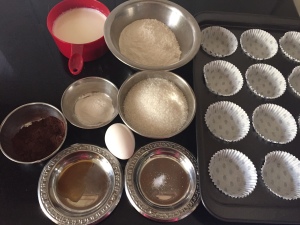
Flour / maida1 cup
Salta pinch
Cocoa powder1 1/4 tablespoons
Sugar2/4 cups
Baking powder1 1/2 teaspoon
Butter1/3 cup at room temperature
Egg1 at room temperature
Milk2/3 cup
Vanilla essence1/4 teaspoon

Method

  • Preheat oven to 180 degree Celsius. Line a 12 hole muffin tray with paper cup cake liners.
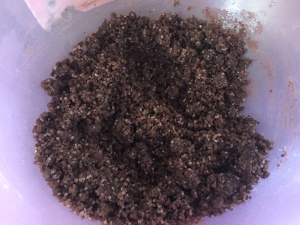
  • Mix flour, salt, sugar, cocoa powder, baking powder and butter together with an egg beater in low speed until you get a sand like well Mixed texture.
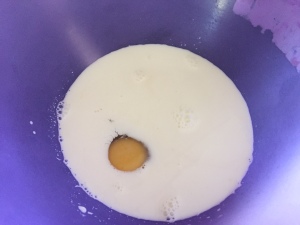
  • Beat egg, milk and vanilla essence together in another bowl with the help of an electric egg beater.
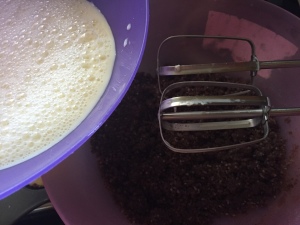
  • Pour the egg+ milk mix into the dry flour mix little at a time and mix well to combine making sure not to over beat.
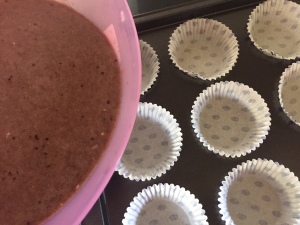
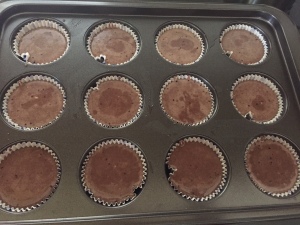
  • Pour the mixed batter into greased paper cup cake moulds to 3/4 full. Bake in a preheated oven at 180 degrees Celsius for 20- 25 minutes.
  • Check with a tooth prick by inserting in the middle. If it comes out clean it’s done. Remove from oven and cool completely.
  • Decorate as desired over the cooled cup cakes. They are ready to be devoured.

Chocolate Ganache

Ingredients
Quantity
chocolate500 grams chopped ( I used modre brand )
fresh cream175 grams ( I used Amul brand )

Method

  • Bring the cream to just bubbling over low heat. Add the chopped chocolate and remove from heat.
  • Mix well together until the cream and chocolate combine together to smooth.
  • Leave it over night closed at room temperature. Fill into piping bags and decorate as desired.

Iyra meen kozlambu

Share Button

FullSizeRender (4)

FullSizeRender (3)

FullSizeRender (2)

Preparation time : 30 minutes
Cooking time      : 20 minutes
Serves                : 6 members

Description

Authentic home curries that our grand mothers and mothers cook always bring in a spark of nostalgic joy to all of us . Like wise this fish curry is also one such that my mother – in – law learnt from her mother . I am not a big fan of the iyra fish but my mother and hubby dear go head over heels over this fish curry . This dish works wonders to melt both of them . My cliche way to get to their hearts through their stomachs . Food always has its surprising element of bringing along memories , family togetherness , emotional attachment … I can go on and on and that’s why I am deeply madly in love with food and cooking . Coming to the dish , it’s spicy and thick in consistency . Best served with white boiled rice or steaming hot soft idlis . I always make fun of hubby dear , saying you ate thousand’s of fish today .. The iyra fish is so tiny and a hand full might be around 40 to 50 fishes . See , yet again a hilarious naughty moment created by this dish that always brings a smile on my face . Clearly say’s that I am in a relationship with food ❤️❤️ .

Ingredients to be ground to a smooth paste

Ingredients
Quantity
Coriander powder3 tablespoons full
Red chilli powder2 1/2 tablespoons full
Turmeric powder1/4 teaspoon
Cumin powder1 teaspoon
Coconut 1/2 cup
  • Grind all the above mentioned ingredients together to get a smooth masala paste
  • Grind coconut separately to a smooth paste

Other ingredients

Ingredients
Quantity
Cleaned iyra fish /
Spined loaches
1/2 kg
Small onions1 1/4 hands + 6-7 to temper chopped into two
Tomatoes2 medium sized chopped ( my mother- in - law just squeezes the whole tomatoes into the tamarin water )
Green chillies2-4 slit
Tamarindlemon size ball , soaked in 1 cups of water and pulp squeezed and strained
Saltto taste
Sesame oil ( gingely oil /nalla ennai )1/4 cup
Fenugreek seeds1 teaspoon
Cumin seeds1 teaspoon
Curry leaves1 strand

Method

  • Rub the tiny iyra fish over a stone surface ( at home it’s done over the cloths washing stone ) with rock salt to remove the slipperiness it has. Rinse in water.
  • Repeat the same three times. Then add the iyra fish over a cup of milk and keep aside until needed to be used.
  • Mix tamarin pulp water, ground masala paste, salt to taste, chopped small onions 6-7, tomatoes and green chillies together. Add 2 cups of water and mix well. Taste and adjust.
  • Heat sesame oil in a heavy bottomed board vessel. Add fenugreek seeds, cumin seeds, chopped onions and curry leaves. Once the fenugreek seeds crackle And small onions are brown and crisp, Pour the tamarind masala water base.
  • Cover and Bring to boil. Once the raw smell has gone and the green chillies are boiled and changes its colour. Rinse the iyra fish in water and add to the curry. Cook on medium heat for one minutes by just rotating the vessel once in a while making sure the gravy coats and covers all the fish in the curry. ( do not use a spatula to toss or mix the fish into the curry as the fish pieces might break ).
  • Dilute the coconut paste with little water. Pour into the curry and mix well. Lower the flame and cook further for another one minutes until oil separates and floats on top. The curry must be of thick consistency. Remove from heat and serve hot with white boiled rice or iddli.

Arabic nests

Share Button

FullSizeRender (1)

IMG_8989

IMG_8991

IMG_8993

IMG_8996

IMG_8997

IMG_9001

IMG_9002

IMG_9003

IMG_9004

IMG_9005

IMG_9007

Preparation time : 50 minutes
Cooking time      : 15 -20 minutes
Serves                : 6 members

Description

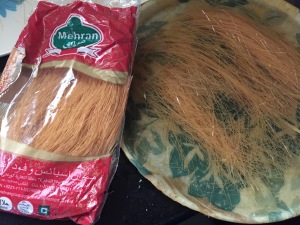
Having very thin fried vermicelli that I got from Dubai on a holiday which was lying in my pantry for a while. Made up my mind to put them to use but in an innovative stylish way. At the same time, my mind was busy thinking about the eid feast table menu. DUBAI – Arabia – thin vermicelli all this immediately took me back to the birds nest sort of dessert that I had in Dubai. Wanting to replicate the same.. I did my best with home friendly techniques that I thought would work. To my surprise it did and looked absolutely good too. Now, it came down to the tasting part, I took my first bite. The crispy vermicelli and the rose flavored filling inside was divine. But this tasted so very different from what I had in Dubai but in a good way. I was blown away with its beautiful balance of flavors, contrasting textures and contemporary presentation. Every one gave it the highest score in the dessert table letting way for it to be the dessert of the day. Happy happy me that my primped and prepped up new dessert for the festive season was a banging hit which evolved indulgence and refined taste.

Ingredients for the nest

Ingredients
Quantity
Thin vermicellione hand full
Waterenough to soak the vermicelli
Salta pinch
Ghee1 tablespoon
Muffin tray1 with 12 dents
Muffin cups12
Ghee or butterto grease

Ingredients for the filling

Ingredients
Quantity
Milk1 1/2 cups
Almond powder4 tablespoons
Cornflour2 tablespoons
Sugar4 tablespoons or to taste
Salta pinch
Rose essence2 drops
Almond + pistachiofew peeled and cut into strips

Method for nests

  • Soak the vermicelli in enough water and salt for 40 minutes making sure the vermicelli dose not break.
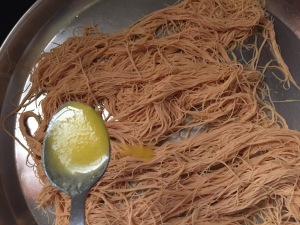
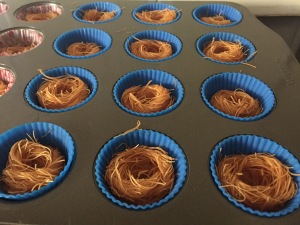
  • Drain the soaked vermicelli and add 1 tablespoon of ghee and mix well. Grease muffin cups with ghee or butter. Line them over a muffin tray.
  • Preheat the oven at 180 degrees Celsius for ten minutes.
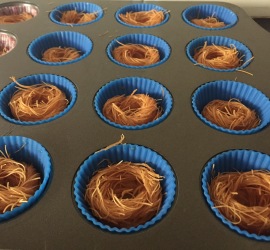
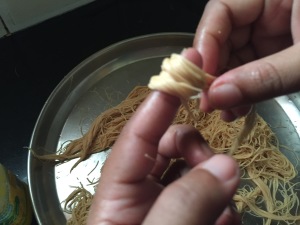
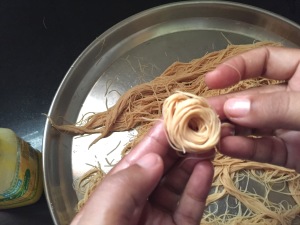
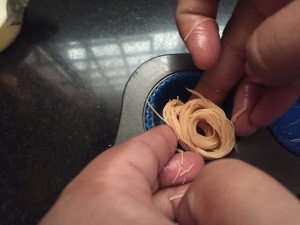
  • Take a little of the vermicelli and roll it around your finger to get a round shaped nest.
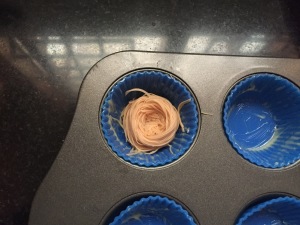
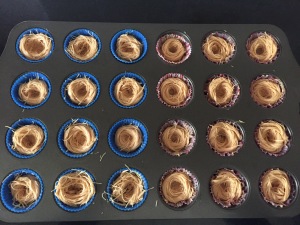
  • Place it over the greased muffin cup. Do the same to all the soaked vermicelli.
  • Place the muffin tray filled with the nests in the middle rack of the preheated oven and bake for 10 -12 minutes until crisp and golden.
  • Remove from the oven and cool completely.

Method for filling

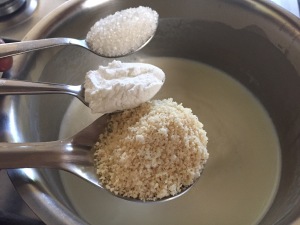
  • Heat milk to boiling point. Mix almond powder, cornflour, salt and sugar together.
  • Dilute it with a little water to pouring consistency. Lower the heat.
  • Add it to the boiling milk, stirring all the way until you get a thick gooey mass of mixture with no lumps.
  • Add rose essence. Mix well and remove from heat.

How to assemble

  • Place 1/2 a teaspoon of the cooled filling into each nest.
  • Garnish with almond and pistachio strips. Serve at room temperature.

Notes

  • Make sure not to break the vermicelli as it’s difficult to roll nests out of cut vermicelli.
  • In case the nests are not crispy. Deep fry in batches to crisp.
  • Drain into sugar syrup. Remove immediately, fill and serve.

Fresh green pepper corns fish fry

Share Button


FullSizeRender (23)

FullSizeRender (22)

FullSizeRender (21)

Preparation time  : 15 minutes
Cooking time       : 10-12 minutes
Serves                 : 6 members

Description

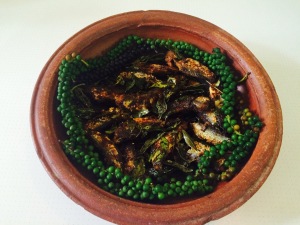
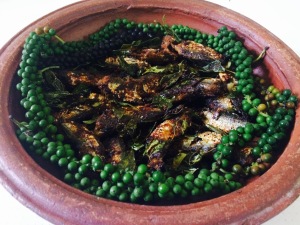
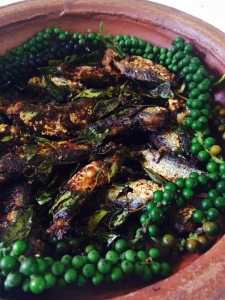
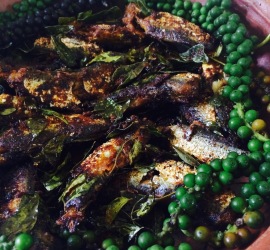
Cooking with seasonal local produce always brings a lot of joy to me. Fresh green pepper corns are always soaked in salted, vinegar water and had as a pickle at home. Nothing else is done with the mighty spice other than that. This time when I got a few from my uncles estate, I tried making a fish fry using them. Believe me, the results were mind blowing with the heat and flavour dominating. I didn’t want to over complicate the dish so kept it easy and  clean. A simple dish of home made style isn’t always a crime as what ever or how ever we dine finally we crave for ghar ka khaana ( home made food ). The brilliantly contrasting flavours with the redolent spices, fresh greens, crispy sensation was beautiful and bracing. This has become a house specialty that brings smiles at the table always. The best part being which hardly involves any effort. So to spread more smiles at your homes too,the easy way.  I am sharing  the recipe. Give a try and add more joy through food.
Ingredients

Ingredients
Quantity
Sardin fish 20
Green chilly1
Turmeric power1/4 teaspoon
Ginger1 inch piece
Curry leavesfew
Garlic6
Small Onion2
Tamarind pulp1/4 cup
Red chilli powder1/4 teaspoon
Fresh Green pepper corns2 tablespoons
SaltTo taste
Coconut oil2 tablespoons

Method

  • Grind all ingredients together except for, fish, curry leaves and coconut oil to a smooth paste. Mix with cleaned fish, coconut oil and curry leaves.
  • Cook in low flame until cooked and dry.
  • Serve hot.

Potato roses

Share Button


image1 (1)

FullSizeRender (16)

FullSizeRender (15)

FullSizeRender (14)

FullSizeRender (13)

FullSizeRender (12)

image2 (1)

Preparation time : 20 minutes
Cooking time      : 15 minutes
Serves                : 4 members

Description

My first cook book ( in Tamil ) release that was taking place at home with a small gathering of my friends and well wishers. I had planned a high tea party along with the book release. Wanting the high tea spread to be grand I took maximum efforts to make the table shine. This potato rose was one gimmick that I tried to pop up all eyes that saw it. I did place it along side the cutlets served to decorate the plate. Every one did ask me what it was and when I told them about it, I had raised eye brows in front of me. The mighty, normal, every day potato just created magic with this rose twist. I still am surprised on how I had time to click step by step pictures when doing this on that nervous busy day. A big pat to myself for that. Happy potato rose making to one and all.

Ingredients

Ingredients
Quantity
Potatoes6 medium sized
SaltTo taste
OilTo deep fry

Method

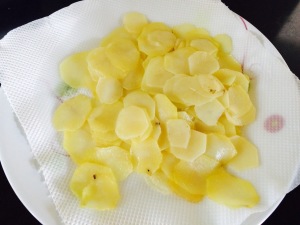
  • Slice the potatoes into thin rounds with the skin ( I peeled the skin but it looks better when done with the skin ) using a slicer dicer.
  • Rinse in water, wipe the potato slice with a cloth to dry.
  • Heat oil to medium low. Drop the round potato slices in batches and fry to soften the potato slices so it’s easy to pile them and roll together. Drain and keep aside.
  • Preheat an oven at 180 degrees Celsius for 10 -15 minutes.
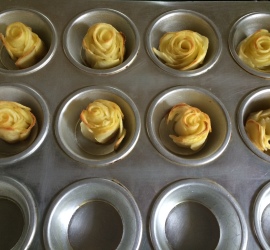
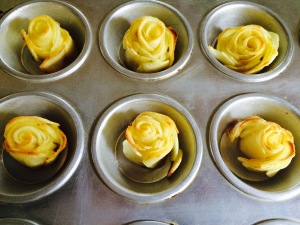
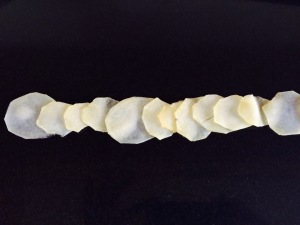
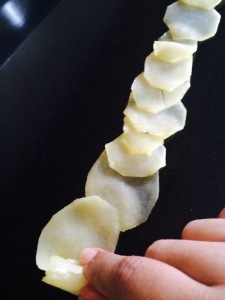
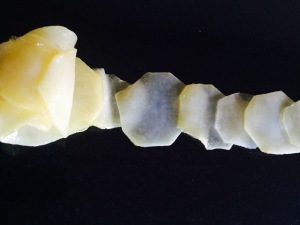
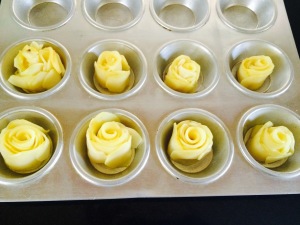
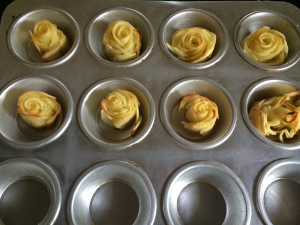
  • Place a batch of 12 -15 round slices of potatoes together over lapping one another. Roll tightly but gently. Then turn the rolled batch and place them straight to get a rose shape. Do the same to all the potatoes.
  • Place the potato roses over a greased muffin tray. Bake in a preheated oven at 180 degree Celsius for about 5-8 minutes until the potato roses crisp up.
  • Remove from the oven and serve as a garnish adding more glamour to the snacks or food served in style.


Panner lemon curd pudding

Share Button


FullSizeRender (20)

FullSizeRender (19)

FullSizeRender (18)

FullSizeRender (17)


Preparation time : 30 minutes
Cooking time       : 20 minutes + setting in the refrigerator for 50 minutes.
Serves                 : 6-8 members

Description

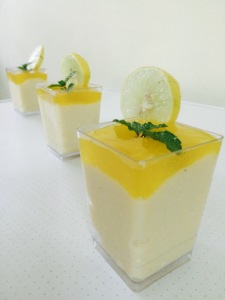
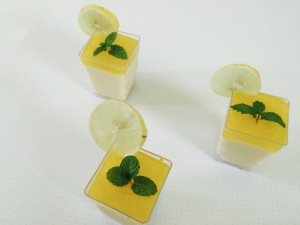
Other than lime juice, I never could relate to lime being used for a dessert or a sweet dish. But then as always breaking the stereo – type mind in me ends up with banging  results letting way for new inventions and more experiments to be added to my bucket list. This dessert also played a similar role as such. The tang of lemons with the sweetness breaking through and the sunshine yellow colour the lemons gave were to die for. Lemony, acidic and zesty. Perfect for a sunny afternoon with its fresh citrus notes. These can be made a day ahead and kept chilled until you need to serve them. If you ever flipped through pages of magazines and wanted to eat the photos, here’s your chance to try it out and surprise your loved ones.

Ingredients for the cream cheese layer

Ingredients
Quantity
Panner1 cup
Condensed milk1 cup
Sugar3 teaspoons
Vanilla essencefew drops
Gelatine1 teaspoons

Ingredients for the lemon curd

Ingredients
Quantity
Fresh lemon juice5 tablespoons
Grated lemon zest1 teaspoon
Sugar1/2 cup or more to taste
SaltA pinch
Butter5 tablespoons at room temperature
Cornflour1 heaped teaspoons
Yellow food colourA few punches ( optional but gives a good look to the pudding )

Method for cream cheese layer

  • Soak gelatine in 1/4 cup water to bloom for ten minutes. Then microwave for 30 seconds to dissolve. Cool to room temperature.
  • Beat Panner, condensed milk, sugar and vanilla essence together with the help of an egg beater to smooth. Add the dissolved gelatine and pour into individual pudding cups to 3/4 full. Place in the refrigerator to set for 40 minutes or more.

Method for lemon curd

  • Mix lemon juice, grated lemon zest, sugar, salt, food Colour and cornflour together with little water to get a loose consistency liquid.
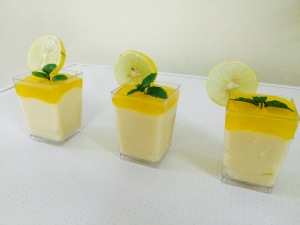
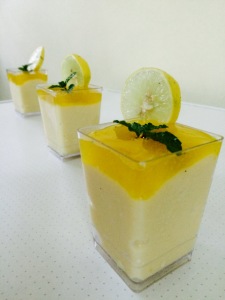
  • Heat over medium flame until it thickens, stirring constantly. Remove from heat and cool completely. Add butter and keep stirring until all combines together and thick. Taste and adjust seasoning. Pour 3 tablespoons of lemon curd over each set cream cheese layer. Place in the refrigerator, until to be served.
  • Serve chill garnished with mint leaves and lemon slices.

Raw mango mixture

Share Button

FullSizeRender (11)

Preparation time : 8 minutes
Cooking time      : nil
Serves                : 3 members

Description

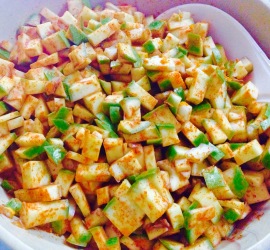
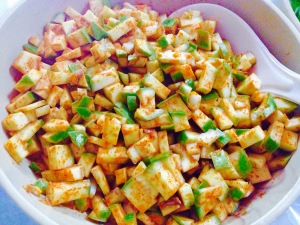
Growing up with a lot of cousins, aunt’s and relatives around. We were fed with home made stuff from scratch. No matter what time of the day or night it was. Those days of no access to fast food or dial for take away. The hungry kids ( that’s around 29 of us in all age groups ) were always served with some thing to munch on that was made then and there. Most of the time it was this raw mango mixture recipe that used to be made right in front of our eyes. As it’s being chopped, the un patient us would grab a hand full and have a taste. The mangoes were mostly plucked from the trees by a senior cousin. The minute it’s ready, we all would just want to grab our share. The lucky person who gets hold of the bowl is chased around for a spoon full. All of us would go umm and ahh with it in our mouth. Our eyes would close automatically with the sourness from the raw mangoes hitting at the right spot. Every thing crystal clear till date with in me. Hot summer carefree days with all of us keeping ourselves busy playing around, climbing trees, ludo, snake and ladder, hide and seek, dark room, trade… Making joyous memories out of the little that was left for us to explore. I am so happy I was born in that ear of no wifi, Internet, mobiles and computers. We knew nothing but still felt so content and happy with the little we had. I am sure each one of you reading this who survived the golden ear ( 1978 to 1989 ) I am talking about would agree.  My heart is pumped with joy now filled with nostalgia hitting me hard. How I wish, I could just rewind the days and go back to those fun filled cherish able days. Well all I am left to do now is take a deep breath and feel blessed for having gone through such a good childhood.

Raw mango mixture

Ingredients
Quantity
Raw mangoes2 chopped with skin
Saltto taste
Red chilly power 1/2 teaspoon or to taste
Coconut oil1 teaspoon

Method

  • Mix all the ingredients together and enjoy.

Home style Pita pockets

Share Button

IMG_0384

image1

image2


Preparation time : 40 minutes
Cooking time      : 30 minutes
Serves                : 5 members

Description

Any food item that is sent home for a tasting from my father – in – laws elder brothers home sure has a surprise element to it. It’s always a new out of the box try done by my elder mother – in – law mahmoodha Rabbani. This home style pita pockets were sent over once a few years back. Immediately I made sure to get the recipe from her. From then till date, I have been making this recipe at home quite often but when wanting to share the recipe, thinking about how much I have to type always made me put it aside for later. This time I made sure to type the recipe over beating my laziness. Reading the recipe might look like a lot of work to be done but once you prep, it’s so easy to assemble and serve. I always am blown away on how my elder mother in law comes up with substituting ingredients and methods that she tries with recipes, she’s had on her abroad trips. In this recipe, instead of using the authentic pita bread, she’s substituted it with a home made wheat semolina poori that stays puffed up like the pita bread and serves to be a pocket as well. Her experience in the kitchen and knowledge of food sure does get me awestruck  with my mouth wide open always. I am in love with food and cooking for this surprise element and never ending learning process it has. I know you all must be thinking is there so much to be learnt in every day cooking.. Come, join me and see how much more we have to explore, learn, give trial and errors, share, inspire and spread the joy of food making memories to cherish for life.

Home style Pita pockets

Ingredients
Quantity
Broken wheat semolina1 cup
Wheat flour1/2 cup
Saltto the taste
Water little

Method for cover 

  • Mix all the ingredients for the cover together and knead into a tight dough. Let it rest for thirty minutes or more.
  • Heat oil to deep fry. Make round poories that is rolled out a bit thicker than we usually do for normal poories with the dough.
  • Drop poories and deep fry to puffed up for 30 seconds on each side. Drain and set aside. Once cool, cut into equal halves using scissors. Keep the pita pockets aside.

Ingredients for filling

Ingredients
Quantity
Tomato2 sliced to strips
Cabbage1/4 cup shredded
Capsicum 1 cut to strips
Potato3 cut into fingers
Egg plants4 cut to fingers
Eggs3 scrambled
Boneless chicken1/2 cup cut into tiny cubes
Dried green peas1 cup soaked for four hours
Dry red chillies2
SaltTo taste
OilTo deep fry

Method for filling

  • Cook the chicken pieces with salt and pepper powder to taste. Keep aside.
  • Grind the soaked, drained dried green peas with salt to taste and dry red chillies to a coarse paste.
  • Heat oil to deep fry. Deep fry the potato fingers and egg plant fingers to crisp. Drain and keep aside. In the same hot oil, drop goose burry size of the ground dried green peas thick corse batter. Deep Fry to crisp. Drain and keep aside.
  • Heat 1 teaspoon of oil, break the eggs, add to the oil, season with salt and pepper to taste. Scramble to done. Remove and keep aside.
  • Mix cabbage, tomato and capsicum together. Season with salt and pepper powder to taste.

Sauce ingredients

Ingredients
Quantity
Mayonnaise1/4 cup
Red chilli flakes1/2 teaspoon
Garlic paste1/4 teaspoon
Tomato sauce4 tablespoons
Sugar1/4 teaspoon
SaltTo taste

Method for sauce

  • Mix all the above ingredients together. Taste and adjust seasoning. Keep aside.

How to proceed

  • Take one half of the pita pocket, layer the bottom with a teaspoon of the raw vegetable mix.
  • Top with a few deep fried potato fingers, egg plant fingers and dried green peas fries.
  • Sprinkle cooked chicken bits and scrambled eggs. Top with sauce generously.
  • Repeat the same once again. Serve immediately.

Ribbon sandwich

Share Button

IMG_0043

FullSizeRender (10)

IMG_0042

IMG_0041

IMG_0044

Preparation time : 15 minutes
Cooking time : 4 minutes
Serves : 6 members

Description

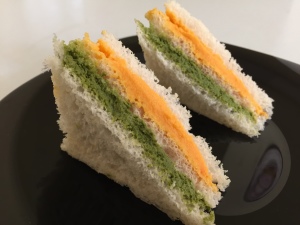
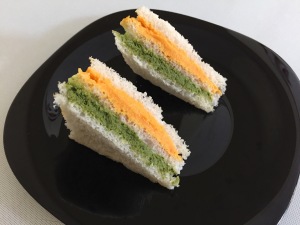
August 15th, Independence Day of India. Days of celebrating it in school with a grand assembly held, flag hosting, chocolates disturbed, paper flag badges… Then came the days of us participating in the celebrations of the Independence Day at the race course ground in ooty with the collector and the locals. One year I was in the band and the next following years in the dance ( bangra and Manipuri ). Joy full days when the simplest thing in life could cheer you up. Laughing, giggling, making fun of other school students ( wonder why we had the attitude that only Shepherdians were the best ?? Sorry to say I still feel the same ) good old memories. After school was done, it was with just watching the telly always with the parade that takes place in Delhi. How can I forget the days of sending my kids to school for their Independence Day celebrations early in the morning. Well now that all that is also done and come to a stand still . Last year , I made sure to celebrate the patriotic side in me. I made these ribbon sandwiches and a few other snacks, bought paper flag badges and celebrated Independence Day with my fellow Zumba mate’s in the gym. Every one had their eyes popped out the minute they saw the sandwich’s. This easy to assemble, tasty sandwich did all the magic. It was so much fun. Well thousands laid down their lives so that we in India can breath in ease today. We should never forget their sacrifice. So be Incredible, Novel, Dazzling, Immense, Adorable Which is what India stands for. Happy Independence Day to one all.

Ingredients 

Ingredients
Quantity
Sandwich bread12 slices edges cut

Ingredients for mint chutney

Ingredients
Quantity
Mint leaves1 cup
Coriander leaves1 cup
Tamarindgoose burry size ball
Grated Coconut 2 teaspoons
Green chillies4
Jaggerya small piece
Saltto taste
Butter2 teaspoon at room temperature

Method for mint chutney

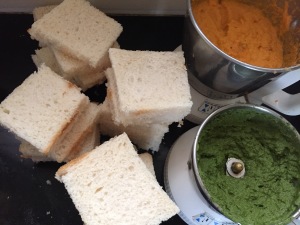
  • Grind all the ingredients together to a smooth thick paste adding very little water.
  • Mix the butter to get a spreading consistency chutney. Taste and adjust seasoning.

Ingredients for carrot chutney

Ingredients
Quantity
Carrots 2 chopped
Saltto taste
Grated coconut
Mayonnaise2 teaspoon
White pepper powder1/2 teaspoon

Method for carrot chutney

  • Boil the chopped carrots with salt to taste and water. Cool completely.
  • Grind boiled carrots with white pepper powder to a smooth thick paste with out adding water.
  • Add mayonnaise and mix well. Taste and adjust seasoning.

How to proceed

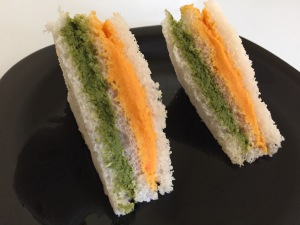
  • Apply mint chutney over one slice of bread slice generously. Cover with another bread slice.
  • Apply carrot chutney over the top of the second bread slice generously. Cover with another bread slice.
  • Cut the sandwich into equal triangles. Do the same to all the bread slices and both the chutney’s.
  • Serve at room temperature.