Daily Archives: August 9, 2014


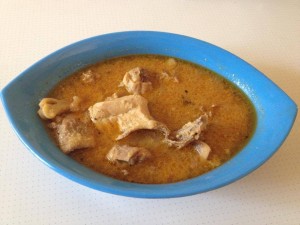
Naattu kozli soup

Share Button

image (25)
Preparation Time : 20 minutes

Cooking Time : 30 -40 minutes

Serving : 4 members

Description

Country chicken soup or nattu kozli soup as addressed at home . This dish is an authentic ravuthar dish of  Nellai and neighbouring  regions . A lightly flavoured runny watery consistency fresh and fragrant  soup but had with dosa or iddiappam ,  Seldom  drank as a soup . I often wonder how the name soup was given to this dish as its an English term . The same applies with places addressed here at Nellai  . We have the railway station area called JUNCTION , and the main bazaar area addressed as TOWN . The wired thing is that these two places have no Tamil names to them but addressed in their English forms . ( hey get back to the dish please … Oops ) this soup is served as a medicinal remedy when we have cold , to girls who attain puberty , boys who have under gone circumcision   and  women who have given birth . This soup is served with a thick dosa  or 2 iddiapams with 2-3 ladles of piping hot delicate soup poured over and left to soak  with a few pieces of fatty tender chicken . when you eat , it just slides through your trout to the stomach . Offering warmth with  a sense of well being to satisfy carvings of a family style familiar classic  soup .

Ingredients 

Ingredients
Quantity
Cleaned country chicken 1/2 kg
Small onions1 hand full chopped
Cinnamon1 inch piece
Cloves 2
Cardamom2
Ghee4 tablespoons
Ginger and garlic paste1/4 teaspoon each
Salt to taste
Tomato1 small chopped
Poppy seeds5 tablespoons
Fennel seeds1/4 teaspoon
Coriander powder1 teaspoon
Chilli powder1/4 teaspoon
Fennel powder 1/4 teaspoon
Cumin powder1/2 teaspoon
Fresh black Pepper crushed1 teaspoon or to taste

Method

  1. Grind poppy seeds with fennel seeds to a smooth paste and set aside .
  2. Heat ghee in a pressure cooker . Add cinnamon , cloves and cardamom .
  3. Once they crackle add the small onion and fry to golden brown . Top with ginger and garlic paste . Fry to brown .
  4. Add the cleaned chicken pieces and tomato .Sauté until the colour of the chicken has changed and the tomato lets out its juices .
  5. Add the poppy fennel seed paste and sauté for a minute adding salt to taste .
  6. Mix well and pour water just enough to cover the chicken ( about 6-8 cups of water ) and pressure cook for 4-5 whistles or until cooked through and the flesh falls a part from the bones .
  7. ( I usually pressure cook on high for one whistle and then on very low heat for 4 whistles . This way the chicken stays moist and soft ) . Add the coriander powder , chilli powder , fennel seeds powder , cumin powder and crushed black pepper powder .
  8. Bring to boil mixing well . Taste and adjust and serve hot with kal dosai’s (thick dosa’s like uttappams ) .

Note

  1. After cleaning the chicken .
  2. Marinate the cleaned chicken in 1 tablespoon of vinegar and one teaspoon of turmeric powder for 5 minutes .
  3. Then rinse the chicken again 2-3 times in water , drain and use .
  4. This helps to take away the bad smell that the country chicken has .
  5. Make sure you buy small sized country chicken that is of 3/4 kg when alive so when cut you get around 1/2 kg of chicken .
  6. This way you get tender flesh and the soup tastes better resulting in a clear broth .

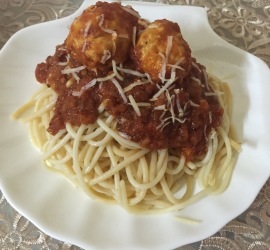
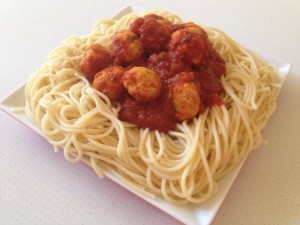
Italian meat balls with spaghetti

Share Button

image (24)

IMG_0281

IMG_0282

IMG_0283

IMG_0285

FullSizeRender (21)

image1 (1)

Preparation Time : 30 minutes

Cooking Time : 40 minutes

Serving : 5 members

Description

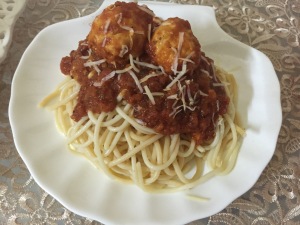
Italian beat balls with spaghetti . Having a packet of spaghetti in my pantry for quite some time . Every time I think of cooking it , I am like let the kids come . Finally one day I made the spaghetti with an Italian meat ball tomato sauce that is an international comfort classic .started of with a slight nervousness not knowing if my beat balls would turn out soft . I religiously followed the recipe for the meat balls but just substituted beef to chicken . Finally the dish resulted  in a wonderfully moist , soft and juicy tomato drunk meat balls . The meat balls turned into a ball of fame as Every one enjoyed it on the dining table and I made sure to pack the left over for my boy in Coimbatore . He had it for lunch , dinner and breakfast . Well , nothing perks us all up like home cooked mummy’s food :-))

Ingredients for meatballs

Ingredients
Quantity
Boneless chicken1/4 kg ground to a paste without water
fresh bread crumbs2 1/2 tablespoons ( blitz 2 slices of bread in a food processor )
Fresh parsley/ coriander leaves chopped 1 tablespoon
grated Parmesan cheese1 tablespoon
Chilli flakes to taste
ground black pepper1/4 teaspoon
Salt to taste
garlic powder/ paste1/4 teaspoon
egg beaten1

Ingredients for Sauce

Ingredients
Quantity
chopped onion3/4 cup
garlic minced 5 flakes
olive oil4 tablespoons
whole peeled tomatoes3/4 kg , ( blanch whole tomatoes in hot water and peel the skins ) , ( I blitzed the peeled tomatoes to a corse pulp )
salt to taste
sugar1 teaspoon
bay leaf1
tomato paste / tomato sauce 1 tablespoon
dried basil 3/4 teaspoon
ground black pepper1/2 teaspoon
Red chilli powder 1 teaspoon ( for the Indian pallet )

Method

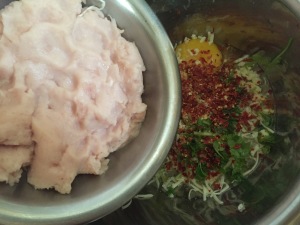
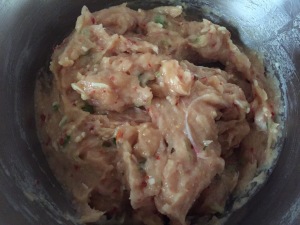
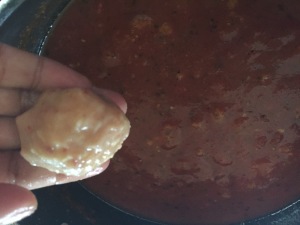
  1. In a large bowl, combine ground chicken , bread crumbs, parsley, Parmesan, 1/4 teaspoon black pepper, garlic powder / paste and beaten egg. Mix well and form into equal sized balls.
  2. Store, covered, in refrigerator until needed.
  3. In a large saucepan over medium heat, saute onion and garlic in olive oil until onion is translucent.
  4. Stir in tomatoes, salt, sugar and bay leaf. Cover, reduce heat to low, and simmer .
  5. Stir in tomato paste, basil, 1/2 teaspoon pepper . taste and adjust .
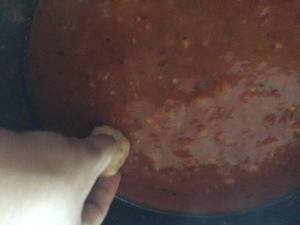
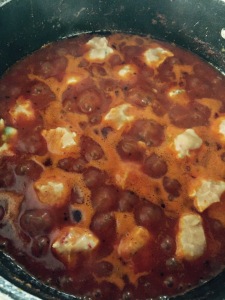
  6. add meatballs and simmer for 30 minutes or more until the meat balls are cooked through , soft and moist . Set aside

How to proceed 

  1. Boil spaghetti as per packet directions in boiling salted water .
  2. Drain and rinse in cold water .
  3. Add to the meat ball sauce and mix well , making sure that the sauce coats the spaghetti well .
  4. Serve hot .

Hunan chicken

Share Button

image (23)

Preparation Time : 20 minutes

Cooking Time : 15 minutes

Serving : 2 members

Description

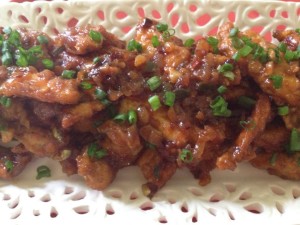
Hunan chicken . A simple stir fry with deep fried crispy chicken stripes and a combination of  sauces which is spicy , sweet and tart . This dish is a perfect appetiser . I remember a Chinese street stall in v.o.c park in Coimbatore where my brother and myself used to often end up entertaining our taste buds . Till date , that has been the best Chinese food I have ever tasted . Hubby dear , does not fancy street food eating much . So my street food eating is done always in his absence . We Indians are so used to the fusion of indo – Chinese version that on my visit to china on a holiday . We were served an old fashioned dinning with a  delectable spread of classic authentic Chinese meal for lunch . I was so very excited about this. It was a grand feast with the table taken by storm  on a huge spread of authentic Chinese dishes .my excitement didn’t last long as the only thing served there that was liked by me was the sweet corn chicken soup and the fried rice . All the other dishes were a treat to my eyes with vibrant colours . This was an alert to me that I needed a definitive update in authentic Chinese food .

Ingredients

Ingredients
Quantity
boneless chicken stripes1/4 kg
light soy sauce 1 1/2 teaspoon + 2 tablespoons
egg1 beaten
cornstarch1 1/2 tablespoon
chicken stock (at room temperature)1/4 cup
white wine or sherry1 1/2 tablespoon ( I just omitted this ingredient )
garlic chopped1/2 teaspoon
ginger grated1/4 teaspoon
sesame oil 3 drops
sugar1/4 teaspoon
white pepper1/4 teaspoon
vinegara splash
Oil to deep fry + little to stir fry
onion stem chopped 4 ( use the white and green parts)
Crushed red chilli flakesto taste

Method

  1. Place chicken in bowl and add 1 1/2 teaspoons of soy sauce, egg and white pepper to taste. Knead as you would dough for about 5 minutes. Add 1 1/2 tablespoons of cornstarch and knead again. Set aside.
  2. In another small bowl , mix together chicken stock and 1 tablespoon of cornstarch.
  3. Add soy sauce, wine or sherry, garlic, ginger, oil, sugar, white pepper & vinegar.this is the sauce for the Hunan chicken . Set aside.
  4. Heat wok to a high heat. Pour 2-3 cups of oil into wok. Heat oil to deep fry . Fry chicken pieces in batches. Do not over crowd the wok or the temperature of the oil will drop.
  5. Cook chicken for about 3-5 minutes and then set on a rack. This will keep the chicken to remain crispy and excess oil to drip off. Repeat until all chicken is cooked.
  6. Remove all oil from the wok leaving 1 teaspoon of oil in the wok . Fry green onions and red chilli flakes for 30 seconds.
  7. Add crispy chicken and hunan sauce . Stir constantly until sauce is thickened and coats the chicken well .
  8. Serve hot garnished with chopped spring onion greens as a side or a starter.

Saffron chicken kebab

Share Button

image (22)

Preparation Time : 20 minutes + 8 hours or 2 days marination time

Cooking Time : 15 – 20 minutes

Serving : 5 members

Description

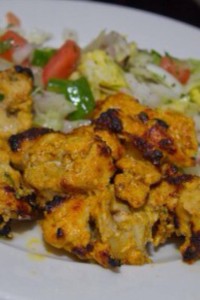
Saffron chicken Kabab . A light , moist soft melt in the mouth Kabab which takes you on a zesty flavour trip . It will be slurped away in minutes .i love the sunshine yellow that comes from the saffron used .  Be prepared to let yourself be seduced  by pure captivation . my mind is taking me to an incident related to grilling now . My parents and daughter had gone on a holiday to Rajasthan once . My mom and my daughter being shopaholics , brought entire Rajasthan to Coimbatore . One among the things was a tandoori stove top cooker that they brought for me as well ( so in total it’s 3 pieces ).  they had couriered it from Rajasthan along with other things . The tandoor cooker was all out of shape by the time it reached Coimbatore . Then got it back repaired in a local shop . A few days back , My daughter wanting an electric egg beater went shopping at my place ( tirunelveli ) . While the egg beater was being billed , we both were just gazing around the shop . And guess what we spotted ???? They had the same  stove top tandoor cooker . Which was just a few bucks more than what they got in Rajasthan . My gal felt so duped . I remember initially at my place most of the things from food items to every thing had to be sourced from else where . 85 % of things are available here now a days . We nellaiat’s are happily making up for the lost time , thanks to things easily available here  :-))

For the chicken

Ingredients
Quantity
ground saffron 1 teaspoon dissolved in 2 tablespoons hot water
fresh lime juice2 teaspoons
Turmeric powder1/4 teaspoon
oil2 tablespoons
large onions, peeled and cubed2
Capsicum2 cubed , ( can use any colour red , yellow , green or all the three )
Tomatoes5 medium sized cut into 1/2
zest of lime 2 tablespoons
yogurt2 cups
salt to taste
freshly ground black pepper2 teaspoons
Chicken1 kg
garlic, peeled, and crushed2 cloves

For the baste

Ingredients
Quantity
lime juice1 lime
butter melted1/4 cup
salt to taste
freshly ground black pepper1/2 teaspoon

To serve

Ingredients
Quantity
Lime wedges As needed
Chopped coriander leaves As needed

Method

  1. In a large bowl, combine half the saffron water and the lime juice, oil, onions, capsicums , garlic, orange zest, yogurt, salt, and pepper. Beat well with a fork. Add the pieces of chicken and toss well with marinade.
  2. Cover and marinate for at least 8 hours or up to 2 days in the refrigerator. Turn the chicken twice during this period.
  3. Start a bed of charcoal 30 minutes before you want to cook and let it burn until the coals glow evenly. Otherwise, preheat the oven 180 degree Celsius .
  4. Skewer the tomatoes.
  5. Spear wings, breasts, and legs onto different skewers (they require different cooking times).

For the baste

  1. Add the juice of 1 lime and the remaining saffron water to the melted butter. Add 1/2 teaspoon salt and 1/2 teaspoon pepper. Mix well and set aside.
  2. Paint the tomato and chicken with the basting mixture. Grill the chicken and tomatoes 8 to 15 minutes, until done.
  3. Turn frequently and baste occasionally. The chicken is done when the juice that runs out is yellow rather than pink.serve hot with a final basting over the grilled chicken pieces .
  4. Garnish  with lime wedges and coriander leaves .
  5. Make sure you grill the chicken to get a crisp crust and a moist inside .
  6. Serve the kebabs with a salad which is light and fresh with out lemon dressing as the chicken has a lot of lime flavour already
  7. There is no need for dips or sauces to be accompanied

Red velvet cake

Share Button

image (21)


Preparation Time : 30 minutes

Cooking Time : 30 – 35 minutes

Serving : 8 members

Description 

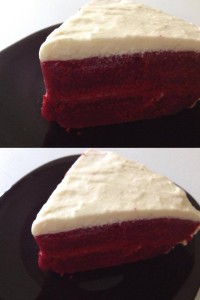
Red velvet cake . A recipe that has been in my must try list for a very long time . I waited to get the right food colouring as I wanted a deep red colour to my cake . The food colour was sourced from Malaysia through my mom . It was the day after Father’s Day . My parents were here till lunch and were leaving there after . Wanted to surprise my dad with this red velvet cake as he loves cakes , desserts and pastries . even though it was a day after Father’s Day as its better late than never , Started of with the cake with my daughter ANISHA beside me . Not having  two equal sized cake tins . Went ahead by baking the entire cake mix in one big cake tin thinking I shall cut through horizontally and sandwich with cream cheese icing in between . But I didn’t get the height that I expected after the cake was baked . So finally what I did was cut the cake into two equal semi circles . Not having enough time to cool them completely as my parents were about to leave in some time . I started applying the cream cheese in between the cakes . It looked good and to the level of 1/4 inch of cream cheese icing as I  wanted but after a while the 1/4 inch was all sucked into the cakes and became a white lining in between . Then my cream cheese icing started giving me trouble as it was extremely hot here then . Had to freeze the icing very frequently to keep the required consistency as wanted . Some how made the cake , managed to take pictures ( took a picture of the semi circle but looked odd so stuck to this one wedged slice ) served it to dad and the smile he had while eating it just threw away all the havoc I had to go through to get   the cake together . My kids were signalling to my hubby and my mom about how my dad was enjoying his red velvet cake and making fun of the love between  me and my dad ( we daughters are always daddies girls isn’t it ? ) Mom, as usual was just controlling dads intake of this calorie culprit.I was over whelmed with joy that my job was done , serving dad his favourite   piece of cake made with love . I did manage and pack some with my parents. The left over was served to all of us at home , my hubby’s niece alfina, her kid zahil and nephews Rabbani and Mohamed Zahil just didn’t want his mom alfina to stop feeding him and to add upon to all this the last two pieces were served to my sons friend morishal ‘s parents who had dropped in home as a surprise visit after a wedding reception attended at my place . A semi circle red velvet cake served to this many people was the biggest surprise to me !!!

Ingredients

Ingredients
Quantity
All purpose flour / maida1 cup
Corn flour 2 tablespoons

Method

  1. Remove 2 tablespoons of flour from 1 cup flour and replace it with 2 tablespoons of corn flour .
  2. Sift together three times and use as demanded in the recipe .
  3. For this recipe I used 2 1/2 cups all purpose flour / maida .
  4. Removed 5 tablespoons of flour and replaced it with corn flour .
  5. Always measure after shifting the both the flours together .

Ingredients for the cake 

Ingredients
Quantity
Unsalted butter to grease same sized cake pans
cake flour(not self-rising)2 1/2 cups
salt1 teaspoon
cocoa powder1/4 cup
sugar1 1/2 cups
canola oil1 1/2 cups ( I used sunflower oil instead )
large eggs2 at room temperature
red food colouring 1/4 cup
pure vanilla extract1 teaspoon
buttermilk 1 cup
baking soda1 1/2 teaspoons
white vinegar 2 teaspoons

Method for the cake

  1. Heat oven to 350 degrees. Generously butter two 9-by-2-inch round cake pans. Sprinkle with flour, and tap out the excess; set aside.
  2. In a medium bowl, whisk cake flour, salt, and cocoa; set aside.In the bowl of an electric mixer fitted with the paddle attachment, combine the sugar and oil, and beat on medium speed until well combined.
  3. Add eggs, one at a time, beating well after each addition. Add food colouring and vanilla, beat until well combined.
  4. Add flour mixture, alternating with buttermilk, scraping the sides of the bowl with a rubber spatula as needed.
  5. In a small bowl, mix baking soda and vinegar until combined. Add to batter, and beat for 10 seconds. Evenly divide batter between the prepared pans.
  6. Bake until a cake tester inserted in the center Of each cake comes out clean, 30 to 35 minutes. Transfer to a wire rack to cool in the pans for 5 minutes.
  7. Remove from the pans, and return to the rack to cool completely.  Allow cakes to cool completely before icing.

Cream cheese icing  ingredients

ingredients
Quantity
cream cheese, softened 450 grams
unsalted butter, softened120 grams
vanilla extract1 teaspoon
icing sugar, sifted2 1/2 cups
salt a pinch

Icing method 

  1. With an electric mixer, blend together cream cheese and butter until smooth.
  2. Reduce speed to low, and blend in icing sugar, salt and vanilla extract. Increase speed to high, and beat until light and fluffy.

How to proceed

  1. Apply a thick layer of cream cheese  icing on top of one cooled cake .
  2. Place another cooled cake over and sandwich together .
  3. Apply the remaining cream cheese icing all around and on top of the cake evenly  .
  4. Cut into equal size wedges and serve .

Notes 

  1. Make sure you use cake flour not self raising flour for the cake .
  2. Make sure all the ingredients for the cake are at room temperature .
  3. Place the cream cheese icing in the fridge until needed to be used as the icing tends to loose its firmness in hot weather .
  4. Store the cake in the fridge and it stays fresh for 3-4 days .
  5. The brand name of the red food colour that i have used is rayner’s red concentrated food colouring .
  6. Be careful with the red food colouring as it stains the cloths you wear as well as your kitchen counter .

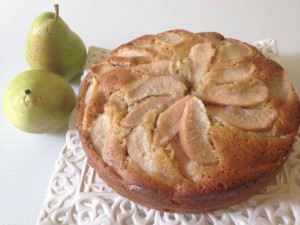
Pear cake flavoured with ginger , honey and butter milk

Share Button

image (20)

Preparation Time : 30 minutes

Cooking Time : 40 – 50 minutes

Serving : 8 members

Description

Pear cake flavoured with honey , ginger and butter milk . A recipe I came across in a magazine . I just love fruits in my cakes . This recipe did take me straight to the pear cake I never miss out while on my visit to kodaikanal  in daily bread , pastry corner .  They bake their goodies every day , fresh with limited stock .if luck favours you on your visit , you get fresh baked goodies  or else it’s sold out and the pastry shop is empty .   Their pear cake is much sought after one.having a lot of fresh pears in hand from my head over heels madness in Bangalore . Tried my hands on this recipe of pear cake Inspired to bake on a damp , drizzling day .  My home was filled with an aromatic flavour of pear and cake together . the cake was moist , soft and melt in your mouth with crunchy pear pieces on the top .gratifyingly delicious , tasted exactly like kodai pastry corner’s pear  cake . Excited about the out come of the cake did post the pictures in all the food groups I am a part of in the world wide net . Recipe requests poured in so had to post this cake recipe here today ( I wanted to post red velvet cake but it can wait right ) . This cake recipe is apt for home – bakers . My hubby and myself almost had more than a slice for every meal :-))

Ingredients

Ingredients
Quantity
Soft Butter4 tablespoons + little to grease the cake tin
All purpose flour / maida 1 cup + extra to dust the cake tin
Sugar 1/2 cup ( measure and powder ) + little to sprinkle on top of the pears
Vanilla essence1 teaspoon
Egg1
Baking powder 1/2 teaspoon
Baking soda / soda bi carbonatea pinch
Butter milk 1/2 cup
Salt a pinch
Honey 2 tablespoons
Ginger grated 1/2 teaspoon
Pears2 peeled and thinly sliced ( do this in the last minute before you lay the pear slices over the top of cake batter , to avoid dis - colouring of pears )

Method

  1. Grease a cake tin with little butter and dust with flour all around .
  2. Pre- heat the oven to 180 degree Celsius .
  3. Beat butter and powdered sugar together till pale and fluffy . ( I used an electric egg beater ) Add the egg and beat well . Sift the flour , baking powder and baking salt together .
  4. Add this flour mix to the egg mixture and mix well .
  5. Incorporate the buttermilk and combine well .
  6. Finally add salt , honey , vanilla essence and grated ginger . Mix well . Pour the cake batter into the prepared greased cake tin .
  7. Arrange the pear slices in a decorative fan pattern and sprinkle sugar over them .
  8. Bake in the pre – heated oven for 35 -40 minutes or more until a tooth pick or skewer inserted in the Center comes out clean . ( my cake took 50 minutes to be cooked ) once cooked , cool .cut into wedges , Serve warm or at room temperature as it is .
  9. Can substitute pears with apples , strawberries , mangoes etc

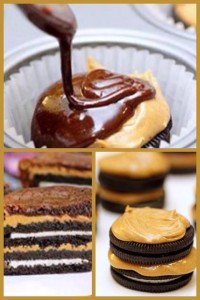
Oreo and peanut butter brownie cakes

Share Button

image (19)

Preparation Time : 30 minutes

Cooking Time : 18 -20 minutes

Serving : 10 members

Description

Ingredients

Ingredients
Quantity
flour8 tablespoons
sugar10 tablespoons
cocoa powder 4 tablespoons
baking powde2 teaspoons
egg2
milk 6 tablespoons
oil 6 tablespoons
salt a pinch
vanilla essence1 teaspoon

Other ingredients

ingredients
Quantity
Oreo Cookies24
creamy peanut butter1/2 cup

Method

  1. Preheat oven to 350 degrees and line a 12 muffin cup baker with paper liners.
  2. Prepare brownie mix , by mixing all the ingredients for brownie together . Set aside .
  3. For each cupcake cup spread 1 teaspoon of peanut butter over 2 Oreo cookies and stack them on top of each other.
  4. Place oreo stacks into the cupcake lined muffin cups.
  5. Spoon 2 tablespoons of brownie batter over each stacked oreos and let it run down the sides of the cookies. If you have left over brownie batter, bake separately in a separate baker or muffin tin.
  6. Bake cookies and brownies for 18 to 20 minutes, until brownies are cooked through. Let cool completely then serve.
  7. Store these cakes in air tight containers in room temperature . Stays moist for 2-3 days .