Daily Archives: July 11, 2014


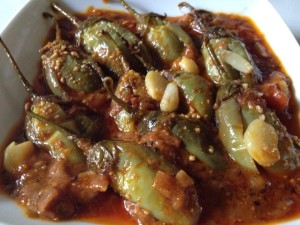
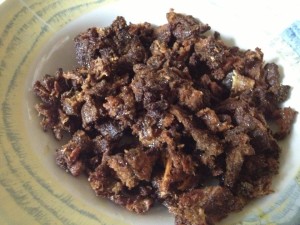
Ennai Katharikai

Share Button

image (8)

Preparation Time : 20 minutes

Cooking Time : 25 to 30 minutes

Serving : 5 to 6 members

Description

I have already posted a recipe similar to this but that dish is called katharikai katta which is served as an accomplishment for biriyani by the Ravuthar community people of Coimbatore , Salem , Tirupur , Erode ( kongu belt ) and Palghat . This is an dish very own to my hubby’s place . My mother -in – laws recipe is a bit complicating and a long process. I used to follow her recipe till a few years back. Once lunch was sent over from my hubby’s cousin brother’s house . As usual it was biriyani with its accomplishment’s . They had sent ennai katharikai also which tasted so very yum and tickled all our taste buds. I immediately called and got the recipe which was a sensational recipe bursting with mouth watering flavours . So easy to what i followed ( my mother – in -laws recipe ). From then on , stuck to this recipe . A slight sweet element in a Savoury dish heightens the flavours and creates a balance . In total this dish is a symphony of sweet and savory. My classmate Christine Coulton had come from Canada to visit me on a holiday and stayed at my place for a week. Took maximum care to entertain her in all means. She loved the Ennai katharikai I served her ( my mother- in – laws complicated version ) she took note of the recipe then and there . She did give the recipe a try and it was a great hit at her home. After a few months , she did call to get the recipe again as she lost the previous recipe note . By then I got to know the easier recipe version and told her this recipe instead. Though not convinced enough she took note and made it on a Sunday. she called me and said , she made quite a lot thinking to freeze half for later use but every thing just vanished in minutes on the table , following with high praise.

Ingredients

Ingredients
Quantity
Small sized brinjal's 1/2 kg , ( cut the bulb into four with the stem on the brinjal's ,important to check for worms in the brinjal ) ,
Small onions whole 1 1/2 hand full
Garlic flakesone hand full
Gingely oil1 cup
Mustard seeds2 teaspoon
Curry leaves few
Sambhar powder3 tablespoons full
Hing 1/4 teaspoon
Tomato chopped
Tamarind pulp 1/2 cup
Salt to taste
White Sesame seeds1 teaspoon
Roasted peanuts1 teaspoon crushed
Jaggery2 teaspoons

Method

  1. Heat oil in a non stick kadai , add mustard seeds and curry leaves . Once they crackle , top with hing , whole onions and garlic .
  2. Sauté for a 2 minutes . Add the brinjal’s and sauté in medium heat for 5 minutes till the colour of the brinjal’s change and looses its stiffness .
  3. Add tomato , salt and sambhar powder . Sauté till the tomatoes lets out its juices . Add 1 cup water and bring to boil .
  4. When the brinjal’s are 3/4 cooked , add the tamarind pulp . Toss well and cook until brinjal’s are cooked through and gets to a thick gravy coated with the brinjal’s .
  5. Add jaggery , sesame seeds and crushed peanuts . Toss well . Simmer till oil separates . Taste and adjust seasoning .
  6. Should taste tangy with the sweetness coming through . Serve hot .

Iddiappam Biriyani

Share Button

FullSizeRender (2)

FullSizeRender (1)

image (7)

Preparation Time : 30 minutes

Cooking Time : 50 minutes

Serving : 3 to 4 members

Description 

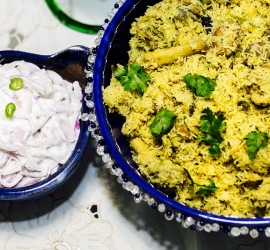
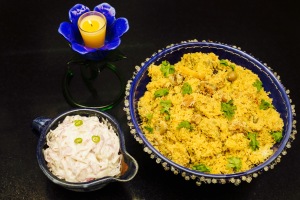
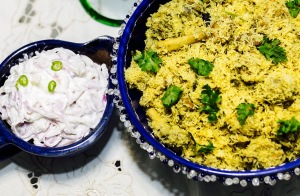
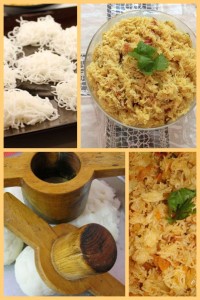
An authentic dish very own to my in – laws place . This dish is actually made by Sri lankan Muslims . Sri Lankan dish made at my in – laws place ???? well my hubby’s grand father ( dad’s dad )established our current business from Colombo in Sri Lanka . I guess that’s how this dish might have landed up at my in laws place. My hubby’s fore father were in Burma as well. Think they followed the chettier community back then to go aboard to make money. This has helped to add a lot of Sri Lankan Muslim cuisine into my in laws place. iddiappam biriyani is a light yet fragrant and delicious dish apt to be packed for a picnic or take away while traveling. When ever you try out this recipe make plenty as they will be devoured in no time. Visited my hubby’s cousin sister Fathima at Colombo on a Holiday . We were invited to a relatives place where there were quite a lot of people but no sign of any arrangements being made for the dinner. Suddenly they spread huge spreads on the floor followed with huge round circle trays ( thalas as we call in Tamil ) with iddiappam biriyani piled like a mountain accompanied with chicken 65 and onion raitha beside . They placed these round Tray’s all around the floor spread leaving some gap between each round tray . I was blinking not knowing what is going on. All the guests started sitting around each round tray (5 people around one tray) and started eating . Only then did i know this method of having food is know as SAHAN SAPPADU which is practiced by the Arabs to share the brotherhood between muslims and feel all are equal. It was fun to grab your bit from the huge tray. The best part was the refilling was being done every 5 minutes once.

Ingredients

Ingredients
Quantity
Chicken1/2 kg cut into small pieces
Onions6 big sliced
Tomato4 big chopped
Green chillies15 slit
Coriander leaves one hand chopped
Mint leavesone hand
Ghee 100 grams
Cinnamon1 inch piece , clove - 4
Cardamom 4
Ginger garlic paste1 teaspoon each
Curd1 cup
Turmeric powder 1 teaspoon
Chilli powder1 /2 teaspoon
Saltto taste
Lime juice1 lime
Coconut1/4 cup grated , cashew nuts -10 ,
Rose essence2 drops
Iddiappam15 to 20

Method

  1. Marinate chicken in curd, turmeric powder, chilli powder and salt together and set aside .
  2. Heat ghee in a pressure cooker, top with cinnamon , cloves and cardamom . Once they crackle add the sliced onions and fry to brown for about 15 minutes . ( patience pays off ) add ginger and garlic paste and fry till they get crisp .
  3. Top with half of mint, tomatoes and green chillies and saute till it gets to a gravy consistency . Add the marinated chicken along with the coriander leaves and remaining mint leaves and toss well .
  4. Saute for 10 minutes till all the flavors infuse and let’s out its flavors . Pressure cook for one whistle adding 1 cup water .
  5. Grind coconut and cashew nuts together to a smooth paste and add it to the chicken gravy . Mix well adding lime juice and rose essence.
  6. Bring to boil, simmer till oil separates. Taste and adjust seasoning. The hotness , sourness and salt should be dominating and more than required only then when added to the iddiappam will it taste good .
  7. The chicken should be of a thick gravy make sure it’s not runny as the iddiapam’s might not take in all the gravy . Cool the gravy to room temperature . Reserve 5 iddiappams aside. Shred the remaining iddiappams and mix it with the chicken gravy .
  8. Once the iddiappams are mixed with the gravy it should have a little moisture stuck to the iddiappams as the iddiappams tend to suck in the moister as time passes by . You can add the reserved iddiappams if you feel the moister is too much . Garnish with chopped coriander and serve hot with onion Raitha ( Thayir chutney ) .

Kozli kanji

Share Button

IMG_4772-1

photo (10)
Preparation Time : 40 minutes

Cooking Time : 40 -50 minutes

Serving : 8 members

Description

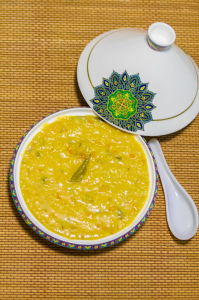
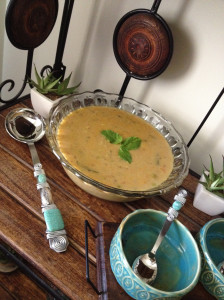
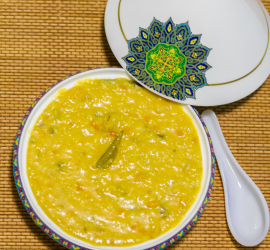
Nonbhu Kanji is a rice based porridge that is served in most Muslim households through out Tamilnadu while breaking your fast during the holy month of Ramadan. Virtually every Muslim home in Tamilnadu has a version of this comfort classic. This recipe differs with slight twists and turns from place to place, district to district and home to home but having the basic as the same. Kanji holds a vast untapped richness of family tradition, tenaciously guarded recipes that are passed down from one generation to the next but rarely documented .This authentic recipe was passed down to me by my co sister Farzana who hails from Nagarkovil , a town in the borders of Tamilnadu and Kerala . This recipe does take me back in memory about an incident at my first cousin aneez’s place . She was newly married and we went to visit her as it was fasting time . As per tradition we were served kanji which had meat , chick peas and many other ingredients in it . I still remember we all from elders to kids made a big fuss about the kanji served as at home the kanji that we are served is based on cumin seeds , fenugreek seeds and coconut. This kanji tastes similar to the one I had at my cousin sisters house but now with a much mature tongue of mine , every mouth full was devoured with a soothing effect as nothing can perk you up quite like a bowl full of hearty kanji does .

Ingredients for rice

Ingredients
Quantity
Jeera sala rice ( jeera samba ) 1 cup
Carrots 2 chopped
Fresh Green peas 1 cup shelled
Small onions 1/2 hand chopped
Garlic flakes 1/2 hand chopped
Mint leaves 2 tablespoons
Coriander leaves 2 tablespoons chopped
Curry leaves 1 tablespoon
Turmeric powder1/2 teaspoon
Cumin seeds 1 teaspoon
Fenugreek seeds 1/4 teaspoon
Water
4 cups

Method for rice

Pressure cook the above ingredients together  for 4 whistles and Set aside .

Ingredients for chicken

Ingredients
Quantity
Boneless chicken200 grams
Oil 2 tablespoons
Cinnamon1 inch stick
Cloves3
Cardamom2
Onion2 chopped
Ginger garlic paste 1 teaspoon each
Tomato2 medium sized chopped
Red chilli powder 1 teaspoon
Turmeric powder1/4 teaspoon
Coriander powder1 teaspoon
Cumin powder 1/2 teaspoon
Fennel powder 1/2 teaspoon
Saltto taste

Method for chicken

  1. Heat oil in a pressure cooker .Top cinnamon, cloves and cardamom.
  2. Once they crackle add onion and saute to golden brown color .
  3. Add ginger and garlic paste and fry to crisp. Top with tomato , chicken and salt to taste .
  4. Saute until the tomatoes get mushy and the color of the chicken changes to white color . Add red chilli powder, turmeric powder, cumin powder,  fennel powder and coriander powder .
  5. Mix well. Add water just above the chicken and pressure cook for 3 whistles. Cool completely . Remove the cooked chicken pieces and blitz in the food processor for a second to get thin threads of shredded chicken . ( Be careful not to grind the chicken to one mass of chicken meat ) .
  6. Reserve the chicken gravy and the shredded chicken and set aside .

Ingredients to grind

Ingredients
Quantity
Coconut 1/2 cup
Fennel seeds1 1/2 teaspoon
Thick Coconut milk ( first extract )2 cups

How to proceed

  1. Mix the chicken shredded,  chicken gravy,  ground coconut and coconut milk to the pressure cooked rice .
  2. Mix well . Bring to boil , taste and adjust seasoning and the consistency of the kanji by adding more water if required .
  3. The consistency of the kanji should be semi thick , following consistency .
  4. The kanji is ready to be Served hot with samosas , rolls , vadais or any deep fried savoury snack as sides.

Asian Style Crab Fry

Share Button

image (6)

Preparation Time : 2 hours for marination + 20 minutes

Cooking Time : 15 to 20 minutes

Serving : 6 members

Description

A recipe l got from my hubby’s cousin sister fathima, who attended a cooking class in Colombo , Sri Lanka . The original recipe demanded an egg to be added in the end. I just didn’t do so because i felt the dish might end up getting an eggy smell . I used to prepare crab in another two different ways , one tomato based and the other pepper based(Both Indian Style). But once i tried this dish, the other two dishes are put to rest . As this preparation is fragrant , visually appealing and almost magical . At home my father-in-law, my son, my hubby’s niece and myself are the only people who eat crab . My hubby admire’s me while i eat the crab(As i separate the shells and flesh very easily) . On my last trip to moms place, mom made some crab cakes (vadai’s) . My hubby had quite a few not knowing it was crab as it was deliciously wicked. When we let him know about it, later in the evening, he was all grumpy and wild . People and their mind set specially when it comes to food .

Ingredients

Ingrredients
Quantity
Crab 1 kg cleaned
Small onions two hands full
Dry Red whole chilies 8 to 10 or to taste
Ginger 1 inch piece
Garlic 6 flakes
Turmeric powder1 / 4 teaspoon
Salt to taste
Oil 1 1/2 cups
Tomato sauce 3 tablespoons
Light Soya sauce 1 teaspoon
Sweet chilli sauce1 teaspoon
Red chilli sauce 1 teaspoon
Ajinomoto a pinch ( optional )
Sugar a pinch

Method 

  1. Add salt and turmeric powder along with 2 cups water to the cleaned crab and bring to boil . strain and cool completely .
  2. Grind small onion , red whole chilies , ginger and garlic to a coarse mixture .
  3. Marinate cooled crab in this coarse mixture for 2 hours . Heat oil to shallow fry and fry just the crab without the marinated mixture for 5 minutes .
  4. Drain and set aside . Heat 4 tablespoons of crab fried oil in a non stick kadai .
  5. Fry the coarse onion mixture to brown till the onions sweat down and become soft .
  6. Top with tomato sauce , light soya sauce , sweet chilli sauce , red chilli sauce , sugar , ajinomoto and salt to taste.
  7. Mix well and bring to boil adding little water to get to a saucy consistency .
  8. Taste and adjust seasoning . Add the fried crab .
  9. Toss well and close with a lid and simmer for 5-8 minutes , tossing every 2 minutes once . Making sure the sauce infuse its flavours into the crab . Serve hot as it is .

Uppu Kandam

Share Button

image (5)

Preparation Time : 40 minutes + 3 to 5 days to dry in the sun

Cooking Time : 2 minutes

Serving  : -

Description 

This is an authentic recipe from my grand mother ( dad’s mom balkees perima ). This dish is mostly prepared during the month of eid when there is a lot of meat in the house. I guess back then not knowing to prepare many dishes using meat and not having access to refrigeration they just thought of preserving the meat and came up with this dish. A salty peppery crispy rustic mutton preparation. The best part is the taste of the sun that comes through as the most dominating factor. Traditional delicacies jostle for space with unconventional time required. When i was a days caller before my 2 nd standard,my lunch box was mostly filled with uppu kandam rice . Mom used to just mix rice with the oil and fried meat . I used to love it and it was my comfort food . Now a days mom makes it double the more as she has to pack a lot for my brothers place (U.K) as every one just go bonkers over this uppu kandam. A carnivorous family we are just Rasam rice with uppu kandam will do to take you to another avatar.

Ingredients

Ingredients
Quantity
Boneless mutton 1 kg cubed
Turmeric powder1 1/2 tablespoon
Pepper1 cup
Cumin seeds1/4 cup
Coconut oil 3 tablespoons
Rock salt3 tablespoons

Other things needed

Thick twine , a thin rope or thin metallic wire ,
Big needle ,
Meat hammer .

Ingredients to fry

Coconut oil or ghee – 1/2 cup .

Method

  1. Grind all the ingredients together except for the mutton to a smooth paste , adding little water .Taste and adjust . The salt and hotness should be more than required only then will it get into the meat and dry out well .
  2. Wash the meat , drain and pay dry .( my grand ma never used to wash the meat , my mom also does the same but I just can’t do that ) apply the ground Masala with the pat dried meat and mix well . String the Masala mixed meat with a help of a needle and heavy twine .( I use metallic thin wire to string , as there is no need for a needle or twine . Hassle free ) tie the stringed meat over a high place where there is good sun light (which helps the meat to dry out fast ) and beware no cats or dogs can access the meat hanging .
  3. Keep a gap of 1/2 inch between each piece of meat . Dry it in the sun for at least one week or more till the meat is dried out really well and sounds like a stone dropped when dropped in your kitchen counter .
  4. This dried meat can be stored in air tight containers for a year or more .
  5. When ever required take 8 pieces of meat ( serves 3-4 people ) and hammer ( i use a real hammer , place the dried meat over the ammi kal (sil patta ) and hammer ) it well till it gets to a thin spread out meat piece .shred the hammered meat piece into thin shreds .
  6. Heat coconut oil or ghee and fry the dried shredded meat for 1 1/2 minutes until it cooks through and gets crispy .
  7. Drain and serve when cooled a little as the crispness is felt only when cooled down .
  8. Can fry in advance and store it in air tight containers . An ideal dish ,best served with boiled white rice for lunch or with Kanji .

Marshmallow tart

Share Button

photo (8)

Preparation Time : 40 minutes

Cooking Time : 20 minutes + setting time 3 hours or more

Serving  : 8 members

Description 

This tart is my take on nigella law sons grass hopper tart with  easily available ingredients in our market , re imaged as new , exciting version of itself . She made the grass hopper tart with pepper mint flavor in a light green color . I have used vanilla essence and added very little red food color to get a pale pink shade . This tart will elite a chorus of oohs and aahs for sure. The first marshmallow i tasted was shared with me by my class mate Christine Coulten (a Sri Lankan ) from Dubai . A chewy sweet that i didn’t fancy much but i was surprised to see the amount of shades and  varieties of Marshmallows in my trip to Europe . It just blew my head out. I got crazy and grabbed how much ever i could for my kids back home ( taking a risk not knowing if they will like it ) they went head over heels with the European marshmallows (thank god, i was saved or else my hubby..)  which followed with another problem of them wanting more and more . Finally once on my trip to Kodaikanal found good quality marshmallows and from then on every visit to Kodaikanal marshmallows are on my must buy list along with home made chocolates, vegetables and passion fruits . This tart is also made with marshmallows sourced from Kodaikanal . Enjoy this pleasure packed tart folks. Oops have to mention how much my daughter troubled  me while  taking these pictures, making monkey faces and coming into the picture frame . Kids are kids how much ever they grow older .

Ingredients for the base

Ingredients
Quantity
chocolate creme cookies (I used bourbon chocolate biscuits can use orio biscuits also ) 25 to 20
chocolate chopped1/4 cup
soft unsalted butter
3 tablespoons

Ingredients for the Filling

Ingredients
Quantity
marshmallows3 cups + few bits to decorate
milk1/2 cup
Vanilla essence 1/4 teaspoon
heavy cream( i used amul cream ) 1 1/2 cups
food colouring few drops (optional, I used red colour and got a pale pink colour )

Method

  1. Blitz the cookies and chocolate in a food processor until they form a crumb mixture. Add the butter and process until the mixture starts to clump together.
  2. Press the mixture into a high-sided fluted tart pan, making a smooth base and sides with your hands or the back of a spoon. Put it into the refrigerator to chill and harden for half an hour .
  3. Melt the marshmallows in a saucepan over low gentle heat along with the milk. Once the milk starts to foam (not boil), take off the heat and keep stirring until the marshmallows blend into the milk to make a smooth mixture.
  4. Pour the mixture out of the saucepan into a heatproof bowl. Leave until cool.
  5. In a medium bowl, whisk the cream until it starts to hold soft peaks then, still whisking, add the cooled marshmallow mixture. This filling should be thick but still soft, not stiff or dry, so that it will eventually drop easily out of the bowl into the chilled pie crust.
  6. When the marshmallow mixture and cream are combined, whisk in a few drops of food coloring, if desired.
  7. Spread the filling into the chilled base, swirling it about with a spatula to fill evenly. Put the pie in the refrigerator, covered, to chill overnight or for a minimum of 4 hours until firm. Decorate before serving with marshmallow bits . cut into wedges and serve.

The pie can be made 1 to 2 days ahead. When chilled and firm, tent with aluminum foil (try not to touch surface with foil as it will leave marks) and store in the refrigerator.  The pie will keep 3 to 4 days in total.