Daily Archives: February 5, 2016


Prawn Crackers

Share Button

FullSizeRender (30)

FullSizeRender (29)

Preparation time : 30 minutes + marination time 2 hours
Cooking time      :  2 minutes for each batch deep fried
Serves                :  3 members

Description

Age no bar for being pampered with food cooked by your mother. I may be busy with food day in and day out but when you get a chance to relish on home made food made your mother, it’s the ultimate. Like wise this prawn fry was served to me on one visit to my parents place. My mom seldom cooks and is not much into cooking, but when she does.. She sure cracks it up. I had to forcefully move the platter of these prawns away from me as it lined my stomach non stop. My dad is a man with simple needs and every thing to him that we need seems to be a waste for sure. When mom brought these prawns from the market , dad was like why so much. I am sure there will be left overs. My mom was signalling all of us in the table to finish it off, when dad took note of it. He started off immediately with his nagging and we all burst out aloud laughing. This is a regular thing that happens at home. I just love the way my dad helps mom to pack all the left overs and makes sure to place it in the refrigerator too. Touch wood, they are true love birds. Coming to the prawns, they had a crisp exterior and a soft, moist inside. Dad was wrong as there were just two pieces of prawns in the plate which I could have easily finished off but just put it away to lessen the calorie in take damage that has already been done. A sure try as even kids will love these prawns. I made sure to take note of the recipe from mom immediately as she is a person who cooks with a little of this and that… The second time you ask her for the same its made in a different way. So let’s all crack up with these prawns as my mom did in her first try .

Ingredients
Quantity
Cleaned Prawns with tail1/2 kg ( you have to buy 1 kg prawn so when cleaned it gets to 1/2 kg )
Flour / maida1 teaspoon
White pepper powder1 teaspoon
Black pepper powder1 /2 teaspoon
Ginger and garlic paste1/4 teaspoon
Saltto taste
Red chilly powder1/4 teaspoon
Vinegar1/8 teaspoon
Lemon juicea squeeze
Ajinomotoa pinch ( optional)
Egg1
Bread crumbs1 cup heaped
Oilto deep fry

Method

  • Marinate cleaned prawns with flour, white + black pepper powder’s, ginger and garlic paste, red chilly powder, vinega, lemon juice, salt, egg and ajinomoto for two hours or more.
  • Coat the marinated prawns over bread crumbs making sure it’s coated well all around. Do the same to all the prawns.
  • Heat oil to deep fry in a heavy bottomed wok . Drop prawns in batches of four to six at a time and deep fry in medium heat for two minutes to crisp and golden.
  • Drain and serve hot with dips of your choice .

Kuthiraivali paniyaram

Share Button

FullSizeRender (28)

IMG_9085

IMG_9087

IMG_9088

IMG_9091

IMG_9094

IMG_9121

FullSizeRender (23)

FullSizeRender (22)

Preparation time  : 10 minutes + 3 hours soaking time
Cooking time       :  2 minutes for each batch
Serves                 :  4-6 members

Description

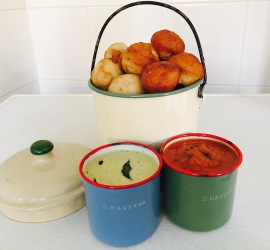
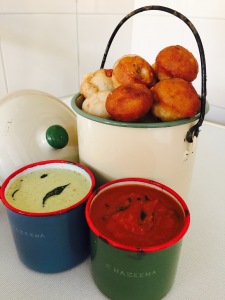
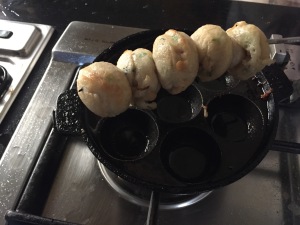
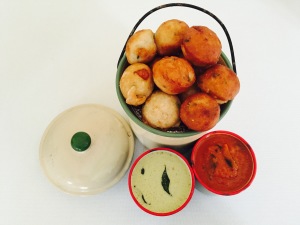
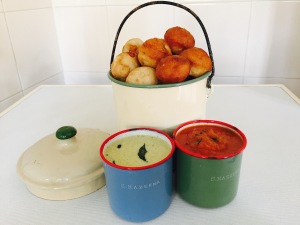
Cooking with millet’s is so in now a days. Like fashion being a circle and takes its turn over and over again. Food also follows the same as all these recipes with millet’s are age old recipes that our ancestors made in daily basis. It’s just that it became a forgotten story in between and now it’s started to pop up in the hit list of recipes. I am trying my best to serve healthy Indian food for breakfast at home with trial and error as always. This was a sure hit and I just loved the way the paniyaram’s puffed up. As alway’s I clicked pictures and sent it over to friends saying today’s breakfast trial. One good friend suggested saying try taking pictures with chattinad vessels. The light bulb moment sparked in me, as I remembered my mom giving me a lot of mangu vessels ( no idea what it’s known as in English ) when I was married of, that are kept safely in the loaf at home. My mom’s best friend Alamu Akka is from karaikudi. I remember my mom being blown away with her friends eldest daughters wedding in karaikudi as they have a custom of exhibiting all that they give the bride from the smallest to biggest thing possible. My Crazy breed mom did the same for my wedding too where I felt embarrassed a lot as this was so new to us and I personally felt it was way too much showing off. Well that’s my personal opinion, no offence to any one. She in fact had an old man come home for nearly four months every day to write my name in each vessel itched by hand using an iron nail sort of thing. Even in these picture’s my name is visible in the chutney containers. But thank god she did give me these vessels as they are put to use in the right way for me to show case the food I make.. Oops again back to square one of showing off in a different way …. I guess every thing is like fashion it runs in a circular motion.

Ingredients
Quantity
Barnyard millet / kuthiraivali arisi1 cup
Raw rice / pacha arisi1/4 cup
Urad dal1/4 cup
Fenugreek seeds1/8 teaspoon
Onion1 big chopped
Curry leavesfew chopped
Coriander leavesfew chopped
Green chillies1 chopped
Grated ginger1/4 teaspoon
Saltto taste
Soda - bi - carbonate1/8 teaspoon
Oil1/8 teaspoon for each paniyaram

Method

  • Soak barnyard millet, raw rice, urad dal and fenugreek seeds in water for three hours.
  • Drain and grind to a smooth paste adding very little water.
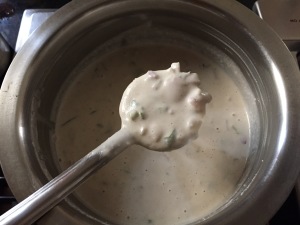
  • Add salt, onion, green chillies, coriander leaves, curry leaves, grated ginger, soda – bi – carbonate to the batter and mix well.The batter must be of dosa batter consistency.
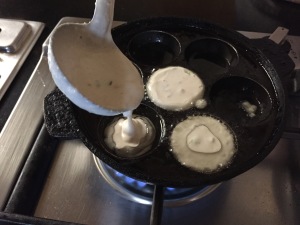
  • Heat an appe pan / kuli paniyaram pan with 1/2 teaspoons oil in each dent. Pour a small ladle of mixed batter into each dent.
  • Cook until you see bubbles on the top and the bottom gets a bit crisp.
  • Turn over the paniyaram ‘s and cook further for a minute or so until cooked through in medium heat . Remove from heat and serve hot with chutney of choice.

Notes

  • Serve these paniyaram’s immediately as they tend to get hard once cold.

Red velvet cup cakes

Share Button

IMG_7318

FullSizeRender (21)

FullSizeRender (20)

Preparation time  : 30 minutes
Cooking time       : 20 to 25 minutes
Serves                 : 6-8 members

Description

Day’s of drooling over exotic looking cakes, pastries and baked goodies in foreign magazine’s are put to shame with much talent seen here in India by our home ministers who are so called as home bakers. I am awe struck with so much talent that all these home bakers posses through out India. The hard work and dedication they must have to put up with one cake, my god.. We must find new words to describe what they go through. I really got to know in and out about this only through my daughter’s home baking experience. Tough job to be done with a hell lot of patience. I made up my mind that baking and decorating cakes is not meant for me as I am so used to cooking with my instincts with a little of this and that. Start to cook a dish and finish it must be done with in some time. Here for a cake to be done it takes days. Uff, this is not my cup of tea. But still at times for a change to challenge my comfort zone I do bake and this cup cake as well was done on one such day. I have already baked a red velvet cake for Father’s Day when I had my dad visit me. So many followed the same recipe and made these cup cakes. Pitch perfect, soft, moist with the correct rise and colour. At days like this I feel I struck gold. This post is purely dedicated to all the home bakers of India that has brought in a revolution of confidence in women to earn an identity of their own with so much confidence and grace. Hip hip hurray to you all.

Cake flour ingredients

Ingredients
Quantity
All purpose flour / maida1 cup
Corn flour2 tablespoons

Cake flour Method

  • Remove 2 tablespoons of flour from 1 cup flour and replace it with 2 tablespoons of corn flour.
  • Sift together three times and use as demanded in the recipe.
  • For this recipe I used 2 1/2 cups all purpose flour /maida.
  • Removed 5 tablespoons of flour and replaced it with corn flour.
  • Always measure after shifting both the flours together.

Ingredients for the cake

Ingredients
Quantity
Cake flour(not self-rising)2 1/2 cups
Salt1 teaspoon
Cocoa powder1/4 cup
Sugar1 1/2 cups
Canola oil1 1/2 cups ( I used sunflower oil instead )
large whole eggs2 at room temperature
Red food colouring1/4 cup
Pure vanilla extract1 teaspoon
Buttermilk1 cup
soda - bi - carbonate1 1/2 teaspoons
White vinegar2 teaspoons

Method for the cup cake

  • Pre heat oven to 175 degrees Celsius.
  • In a medium bowl, whisk cake flour, salt, and cocoa. set aside.
  • In the bowl of an electric mixer fitted with the paddle attachment, combine the sugar and oil, and beat on medium speed until well combined.
  • Add eggs, one at a time, beating well after each addition. Add food colouring and vanilla, beat until well combined.
  • Add flour mixture, alternating with buttermilk, scraping the sides of the bowl with a rubber spatula as needed.
  • In a small bowl, mix soda – bi – carbonate and vinegar until combined. Add to batter, and beat for 10 seconds.
  • Evenly divide batter between the lined cup cake liners.
  • Bake until a cake tester inserted in the Centre of each cup cake comes out clean, 20 to 25 minutes.
  • Transfer to a wire rack to cool in the pans for 5 minutes. Remove from the pans, and return to the rack to cool completely.
  • Allow cakes to cool completely before icing.

Cream cheese icing  ingredients

Ingredients
Quantity
Cream cheese, softened450 grams
Unsalted butter, softened120 grams
Vanilla extract1 teaspoon
Icing sugar, sifted2 1/2 cups
Salta pinch

Icing method

  • With an electric mixer, blend together cream cheese and butter until smooth.
  • Reduce speed to low, and blend in icing sugar, salt and vanilla extract.
  • Increase speed to high, and beat until light and fluffy.

How to proceed

  • Fill cream cheese frosting into pipping bags fitted with nozzle of choice.
  • Pipe over each cup cake and serve.

Notes

  • Make sure you use cake flour not self raising flour for the cup cake.
  • Make sure all the ingredients for the cup cake are at room temperature.
  • Place the cream cheese icing in the fridge until needed to be used as the icing tends to loose its firmness in hot weather.
  • Store the cup cake’s at room temperature in an air tight box and it stays fresh for 2-3 days.
  • The brand name of the red food colour that i have used is rayner’s red concentrated food colouring.
  • Be careful with the red food colouring as it stains the cloths you wear as well as your kitchen counter.

Salami Wraps

Share Button

IMG_0311

IMG_0303

IMG_0304

IMG_0305

IMG_0306

IMG_0307

IMG_0309

IMG_0310

IMG_0336

Preparation time : 10 minutes
Cooking time      :  6 minutes
Serves                :  4 – 6 members

Description

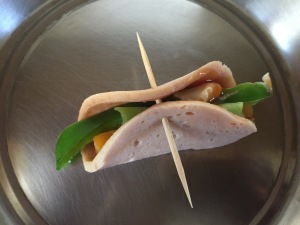
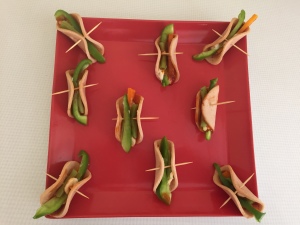
Appetizers or canapés always bring in a surprise element when served to Guests as its decorative food, eaten in one bite with hands. I always look out for ideas to impress loved ones through food and canapés are my favorite cheats way to win hearts. This idea, I did steal from the cover of the salami packet that I had in my freezer. ( shameless me ) Wanting to finish off the salami which I usually use for sandwiches, this idea seemed to be easy and impressive. Made good use of it when I had my friend drop in home for dinner. We had so much fun eating these making sure not to drop a bit of these and make a mess. The taste was sublime with simple ingredients put together to create a visual treat. This was the most impressive dish on the table which took me just a few minutes to assemble. Food has its own way to bring in a new twist each day. Which is why I am madly, deeply in love with it. So peeps fall in love over and over again as the entire world revolves around being loved the most.

Ingredients
Quantity
Frozen Salami1 packet
Vegetable strips2 cups ( carrots, beans , three colour capsicum's )
Mayonnaise3 tablespoons
Tomato ketchup3 tablespoons
Saltto taste
Pepperto taste
Tooth prickfew

Method

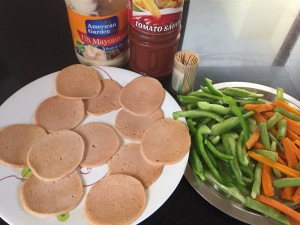
  • Boil carrot strips and beans with salt to taste and water to cook with a slight bite to it. Remove from heat and cool completely.
  • Thaw the salami that has been in the freezer. Microwave it for one minute. Remove and cool completely.
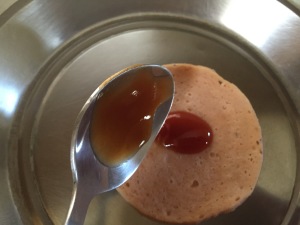
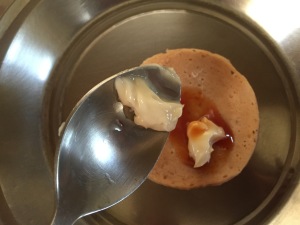
  • Place a dot of tomato ketchup in the center of the salami. Top it with a dot of mayonnaise. Sprinkle with salt and pepper to taste.
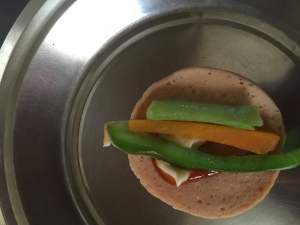
  • Place vegetable strips one each in the center ( I used green capsicum alone as only that was available in my pantry ).
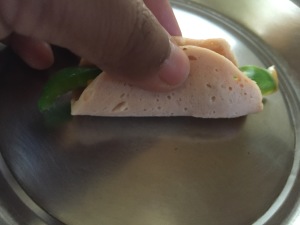
  • Bring the edges of the salami together towards the center making sure the vegetable strips are intact .
  • Prick with a tooth prick together and serve.